
大家好,又见面了,我是你们的朋友全栈君。
Rabbitmq入门案例
学习视频参考以下网址:https://www.bilibili.com/video/av49799767?p=7
1 创建一个maven项目
配置资源pom.xml文件
<project xmlns="http://maven.apache.org/POM/4.0.0"
	xmlns:xsi="http://www.w3.org/2001/XMLSchema-instance"
	xsi:schemaLocation="http://maven.apache.org/POM/4.0.0 http://maven.apache.org/xsd/maven-4.0.0.xsd">
	<modelVersion>4.0.0</modelVersion>

	<groupId>cn.yunhe</groupId>
	<artifactId>springcloud-mq</artifactId>
	<version>0.0.1-SNAPSHOT</version>
	<packaging>jar</packaging>

	<name>springcloud-mq</name>
	<description>Demo project for Spring Boot</description>


	<parent>
		<groupId>org.springframework.boot</groupId>
		<artifactId>spring-boot-starter-parent</artifactId>
		<version>2.2.1.RELEASE</version>
		<relativePath />
	</parent>

	<properties>
		<project.build.sourceEncoding>UTF-8</project.build.sourceEncoding>
		<project.reporting.outputEncoding>UTF-8</project.reporting.outputEncoding>
		<java.version>1.8</java.version>
		<maven-jar-plugin.version>3.1.1</maven-jar-plugin.version>

	</properties>

	<dependencies>
		<dependency>
			<groupId>org.springframework.boot</groupId>
			<artifactId>spring-boot-starter-web</artifactId>
		</dependency>

		<dependency>
			<groupId>org.springframework.boot</groupId>
			<artifactId>spring-boot-starter-test</artifactId>
			<scope>test</scope>
		</dependency>

		<dependency>
			<groupId>org.springframework.boot</groupId>
			<artifactId>spring-boot-starter-amqp</artifactId>

		</dependency>

	</dependencies>

	<build>
		<plugins>
			<plugin>
				<groupId>org.springframework.boot</groupId>
				<artifactId>spring-boot-maven-plugin</artifactId>
			</plugin>
		</plugins>


	</build>


</project>
1.1在资源管理目录下里创建一个application.properties文件
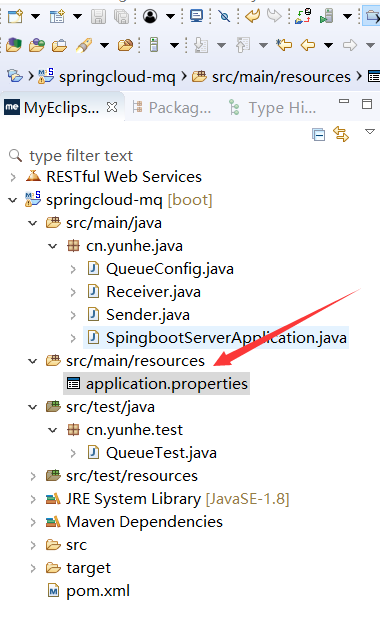

spring.application.name=springcloud-mq

spring.rabbitmq.host=192.168.40.96
spring.rabbitmq.port=5672
spring.rabbitmq.username=rabbitmq
spring.rabbitmq.password=123456
1.2 在主目录下创建SpringbootServerApplication类
@SpringBootApplication
public class SpingbootServerApplication {

	public static void main(String[] args) {
		SpringApplication.run(SpingbootServerApplication.class, args);
	}

}
1.3 创建消息队列QueueConfig
/**
 *  创建消息队列
 *
 * @author 85762
 *
 */


@Configuration//初始化
public class QueueConfig {

	@Bean
	public Queue createQueue() {

		return new Queue("hello-queue");

	}


}
1.4 创建消息发送者Sender
/**
 * 消息发送者
 * @author 85762
 *
 */


@Component
public class Sender {

	@Autowired
	private AmqpTemplate rabbAmqpTemplate;


	/*
	 * 发送消息的方法
	 *
	 */
	public void send(String msg) {
		//向消息队列发送消息
		//参数一:队列的名称
		//参数二:消息
		this.rabbAmqpTemplate.convertAndSend("hello-queue",msg);


	}

}
创建消息接收者Receiver
/**
 *
 * 消息接收者
 * @author 85762
 *
 */
@Component
public class Receiver {

	/*
	 * 接受消息的方法,采用消息队列监听机制
	 */
	@RabbitListener(queues="hello-queue")
	public void process(String msg) {

		System.out.println("receiver:"+msg);

	}


}
创建消息队列测试类QueueTest
/**
 * 消息队列测试类
 * @author 85762
 *
 */
@RunWith(SpringRunner.class)
@SpringBootTest(classes=SpingbootServerApplication.class)
public class QueueTest {

	@Autowired
	private Sender sender;

	@Test
	public void test1() throws InterruptedException {
		while(true) {

			Thread.sleep(1000);
			this.sender.send("Hello RabbitMQ");
		}

	}


}
版权声明:本文内容由互联网用户自发贡献,该文观点仅代表作者本人。本站仅提供信息存储空间服务,不拥有所有权,不承担相关法律责任。如发现本站有涉嫌侵权/违法违规的内容, 请联系我们举报,一经查实,本站将立刻删除。
发布者:全栈程序员-站长,转载请注明出处:https://javaforall.net/126340.html原文链接:https://javaforall.net


