
大家好,又见面了,我是你们的朋友全栈君。


cinemachine
Have you been working on a camera system for your 2D game for ages and wish there was something like Cinemachine for 2D? Not many people know about it, but there already is! This blog post gives you some tips for getting the best out of Cinemachine, and how this tool can benefit and speed up the development of your 2D game significantly. Keep reading to find out more about Cinemachine Virtual Cameras, Confiners and more, specifically for use in 2D games.
您是否一直在为2D游戏开发摄影机系统,并希望有类似Cinemachine的2D游戏? 没有多少人知道这一点,但是已经有! 这篇博客文章为您提供了一些技巧,帮助您充分利用Cinemachine,以及该工具如何使2D游戏受益并加速其开发。 继续阅读以了解有关Cinemachine虚拟相机,限制器等的更多信息,这些信息专门用于2D游戏。
获取电影机 (Getting Cinemachine)
You can get Cinemachine from our Package Manager within Unity if you are using any version greater than 2018.1.0b7.
如果您使用的版本大于2018.1.0b7,则可以从Unity中的包管理器中获取Cinemachine。
This can be done by going to Window > Package Manager > All and then selecting Cinemachine.
可以通过转到窗口>程序包管理器>全部 ,然后选择Cinemachine来完成。
Importing from PackageManager
从PackageManager导入
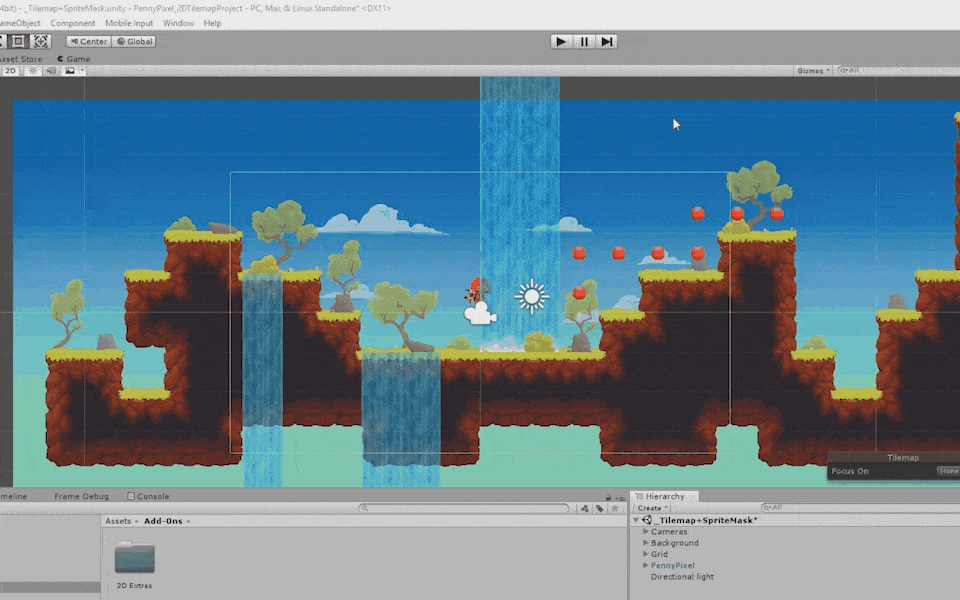
创建2D相机 (Creating a Camera for 2D)
With Cinemachine, it’s relatively easy to start creating your camera system for a 2D environment. Let’s take a look at creating a Virtual Camera for 2D.
使用Cinemachine,相对容易地开始为2D环境创建相机系统。 让我们看一下为2D创建虚拟相机。
-
Create a 2D Virtual Camera by going to the menu bar and selecting Cinemachine > Create 2D Camera. This will create a Virtual Camera set up for a 2D environment. If it’s your first Virtual Camera in the scene, it will also add a Cinemachine Brain Component to your Main Camera.
通过转到菜单栏并选择Cinemachine>创建2D摄像机来创建2D虚拟摄像机。 这将创建一个用于2D环境的虚拟相机。 如果这是您场景中的第一台虚拟摄像机,它还将为您的主摄像机添加一个Cinemachine Brain组件。
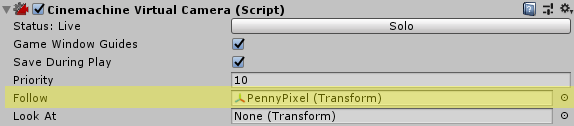
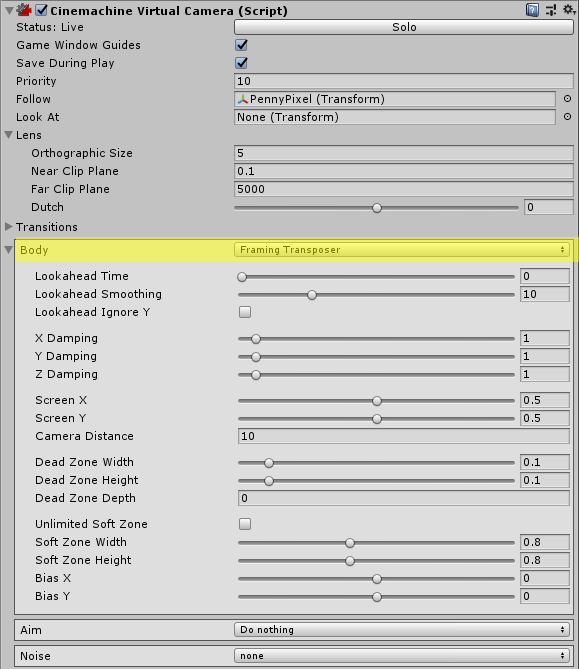
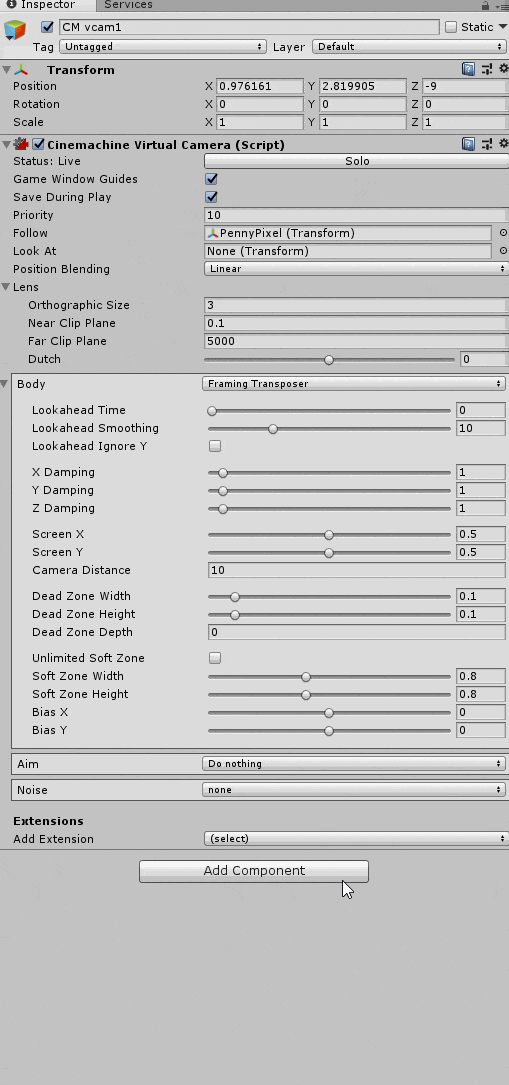
The main thing you will notice between a 2D Virtual Camera and a 3D Virtual Camera is the fact that we are using a Framing Transposer. This special transposer will follow a target on the camera’s X-Y plane, and stop the camera from rotating. For the framing transposer to work correctly we need to ensure that the Virtual Cameras ‘LookAt target’ is null. Another thing to note is that 2D games use an Orthographic View, when first creating your Virtual Camera you will need to change the projection to Orthographic on the Cinemachine Brain Camera of your Scene.
您会在2D虚拟相机和3D虚拟相机之间注意到的主要事实是我们正在使用取景器。 这个特殊的转座器将跟随相机XY平面上的目标,并停止相机旋转。 为了使框架转储器正常工作,我们需要确保虚拟摄像机的“ LookAt目标”为空。 要注意的另一件事是2D游戏使用正交视图,在首次创建虚拟相机时,您需要将场景的Cinemachine Brain Camera上的投影更改为正交。
An important thing to remember is that with Cinemachine you shouldn’t try to make one camera do everything. Instead, you can have different ‘Virtual Cameras’ around your scene and blend between them using the Cinemachine Brain. This blending can occur if the player is low health, the player has entered a certain area or any other scenario you can imagine that requires a change of Camera framing or Post Processing. You can adjust the blend settings on the Cinemachine Brain depending on how you want the visuals to be.
要记住的重要一件事是,使用Cinemachine时,您不应尝试让一台相机完成所有操作。 相反,您可以在场景周围使用不同的“虚拟相机”,并使用Cinemachine Brain在它们之间进行融合。 如果播放器健康状况不佳,播放器进入某个区域或您可以想象需要更改照相机取景或后期处理的任何其他场景,则可能会发生这种融合。 您可以根据想要的视觉效果来调整Cinemachine Brain上的混合设置。
Check out the video below to see how you can adjust your Virtual Camera during Play Mode.
观看下面的视频,了解如何在播放模式下调整虚拟相机。
提示:在“播放模式”下,您可以调整相机设置,只要您在虚拟相机上选中“在播放过程中保存” ,它们就会保存 (Tip: You can adjust the camera settings while in Play Mode and they will save as long as you have “Save During Play” checked on the Virtual Camera)
限制相机 (Confining a Camera)
Another cool thing we can do with Cinemachine is to use a boundary box to confine the Virtual Camera to a certain area. This feature is available in the extension section of the Virtual Camera. Below are the steps to create this effect.
我们对Cinemachine可以做的另一件很酷的事情是使用边界框将虚拟摄像机限制在特定区域。 该功能在虚拟相机的扩展部分中可用。 以下是创建此效果的步骤。
-
Set up a boundary box for our level. This will be used to confine the level. This is done by:
为我们的关卡设置一个边界框。 这将用于限制级别。 这是通过以下方式完成的:
-
Set the ‘BoxCollider2D’ to be “Used by Composite”.
将“ BoxCollider2D”设置为“复合使用”。
-
See the results of this below:
请参阅下面的结果:
提示:使用“限制屏幕边缘”复选框时,边界区域必须大于虚拟摄像机的正投影大小。 如果边框小于屏幕,则限制器在该区域将无法正确运行。 (Tip: When using the “Confine Screen Edges” checkbox the bounding area needs to be bigger than the orthographic size of the Virtual Camera. If the bounding box is smaller than the screen, the confiner will not behave correctly in that area.)
Video Example:
视频示例:
集体相机 (Group Camera)
Another cool feature from Cinemachine that we can use in 2D is the Group Camera. This camera allows us to create a target group for our camera to look at. A Group Camera is useful if you’re doing a cutscene where you want to show something of importance, you want to keep more than one object in each frame, or if you want to create a local multiplayer game in 2D.
我们可以在2D中使用的Cinemachine的另一个很酷的功能是组相机。 通过此摄像机,我们可以为摄像机创建目标组以供查看。 如果您要进行过场动画以显示重要的内容,要在每个帧中保留多个对象,或者想要以2D方式创建本地多人游戏,则“组摄像机”很有用。
In Cinemachine we can do this the following way:
在Cinemachine中,我们可以通过以下方式进行操作:
-
Create a new GameObject in the scene
在场景中创建一个新的GameObject
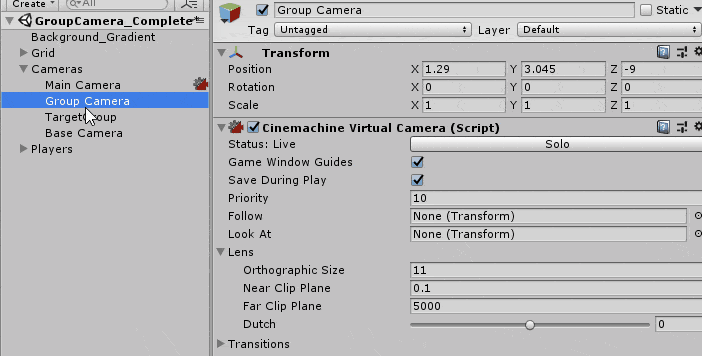
A ‘Target Group’ is a Cinemachine component that allows you to view multiple targets on the same Virtual Camera. It adjusts the camera’s size to ensure that the targets are visible depending on the weight. For example, if all of the targets have a weight of 1, the target group will ensure that all targets are visible.
“目标组”是Cinemachine组件,可让您查看同一虚拟摄像机上的多个目标。 它会调整相机的尺寸,以确保根据重量可见目标。 例如,如果所有目标的权重均为1,则目标组将确保所有目标可见。
Here’s an example of a Group Camera that focuses on the player and a chest.
这是一个专注于玩家和箱子的集体摄像机的示例。

提示:在组虚拟摄像机处于活动状态时添加或删除组成员时,将成员的权重限制为零。 这将使相机平稳地重新构图。 (Tip: When adding or removing group members while the Group Virtual Camera is live, lerp the member’s weight to and from zero. This will allow the Camera to reframe smoothly.)
使用脉冲相机震动 (Camera Shake using Impulse)
With Cinemachine V2.2, we’ve added in a new Impulse Extension. This extension allows users to create camera shake effects without creating any code. Impulse Extension can be added as an extension to your Virtual Camera. I’m going to walk you through how to add this to your scene:
使用Cinemachine V2.2,我们添加了新的Impulse Extension。 此扩展允许用户创建相机抖动效果而无需创建任何代码。 可以将Impulse Extension作为扩展添加到您的Virtual Camera。 我将指导您如何将其添加到场景中:
-
Under the ‘Signal Shape’ heading, we’re going to select a Signal for the Raw Signal variable. This is a ‘NoiseSettings’ profile. We can either use the default ones or create our own.
在“信号形状”标题下,我们将为原始信号变量选择一个信号。 这是一个“ NoiseSettings”配置文件。 我们可以使用默认值,也可以创建自己的默认值。
If we wanted to we could adjust the Dissipation Mode to change the decay type. There are other settings we can adjust, but for now, that’s all we need.
如果我们愿意,可以调整“耗散模式”以更改衰减类型。 我们还有其他可以调整的设置,但是到目前为止,这就是我们所需要的。
You can see the result below:
您可以在下面看到结果:

So, to summarize, we now know how to:
因此,总而言之,我们现在知道如何:
I hope you enjoyed this blog post and now feel ready to use Cinemachine in your next 2D project! If you want to keep up to date with Cinemachine? Join in the discussion on our forum.
希望您喜欢这篇博客文章,现在就准备在下一个2D项目中使用Cinemachine! 如果您想了解Cinemachine的最新信息? 参加我们论坛上的讨论 。
翻译自: https://blogs.unity3d.com/2018/07/17/cinemachine-for-2d-tips-and-tricks/
cinemachine
发布者:全栈程序员-站长,转载请注明出处:https://javaforall.net/140331.html原文链接:https://javaforall.net


