
大家好,又见面了,我是你们的朋友全栈君。如果您正在找激活码,请点击查看最新教程,关注关注公众号 “全栈程序员社区” 获取激活教程,可能之前旧版本教程已经失效.最新Idea2022.1教程亲测有效,一键激活。
Jetbrains全系列IDE稳定放心使用
注:本人为初学者,欢迎各位大神指教
在线试一试
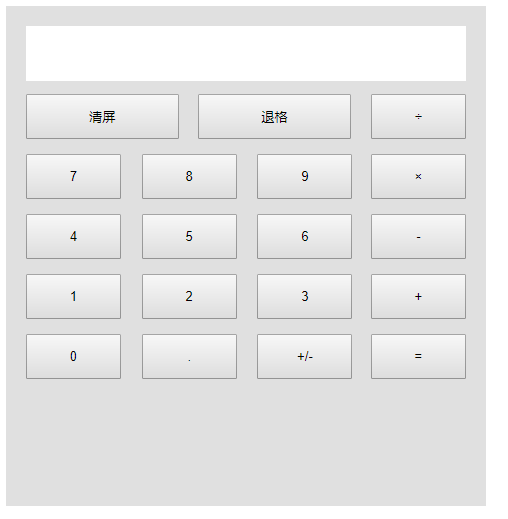
简单计算器实现效果:

HTML代码counter.html
<!DOCTYPE html>
<html>

	<head>
		<meta charset="UTF-8">
		<title>计算器</title>
		<link rel="stylesheet" type="text/css" href="css/counter.css" />
		<script type="text/javascript" src="js/counter.js"></script>
	</head>

	<body>
		<div class="counter">
			<div class="counter_top" >
				<form>
					<input type="text" id="top" value="" />
				</form>
			</div>
			<div class="counter_down">

				<form>
					<input type="button" class="CE" value="清屏" onclick="cl(this.value)" />
					<input type="button" class="CE" value="退格" onclick="cl(this.value)"/>
					<div class="down_right" id="cou">
						<input type="button" class="cou" value="÷" onclick="eva(this.value)"/>
						<input type="button" class="cou" value="×" onclick="eva(this.value)"/>
						<input type="button" class="cou" value="-" onclick="eva(this.value)"/>
						<input type="button" class="cou" value="+" onclick="eva(this.value)"/>
						<input type="button" class="cou" value="=" onclick="eva(this.value)"/>
					</div>
					<div id="down_num" >
						<input type="button" class="num" value="7" onclick="show(this.value)"/>
						<input type="button" class="num" value="8" onclick="show(this.value)"/>
						<input type="button" class="num" value="9" onclick="show(this.value)"/>
						<input type="button" class="num" value="4" onclick="show(this.value)" />
						<input type="button" class="num" value="5" onclick="show(this.value)" />
						<input type="button" class="num" value="6" onclick="show(this.value)"/>
						<input type="button" class="num" value="1" onclick="show(this.value)"/>
						<input type="button" class="num" value="2" onclick="show(this.value)"/>
						<input type="button" class="num" value="3" onclick="show(this.value)"/>
						<input type="button" class="num" value="0" onclick="show(this.value)"/>
						<input type="button" class="num" value="." onclick="show(this.value)"/>
						<input type="button" class="num" value="+/-" onclick="eva(this.value)"/>
					</div>

				</form>

			</div>
		</div>
	</body>

</html>
CSS代码counter.css
.counter{
	background-color: #E0E0E0;
	width: 440px;
	height: 460px;
	padding: 20px;
}

.counter .counter_top{
	width: 440px;
	height: 53px;
	background-color: #fff;
}

.counter .counter_top input{
	width: 440px;
	height: 53px;
	border: 0px;
}

.counter_down .CE{
	width: 152.5px;
	height: 45px;
	margin: 15px 15px 0px 0px;
}

.counter_down .cou{
	width: 95px;
	height: 45px;
	margin-bottom: 15px;
}

.down_right{
	width: 95px;
	float: right;
	margin-top: 15px;
}

.counter_down .num{
	width: 95px;
	height: 45px;
	margin: 15px 16px 0px 0px;
}
js代码counter.js
var a=0;
var b;
var c = 0;

function show(value) {
	document.getElementById("top").value +=value;
}

function eva(value){
	c=parseFloat(document.getElementById("top").value);

	if (value=="=") {
		if(b=="+"){
			document.getElementById("top").value=(a+c);
		}else if(b=="-"){
			document.getElementById("top").value=(a-c);
		}else if(b=="×"){
			document.getElementById("top").value=(a*c);
		}else if(b=="÷"){
			if(c==0){
				document.getElementById("top").value="分母不能为0";
			}else{
				document.getElementById("top").value=(a/c);
			}
		}
	}else{
		a=parseFloat(document.getElementById("top").value);
		document.getElementById("top").value="";
		b=value;
		if(b=="+/-"){
			a=-a;
			document.getElementById("top").value=a;
		}
	}
}

function cl(value){
	if(value=="清屏"){
		document.getElementById("top").value="";
	}else{		document.getElementById("top").value=document.getElementById("top").value.substring(0,(document.getElementById("top").value.length-1))
	}
}
版权声明:本文内容由互联网用户自发贡献,该文观点仅代表作者本人。本站仅提供信息存储空间服务,不拥有所有权,不承担相关法律责任。如发现本站有涉嫌侵权/违法违规的内容, 请联系我们举报,一经查实,本站将立刻删除。
发布者:全栈程序员-站长,转载请注明出处:https://javaforall.net/182540.html原文链接:https://javaforall.net


