
大家好,又见面了,我是你们的朋友全栈君。如果您正在找激活码,请点击查看最新教程,关注关注公众号 “全栈程序员社区” 获取激活教程,可能之前旧版本教程已经失效.最新Idea2022.1教程亲测有效,一键激活。
Jetbrains全系列IDE稳定放心使用
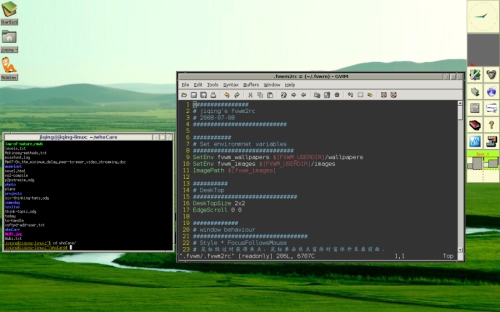
用了gnome和xfce,还是有些厌了,摆弄了两天fvwm,发现虽然配置起来有点麻烦,但用起来还是它最贴心,而且占资源极少,系统使用过程中内存一直只用了五六十兆。
我的鼠标左键坏了,但是通过配置fvwm,只用鼠标右键也可以完成大多数工作了。
下面是我的截图和配置文件:
 ################
# jiqing’s fvwm2rc
# 2008-07-08
###########################
###########
# Set environmnet variables
#############################
SetEnv fvwm_wallpapers $[FVWM_USERDIR]/wallpapers
SetEnv fvwm_images $[FVWM_USERDIR]/images
ImagePath $[fvwm_images]
##########
# DeskTop
##############################
DesktopName 0 Debian Linux
DeskTopSize 2×2
EdgeScroll 0 0
# Meta+F1 Page0(左上角)
Key F1 A M GotoPage 0 0
# Meta+F2 Page1(右上角)
Key F2 A M GotoPage 1 0
# Meta+F3 Page2(左下角)
Key F3 A M GotoPage 0 1
# Meta+F4 Page3(右下角)
Key F4 A M GotoPage 1 1
#############
# window behaviour
#################################
# Style * FocusFollowsMouse
# 鼠标经过时获得焦点,鼠标单击焦点窗体时窗体升至最前面。
Style * SloppyFocus, MouseFocusClickRaises
# 窗体出现时尽量不挡住其它的窗体
Style * TileCascadePlacement
##########
# window colorsets
###########################
Colorset 3 fg #101060, bg #e6e7d7
Colorset 4 fg Black, bg #a6a797
Colorset 5 fg White, bg Black
#####
# Window Decor
###########
#DestroyDecor MyDecor
#AddToDecor
#+ TitleStyle LeftJustified Height 18
#+ ButtonStyle 1 ActiveUp Vector 4 30×30@3 60×60@3 60×30@4 30×60@3 — Flat
#+ ButtonStyle 1 ActiveDown Vector 4 30×30@3 60×60@3 60×30@4 30×60@3 — Flat
#+ ButtonStyle 1 Inactive Vector 4 30×30@3 60×60@3 60×30@4 30×60@3 — Flat
#+ ButtonStyle 3 ActiveUp Vector 5 30×60@3 60×60@3 60×50@3 30×50@3 30×60@3 — Flat
#+ ButtonStyle 3 ActiveDown Vector 5 30×60@3 60×60@3 60×50@3 30×50@3 30×60@3 — Flat
#+ ButtonStyle 3 Inactive Vector 5 30×60@3 60×60@3 60×50@3 30×50@3 30×60@3 — Flat
#+ ButtonStyle 5 ActiveUp Vector 7 30×30@3 30×60@3 60×60@3 60×30@3 30×30@3 30×35@3 60×35@3 — Flat
#+ ButtonStyle 5 ActiveDown Vector 7 30×30@3 30×60@3 60×60@3 60×30@3 30×30@3 30×35@3 60×35@3 — Flat
#+ ButtonStyle 5 Inactive Vector 7 30×30@3 30×60@3 60×60@3 60×30@3 30×30@3 30×35@3 60×35@3 — Flat
#+ TitleStyle — Flat
#+ BorderStyle Simple — NoInset Flat
#+ ButtonStyle All — UseTitleStyle
############
# window looks
##########################
#Style * UseDecor MyDecor
#Style * MWMBorder, FirmBorder
Style * Colorset 4
Style * HilightColorset 3
Style * BorderColorset 5
Style * HilightBorderColorset 4
Style * Font “xft:Bitstream Vera Sans:size=10:style=Bold:antialias=True”
Style * Button 6, Button 4, Button 2
###############
# 窗体上的按扭,复制自高德纳的配置文件
#########################################
Mouse 0 2 A Close
ButtonStyle 2 Vector 7 /
ButtonStyle 2 – MWMDecorMenu
# At the right, a button that iconifies the window; we draw a small square
Mouse 0 6 A Iconify
ButtonStyle 6 Vector 5 40×40@1 60×40@1 60×60@0 40×60@0 40×40@1
ButtonStyle 6 – MWMDecorMin
# Next to that, a button with a big square; this one maximizes the window.
# (More precisely, if you double-click, the window goes to full screen size;
# if you single-click, it goes to full height but keeps its width.
# But if the window was already in “maximized” state, it goes back to normal.
# If you try to drag this button, it unconditionally goes to full width.)
# Mouse 0 4 A Maximize-Function
Mouse 3 4 A Maximize 100 100
Mouse 1 4 A Maximize 0 100
ButtonStyle 4 Vector 5 20×20@1 80×20@1 80×80@0 20×80@0 20×20@1
#AddtoFunc Maximize-Function “C” Maximize 100 100
#+
#+
#AddtoFunc Go-Max
#+
ButtonStyle 4 – MWMDecorMax
# 在窗体标题栏单击提升窗体,拖动移动窗体
Mouse 3 T C FvwmMoveOrRaise
DestroyFunc FvwmMoveOrRaise
AddToFunc FvwmMoveOrRaise “M” Move
+ “C” Raise
# 在图标上单击移动图标,双击使图标恢复为窗体
Mouse 0 I A FvwmMoveOrIconify
DestroyFunc FvwmMoveOrIconify
AddToFunc FvwmMoveOrIconify “M” Move
+ “D” Iconify
# 在窗口标题栏上向上滚动鼠标,收起窗口
#Mouse 4 T A FvwmWindowShade True
# 在窗口标题栏上向下滚动鼠标,展开窗口
#Mouse 5 T A FvwmWindowShade False
#########
# menu colorsets
################################
Colorset 7 fg Black, bg #e6e7d7, sh Black, hi #202070
Colorset 8 fg DarkRed, bg #e6e7d7, sh Black, hi #202070
##########
# menu styles
#################################
MenuStyle * PopupDelayed, PopupDelay 300, PopdownImmediately
MenuStyle * Popupoffset -5 100, TitleWarpoff
MenuStyle * BorderWidth 2
#MenuStyle * PopupAsSubmenu, HoldSubmenus, SubmenusRight
MenuStyle * MenuColorset 7
MenuStyle * ActiveFore
MenuStyle * ActiveColorset 8
MenuStyle * Font “xft:Bitstream Vera Sans:size=12:style=Bold:antialias=True”
###############
# 菜单
###################################
DestroyMenu FvwmRootMenu
AddToMenu FvwmRootMenu “Root Menu” Title
+ “uxterm%xterm.png%” Exec exec /usr/bin/uxterm
+ “uxterm(Big)%xterm.png%” /
+ “Gnome Terminal%term.png%”/
+ “” Nop
+ “Debian%debian.png%” Popup “/Debian”
+ “” Nop
+ “Restart FVWM” Restart
+ “Quit FVWM” Quit
###########
# Pager and Buttons colorset
###############################
Colorset 10 fg OrangeRed, bg GreenYellow
Colorset 11 fg DarkRed, bg LightGoldenrodYellow
#############
# FvwmPager
######################
Style “FvwmPager” NoTitle, !Handles, !Borders, Sticky, WindowListSkip, /
DestroyModuleConfig FvwmPager: *
*FvwmPager: Geometry 96×96-0-0
*FvwmPager: Colorset * 11
*FvwmPager: HilightColorset * 10
###########
# FvwmButtons
###############################
Style “FvwmButtons” NoTitle, NoHandles, BorderWidth 0, Sticky,/
DestroyModuleConfig MyButtons: *
*MyButtons: Geometry 96×528-0+0
*MyButtons: Back LightGoldenrodYellow
*MyButtons: Rows 11
*MyButtons: Columns 2
#*MyButtons: Frame 0
*MyButtons: (2×2, Swallow(UseOld,Respawn) /
*MyButtons: (2×2, Swallow(UseOld,Respawn) /
*MyButtons: (1×1, Icon vim.xpm, /
Action “Exec exec /usr/bin/gvim -geometry 72×40”)
*MyButtons: (1×1, Icon emacs.png,/
Action “Exec exec /usr/bin/emacs -geometry 72×40”)
*MyButtons: (1×1, Icon fm.png, Action “Exec exec /usr/bin/thunar”)
*MyButtons: (1×1, Icon browser.png,Action “Exec exec /usr/bin/epiphany”)
*MyButtons: (1×1, Icon music.xpm, Action “Exec exec /usr/bin/rhythmbox”)
*MyButtons: (1×1, Icon movie.xpm, Action “Exec exec /usr/bin/gmplayer”)
*MyButtons: (1×1, Icon dict.xpm, Action “Exec exec /usr/bin/stardict”)
*MyButtons: (1×1, Icon help.png,Action “Exec exec /usr/bin/kdissert”)
# 要注意virtual box的大小写
*MyButtons: (1×1, Icon vbox.png, Action “Exec exec /usr/bin/VirtualBox”)
*MyButtons: (1×1, Icon game.xpm, Action “Exec exec /usr/games/gnibbles”)
*MyButtons: (2×2, Swallow “FvwmPager”, “FvwmPager 0 0”)
##############
# Functions
#############################
DestroyFunc StartFunction
AddToFunc StartFunction
+ “I” Module FvwmButtons MyButtons
#+ “I” Wait MyButtons
DestroyFunc InitFunction
AddToFunc InitFunction
+ I Exec exec fvwm-root -r $[fvwm_wallpapers]/wallpaper-grass.png
#+ I Nop
DestroyFunc RestartFunction
AddToFunc RestartFunction
+ I Nop
DestroyFunc ExitFunction
AddToFunc ExitFunction
+ I KillModule FvwmButtons
################
# Mouse and key
##########################
# Nop表示鼠标双击时不做任何动作
Mouse 3 R A Menu FvwmRootMenu Nop
Mouse 1 R A WindowList
# 有F12按下时,显示内建菜单
Key F12 A A Menu MenuFvwmRoot
# 有F9按下时,显示自定义的根菜单
# Key F9 A N Menu FvwmRootMenu Nop 不知道这个为什么不行
Key F9 A A Menu FvwmRootMenu Nop
# 按下alt+tab时,显示窗口列表,并使选中的窗口获得焦点
#Key Tab A M WindowList Root c c NoDeskSort,SelectOnRelease Meta_L
# 可以用Key Tab A M -取消这一键绑定
Key Tab A M WindowList Root c c NoDeskSort
# 按下右边的窗口键时,启动一个uxterm
Key Super_R A A Exec exec uxterm
# 按下printscreen时,截图
Key Print A A Exec exec gnome-screenshot
发布者:全栈程序员-站长,转载请注明出处:https://javaforall.net/186500.html原文链接:https://javaforall.net


