
大家好,又见面了,我是你们的朋友全栈君。如果您正在找激活码,请点击查看最新教程,关注关注公众号 “全栈程序员社区” 获取激活教程,可能之前旧版本教程已经失效.最新Idea2022.1教程亲测有效,一键激活。
Jetbrains全系列IDE使用 1年只要46元 售后保障 童叟无欺
Cutout
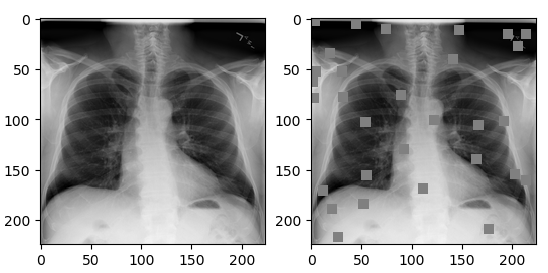
Cutout[1]是一种新的正则化方法。原理是在训练时随机把图片的一部分减掉,这样能提高模型的鲁棒性。它的来源是计算机视觉任务中经常遇到的物体遮挡问题。通过cutout生成一些类似被遮挡的物体,不仅可以让模型在遇到遮挡问题时表现更好,还能让模型在做决定时更多地考虑环境(context)。
The implementation of Cutout
1.自己码
import torch
import numpy as np

class Cutout(object):
 """Randomly mask out one or more patches from an image. Args: n_holes (int): Number of patches to cut out of each image. length (int): The length (in pixels) of each square patch. """
 def __init__(self, n_holes, length):
        self.n_holes = n_holes
        self.length = length

 def __call__(self, img):
 """ Args: img (Tensor): Tensor image of size (C, H, W). Returns: Tensor: Image with n_holes of dimension length x length cut out of it. """
        h = img.size(1)
        w = img.size(2)

        mask = np.ones((h, w), np.float32)

 		for n in range(self.n_holes):
            y = np.random.randint(h)
            x = np.random.randint(w)

            y1 = np.clip(y - self.length // 2, 0, h)
            y2 = np.clip(y + self.length // 2, 0, h)
            x1 = np.clip(x - self.length // 2, 0, w)
            x2 = np.clip(x + self.length // 2, 0, w)

            mask[y1: y2, x1: x2] = 0.

        mask = torch.from_numpy(mask)
        mask = mask.expand_as(img)
        img = img * mask

 return img
2.借助第三方库
from albumentations import Cutout
import matplotlib.pyplot as plt
import cv2

transform = Compose([
		             Cutout(num_holes=30, max_h_size=7, max_w_size=7, fill_value=128, p=1)
				    ])
images = cv2.imread("./data/input/images/00000060_000.png")
images2 = transform(image=images)["image"]
plt.subplot(121)
plt.imshow(images)
plt.subplot(122)
plt.imshow(images2)
plt.show()
效果展示:

升级版——CoarseDropout
孔洞数量、长和宽可以任意调节
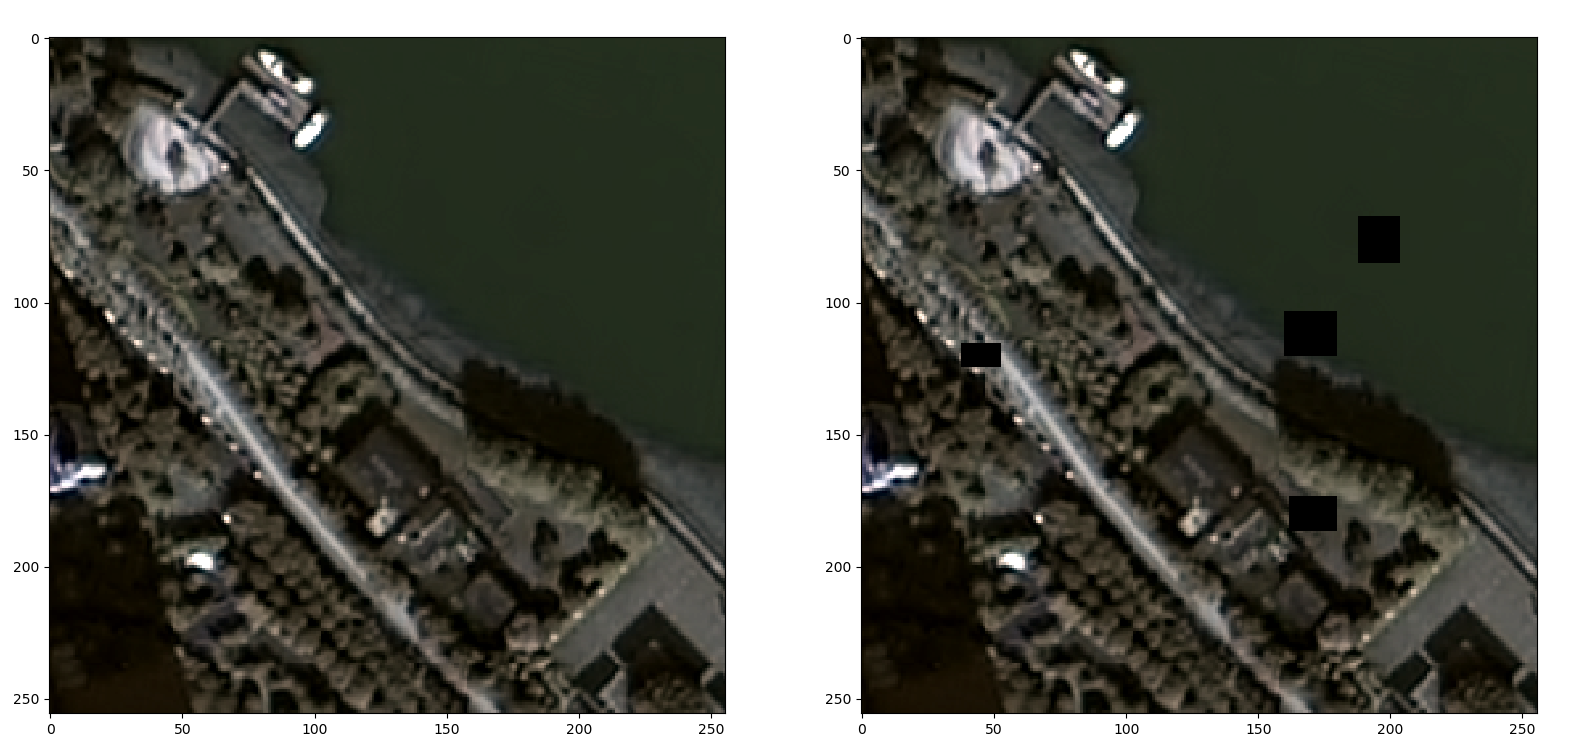
def cutout(img, holes, fill_value=0):
    # Make a copy of the input image since we don't want to modify it directly
    img = img.copy()
    for x1, y1, x2, y2 in holes:
        img[y1: y2, x1: x2] = fill_value
    return img


class CoarseDropout:
    """ CoarseDropout of the rectangular regions in the image. """
    def __init__(self, max_holes=8, max_height=20, max_width=20,
                 min_holes=4, min_height=8, min_width=8,
                 fill_value=0, p=1):
        self.max_holes = max_holes
        self.max_height = max_height
        self.max_width = max_width
        self.min_holes = min_holes if min_holes is not None else max_holes
        self.min_height = min_height if min_height is not None else max_height
        self.min_width = min_width if min_width is not None else max_width
        self.fill_value = fill_value
        self.prob = p
        assert 0 < self.min_holes <= self.max_holes
        assert 0 < self.min_height <= self.max_height
        assert 0 < self.min_width <= self.max_width

    def get_params_dependent_on_targets(self, img):
        height, width = img.shape[:2]

        holes = []
        for n in range(random.randint(self.min_holes, self.max_holes + 1)):
            hole_height = random.randint(self.min_height, self.max_height + 1)
            hole_width = random.randint(self.min_width, self.max_width + 1)

            y1 = random.randint(0, height - hole_height)
            x1 = random.randint(0, width - hole_width)
            y2 = y1 + hole_height
            x2 = x1 + hole_width
            holes.append((x1, y1, x2, y2))

        return holes

    def __call__(self, image):
        if random.random() < self.prob:
            holes = self.get_params_dependent_on_targets(image)
            image = cutout(image, holes, self.fill_value)
        return image
Reference
[1] https://arxiv.org/pdf/1708.04552.pdf
[2] https://zhuanlan.zhihu.com/p/66080948
版权声明:本文内容由互联网用户自发贡献,该文观点仅代表作者本人。本站仅提供信息存储空间服务,不拥有所有权,不承担相关法律责任。如发现本站有涉嫌侵权/违法违规的内容, 请联系我们举报,一经查实,本站将立刻删除。
发布者:全栈程序员-站长,转载请注明出处:https://javaforall.net/192811.html原文链接:https://javaforall.net


