
大家好,又见面了,我是你们的朋友全栈君。如果您正在找激活码,请点击查看最新教程,关注关注公众号 “全栈程序员社区” 获取激活教程,可能之前旧版本教程已经失效.最新Idea2022.1教程亲测有效,一键激活。
Jetbrains全系列IDE使用 1年只要46元 售后保障 童叟无欺
原文地址: http://www.30daydo.com/article/56
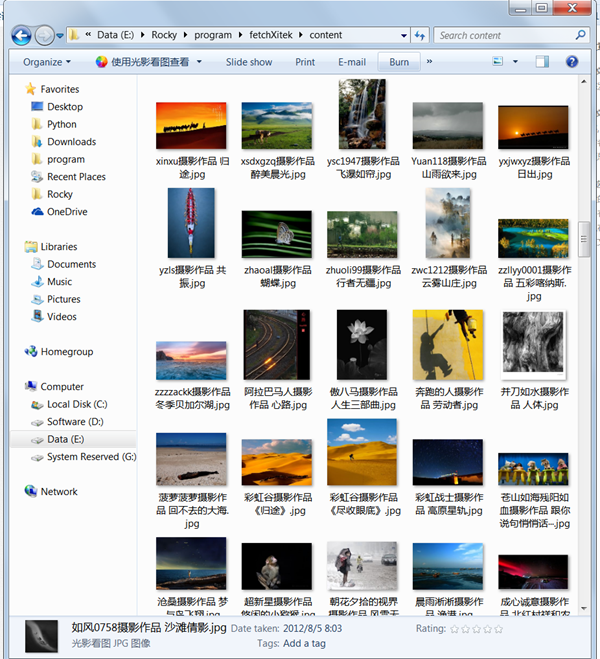
因为平时爱好摄影,所以喜欢看看色影无忌论坛的获奖摄影作品,所以写了个小script用来抓取上面的获奖图片,亲自测试可以使用。
自动抓所有的获奖图片

完整代码:
#-*-coding=utf-8-*-
__author__ = 'rocchen'
from bs4 import BeautifulSoup
import urllib2,sys,StringIO,gzip,time,random,re,urllib,os
reload(sys)
sys.setdefaultencoding('utf-8')
class Xitek():
    def __init__(self):
        self.url="http://photo.xitek.com/"
        user_agent="Mozilla/5.0 (compatible; MSIE 9.0; Windows NT 6.1; Trident/5.0)"
        self.headers={"User-Agent":user_agent}
        self.last_page=self.__get_last_page()


    def __get_last_page(self):
        html=self.__getContentAuto(self.url)
        bs=BeautifulSoup(html,"html.parser")
        page=bs.find_all('a',class_="blast")
        last_page=page[0]['href'].split('/')[-1]
        return int(last_page)


    def __getContentAuto(self,url):
        req=urllib2.Request(url,headers=self.headers)
        resp=urllib2.urlopen(req)
        #time.sleep(2*random.random())
        content=resp.read()
        info=resp.info().get("Content-Encoding")
        if info==None:
            return content
        else:
            t=StringIO.StringIO(content)
            gziper=gzip.GzipFile(fileobj=t)
            html = gziper.read()
            return html

    #def __getFileName(self,stream):


    def __download(self,url):
        p=re.compile(r'href="(/photoid/\d+)"')
        #html=self.__getContentNoZip(url)

        html=self.__getContentAuto(url)

        content = p.findall(html)
        for i in content:
            print i

            photoid=self.__getContentAuto(self.url+i)
            bs=BeautifulSoup(photoid,"html.parser")
            final_link=bs.find('img',class_="mimg")['src']
            print final_link
            #pic_stream=self.__getContentAuto(final_link)
            title=bs.title.string.strip()
            filename = re.sub('[\/:*?"<>|]', '-', title)
            filename=filename+'.jpg'
            urllib.urlretrieve(final_link,filename)
            #f=open(filename,'w')
            #f.write(pic_stream)
            #f.close()
        #print html
        #bs=BeautifulSoup(html,"html.parser")
        #content=bs.find_all(p)
        #for i in content:
        #    print i
        '''
        print bs.title
        element_link=bs.find_all('div',class_="element")
        print len(element_link)
        k=1
        for href in element_link:

            #print type(href)
            #print href.tag
        '''
        '''
            if href.children[0]:
                print href.children[0]
        '''
        '''
            t=0

            for i in href.children:
                #if i.a:
                if t==0:
                    #print k
                    if i['href']
                    print link

                        if p.findall(link):
                            full_path=self.url[0:len(self.url)-1]+link
                            sub_html=self.__getContent(full_path)
                            bs=BeautifulSoup(sub_html,"html.parser")
                            final_link=bs.find('img',class_="mimg")['src']
                            #time.sleep(2*random.random())
                            print final_link
                    #k=k+1
                #print type(i)
                #print i.tag
                #if hasattr(i,"href"):
                    #print i['href']
                #print i.tag
                t=t+1
                #print "*"

        '''

        '''
            if href:
                if href.children:
                    print href.children[0]
        '''
            #print "one element link"


    def getPhoto(self):

        start=0
        #use style/0
        photo_url="http://photo.xitek.com/style/0/p/"
        for i in range(start,self.last_page+1):
            url=photo_url+str(i)
            print url
            #time.sleep(1)
            self.__download(url)

        '''
        url="http://photo.xitek.com/style/0/p/10"
        self.__download(url)
        '''
        #url="http://photo.xitek.com/style/0/p/0"
        #html=self.__getContent(url)
        #url="http://photo.xitek.com/"
        #html=self.__getContentNoZip(url)
        #print html
        #'''
def main():
    sub_folder = os.path.join(os.getcwd(), "content")
    if not os.path.exists(sub_folder):
        os.mkdir(sub_folder)
    os.chdir(sub_folder)
    obj=Xitek()
    obj.getPhoto()


if __name__=="__main__":
    main()
详细讲解请移步:
版权声明:本文内容由互联网用户自发贡献,该文观点仅代表作者本人。本站仅提供信息存储空间服务,不拥有所有权,不承担相关法律责任。如发现本站有涉嫌侵权/违法违规的内容, 请联系我们举报,一经查实,本站将立刻删除。
发布者:全栈程序员-站长,转载请注明出处:https://javaforall.net/193821.html原文链接:https://javaforall.net


