
目录说明
使用GRUB版本2.02,目录如下(非完全,还有文件没有包含):
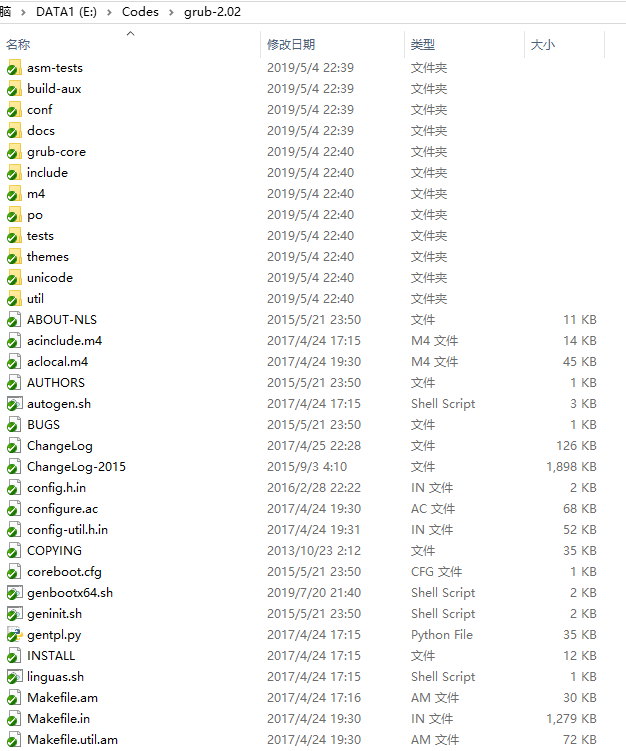

asm-tests:这里面是几个汇编代码文件,似乎没有什么用;
build-aux:包含了编译时可能用到的脚本;
conf:编译需要用的文件,make的时候会用到;
docs:主要时帮助文件,还有grub.cfg示例模板;
grub-core:GRUB的主体代码;
include:GRUB主体需要使用到的头文件;
m4:包含m4文件,configure的时候会使用到;
po:这个目录下主要由两种文件,一种时.po文件,另一种时.gmo文件。它们是用来支持多语言的,这里简单说明下。
.po文件就是一个文本文件,翻译就在这里做,下面是一个例子:
#: grub-core/hello/hello.c:36 msgid "Hello World" msgstr "Hello World"第一句指定了代码中的位置,第二句是代码中的原文,第三句就是不同语言下的翻译。
.gmo文件时将.po文件通过gettext工具生成的二进制,它们是实际使用的翻译。
tests:一些测试的脚本;
themes:GRUB界面的主题;
unicode:Unicode数据;
util:一些工具源的文件。
编译说明
编译主要分为3个部分。
首先是configure,下面是一种配置:
./configure --target=x86_64 --with-platform=efi因为GRUB可以给不同的平台使用,所以这里需要指定目标硬件平台。目前比较常用的有x86_64位平台,通过–target来指定。x86_64位平台使用UEFI BIOS,所以通常还会带–with-platform来指定将GRUB编译成适用于UEFI的应用。
第二步是make,这个不用多说。
第三步是生成GRUB文件:
./grub-mkimage -p . -d ./grub-core/ -O x86_64-efi -o bootx64.efi normal minicmd这里需要说明,我们编译的是用于x86平台适用于UEFI BIOS启动的GRUB应用,所以使用上述命令来生成独立的GRUB,实际上也可以直接安装到本地的电脑,可以使用编译生成的grub-install工具。
由于本文主要介绍代码,所以只做简单的编译介绍。
入口
当我们分析代码的时候,入口函数是非常重要的一部分,本节主要介绍GRUB的入口。
需要说明,从本节以及之后的代码,都是针对x86平台用于UEFI的GRUB应用为基础进行介绍的。
GRUB在通常情况下是不可见的,当不存在GRUB配置文件(默认是grub.cfg)时,才会进入GRUB界面,如下所示:
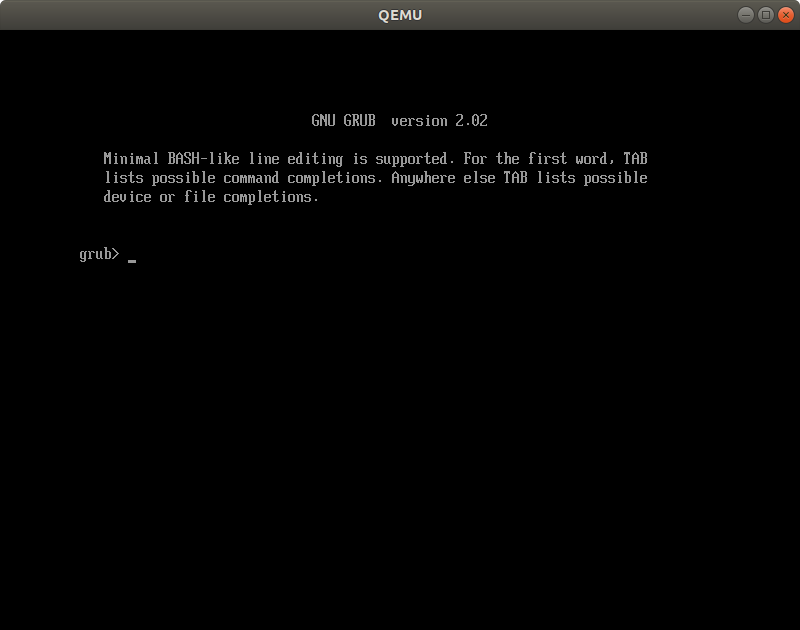
通过这个界面,我们可以比较容易地找到对应的代码,它位于如下的文件中:
grub-core/normal/main.c可以看到上述的界面其实是通过一个命令进入的,这个命令是normal,在如下的代码中注册:
GRUB_MOD_INIT(normal) { unsigned i; grub_boot_time ("Preparing normal module"); /* Previously many modules depended on gzio. Be nice to user and load it. */ grub_dl_load ("gzio"); grub_errno = 0; grub_normal_auth_init (); grub_context_init (); grub_script_init (); grub_menu_init (); grub_xputs_saved = grub_xputs; grub_xputs = grub_xputs_normal; /* Normal mode shouldn't be unloaded. */ if (mod) grub_dl_ref (mod); cmd_clear = grub_register_command ("clear", grub_mini_cmd_clear, 0, N_("Clear the screen.")); grub_set_history (GRUB_DEFAULT_HISTORY_SIZE); grub_register_variable_hook ("pager", 0, grub_env_write_pager); grub_env_export ("pager"); /* Register a command "normal" for the rescue mode. */ grub_register_command ("normal", grub_cmd_normal, 0, N_("Enter normal mode.")); grub_register_command ("normal_exit", grub_cmd_normal_exit, 0, N_("Exit from normal mode."));可以看到不仅注册了normal,还注册了normal_exit,当你看到上面的界面之后,就可以通过normal_exit来退出这个界面:
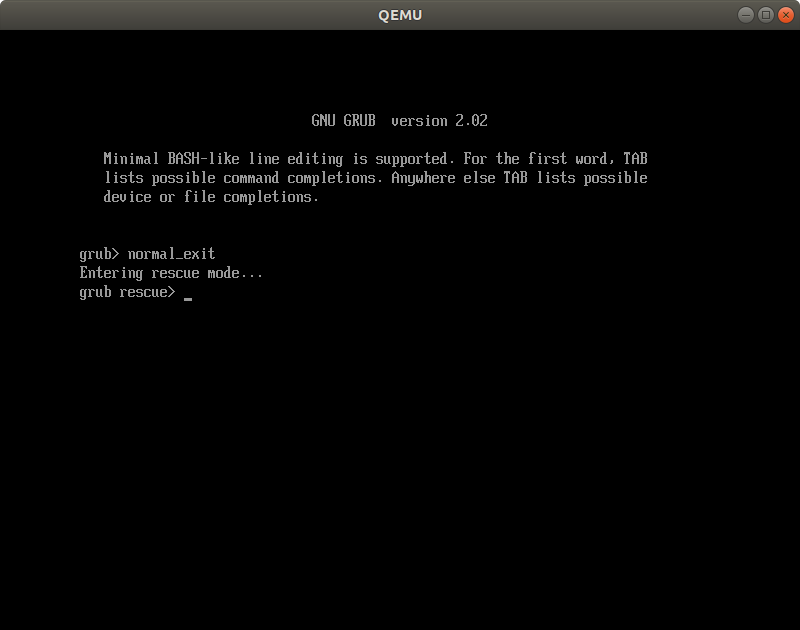
退出之后来到了rescue界面,这个会在以后讨论。
根据normal这个点,我们可以往前追溯,来找到真正的入口。由于normal是一条命令,那么一定有一个地方会调用这个命令,
具体的代码位于:
grub-core/kern/main.c如下所示:
/* The main routine. */ void __attribute__ ((noreturn)) grub_main (void) { /* First of all, initialize the machine. */ grub_machine_init (); grub_boot_time ("After machine init."); /* Hello. */ grub_setcolorstate (GRUB_TERM_COLOR_HIGHLIGHT); grub_printf ("Welcome to GRUB!\n\n"); grub_setcolorstate (GRUB_TERM_COLOR_STANDARD); grub_load_config (); grub_boot_time ("Before loading embedded modules."); /* Load pre-loaded modules and free the space. */ grub_register_exported_symbols (); #ifdef GRUB_LINKER_HAVE_INIT grub_arch_dl_init_linker (); #endif grub_load_modules (); grub_boot_time ("After loading embedded modules."); /* It is better to set the root device as soon as possible, for convenience. */ grub_set_prefix_and_root (); grub_env_export ("root"); grub_env_export ("prefix"); /* Reclaim space used for modules. */ reclaim_module_space (); grub_boot_time ("After reclaiming module space."); grub_register_core_commands (); grub_boot_time ("Before execution of embedded config."); if (load_config) grub_parser_execute (load_config); grub_boot_time ("After execution of embedded config. Attempt to go to normal mode"); grub_load_normal_mode (); grub_rescue_run (); }该函数的最后有grub_load_normal_mode(),就是加载并执行normal命令。
还可以看到,在退出normal之后,就进入到了rescue模式,与前面的测试符合。
当然这还不是真正的入口,真正的入口在调用grub_main()的地方:
start: _start: movq %rcx, EXT_C(grub_efi_image_handle)(%rip) movq %rdx, EXT_C(grub_efi_system_table)(%rip) andq $~0xf, %rsp call EXT_C(grub_main) /* Doesn't return. */对于UEFI来说,它会传入一个EFI_HANDLE和一个EFI_SYSTEM_TABLE作为参数,并赋值给这里的两个参数grub_efi_image_handle和grub_efi_system_table,供后续使用。
上述代码在startup.S文件中,这样的同名文件有很多个,不同的Configure会使用不同的文件,具体可以参考Makefile文件:
kernel_exec_SOURCES = kern/x86_64/efi/startup.S \ kern/i386/efi/tsc.c \ kern/i386/tsc_pmtimer.c \ kern/x86_64/efi/callwrap.S \ kern/i386/efi/init.c bus/pci.c \ kern/x86_64/dl.c disk/efi/efidisk.c \ kern/efi/efi.c kern/efi/init.c \ kern/efi/mm.c term/efi/console.c \ kern/acpi.c kern/efi/acpi.c \ kern/i386/tsc.c kern/i386/tsc_pit.c \ kern/compiler-rt.c kern/mm.c kern/time.c \ kern/generic/millisleep.c kern/command.c \ kern/corecmd.c kern/device.c kern/disk.c \ kern/dl.c kern/env.c kern/err.c \ kern/file.c kern/fs.c kern/list.c \ kern/main.c kern/misc.c kern/parser.c \ kern/partition.c kern/rescue_parser.c \ kern/rescue_reader.c kern/term.c如此,我们就可以确定GRUB的入口。
GRUB中的UEFI调用
前面已经提到过多次,本文主要研究GRUB作为UEFI应用的使用,所以这里就开始说明GRUB下是如何调用到UEFI的内容的。
上一节已经提到,入口函数中会传递EFI_HANDLE和EFI_SYSTEM_TABLE作并赋值给GRUB中的变量,这也是UEFI应用的标配,通过这两个变量就可以调用到UEFI接口,定义在grub-core/kern/efi/efi.c中:
/* The handle of GRUB itself. Filled in by the startup code. */ grub_efi_handle_t grub_efi_image_handle; /* The pointer to a system table. Filled in by the startup code. */ grub_efi_system_table_t *grub_efi_system_table;在GRUB中对UEFI的常用接口进行了包装,比如获取Protocol等,它们定义在include/grub/efi/efi.h中:
 #include

    #include

     #include

      /* Functions. */ void *EXPORT_FUNC(grub_efi_locate_protocol) (grub_efi_guid_t *protocol, void *registration); grub_efi_handle_t * EXPORT_FUNC(grub_efi_locate_handle) (grub_efi_locate_search_type_t search_type, grub_efi_guid_t *protocol, void *search_key, grub_efi_uintn_t *num_handles); void *EXPORT_FUNC(grub_efi_open_protocol) (grub_efi_handle_t handle, grub_efi_guid_t *protocol, grub_efi_uint32_t attributes); int EXPORT_FUNC(grub_efi_set_text_mode) (int on); void EXPORT_FUNC(grub_efi_stall) (grub_efi_uintn_t microseconds); void * EXPORT_FUNC(grub_efi_allocate_pages) (grub_efi_physical_address_t address, grub_efi_uintn_t pages); void EXPORT_FUNC(grub_efi_free_pages) (grub_efi_physical_address_t address, grub_efi_uintn_t pages); int EXPORT_FUNC(grub_efi_get_memory_map) (grub_efi_uintn_t *memory_map_size, grub_efi_memory_descriptor_t *memory_map, grub_efi_uintn_t *map_key, grub_efi_uintn_t *descriptor_size, grub_efi_uint32_t *descriptor_version); grub_efi_loaded_image_t *EXPORT_FUNC(grub_efi_get_loaded_image) (grub_efi_handle_t image_handle); void EXPORT_FUNC(grub_efi_print_device_path) (grub_efi_device_path_t *dp); char *EXPORT_FUNC(grub_efi_get_filename) (grub_efi_device_path_t *dp); grub_efi_device_path_t * EXPORT_FUNC(grub_efi_get_device_path) (grub_efi_handle_t handle); grub_efi_device_path_t * EXPORT_FUNC(grub_efi_find_last_device_path) (const grub_efi_device_path_t *dp); grub_efi_device_path_t * EXPORT_FUNC(grub_efi_duplicate_device_path) (const grub_efi_device_path_t *dp); grub_err_t EXPORT_FUNC (grub_efi_finish_boot_services) (grub_efi_uintn_t *outbuf_size, void *outbuf, grub_efi_uintn_t *map_key, grub_efi_uintn_t *efi_desc_size, grub_efi_uint32_t *efi_desc_version); grub_err_t EXPORT_FUNC (grub_efi_set_virtual_address_map) (grub_efi_uintn_t memory_map_size, grub_efi_uintn_t descriptor_size, grub_efi_uint32_t descriptor_version, grub_efi_memory_descriptor_t *virtual_map); void *EXPORT_FUNC (grub_efi_get_variable) (const char *variable, const grub_efi_guid_t *guid, grub_size_t *datasize_out); grub_err_t EXPORT_FUNC (grub_efi_set_variable) (const char *var, const grub_efi_guid_t *guid, void *data, grub_size_t datasize); int EXPORT_FUNC (grub_efi_compare_device_paths) (const grub_efi_device_path_t *dp1, const grub_efi_device_path_t *dp2); extern void (*EXPORT_VAR(grub_efi_net_config)) (grub_efi_handle_t hnd, char device, char path); #if defined(__arm__) || defined(__aarch64__) void *EXPORT_FUNC(grub_efi_get_firmware_fdt)(void); #endif
因此我们就可以在这里调用UEFI中实现的Protocol了。
在【UEFI基础】Protocol介绍中实现了一个EFI_HELLO_WORLD_PROTOCOL,下面就以它为例,在GRUB下调用Protocol,相关的代码可以在grub-2.02: GRUB2源代码,来自ftp://ftp.gnu.org/gnu/grub/,版本是grub-2.02.tar.gz。找到。
具体步骤如下:
1. 首先在api.h中定义相关的Protocol和GUID:
#define EFI_HELLO_WORLD_PROTOCOL_GUID \ { 0x038f1af5, 0x1c8d, 0x408f, \ { 0xab, 0x25, 0x30, 0xae, 0xb5, 0x96, 0x5d, 0x6e } \ } struct efi_hello_world { grub_efi_uint64_t revision; grub_efi_status_t (*hello) (struct efi_hello_world *this); }; typedef struct efi_hello_world efi_hello_world_t;2. 然后在hello.c中增加相关的代码,首先是头文件:
#include

    #include
然后是对应函数的实现:
static void efi_hello (void) { grub_efi_uintn_t num_handles; grub_efi_handle_t *handles; grub_efi_handle_t *handle; grub_efi_guid_t guid = EFI_HELLO_WORLD_PROTOCOL_GUID; handles = grub_efi_locate_handle (GRUB_EFI_BY_PROTOCOL, &guid, 0, &num_handles); if (!handles) { return; } for (handle = handles; num_handles--; handle++) { efi_hello_world_t *hello_p; hello_p = grub_efi_open_protocol (*handle, &guid, GRUB_EFI_OPEN_PROTOCOL_GET_PROTOCOL); if (hello_p) { efi_call_1 (hello_p->hello, hello_p); } } return; } static grub_err_t grub_cmd_hello (grub_extcmd_context_t ctxt __attribute__ ((unused)), int argc __attribute__ ((unused)), char args __attribute__ ((unused))) { grub_printf ("%s\n", _("Hello World")); efi_hello (); return 0; }这样当我们在GRUB界面执行hello命令时,回去调用UEFI下的Protocol并执行,可以在串口看到相应的打印:
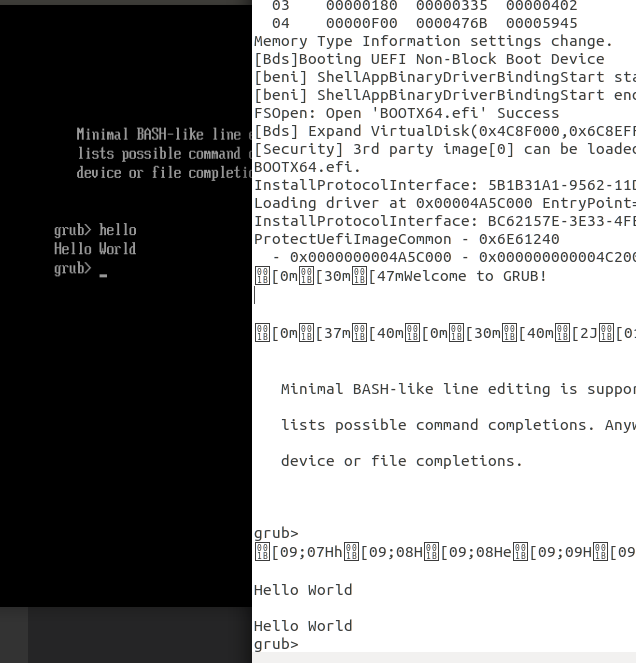
可以看到GRUB界面里面打印了一次,而串口里面有两次,其中一次就是在UEFI Protocol中的打印。
需要注意在grub-mkimage的时候增加hello模块,否则不会有hello命令。
发布者:全栈程序员-站长,转载请注明出处:https://javaforall.net/211475.html原文链接:https://javaforall.net


