
- react-native-ble-manager:文档清晰明了,简单易懂,基本每个月都有更新,遇到问题提交issue作者也能及时回复,不确保能兼容所有BLE蓝牙设备。(本文使用这个库:demo源码地址)
- react-native-ble-plx:文档阅读起来有点难度,但API很丰富,相比
react-native-ble-manager显的比较专业。(我也试用了这个库 : demo源码地址) - react-native-ble:由Node.js BLE移植而成,而且久未更新,能不能适配最新React Native版本还是个问题,没有深入研究。
如有疑问,可在评论区留言,或者加我()咨询讨论。
友情提示:
react-native-ble-manager只适用于BLE蓝牙通信,不适用于经典蓝牙通信,接入前请确保你的设备是BLE(低功耗)蓝牙,以免前功尽弃。android请使用BlueLoupe软件查看当前蓝牙是否是低功耗的,当有Bluetooth Low Energy 值时,表示当前蓝牙是BLE蓝牙。

ios平台可以下载LightBlue软件测试蓝牙连接和通信,但貌似无法区分BLE和经典蓝牙
根据多数网友反馈总结:
- 如果连接的是蓝牙打印机(大部分为小票打印机)的话, 使用
react-native-ble-manager或react-native-ble-plx,如果可以正常搜索连接的话,那通信应该是没问题的,但有可能会出现android可以连接而ios不行,或者ios可以连接而android不行,有可能是库不支持你的蓝牙设备,或者你的设备不是BLE蓝牙。 - 如果BLE蓝牙通信不行,那也可以尝试使用经典蓝牙通信react-native-bluetooth-classic、react-native-bluetooth-serial等实现打印。
- 如果你是用
react-native-ble-plx实现小票打印机的话,如果某些蓝牙协议需要特殊的结束码才能打印的话,那就需要修改下源码才能正确识别结束标志[0x0D, 0x0A],修改后的源码地址。
数据通信
实现蓝牙数据通信需要初始化、搜索、连接、获取Service和Characteristic、通知监听、读数据、写数据、解析蓝牙指令
初始化
import BleManager from 'react-native-ble-manager'; const BleManagerModule = NativeModules.BleManager; const bleManagerEmitter = new NativeEventEmitter(BleManagerModule); BleManager.start({
   showAlert: false}) .then( ()=>{
    //检查蓝牙打开状态,初始化蓝牙后检查当前蓝牙有没有打开 BleManager.checkState(); console.log('Init the module success.'); }).catch(error=>{
    console.log('Init the module fail.'); });
添加相应的监听器
//蓝牙状态改变监听 bleManagerEmitter.addListener('BleManagerDidUpdateState', (args) => {
    console.log('BleManagerDidUpdateStatea:', args); if(args.state == 'on' ){
    //蓝牙已打开 } });
搜索
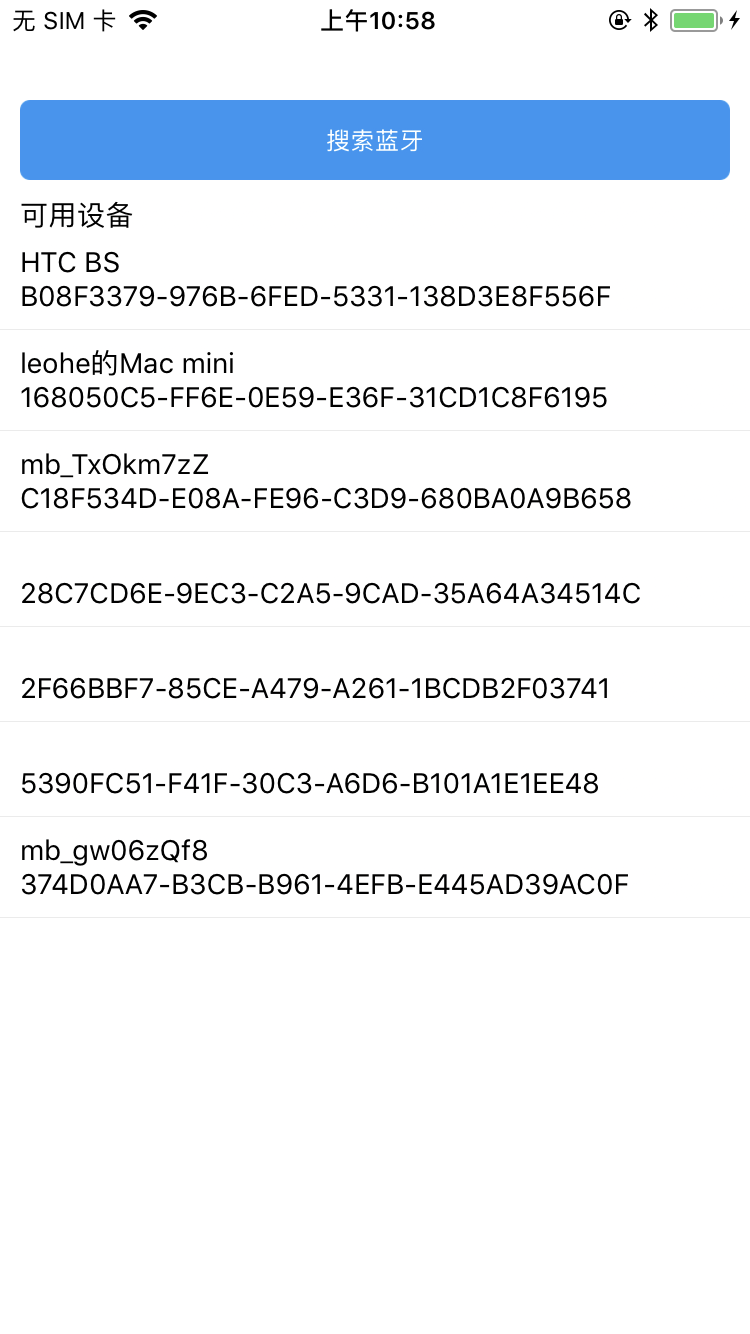
第一次使用react-native-ble-manager这个组件时,发现搜索不到附近的蓝牙设备(手机,电脑),于是就向作者提交了一个issue,问题是:Can’t discovery to some devices,然后才明白该组件只能搜索到标准的BLE蓝牙设备。
注意:从Android 6.0之后,想要扫描低功率蓝牙设备,应用需要拥有访问设备位置的权限。这是因为Bluetooth beacons蓝牙信标,可用于确定手机和用户的位置。此外,在申请位置权限后,还需要打开定位服务(GPS)才能扫描到BLE设备。在小米手机上,如果没有在代码中手动申请定位权限,需要在应用权限管理中将定位改为允许才可以。Android这样的做法无疑保护了用户的安全,但也给开发者带来了小小的麻烦。
//扫描可用设备,5秒后结束  BleManager.scan([], 5, true) .then(() => {
    console.log('Scan started'); }) .catch( (err)=>{
    console.log('Scan started fail'); }); //停止扫描 BleManager.stopScan() .then(() => {
    console.log('Scan stopped'); }) .catch( (err)=>{
    console.log('Scan stopped fail',err); });
添加相应的监听器
//搜索到一个新设备监听 bleManagerEmitter.addListener('BleManagerDiscoverPeripheral', (data) => {
    console.log('BleManagerDiscoverPeripheral:', data); let id; //蓝牙连接id let macAddress; //蓝牙Mac地址  if(Platform.OS == 'android'){
    macAddress = data.id; id = macAddress; }else{
    //ios连接时不需要用到Mac地址,但跨平台识别是否是同一设备时需要Mac地址 //如果广播携带有Mac地址,ios可通过广播0x18获取蓝牙Mac地址, macAddress = getMacAddressFromIOS(data); id = data.id; } }); //搜索结束监听 bleManagerEmitter.addListener('BleManagerStopScan', () => {
    console.log('BleManagerStopScan:','Scanning is stopped'); //搜索结束后,获取搜索到的蓝牙设备列表,如监听了BleManagerDiscoverPeripheral,可省去这个步骤 BleManager.getDiscoveredPeripherals([]) .then((peripheralsArray) => {
    console.log('Discovered peripherals: ', peripheralsArray); }); }); / ios系统从蓝牙广播信息中获取蓝牙MAC地址 */ getMacAddressFromIOS(data){
    let macAddressInAdvertising = data.advertising.kCBAdvDataManufacturerMacAddress; //为undefined代表此蓝牙广播信息里不包括Mac地址 if(!macAddressInAdvertising){
    return; } macAddressInAdvertising = macAddressInAdvertising.replace("<","").replace(">","").replace(" ",""); if(macAddressInAdvertising != undefined && macAddressInAdvertising != null && macAddressInAdvertising != '') {
    macAddressInAdvertising = swapEndianWithColon(macAddressInAdvertising); } return macAddressInAdvertising; } / * ios从广播中获取的mac地址进行大小端格式互换,并加上冒号: * @param str 010000CAEA80 * @returns string 80:EA:CA:00:00:01 */ swapEndianWithColon(str){
    let format = ''; let len = str.length; for(let j = 2; j <= len; j = j + 2){
    format += str.substring(len-j, len-(j-2)); if(j != len) {
    format += ":"; } } return format.toUpperCase(); }
连接
android使用Mac地址与蓝牙连接,ios使用UUID与蓝牙连接。
//连接蓝牙 BleManager.connect(id) .then(() => {
    console.log('Connected'); }) .catch((error) => {
    console.log('Connected error:',error); }); //断开蓝牙连接 BleManager.disconnect(id) .then( () => {
    console.log('Disconnected'); }) .catch( (error) => {
    console.log('Disconnected error:',error); });
添加相应的监听器
//蓝牙设备已连接监听 bleManagerEmitter.addListener('BleManagerConnectPeripheral', (args) => {
    log('BleManagerConnectPeripheral:', args); }); //蓝牙设备已断开连接监听 bleManagerEmitter.addListener('BleManagerDisconnectPeripheral', (args) => {
    console.log('BleManagerDisconnectPeripheral:', args); });
蓝牙连接后会显示该设备的具体信息,android平台下连接成功后返回的数据如下:
{
    characteristics: [ {
    properties: {
    Read: 'Read' }, characteristic: '2a00', service: '1800' }, {
    properties: {
    Read: 'Read' }, characteristic: '2a01', service: '1800' }, {
    properties: {
    Write: 'Write', Read: 'Read' }, characteristic: '2a02', service: '1800' }, {
    properties: {
    Read: 'Read' }, characteristic: '2a04', service: '1800' }, {
    descriptors: [ {
    value: null, uuid: '2902' } ], properties: {
    Indicate: 'Indicate', Read: 'Read' }, characteristic: '2a05', service: '1801' }, {
    descriptors: [ {
    value: null, uuid: '2902' }, {
    value: null, uuid: '2901' } ], properties: {
    Notify: 'Notify' }, characteristic: '0783b03e-8535-b5a0-7140-a304d2495cb8', service: '0783b03e-8535-b5a0-7140-a304d2495cb7' }, {
    descriptors: [ {
    value: null, uuid: '2902' }, {
    value: null, uuid: '2901' } ], properties: {
    WriteWithoutResponse: 'WriteWithoutResponse' }, characteristic: '0783b03e-8535-b5a0-7140-a304d2495cba', service: '0783b03e-8535-b5a0-7140-a304d2495cb7' }, {
    descriptors: [ {
    value: null, uuid: '2902' }, {
    value: null, uuid: '2901' } ], properties: {
    Notify: 'Notify', WriteWithoutResponse: 'WriteWithoutResponse', Read: 'Read' }, characteristic: '0783b03e-8535-b5a0-7140-a304d2495cb9', service: '0783b03e-8535-b5a0-7140-a304d2495cb7' } ], services: [ {
    uuid: '1800' }, {
    uuid: '1801' }, {
    uuid: '0783b03e-8535-b5a0-7140-a304d2495cb7' } ], rssi: -46, advertising:{
    data: 'AgEGEQe3XEnSBKNAcaC1NYU+sIMHCQlQRVAtUEVOLQAAAAAAAAAAAAAAAAAAAAAAAAAAAAAAAAAAAAAAAAA=',CDVType: 'ArrayBuffer' }, id: '00:CD:FF:00:22:2D', name: 'PEP-HC001' }
ios平台下连接成功后返回的数据如下:
{
name: 'PEP-HC001', id: '-E97B-46C0-91AE-261E93EADBFD', advertising: {
kCBAdvDataLocalName: 'PEP-HC001', kCBAdvDataIsConnectable: true, kCBAdvDataServiceUUIDs: [ '0783' ], kCBAdvDataManufacturerMacAddress: '' , kCBAdvDataManufacturerData: {
CDVType: 'ArrayBuffer', data: 'RyIA/80A' } }, services: [ '0783B03E-8535-B5A0-7140-A304D2495CB7' ], characteristics: [ {
service: '0783B03E-8535-B5A0-7140-A304D2495CB7', isNotifying: false, characteristic: '0783B03E-8535-B5A0-7140-A304D2495CB8', properties: [ 'Notify' ] }, {
service: '0783B03E-8535-B5A0-7140-A304D2495CB7', isNotifying: false, characteristic: '0783B03E-8535-B5A0-7140-A304D2495CBA', properties: [ 'WriteWithoutResponse' ] }, {
service: '0783B03E-8535-B5A0-7140-A304D2495CB7', isNotifying: false, characteristic: '0783B03E-8535-B5A0-7140-A304D2495CB9', properties: [ 'Read', 'WriteWithoutResponse', 'Notify' ] } ], rssi: -35 } 获取Service和Characteristic
BLE分为三部分Service(服务)、Characteristic(特征)、Descriptor(描述符),这三部分都由UUID作为唯一标示符。一个蓝牙4.0的终端可以包含多个Service,一个Service可以包含多个Characteristic,一个Characteristic包含一个Value和多个Descriptor,一个Descriptor包含一个Value。一般来说,Characteristic是手机与BLE终端交换数据的关键,Characteristic有跟权限相关的字段,如Property,Property有读写等各种属性,如Notify、Read、Write、WriteWithoutResponse。(引自:Android BLE开发之Android手机与BLE终端通信)
Service
注意:除了标准的UUID,蓝牙硬件工程师也可以自定义一些标准之外的UUID以满足一些特殊通信要求,要是你的蓝牙使用的是自定义的UUID,那写数据的时候得传128位的UUID才能正常通信,要是你用的是标准的UUID通信,那写数据的时候传16位UUID就可以了。
Characteristic
在 Service 下面,又包括了许多的独立数据项,我们把这些独立的数据项称作 Characteristic。同样的,每一个 Characteristic 也有一个唯一的 UUID 作为标识符。建立蓝牙连接后,我们说的通过蓝牙发送数据给外围设备就是往这些 Characteristic 中的 Value 字段写入数据;外围设备发送数据给手机就是监听这些 Charateristic 中的 Value 字段有没有变化,如果发生了变化,手机的 BLE API 就会收到一个监听的回调。(引自:Android BLE 蓝牙开发入门)
蓝牙连接成功后,需要调用retrieveServices方法获取Notify、Read、Write的serviceUUID和characteristicUUID作为参数来跟蓝牙进一步通信
//获取蓝牙Service和Characteristics BleManager.retrieveServices(peripheralId) .then((peripheralInfo) => {
this.getUUID(); console.log('Peripheral info:', peripheralInfo); }); peripheralInfo下的characteristics字段值是一个特征数组,每一项代表一个特征通道,找到properties中包含有Notify、Read、Write、WriteWithoutResponse属性的那一项,其service和characteristic即是我们需要的参数。
PS:serviceUUID和characteristicUUID标准格式为XXXXXXXX-XXXX-XXXX-XXXX-XXXXXXXXXXXX的128bit的UUID。所以需要将获到的’XXXX’格式的UUID转换为标准的128bit的UUID格式才可能进行通信。
不同的蓝牙设备,可能有多个特征通道包含Notify、Read、Write、WriteWithoutResponse属性值,那每个通道属性的功能可能会不一样,应根据具体的蓝牙设备选择符合我们要求的特征通道。有些可能不包含Notify、Read、Write、WriteWithoutResponse中的一个或多个属性,具体跟蓝牙硬件有关系,一般有Notify和Write两个属性就可以满足通信的要求了。
//获取Notify、Read、Write、WriteWithoutResponse的serviceUUID和characteristicUUID getUUID(peripheralInfo){
    this.readServiceUUID = []; this.readCharacteristicUUID = []; this.writeWithResponseServiceUUID = []; this.writeWithResponseCharacteristicUUID = []; this.writeWithoutResponseServiceUUID = []; this.writeWithoutResponseCharacteristicUUID = []; this.nofityServiceUUID = []; this.nofityCharacteristicUUID = []; for(let item of peripheralInfo.characteristics){
    //请根据具体需要是否转成128位的,ios有些设备需要传16位的才能正常通信 //item.service = this.fullUUID(item.service); item.characteristic = this.fullUUID(item.characteristic); if(Platform.OS == 'android'){
    if(item.properties.Notify == 'Notify'){
    this.nofityServiceUUID.push(item.service); this.nofityCharacteristicUUID.push(item.characteristic); } if(item.properties.Read == 'Read'){
    this.readServiceUUID.push(item.service); this.readCharacteristicUUID.push(item.characteristic); } if(item.properties.Write == 'Write'){
    this.writeWithResponseServiceUUID.push(item.service); this.writeWithResponseCharacteristicUUID.push(item.characteristic); } if(item.properties.Write == 'WriteWithoutResponse'){
    this.writeWithoutResponseServiceUUID.push(item.service); this.writeWithoutResponseCharacteristicUUID.push(item.characteristic); } }else{
    //ios for(let property of item.properties){
    if(property == 'Notify'){
    this.nofityServiceUUID.push(item.service); this.nofityCharacteristicUUID.push(item.characteristic); } if(property == 'Read'){
    this.readServiceUUID.push(item.service); this.readCharacteristicUUID.push(item.characteristic); } if(property == 'Write'){
    this.writeWithResponseServiceUUID.push(item.service); this.writeWithResponseCharacteristicUUID.push(item.characteristic); } if(property == 'WriteWithoutResponse'){
    this.writeWithoutResponseServiceUUID.push(item.service); this.writeWithoutResponseCharacteristicUUID.push(item.characteristic); } } } } } / * 请根据具体需要是否转成128位的,ios有些设备需要传16位的才能正常通信 * Converts UUID to full 128bit. * * @param {UUID} uuid 16bit, 32bit or 128bit UUID. * @returns {UUID} 128bit UUID. */ fullUUID(uuid) {
    if (uuid.length === 4){
    return '0000' + uuid.toUpperCase() + '-0000-1000-8000-00805F9B34FB' } if (uuid.length === 8) {
    return uuid.toUpperCase() + '-0000-1000-8000-00805F9B34FB' } return uuid.toUpperCase() }
注意:
- 如果android和ios使用的是同一个ServiceUUID和CharacteristicUUID,有可能会导致ios通信正常,android通信失败(或者android通信正常,ios通信失败),这时,就需要针对ios和android传入不同的UUID,这样才能正常通信;
- 也可能是另一种情况,ios需要传入16位的UUID(如
FEE0、FEE1等),而android需要传入128位的UUID(如0000FEE0-0000-1000-8000-00805F9B34FB); - 总之,android和ios有一方通信失败,大多是传入UUID的问题。
通知监听
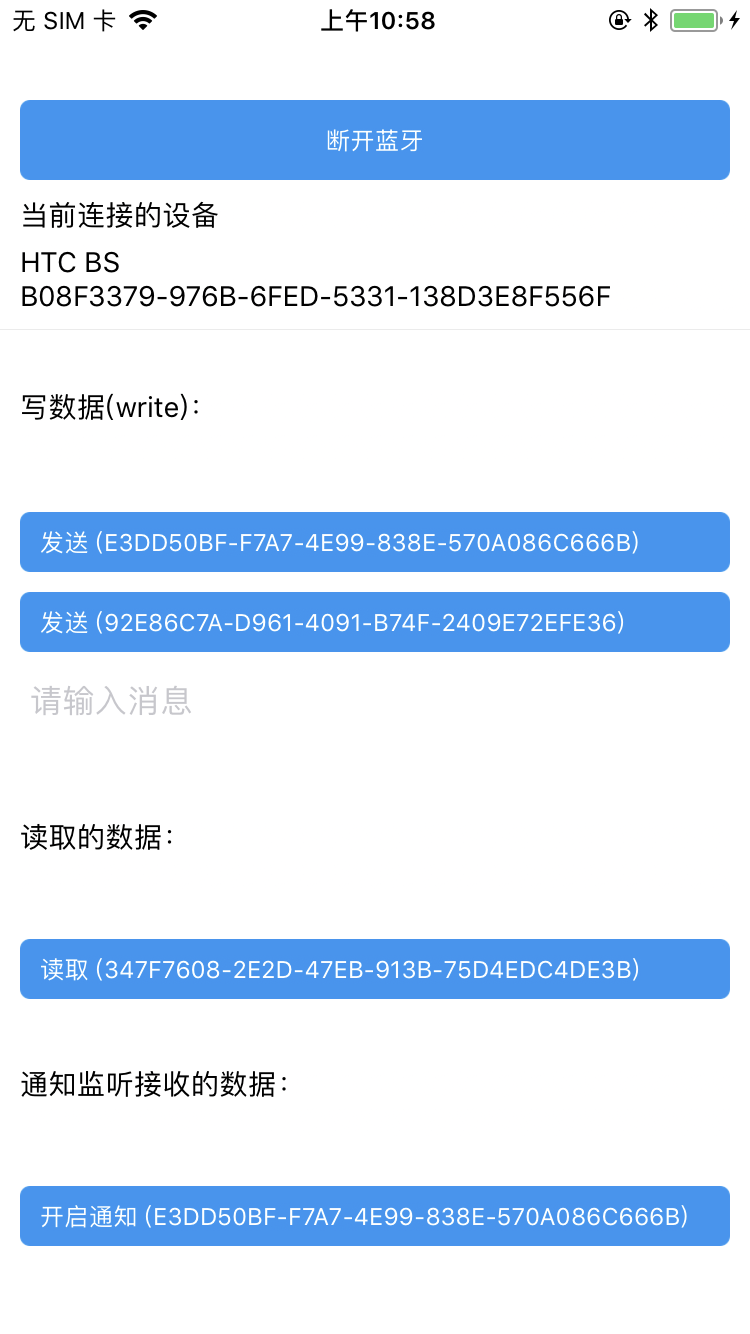
蓝牙连接成功,当我们向设备写入数据成功并且指令也正确的话,我们就会得到设备通过蓝牙发送给APP的响应数据,实现这一响应的前提是需要开启通知监听,这样就能在回调中监听到数据返回了。
//打开通知 BleManager.startNotification(peripheralId, this.nofityServiceUUID[0], this.nofityCharacteristicUUID[0]) .then(() => {
    console.log('Notification started'); }) .catch((error) => {
    console.log('Notification error:',error); }); //关闭通知 BleManager.stopNotification(peripheralId, this.nofityServiceUUID[0], this.nofityCharacteristicUUID[0]) .then(() => {
    console.log('stopNotification success!'); }) .catch((error) => {
    console.log('stopNotification error:',error); });
读数据
通过read读取的数据,一般是固定的数据,如设备名,固件版本等等,返回的数据是byte数组,需要转换
//读取蓝牙数据 BleManager.read(peripheralId, this.readServiceUUID[0], this.readCharacteristicUUID[0]) .then((data) => {
    const str = byteToString(data); console.log('Read: ', str); }) .catch((error) => {
    console.log(error); }); // byte数组转换成字符串 byteToString(arr) {
    if(typeof arr === 'string') {
    return arr; } var str = '', _arr = arr; for(var i = 0; i < _arr.length; i++) {
    var one = _arr[i].toString(2), v = one.match(/^1+?(?=0)/); if(v && one.length == 8) {
    var bytesLength = v[0].length; var store = _arr[i].toString(2).slice(7 - bytesLength); for(var st = 1; st < bytesLength; st++) {
    store += _arr[st + i].toString(2).slice(2); } str += String.fromCharCode(parseInt(store, 2)); i += bytesLength - 1; } else {
    str += String.fromCharCode(_arr[i]); } } return str; }
写数据
- 如果你要在
service为1800,characteristic为2a02上写指令就只能用write方法; - 如果你要在
service为0783b03e-8535-b5a0-7140-a304d2495cb7,characteristic为0783b03e-8535-b5a0-7140-a304d2495cb9上写指令就只能用writeWithoutResponse方法; - 在
service为1800,characteristic为2a00上是没有写属性的,所以调用哪个方法都会写入失败; - 同样硬件规格的蓝牙,
service和characteristic的属性都是固定的,有些硬件设备商也会直接告诉你具体使用哪个service和characteristic来进行蓝牙通信。
{
    characteristics: [ {
    properties: {
    Read: 'Read' }, characteristic: '2a00', service: '1800' }, {
    properties: {
    Write: 'Write', Read: 'Read' }, characteristic: '2a02', service: '1800' }, {
    properties: {
    Notify: 'Notify', Read: 'Read', WriteWithoutResponse: 'WriteWithoutResponse' }, characteristic: '0783b03e-8535-b5a0-7140-a304d2495cb9', service: '0783b03e-8535-b5a0-7140-a304d2495cb7' } ], services: [ {
    uuid: '1800' }, {
    uuid: '1801' }, {
    uuid: '0783b03e-8535-b5a0-7140-a304d2495cb7' } ], rssi: -46, advertising:{
    data: 'AgEGEQe3XEnSBKNAcaC1NYU+sIMHCQlQRVAtUEVOLQAAAAAAAAAAAAAAAAAAAAAAAAAAAAAAAAAAAAAAAAA=',CDVType: 'ArrayBuffer' }, id: '00:CD:FF:00:22:2D', name: 'PEP-HC001' }
写数据注意事项:
BLE蓝牙传输速率比经典蓝牙慢的多,而且GATT底层需要封装7个字节的额外协议数据, 即一次最多只能传输20字节,所以一般选用16进制数据来提高单次数据传输量。而且如果发送的数据大于20字节的话要分包发送,例如要发送30个字节,可以先write(前20个字节),等这次写入成功后(或者开启线程sleep几十毫秒后),再write(后面10个字节)。
发送的时候需要先将其装载到byte[]数组中,例如要发送0xFE 0xFD 0x01 0x0A 0xFC 0xFB这个指令,需要把它转化为
new byte[] { (byte) 0xFE, (byte) 0xFD, (byte) 0x01, (byte) 0x0A ,(byte) 0xFC, (byte) 0xFB }
这样去发送。
这是官方最新的例子
import {
    stringToBytes } from 'convert-string'; //发送给蓝牙的指令 let command = 'FEFD010AFCFB'; //将字符串转换成字节数组传送,stringToByte方法将每个16进制的字符转换成指定位置的字符的 Unicode编码,这个返回值是 0 - 65535 之间的整数 let bytes = stringToBytes(command); // 转换后为:[ 70, 69, 70, 68, 48, 49, 48, 65, 70, 67, 70, 66 ]
5.0.1之前的版本写数据是需要经过base64编码转换后发送的,5.0.1之后的版本虽然能发送byte[],但却是通过stringToBytes将其转化为Unicode编码位置的byte[],然而蓝牙那边只能接收16进制的byte[]数据。带着这个疑问,我提了一个issue给作者,问题是:Can I send hexadecimal data to BLE instead of base64 format?然而作者却没有给我一个满意的解决办法。所以,自己动手对源码做一些小小的修改以符合我们的实际需求吧。
android源码修改
修改的源文件只有一个:在react-native-ble-manager\android\src\main\java\it\innove目录下的BleManager.java文件。
点击跳转到修改后的BleManager.java文件
BleManager.java文件
- 增加的方法:
/ 16进制字符串转换成16进制byte数组,每两位转换 */ public static byte[] strToHexByteArray(String str){
    byte[] hexByte = new byte[str.length()/2]; for(int i = 0,j = 0; i < str.length(); i = i + 2,j++){
hexByte[j] = (byte)Integer.parseInt(str.substring(i,i+2), 16); } return hexByte; } - 修改write方法:
@ReactMethod public void write(String deviceUUID, String serviceUUID, String characteristicUUID, String message, Integer maxByteSize, Callback callback) {
    Log.d(LOG_TAG, "Write to: " + deviceUUID); Peripheral peripheral = peripherals.get(deviceUUID); if (peripheral != null){
    // byte[] decoded = new byte[message.size()]; // for (int i = 0; i < message.size(); i++) {
// decoded[i] = new Integer(message.getInt(i)).byteValue(); // Log.d(LOG_TAG, "decoded: " + decoded[i]); // } // Log.d(LOG_TAG, "Message(" + decoded.length + "): " + bytesToHex(decoded)); //message由原来的ReadableArray类型改为String类型,再将16进制字符串转化成16进制byte[]数组 byte [] decoded = strToHexByteArray(message); Log.d(LOG_TAG, "decoded: " + Arrays.toString(decoded)); peripheral.write(UUIDHelper.uuidFromString(serviceUUID), UUIDHelper.uuidFromString(characteristicUUID), decoded, maxByteSize, null, callback, BluetoothGattCharacteristic.WRITE_TYPE_DEFAULT); } else callback.invoke("Peripheral not found"); } - 修改writeWithoutResponse方法(修改的地方同write方法一样):
@ReactMethod public void writeWithoutResponse(String deviceUUID, String serviceUUID, String characteristicUUID, String message, Integer maxByteSize, Integer queueSleepTime, Callback callback) {
    Log.d(LOG_TAG, "Write without response to: " + deviceUUID); Peripheral peripheral = peripherals.get(deviceUUID); if (peripheral != null){
    // byte[] decoded = new byte[message.size()]; // for (int i = 0; i < message.size(); i++) {
    // decoded[i] = new Integer(message.getInt(i)).byteValue(); // } // Log.d(LOG_TAG, "Message(" + decoded.length + "): " + bytesToHex(decoded)); //message由原来的ReadableArray类型改为String类型,再将16进制字符串转化成16进制byte[]数组 byte [] decoded = strToHexByteArray(message); Log.d(LOG_TAG, "decoded: " + Arrays.toString(decoded)); peripheral.write(UUIDHelper.uuidFromString(serviceUUID), UUIDHelper.uuidFromString(characteristicUUID), decoded, maxByteSize, queueSleepTime, callback, BluetoothGattCharacteristic.WRITE_TYPE_NO_RESPONSE); } else callback.invoke("Peripheral not found"); }
ios源码修改
看了下Object-C的语法,参考了iOS蓝牙中的进制转换,总算完成了ios的源码修改。
修改的源文件只有一个:在react-native-ble-manager/ios目录下的BleManager.m文件。
点击跳转到修改后的BleManager.m文件
BleManager.m文件
- 增加的方法:
//16进制字符串转换成16进制byte数组,每两位转换 - (NSData *)hexToBytes:(NSString *)str{
    NSMutableData* data = [NSMutableData data]; int idx; for (idx = 0; idx+2 <= str.length; idx+=2) {
NSRange range = NSMakeRange(idx, 2); NSString* hexStr = [str substringWithRange:range]; NSScanner* scanner = [NSScanner scannerWithString:hexStr]; unsigned int intValue; [scanner scanHexInt:&intValue]; [data appendBytes:&intValue length:1]; } return data; } - 修改write方法(方法太长,只截修改的部分):
- 修改writeWithoutResponse方法(修改的地方同write方法一样):
修改源码后写数据示例
//发送给蓝牙的数据 let data = 'FEFD010AFCFB'; //写数据到蓝牙 BleManager.write(peripheralId, this.writeWithResponseServiceUUID[0], this.writeWithResponseCharacteristicUUID[0], data) .then(() => {
    console.log('write success: ',data); }) .catch((error) => {
    console.log('write failed: ',data); }); //写数据到蓝牙,没有响应  BleManager.writeWithoutResponse(peripheralId, this.writeWithoutResponseServiceUUID[0], this.writeWithoutResponseCharacteristicUUID[0], data) .then(() => {
    console.log('writeWithoutResponse success: ',data); }) .catch((error) => {
    console.log('writeWithoutResponse failed: ',data); });
我fork了一个分支,并将源码修改的版本上传到了github,如有需要,可直接安装我修改后的版本(fork分支的版本太旧,有需要建议安装最新版本再改源码)
- yarn安装:
yarn add https://github.com/zhanguangao/react-native-ble-manager.git
- npm安装:
npm install git+https:///zhanguangao/react-native-ble-manager.git
解析蓝牙指令
当通知成功开启后,就可以添加相应的监听器,并对接收到的数据进行解析
const BleProtocol = new BleProtocol(); //接收到新数据监听,开启通知成功后,该监听才可接收到数据 bleManagerEmitter.addListener('BleManagerDidUpdateValueForCharacteristic', (data) => {
    //ios接收到的是小写的16进制,android接收的是大写的16进制,统一转化为大写16进制 let value = data.value.toUpperCase(); console.log('BluetoothUpdateValue', value); BluetoothProtocol.parseData(value); });
const BLE_HEAD = "FEFD"; const BLE_TRAIL = "FCFB"; / * 2个16进制字符串代表8位二进制即 1 byte的数据,即FE = * 包数据长度 = 包命令 + Data的byte长度,1个 * 返回数据:FEFD048D010203FCFB(16进制) * 分段解析:包头(FEFD) + 包数据长度(04) + 包命令(8D) + Data(010203) + 包尾(FCFB) * */ export default class BleProtocol {
constructor() {
this.trailStatus = true; //接收到包头后,接收包尾的状态,一个完整数据包的接收状态 this.receiveData = []; //接收蓝牙数据缓存 } / 解析蓝牙返回的数据 */ parseData(data) {
this.receiveData.push(data); let packet = this.receiveData.join(""); //将数组转换为字符串解析 let command; //包命令 if (isHead(packet)) {
this.trailStatus = false; //接收到包头,等待接收包尾 this.packetLen = this.getPacketByteLen(packet); //包数据长度 } //接收到包尾 if (isTrail(packet)) {
//校验数据长度:包数据长度 = 实际接收到的包长度 if (this.packetLen === this.getDataByteLen(packet)) {
this.trailStatus = true; //接收到包尾 command = this.getResponseCommand(packet); this.receiveData = []; //一个包接收完毕后,清空接收到的蓝牙数据缓存 } } this.receivedDelayTimer && clearTimeout(this.receivedDelayTimer); //接收到包头后,如果300ms还没收到包尾的话,就丢掉这一不完整的包数据, // 一般100ms足够,但某些情况可能会大于100ms,为确保准备接收,这里设置300ms this.receivedDelayTimer = setTimeout(() => {
if (!this.trailStatus) {
this.receiveData = []; } }, 300); //一个数据包接收完毕前不进行数据处理 if (!this.trailStatus) return; this.trailStatus = false; // 根据具体的包命令进行相应的操作 if (command == "8D") {
} } /* * 判断返回的数据是否包含一个完整数据的包头 * 这里假设蓝牙协议定义的包头为FEFD */ isHead(str) {
return str.substring(0, 4) == BLE_HEAD; } /* * 判断返回的数据是否包含一个完整数据的包尾 * 这里假设蓝牙协议定义的包头为FCFB */ isTrail(str) {
const len = str.length; return str.substring(len - 4, len) == BLE_TRAIL; } / * 获取返回数据的包命令 */ getResponseCommand(str) {
return str.substring(6, 8); } / * 返回一个数据包的包数据长度,不包含包头和包尾 */ getPacketByteLen(str) {
let hexLen = str.substring(4, 6); return parseInt(hexLen, 16); } / * Data实际的Byte长度 * 2个16进制字符串表示1 Byte */ getDataByteLen(str) {
return str.substring(6, str.length - 4).length / 2; } / 在字符串前面添加 0, 默认补充为2位*/ addZero(str, bit = 2) {
for (let i = str.length; i < bit; i++) {
str = "0" + str; } return str; } } demo
源码地址:适配android和ios平台
PS:由于海马玩模拟器的android版本是4.2.2,而react-native-ble-manager支持的android最低版本为API 19,即4.4.2,所以用海马玩模拟器打开使用这个组件的App会闪退,如果需要使用模拟器调试,建议使用Android官方模拟器、Genymotion、夜神模拟器等等,不过这个组件涉及到蓝牙硬件,测试蓝牙功能只能使用真机。
截图(ios)
发布者:全栈程序员-站长,转载请注明出处:https://javaforall.net/229580.html原文链接:https://javaforall.net


