
Spring MVC 项目快速搭建
Spring MVC使我们可以简单地开发灵活且松耦合的Web项目,本章将关注基于注解和Java配置的Spring MVC开发。
基本架构:Spring MVC 4.1.5+maven+logback+log4j
1.构建Maven项目
pom.xml内容:
<?xml version="1.0" encoding="UTF-8"?>
<project xmlns="http://maven.apache.org/POM/4.0.0" xmlns:xsi="http://www.w3.org/2001/XMLSchema-instance"
	xsi:schemaLocation="http://maven.apache.org/POM/4.0.0 http://maven.apache.org/xsd/maven-4.0.0.xsd">
	<modelVersion>4.0.0</modelVersion>

	<groupId>com.just</groupId>
	<artifactId>springmvc4learning</artifactId>
	<version>0.0.1-SNAPSHOT</version>
	<packaging>war</packaging>

	<name>springmvc4Learning</name>
	<description>Demo project for Spring MVC4</description>

	<properties>
		<project.build.sourceEncoding>UTF-8</project.build.sourceEncoding>
		<project.reporting.outputEncoding>UTF-8</project.reporting.outputEncoding>
		<java.version>1.8</java.version>
		<!-- web -->
		<jsp.version>2.2.1</jsp.version>
		<jstl.version>1.2</jstl.version>
		<servlet.version>3.1.0</servlet.version>
		<!-- Spring -->
		<spring-framework.version>4.1.6.RELEASE</spring-framework.version>
		<!-- logging -->
		<logback.version>1.0.13</logback.version>
		<slf4j.version>1.7.5</slf4j.version>
	</properties>

	<dependencies>
		<dependency>
			<groupId>javax</groupId>
			<artifactId>javaee-web-api</artifactId>
			<version>7.0</version>
			<!-- provided表示打包的时候不用包进去-->
			<scope>provided</scope>
		</dependency>

		<!-- Spring MVC -->
		<dependency>
			<groupId>org.springframework</groupId>
			<artifactId>spring-webmvc</artifactId>
			<version>${spring-framework.version}</version>
		</dependency>

		<!-- 其他web依赖-->
		<dependency>
			<groupId>javax.servlet</groupId>
			<artifactId>jstl</artifactId>
			<version>${jstl.version}</version>
		</dependency>
		<dependency>
			<groupId>javax.servlet</groupId>
			<artifactId>javax.servlet-api</artifactId>
			<version>${servlet.version}</version>
			<scope>provided</scope>
		</dependency>
		<dependency>
			<groupId>javax.servlet.jsp</groupId>
			<artifactId>javax.servlet.jsp-api</artifactId>
			<version>${jsp.version}</version>
		</dependency>

		<!-- Spring and Transactions -->
		<dependency>
			<groupId>org.springframework</groupId>
			<artifactId>spring-tx</artifactId>
			<version>${spring-framework.version}</version>
		</dependency>

		<!-- 使用SLF4J和LogBack作为日志 -->
		<dependency>
			<groupId>org.slf4j</groupId>
			<artifactId>slf4j-api</artifactId>
			<version>${slf4j.version}</version>
		</dependency>
		<dependency>
			<groupId>log4j</groupId>
			<artifactId>log4j</artifactId>
			<version>1.2.16</version>
		</dependency>
		<dependency>
			<groupId>org.slf4j</groupId>
			<artifactId>jcl-over-slf4j</artifactId>
			<version>${slf4j.version}</version>
		</dependency>
		<dependency>
			<groupId>ch.qos.logback</groupId>
			<artifactId>logback-classic</artifactId>
			<version>${logback.version}</version>
		</dependency>
		<dependency>
			<groupId>ch.qos.logback</groupId>
			<artifactId>logback-core</artifactId>
			<version>${logback.version}</version>
		</dependency>
		<dependency>
			<groupId>ch.qos.logback</groupId>
			<artifactId>logback-access</artifactId>
			<version>${logback.version}</version>
		</dependency>
		<!-- 对json和xml文件的支持-->
		<dependency>
			<groupId>com.fasterxml.jackson.dataformat</groupId>
			<artifactId>jackson-dataformat-xml</artifactId>
			<version>2.9.5</version>
		</dependency>
		<!-- file upload -->
		<dependency>
			<groupId>commons-fileupload</groupId>
			<artifactId>commons-fileupload</artifactId>
			<version>1.3.1</version>
		</dependency>
		<dependency>
			<groupId>commons-io</groupId>
			<artifactId>commons-io</artifactId>
			<version>2.4</version>
		</dependency>
		<!-- test -->
		<dependency>
			<groupId>org.springframework</groupId>
			<artifactId>spring-test</artifactId>
			<version>${spring-framework.version}</version>
		</dependency>
		<dependency>
			<groupId>junit</groupId>
			<artifactId>junit</artifactId>
			<version>4.10</version>
            <scope>test</scope>
		</dependency>
	</dependencies>

	<build>
		<plugins>
			<plugin>
				<groupId>org.apache.maven.plugins</groupId>
				<artifactId>maven-compiler-plugin</artifactId>
				<version>2.3.2</version>
				<configuration>
					<source>${java.version}</source>
					<target>${java.version}</target>
				</configuration>
			</plugin>
			<plugin>
				<groupId>org.apache.maven.plugins</groupId>
				<artifactId>maven-war-plugin</artifactId>
				<version>2.3</version>
				<configuration>
					<failOnMissingWebXml>false</failOnMissingWebXml>
				</configuration>
			</plugin>
		</plugins>
	</build>


</project>
2.日志配置
在src/main/resources目录下,新建logback.xml来配置日志
<?xml version="1.0" encoding="UTF-8"?>
<configuration scan="true" scanPeriod="1 seconds">
    <contextListener class="ch.qos.logback.classic.jul.LevelChangePropagator">
        <resetJUL>true</resetJUL>
    </contextListener>

    <jmxConfigurator/>
    <appender name="console" class="ch.qos.logback.core.ConsoleAppender">
        <encoder>
            <pattern>logback: %d{HH:mm:ss.SSS} %logger{36} - %msg%n</pattern>
        </encoder>
    </appender>
    <logger name="org.springframework.web" level="DEBUG"/>
    <root level="INFO">
        <appender-ref ref="console"/>
    </root>
</configuration>
3.演示页面
在src/main/resources下新建views目录,并在此目录下新建index.jsp
<%@ page contentType="text/html;charset=UTF-8" language="java" %>
<html>
<head>
<title>我是标题呀</title>
</head>
<body>
<pre>
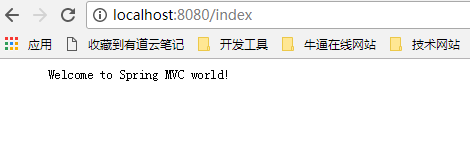
Welcome to Spring MVC world!
</pre>
</body>
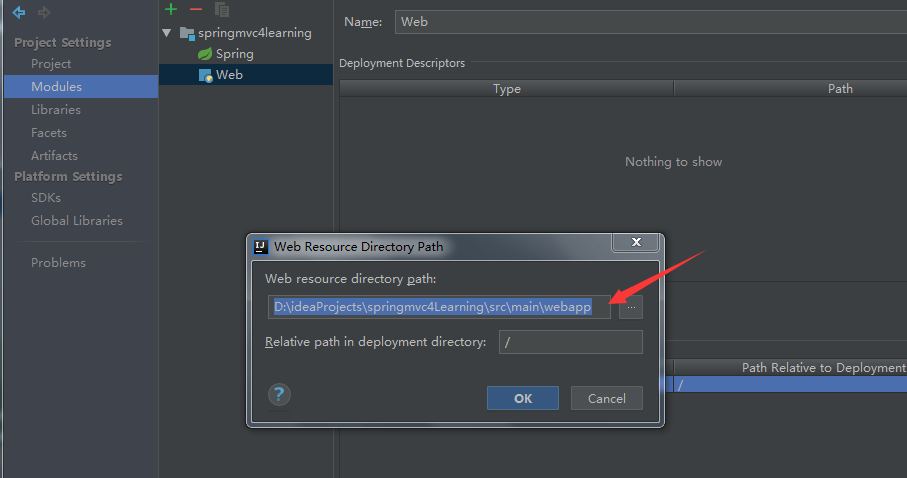
</html>注意:本人用的是idea开发的,在这个目录下右键新建jsp的时候发现没有jsp选项,这是因为默认的web的东西是在webapp目录下,所以要将工程web指向这个resource目录,具体可看截图:

4.springmvc配置
package com.just.springmvc4.config;
import org.springframework.context.annotation.Bean;
import org.springframework.context.annotation.ComponentScan;
import org.springframework.context.annotation.Configuration;
import org.springframework.web.servlet.config.annotation.EnableWebMvc;
import org.springframework.web.servlet.view.InternalResourceViewResolver;
import org.springframework.web.servlet.view.JstlView;
@Configuration
@EnableWebMvc
@ComponentScan("com.just.springmvc4")
public class MyMvcConfig {
@Bean
public InternalResourceViewResolver viewResolver(){
InternalResourceViewResolver resourceViewResolver=new InternalResourceViewResolver();
resourceViewResolver.setPrefix("/WEB-INF/classes/views/"); //运行时的目录
resourceViewResolver.setSuffix(".jsp");
resourceViewResolver.setViewClass(JstlView.class);
return resourceViewResolver;
}
}
5.web配置
package com.just.springmvc4.config;

import org.springframework.web.WebApplicationInitializer;
import org.springframework.web.context.support.AnnotationConfigWebApplicationContext;
import org.springframework.web.servlet.DispatcherServlet;
import javax.servlet.ServletContext;
import javax.servlet.ServletException;
import javax.servlet.ServletRegistration;

/**
 * WebApplicationInitializer 是spring提供用来配置Servlet3.0+配置的接口,替代web.xml
 */
public class WebInitializer implements WebApplicationInitializer{
    @Override
    public void onStartup(ServletContext servletContext) throws ServletException {
        AnnotationConfigWebApplicationContext context=new AnnotationConfigWebApplicationContext();
        context.register(MyMvcConfig.class);
        context.setServletContext(servletContext);
        //注册DispatcherServlet
        ServletRegistration.Dynamic servlet=servletContext.addServlet("dispatcher",new DispatcherServlet(context));
        servlet.addMapping("/");
        servlet.setLoadOnStartup(1);

    }
}
WebApplicationInitializer是Spring提供用来配置Sevlet3.0+配置的接口,用来替换web.xml。
实现此接口会自动被SpringServletContainerInitializer获取到
6.简单控制器
package com.just.springmvc4.controller;

import org.springframework.stereotype.Controller;
import org.springframework.web.bind.annotation.RequestMapping;

@Controller
public class HelloController {
    @RequestMapping("/index")
    public String hello(){
        return "index";
    }
}
7.部署,访问http://localhost:8080/index
8.总结
springmvc架构零xml配置,简单粗暴的例子,后续会根据项目中常见的问题增加一些东西,书中没提到的还有很多。
版权声明:本文内容由互联网用户自发贡献,该文观点仅代表作者本人。本站仅提供信息存储空间服务,不拥有所有权,不承担相关法律责任。如发现本站有涉嫌侵权/违法违规的内容, 请联系我们举报,一经查实,本站将立刻删除。
发布者:全栈程序员-站长,转载请注明出处:https://javaforall.net/100314.html原文链接:https://javaforall.net


