
前言:前面和大家一起学习了springboot启动流程源码中如何从springboot过度到spring以及springboot如何内置tomcat,如何还不了解的童鞋可以去看一下之前的文章(springboot启动流程源码分析(1))。今天和大家一起学习的是springboot如何加载第三方的starter,只有熟悉了这个原理我们才会发现自定义springboot的starter也是非常容易。
一、引入思考的问题
1、springboot未出现之前,我们在在spring项目中如果要使用数据源(比如我们使用druid),需要做哪些事情呢?
(1)引入druid的jar包
(2)配置数据源的参数
(2)在xml文件中配置数据源的bean,或者使用注解的方式@bean注入到spring容器中
2、当我们使用springboot项目时,需要做的事情有哪些?
(1)引入相应的druid的starter的包
(2)在yml或者properties中配置数据源参数
对比上面两个步骤,我们发现springboot中,我们并没有显示的向spring容器中注入相应的datasource的bean,但是我们为什么能够直接使用数据源呢(比如使用事务的时候)
今天咱们要学习的内容,就是解释下上面的问题,如果你还不了解上述的原理,那咱们开始吧。在学习之前如果大家了解SPI(service provider interface)那就更好了,因为这里面其实就是用到了SPI的机制,SPI引用还是非常广泛的,比如spring、dubbo中都有广泛使用
二、springboot启动加载starter
我们还是从启动类开始分析
@SpringBootApplication
public class HellobootApplication {


   public static void main(String[] args) {

      SpringApplication.run(HellobootApplication.class, args);
   }

}
我们进入@SpingBootApplication的注解
@Target(ElementType.TYPE)
@Retention(RetentionPolicy.RUNTIME)
@Documented
@Inherited
@SpringBootConfiguration
//关注这里
@EnableAutoConfiguration
@ComponentScan(excludeFilters = {
    @Filter(type = FilterType.CUSTOM, classes = TypeExcludeFilter.class),
      @Filter(type = FilterType.CUSTOM, classes = AutoConfigurationExcludeFilter.class) })
public @interface SpringBootApplication {
   ....}
只需要继续看上面的注解就行,这次我们关注@EnableAutoConfiguration这个注解类,继续跟
@Target(ElementType.TYPE)
@Retention(RetentionPolicy.RUNTIME)
@Documented
@Inherited
@AutoConfigurationPackage
//关注这里
@Import(AutoConfigurationImportSelector.class)
public @interface EnableAutoConfiguration {
   ...}
我们关注这一行注解@Import(AutoConfigurationImportSelector.class)这里需要spring的知识,如果想要了解这一行注解的原理,可以自行在网上查取(其实原理就是ConfigurationClassPostProcessor这个处理器起的作用),暂时不了解也没关系,在这里先解释一下,他会注入AutoConfigurationImportSelector的bean到spring容器,然而这个类又实现了ImportSelector,所以会调用selectImports,并且该方法返回的String[]的内容全部会注入到spring容器中。我们看下这个类的selectImports()方法
@Override
public String[] selectImports(AnnotationMetadata annotationMetadata) {

   if (!isEnabled(annotationMetadata)) {

      return NO_IMPORTS;
   }
   AutoConfigurationMetadata autoConfigurationMetadata = AutoConfigurationMetadataLoader
         .loadMetadata(this.beanClassLoader);
    //重点看这里
   AutoConfigurationEntry autoConfigurationEntry = getAutoConfigurationEntry(autoConfigurationMetadata,
         annotationMetadata);
   return StringUtils.toStringArray(autoConfigurationEntry.getConfigurations());
}
到了这里,我们差不多已经见到了胜利的曙光了,springboot启动流程的原理还是相对比较容易的,当然前提是你需要对spring的知识有一定的了解。上述方法很简单,我们只要关注它需要向spring容器里面注入哪些bean(不要跑偏了,我们之前带着问题,就是为什么我们没有显示向spring容器中注入datasource,但是在springboot中我们能直接拿到),所以我们接着看getAutoConfigurationEntry()会给我们返回哪些string
protected AutoConfigurationEntry getAutoConfigurationEntry(AutoConfigurationMetadata autoConfigurationMetadata,
      AnnotationMetadata annotationMetadata) {

   if (!isEnabled(annotationMetadata)) {

      return EMPTY_ENTRY;
   }
   AnnotationAttributes attributes = getAttributes(annotationMetadata);
    //拿到所有候选的需要注入到spring容器的bean的全路径
   List<String> configurations = getCandidateConfigurations(annotationMetadata, attributes);
    //删除重复,其实就是用set转存了一下
   configurations = removeDuplicates(configurations);
    //排除一些我们不需要的...
   Set<String> exclusions = getExclusions(annotationMetadata, attributes);
   checkExcludedClasses(configurations, exclusions);
   configurations.removeAll(exclusions);
   configurations = filter(configurations, autoConfigurationMetadata);
   fireAutoConfigurationImportEvents(configurations, exclusions);
   return new AutoConfigurationEntry(configurations, exclusions);
}
上面这个方法也挺好理解的,从每一行代码的名字,我们大概就知道是做了哪些事情,为了简单梳理主要的流程,我这里只看getCandidateConfigurations(),看看springboot如何帮我们找到需要注入到spring容器中的对象
protected List<String> getCandidateConfigurations(AnnotationMetadata metadata, AnnotationAttributes attributes) {

   List<String> configurations = SpringFactoriesLoader.loadFactoryNames(getSpringFactoriesLoaderFactoryClass(),
         getBeanClassLoader());
   Assert.notEmpty(configurations, "No auto configuration classes found in META-INF/spring.factories. If you "
         + "are using a custom packaging, make sure that file is correct.");
   return configurations;
}
你如果留意的话,会看到一个校验的信息”…META-INF/spring.factories…”,暂时先不说,这个方法很简单,我们直接看第一行代码跟下一个方法SpringFactoriesLoader.loadFactoryNames()
String factoryTypeName = factoryType.getName();
return loadSpringFactories(classLoader).getOrDefault(factoryTypeName, Collections.emptyList());
private static Map<String, List<String>> loadSpringFactories(@Nullable ClassLoader classLoader) {

    //先从缓存里面拿,拿到了直接返回,提高性能,因为后面的扫描比较耗时
   MultiValueMap<String, String> result = cache.get(classLoader);
   if (result != null) {

      return result;
   }

   try {

       //这里就是通过类加载器去扫描所有的"META-INF/spring.factories"文件
      Enumeration<URL> urls = (classLoader != null ?
            classLoader.getResources(FACTORIES_RESOURCE_LOCATION) :
            ClassLoader.getSystemResources(FACTORIES_RESOURCE_LOCATION));
      result = new LinkedMultiValueMap<>();
       //下面就不用了,扫描了很多spring.factories,需要一个个处理
      while (urls.hasMoreElements()) {

         URL url = urls.nextElement();
         UrlResource resource = new UrlResource(url);
         Properties properties = PropertiesLoaderUtils.loadProperties(resource);
         for (Map.Entry<?, ?> entry : properties.entrySet()) {

            String factoryTypeName = ((String) entry.getKey()).trim();
            for (String factoryImplementationName : StringUtils.commaDelimitedListToStringArray((String) entry.getValue())) {

               result.add(factoryTypeName, factoryImplementationName.trim());
            }
         }
      }
       //加入缓存
      cache.put(classLoader, result);
      return result;
   }
   catch (IOException ex) {

      throw new IllegalArgumentException("Unable to load factories from location [" +
            FACTORIES_RESOURCE_LOCATION + "]", ex);
   }
}
这里我将两个方法写一起了,第一个方法太简单了,我们直接看第二个吧,第二个方法的主要的核心代码已经注释了,下面总结一下:
(1)首先从判断缓存里面拿,拿不到就扫描
(2)扫描所有jar包中的META-INF/spring.factories文件,并处理里面的内容(SPI)
(3)加入缓存,方便下次扫描
也就是说,前面跟了那么多步骤,其实springboot要做的事情就是获取每个jar包中的META-INF/spring.factories文件,然后将里面的内容通过反射的方式创建对象,放入到spring容器中管理
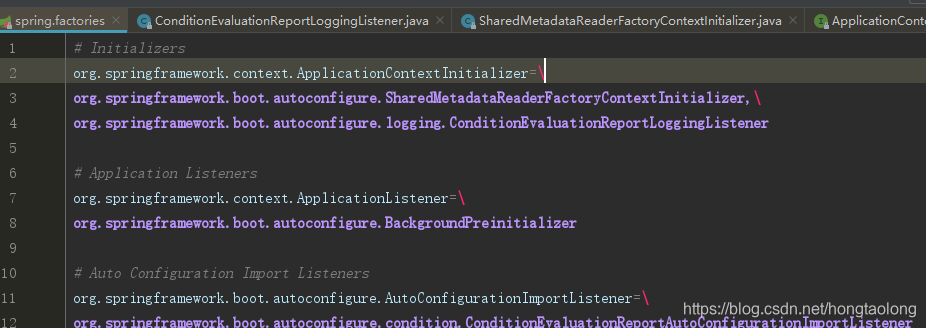
那我们看看这些META-INF/spring.factories文件的内容
(1)springboot自带的

(2)druid-start里面的

所以通过上面的分析,我们的spring容器会自动注册”com.alibaba.druid.spring.boot.autoconfigure.DruidDataSourceAutoConfigure”这个bean,看下这个类吧
@Configuration
@ConditionalOnClass(DruidDataSource.class)
@AutoConfigureBefore(DataSourceAutoConfiguration.class)
@EnableConfigurationProperties({
   DruidStatProperties.class, DataSourceProperties.class})
@Import({
   DruidSpringAopConfiguration.class,
    DruidStatViewServletConfiguration.class,
    DruidWebStatFilterConfiguration.class,
    DruidFilterConfiguration.class})
public class DruidDataSourceAutoConfigure {


    private static final Logger LOGGER = LoggerFactory.getLogger(DruidDataSourceAutoConfigure.class);

    @Bean(initMethod = "init")
    @ConditionalOnMissingBean
    public DataSource dataSource() {

        LOGGER.info("Init DruidDataSource");
        return new DruidDataSourceWrapper();
    }
}
到这里就很明显了,我们看到这个类用@Configuration注释了,并且有@Bean注释了datasource,所以相当在druid里面里经帮我们自动注入了datasource(当然这里有一些springboot的注解,比如@COnditionOnclass等条件注入,大家可以自己网上查找资料或研究),另外大家可以自行研究druid如何将yml或者properties文件中的配置信息注入到datasource中,我就不跟大家一起了。分析到这里,相信大家对springboot加载流程有一个整理的理解,同时也可以自定义starter启动器,如果还是有一些问题,可以自己再跟一遍源码,并且学习他人的自定义starter。
发布者:全栈程序员-站长,转载请注明出处:https://javaforall.net/111212.html原文链接:https://javaforall.net


