
大家好,又见面了,我是你们的朋友全栈君。
Java 使用微信支付
前言百度搜了一下微信支付,都描述的不太好,于是乎打算自己写一个案例,希望以后拿来直接改造使用。
因为涉及二维码的前端显示,所以有前端的内容
一. 准备工作
所需微信公众号信息配置
- APPID:绑定支付的APPID(必须配置)
- MCHID:商户号(必须配置)
- KEY:商户支付密钥,参考开户邮件设置(必须配置)
- APPSECRET:公众帐号secert(仅JSAPI支付的时候需要配置)
我这个案例用的是尚硅谷一位老师提供的,这里不方便提供出来,需要大家自己找,或者公司提供
二. 构建项目架构
1.新建maven项目
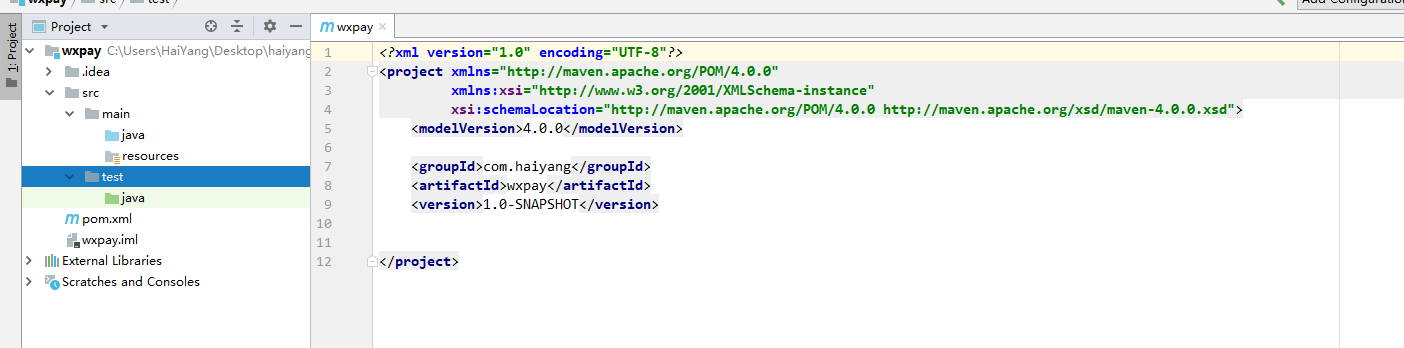

2.导入依赖
    <parent>
        <groupId>org.springframework.boot</groupId>
        <artifactId>spring-boot-starter-parent</artifactId>
        <version>2.2.1.RELEASE</version>
    </parent>
    <dependencies>
        <!--spring boot -->
        <dependency>
            <groupId>org.springframework.boot</groupId>
            <artifactId>spring-boot-starter-web</artifactId>
        </dependency>
        <!--微信提供的sdk-->
        <dependency>
            <groupId>com.github.wxpay</groupId>
            <artifactId>wxpay-sdk</artifactId>
            <version>0.0.3</version>
        </dependency>
        <!--发送http请求-->
        <dependency>
            <groupId>org.apache.httpcomponents</groupId>
            <artifactId>httpclient</artifactId>
        </dependency>
        <!--模板引擎-->
        <dependency>
            <groupId>org.springframework.boot</groupId>
            <artifactId>spring-boot-starter-freemarker</artifactId>
        </dependency>
    </dependencies>
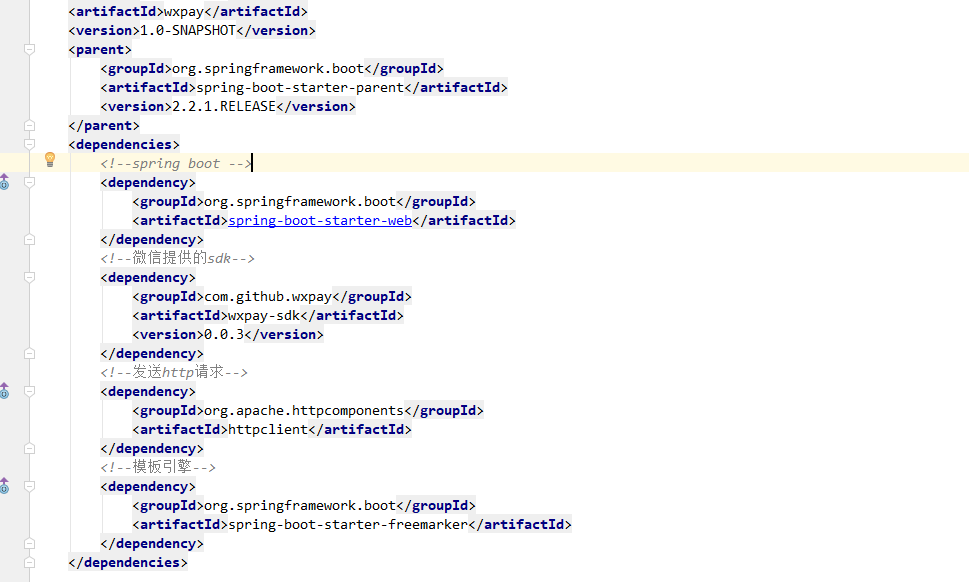
依赖中需要注意的是我导入了微信提供的sdk,以及freemarker模板引擎
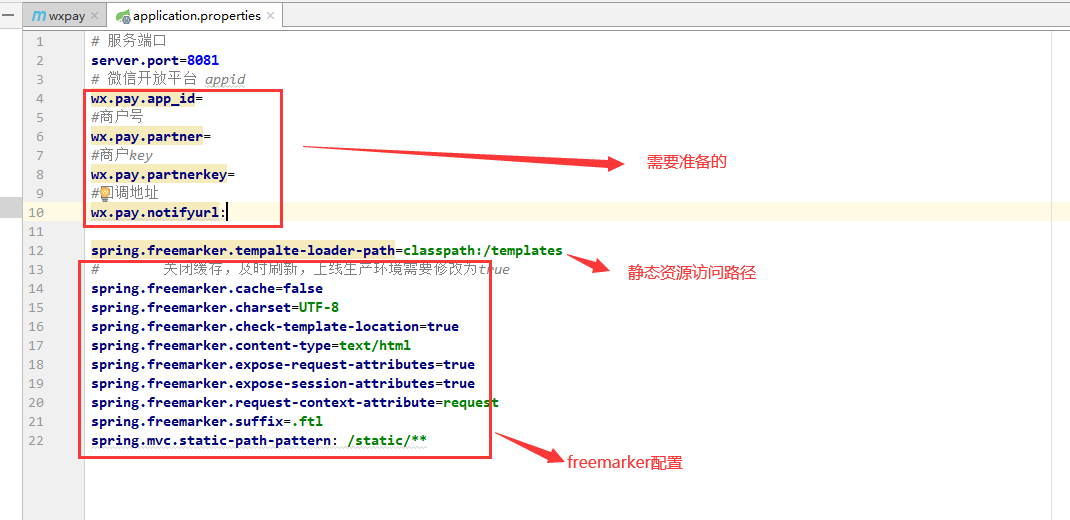
3.编写配置文件application.properties
# 服务端口
server.port=8081
# 微信开放平台 appid
wx.pay.app_id=
#商户号
wx.pay.partner=
#商户key
wx.pay.partnerkey=
#回调地址
wx.pay.notifyurl:

spring.freemarker.tempalte-loader-path=classpath:/templates
#        关闭缓存,及时刷新,上线生产环境需要修改为true
spring.freemarker.cache=false
spring.freemarker.charset=UTF-8
spring.freemarker.check-template-location=true
spring.freemarker.content-type=text/html
spring.freemarker.expose-request-attributes=true
spring.freemarker.expose-session-attributes=true
spring.freemarker.request-context-attribute=request
spring.freemarker.suffix=.ftl
spring.mvc.static-path-pattern: /static/**
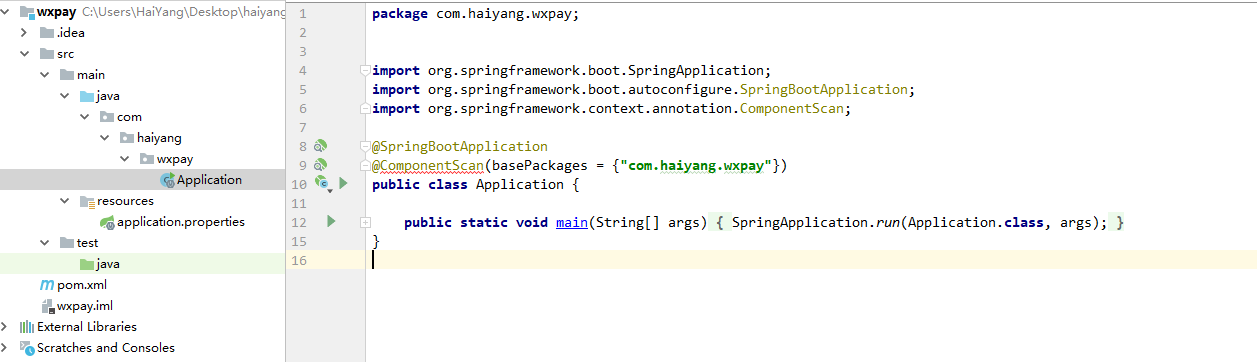
4.编写启动类
@SpringBootApplication
@ComponentScan(basePackages = {"com.haiyang.wxpay"})
public class Application {

    public static void main(String[] args) {
        SpringApplication.run(Application.class, args);
    }
}
5.创建常用包controller,service,impl,utils
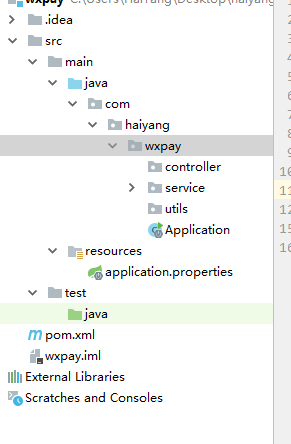
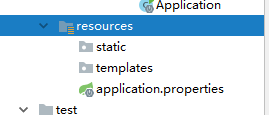
6.创建两个前端需要的文件夹 static和templates
三. 代码实现
1. 创建工具类读取配置文件的参数
@Component
public class WxPayUtils implements InitializingBean {

    @Value("${wx.pay.app_id}")
    private String appId;

    @Value("${wx.pay.partner}")
    private String partner;

    @Value("${wx.pay.partnerkey}")
    private String partnerKey;
    @Value("${wx.pay.notifyurl}")
    private String notifyUrl;


    public static String WX_PAY_APP_ID;
    public static String WX_PAY_PARTNER;
    public static String WX_PAY_PARTNER_KEY;
    public static String WX_OPEN_NOTIFY_URL;

    @Override
    public void afterPropertiesSet() throws Exception {
        WX_PAY_APP_ID = appId;
        WX_PAY_PARTNER = partner;
        WX_PAY_PARTNER_KEY = partnerKey;
        WX_OPEN_NOTIFY_URL = notifyUrl;
    }

}

2. 构建工具类发送http请求
/**
 * http请求客户端
 *
 * @author qy
 *
 */
public class HttpClient {
	private String url;
	private Map<String, String> param;
	private int statusCode;
	private String content;
	private String xmlParam;
	private boolean isHttps;

	public boolean isHttps() {
		return isHttps;
	}

	public void setHttps(boolean isHttps) {
		this.isHttps = isHttps;
	}

	public String getXmlParam() {
		return xmlParam;
	}

	public void setXmlParam(String xmlParam) {
		this.xmlParam = xmlParam;
	}

	public HttpClient(String url, Map<String, String> param) {
		this.url = url;
		this.param = param;
	}

	public HttpClient(String url) {
		this.url = url;
	}

	public void setParameter(Map<String, String> map) {
		param = map;
	}

	public void addParameter(String key, String value) {
		if (param == null)
			param = new HashMap<String, String>();
		param.put(key, value);
	}

	public void post() throws ClientProtocolException, IOException {
		HttpPost http = new HttpPost(url);
		setEntity(http);
		execute(http);
	}

	public void put() throws ClientProtocolException, IOException {
		HttpPut http = new HttpPut(url);
		setEntity(http);
		execute(http);
	}

	public void get() throws ClientProtocolException, IOException {
		if (param != null) {
			StringBuilder url = new StringBuilder(this.url);
			boolean isFirst = true;
			for (String key : param.keySet()) {
				if (isFirst)
					url.append("?");
				else
					url.append("&");
				url.append(key).append("=").append(param.get(key));
			}
			this.url = url.toString();
		}
		HttpGet http = new HttpGet(url);
		execute(http);
	}

	/**
	 * set http post,put param
	 */
	private void setEntity(HttpEntityEnclosingRequestBase http) {
		if (param != null) {
			List<NameValuePair> nvps = new LinkedList<NameValuePair>();
			for (String key : param.keySet())
				nvps.add(new BasicNameValuePair(key, param.get(key))); // 参数
			http.setEntity(new UrlEncodedFormEntity(nvps, Consts.UTF_8)); // 设置参数
		}
		if (xmlParam != null) {
			http.setEntity(new StringEntity(xmlParam, Consts.UTF_8));
		}
	}

	private void execute(HttpUriRequest http) throws ClientProtocolException,
			IOException {
		CloseableHttpClient httpClient = null;
		try {
			if (isHttps) {
				SSLContext sslContext = new SSLContextBuilder()
						.loadTrustMaterial(null, new TrustStrategy() {
							// 信任所有
							public boolean isTrusted(X509Certificate[] chain,
									String authType)
									throws CertificateException {
								return true;
							}
						}).build();
				SSLConnectionSocketFactory sslsf = new SSLConnectionSocketFactory(
						sslContext);
				httpClient = HttpClients.custom().setSSLSocketFactory(sslsf)
						.build();
			} else {
				httpClient = HttpClients.createDefault();
			}
			CloseableHttpResponse response = httpClient.execute(http);
			try {
				if (response != null) {
					if (response.getStatusLine() != null)
						statusCode = response.getStatusLine().getStatusCode();
					HttpEntity entity = response.getEntity();
					// 响应内容
					content = EntityUtils.toString(entity, Consts.UTF_8);
				}
			} finally {
				response.close();
			}
		} catch (Exception e) {
			e.printStackTrace();
		} finally {
			httpClient.close();
		}
	}

	public int getStatusCode() {
		return statusCode;
	}

	public String getContent() throws ParseException, IOException {
		return content;
	}

}
额~有点长就不放图片了 代码都一样
3. 新建controller
@Controller
@RequestMapping("/wxpay")
public class WxPayController {
@RequestMapping("/pay")
public String createPayQRcode(Model model) throws Exception{
String price = "0.01";
String no = getOrderNo();
Map m = new HashMap();
m.put("appid", WxPayUtils.WX_PAY_APP_ID);
m.put("mch_id", WxPayUtils.WX_PAY_PARTNER);
m.put("nonce_str", WXPayUtil.generateNonceStr());
m.put("body","微信支付测试"); //主体信息
m.put("out_trade_no", no); //订单唯一标识
m.put("total_fee", getMoney(price));//金额
m.put("spbill_create_ip", "127.0.0.1");//项目的域名
m.put("notify_url", WxPayUtils.WX_OPEN_NOTIFY_URL);//回调地址
m.put("trade_type", "NATIVE");//生成二维码的类型
//3 发送httpclient请求,传递参数xml格式,微信支付提供的固定的地址
HttpClient client = new HttpClient("https://api.mch.weixin.qq.com/pay/unifiedorder");
//设置xml格式的参数
//把xml格式的数据加密
client.setXmlParam(WXPayUtil.generateSignedXml(m, WxPayUtils.WX_PAY_PARTNER_KEY));
client.setHttps(true);
//执行post请求发送
client.post();
//4 得到发送请求返回结果
//返回内容,是使用xml格式返回
String xml = client.getContent();
//把xml格式转换map集合,把map集合返回
Map<String,String> resultMap = WXPayUtil.xmlToMap(xml);
//最终返回数据 的封装
Map map = new HashMap();
map.put("no", no);
map.put("price", price);
map.put("result_code", resultMap.get("result_code"));
map.put("code_url", resultMap.get("code_url"));
model.addAttribute("map",map);
return "pay";
}
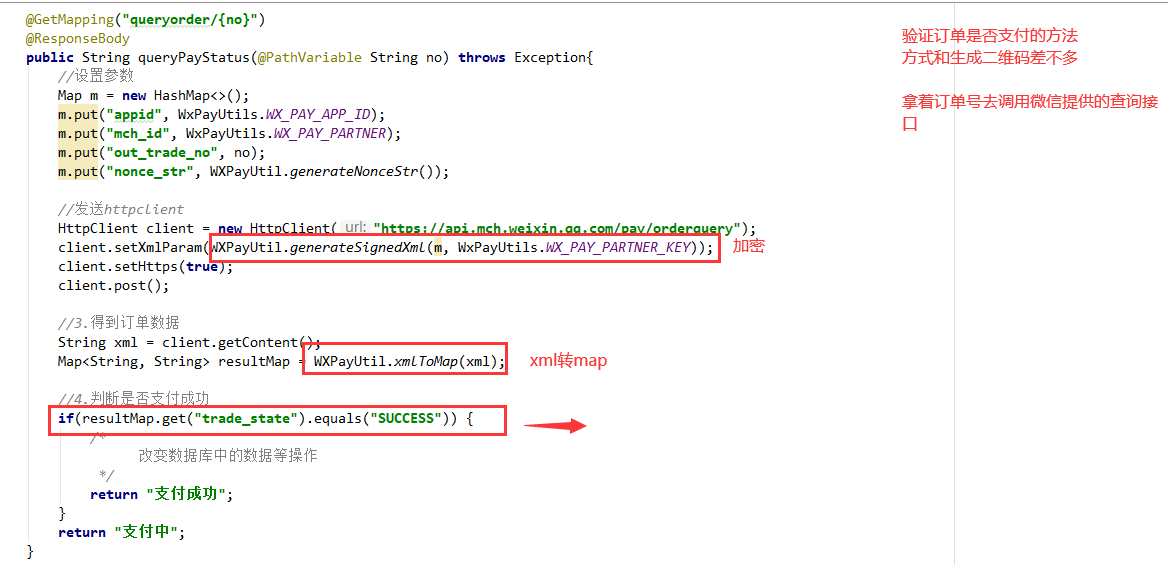
@GetMapping("queryorder/{no}")
@ResponseBody
public String queryPayStatus(@PathVariable String no) throws Exception{
//1、封装参数
Map m = new HashMap<>();
m.put("appid", WxPayUtils.WX_PAY_APP_ID);
m.put("mch_id", WxPayUtils.WX_PAY_PARTNER);
m.put("out_trade_no", no);
m.put("nonce_str", WXPayUtil.generateNonceStr());
//2 发送httpclient
HttpClient client = new HttpClient("https://api.mch.weixin.qq.com/pay/orderquery");
client.setXmlParam(WXPayUtil.generateSignedXml(m, WxPayUtils.WX_PAY_PARTNER_KEY));
client.setHttps(true);
client.post();
//3.得到订单数据
String xml = client.getContent();
Map<String, String> resultMap = WXPayUtil.xmlToMap(xml);
//4.判断是否支付成功
if(resultMap.get("trade_state").equals("SUCCESS")) {
/*
改变数据库中的数据等操作
*/
return "支付成功";
}
return "支付中";
}
@GetMapping("success")
public String success(){
return "success";
}
@RequestMapping("test")
public String test(){
return "pay";
}
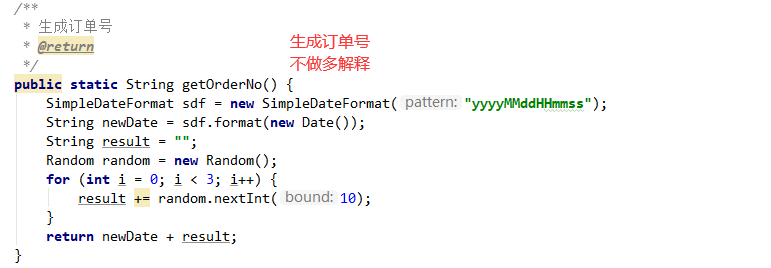
/**
* 生成订单号
* @return
*/
public static String getOrderNo() {
SimpleDateFormat sdf = new SimpleDateFormat("yyyyMMddHHmmss");
String newDate = sdf.format(new Date());
String result = "";
Random random = new Random();
for (int i = 0; i < 3; i++) {
result += random.nextInt(10);
}
return newDate + result;
}
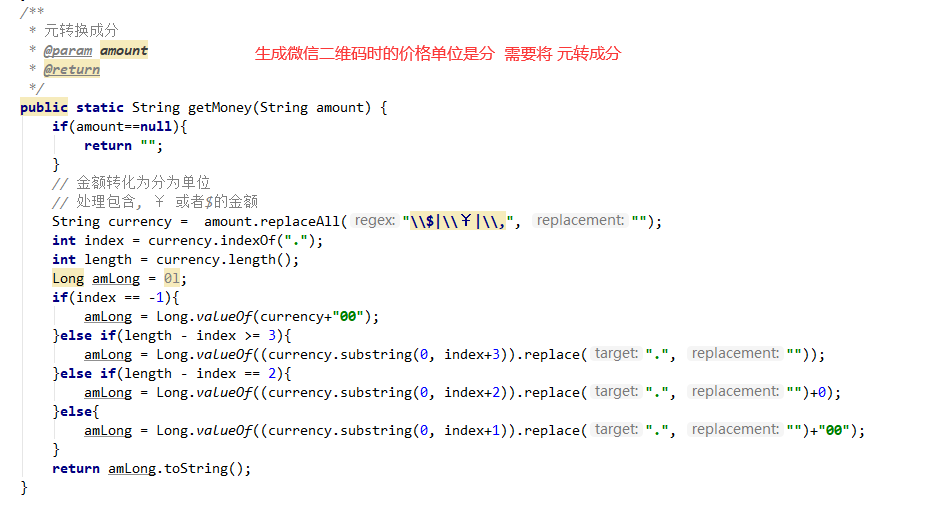
/**
* 元转换成分
* @param amount
* @return
*/
public static String getMoney(String amount) {
if(amount==null){
return "";
}
// 金额转化为分为单位
// 处理包含, ¥ 或者$的金额
String currency = amount.replaceAll("\\$|\\¥|\\,", "");
int index = currency.indexOf(".");
int length = currency.length();
Long amLong = 0l;
if(index == -1){
amLong = Long.valueOf(currency+"00");
}else if(length - index >= 3){
amLong = Long.valueOf((currency.substring(0, index+3)).replace(".", ""));
}else if(length - index == 2){
amLong = Long.valueOf((currency.substring(0, index+2)).replace(".", "")+0);
}else{
amLong = Long.valueOf((currency.substring(0, index+1)).replace(".", "")+"00");
}
return amLong.toString();
}
}


值得一提的是 这里我们用的是controller而不是restcontroller,因为我们需要展示二维码
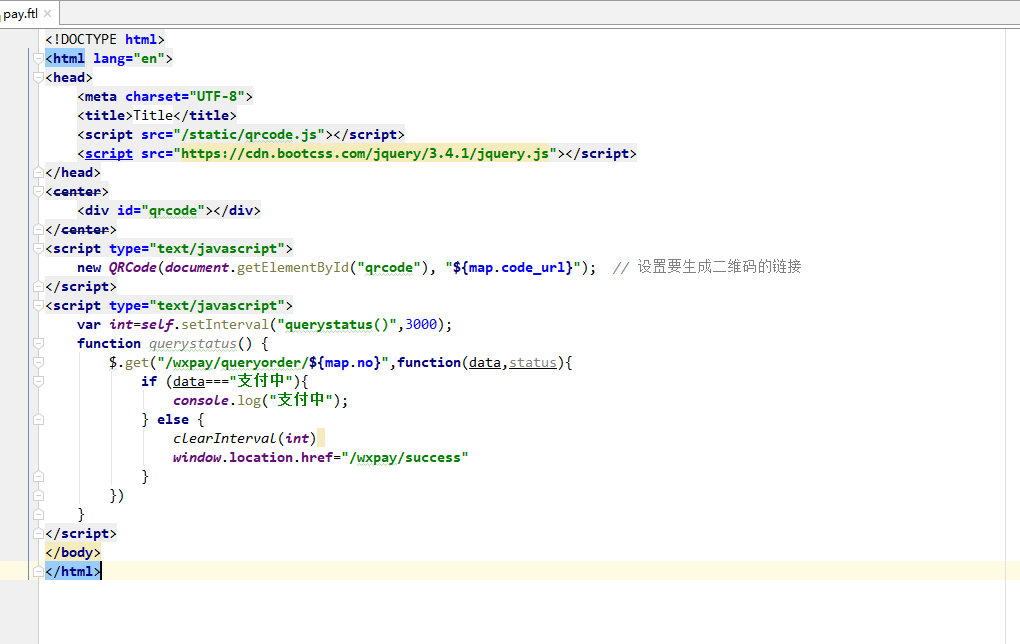
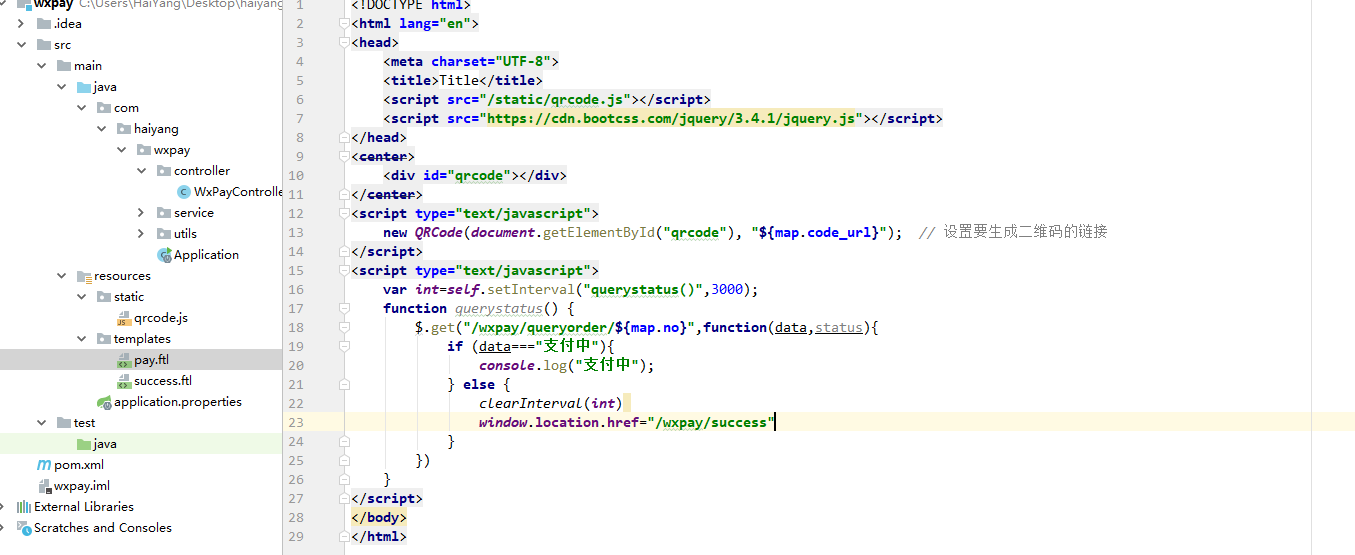
4. 在templates文件中新建 订单支付页面(二维码生成的页面)
注意:文件名必须和生成二维码方法中返回的字符串名称一样 我这里叫 pay
先新建html页面,然后再将后缀改成ftl(freemarker模板引擎的后缀名)
<!DOCTYPE html>
<html lang="en">
<head>
    <meta charset="UTF-8">
    <title>Title</title>
    <script src="/static/qrcode.js"></script>
    <script src="https://cdn.bootcss.com/jquery/3.4.1/jquery.js"></script>
</head>
<center>
    <div id="qrcode"></div>
</center>
<script type="text/javascript">
    new QRCode(document.getElementById("qrcode"), "${map.code_url}");  // 设置要生成二维码的链接
</script>
<script type="text/javascript">
    var int=self.setInterval("querystatus()",3000);
    function querystatus() {
        $.get("/wxpay/queryorder/${map.no}",function(data,status){
            if (data==="支付中"){
                console.log("支付中");
            } else {
                clearInterval(int)
                window.location.href="/wxpay/success"
            }
        })
    }
</script>
</body>
</html>
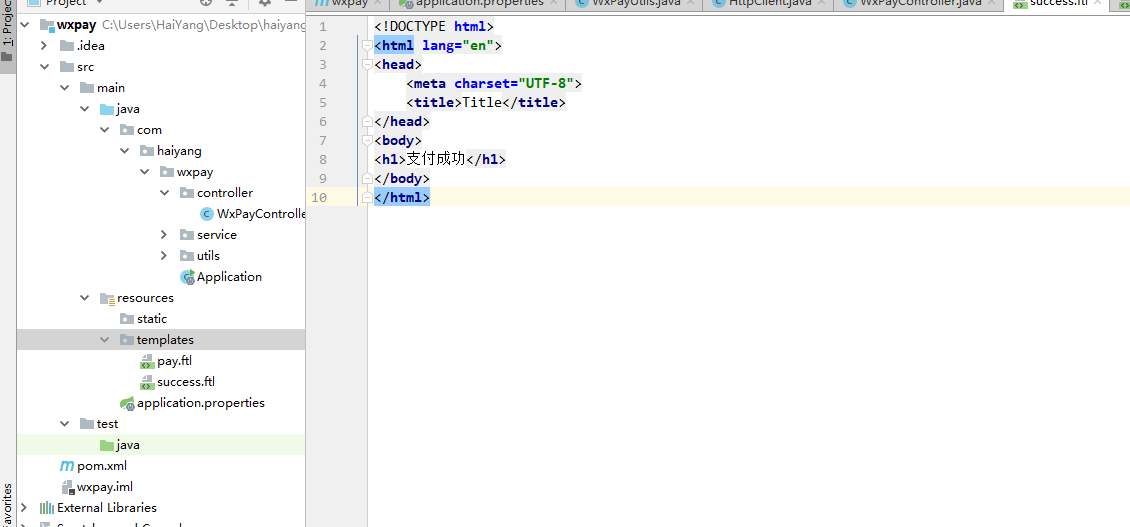
再创建支付成功跳转的页面 文件名要与支付成功方法返回的文件名一样
<!DOCTYPE html>
<html lang="en">
<head>
    <meta charset="UTF-8">
    <title>Title</title>
</head>
<body>
<h1>支付成功</h1>
</body>
</html>
引入 qrcode 生成二维码的依赖,放入static文件中
这里我提供下载链接
链接: https://pan.baidu.com/s/15-E3KpRCenAewh0ZaBLnjQ 提取码: xhs9 复制这段内容后打开百度网盘手机App,操作更方便哦
引入完成后
最后 我们启动项目来测试一下
浏览器输入地址
http://localhost:8081/wxpay/pay
发现二维码生成成功,并且定时器也没问题

之后我们扫码支付
成功跳转到支付成功页面 ~nice
四. 总结
- 首先就是生成二维码,需要的几个主要的参数,订单号,金额,购买的信息(主体信息),其余的参数除了一些可以不写的都是固定的
- 生成二维码然后展示在页面上,用的qrcode插件,生成
- 然后设置定时器,来实时查询订单是否支付
- 查询订单信息的写法和生成二维码的方式差不多 无非就是请求时少了几个参数,必须得带上订单号
- 微信提供的查询订单接口返回数据中 trade_state 代表支付状态 notpay没有支付,seccess表示已成功
- 定时器检测到订单支付成功就清除定时器,并且执行支付成功之后的操作
实际项目中远没有这么简单,并且所有的数据都要从数据库中获取,在这里我为了方便把价格固定写死的
版权声明:本文内容由互联网用户自发贡献,该文观点仅代表作者本人。本站仅提供信息存储空间服务,不拥有所有权,不承担相关法律责任。如发现本站有涉嫌侵权/违法违规的内容, 请联系我们举报,一经查实,本站将立刻删除。
发布者:全栈程序员-站长,转载请注明出处:https://javaforall.net/128293.html原文链接:https://javaforall.net


