
大家好,又见面了,我是你们的朋友全栈君。
上一博客讲到构建了一个vue项目,现在在那个项目之上实现一个登录页面。
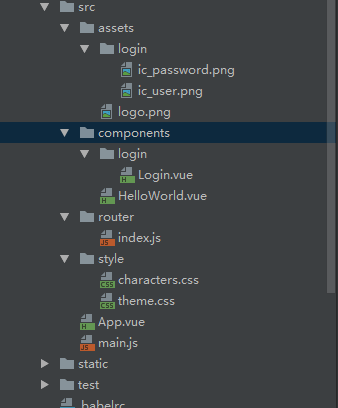
1.构建项目的目录

2.App.vue
<template>
  <div id="app">
    <router-view/>
  </div>
</template>

<script>
  export default {
    name: 'App'
  }
</script>
main.js
// The Vue build version to load with the `import` command
// (runtime-only or standalone) has been set in webpack.base.conf with an alias.
import Vue from 'vue'
import App from './App'
import router from './router'

import ElementUI from 'element-ui'
import 'element-ui/lib/theme-chalk/index.css'

//自己写的样式
import './style/theme.css'
import './style/characters.css'

// 注册element-ui
Vue.use(ElementUI)

Vue.config.productionTip = false

/* eslint-disable no-new */
new Vue({
  el: '#app',
  router,
  components: { App },
  template: '<App/>'
})
theme.css
body {
  padding: 0;
  margin:0;
  font-family: "Microsoft YaHei UI Light";
}

.outer_label {
  position: relative;
  left: 0;
  top: 0;
  width: 100%;
  height: 220px;
  background: -webkit-linear-gradient(left, #000099, #2154FA); /* Safari 5.1 - 6.0 */
  background: -o-linear-gradient(right, #000099, #2154FA); /* Opera 11.1 - 12.0 */
  background: -moz-linear-gradient(right, #000099, #2154FA); /* Firefox 3.6 - 15 */
  background: linear-gradient(to right, #000099 , #2154FA); /* 标准的语法 */
  /*background-color: #000099;*/
  text-align: center;
  filter: brightness(1.4);
}
.inner_label {
  position: absolute;
  left:0;
  right: 0;
  bottom: 0;
  top:0;
  margin: auto;
  height: 50px;
}
.qxs-icon {
  height: 40px;
  width: 90%;
  margin-bottom: 5px;
  padding-left: 10%;
  border: 0;
  border-bottom: solid 1px lavender;
}
character.css
.text-size12px{
  font-size: 12px;
}
.text-size14px{
  font-size: 14px;
}
.text-size16px{
  font-size: 16px;
}
.float-right {
  float: right;
}
.item-color {
  color: #848487;
}
index.js
import Vue from 'vue'
import Router from 'vue-router'
// import HelloWorld from '@/components/HelloWorld'
import Login from '@/components/login/Login'

Vue.use(Router)

export default new Router({
  routes: [
    {
      path: '/',
      name: 'Login',
      component: Login
    }
  ]
})
Login.vue
<template>
<div>
<div class="outer_label">
<img class="inner_label login_logo" src="../../assets/logo.png">
</div>
<div class="login_form">
<input type="text" class="qxs-ic_user qxs-icon" placeholder="用户名" v-model="userName">
<input type="text" class="qxs-ic_password qxs-icon" placeholder="密码" v-model="password">
<!--<button class="login_btn el-button el-button--primary is-round" type="primary" round>登录</button>-->
<el-button class="login_btn" @click.native="login" type="primary" round :loading="isBtnLoading">登录</el-button>
<div style="margin-top: 10px">
<span style="color: #000099;" @click="login">司机账号登陆</span><span style="float: right;color: #A9A9AB">忘记密码?</span>
</div>
</div>
</div>
</template>
<script>
// import { userLogin } from '../../api/api';
export default {
data() {
return {
userName: '',
password: '',
isBtnLoading: false
}
},
created () {
if(JSON.parse( localStorage.getItem('user')) && JSON.parse( localStorage.getItem('user')).userName){
this.userName = JSON.parse( localStorage.getItem('user')).userName;
this.password = JSON.parse( localStorage.getItem('user')).password;
}
},
computed: {
btnText() {
if (this.isBtnLoading) return '登录中...';
return '登录';
}
},
methods: {
login() {
if (!this.userName) {
this.$message.error('请输入用户名');
return;
}
if (!this.password) {
this.$message.error('请输入密码');
return;
}
}
}
}
</script>
<style>
.login_form {
padding-top: 10%;
padding-left: 10%;
padding-right: 10%;
}
.qxs-ic_user {
background: url("../../assets/login/ic_user.png") no-repeat;
background-size: 13px 15px;
background-position: 3%;
}
.qxs-ic_password {
background: url("../../assets/login/ic_password.png") no-repeat;
background-size: 13px 15px;
background-position: 3%;
margin-bottom: 20px;
}
.login_logo {
height: 100%;
}
.login_btn {
width: 100%;
font-size: 16px;
background: -webkit-linear-gradient(left, #000099, #2154FA); /* Safari 5.1 - 6.0 */
background: -o-linear-gradient(right, #000099, #2154FA); /* Opera 11.1 - 12.0 */
background: -moz-linear-gradient(right, #000099, #2154FA); /* Firefox 3.6 - 15 */
background: linear-gradient(to right, #000099 , #2154FA); /* 标准的语法 */
filter: brightness(1.4);
}
</style>
ic_password.png

ic_user.png

logo.png

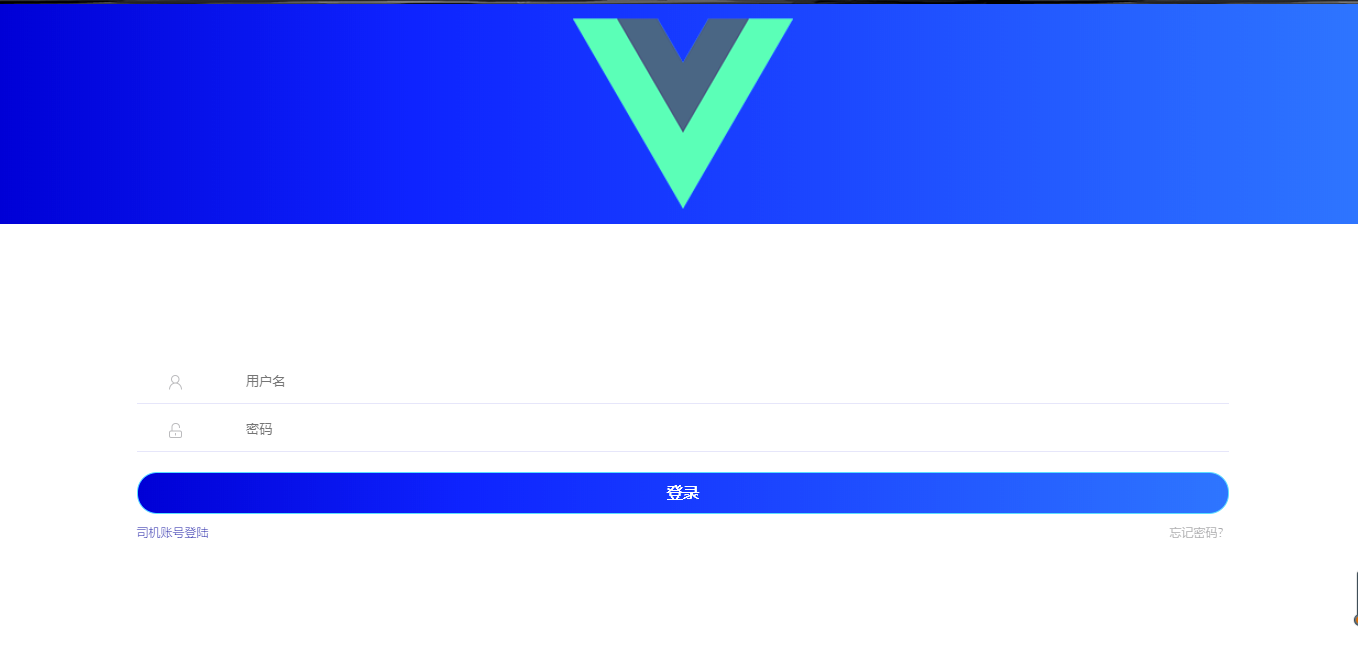
3.根据npm run dev 命令启动,启动完成之后会有个链接,访问链接就直接可以看到下面页面:
问题交流群,不定期分享各种技术文档:
QQ群号:464512055
群二维码:

这是一个神器的二维码,扫描之后你会少掉一块钱。

版权声明:本文内容由互联网用户自发贡献,该文观点仅代表作者本人。本站仅提供信息存储空间服务,不拥有所有权,不承担相关法律责任。如发现本站有涉嫌侵权/违法违规的内容, 请联系我们举报,一经查实,本站将立刻删除。
发布者:全栈程序员-站长,转载请注明出处:https://javaforall.net/143657.html原文链接:https://javaforall.net


