
大家好,又见面了,我是你们的朋友全栈君。
效果:
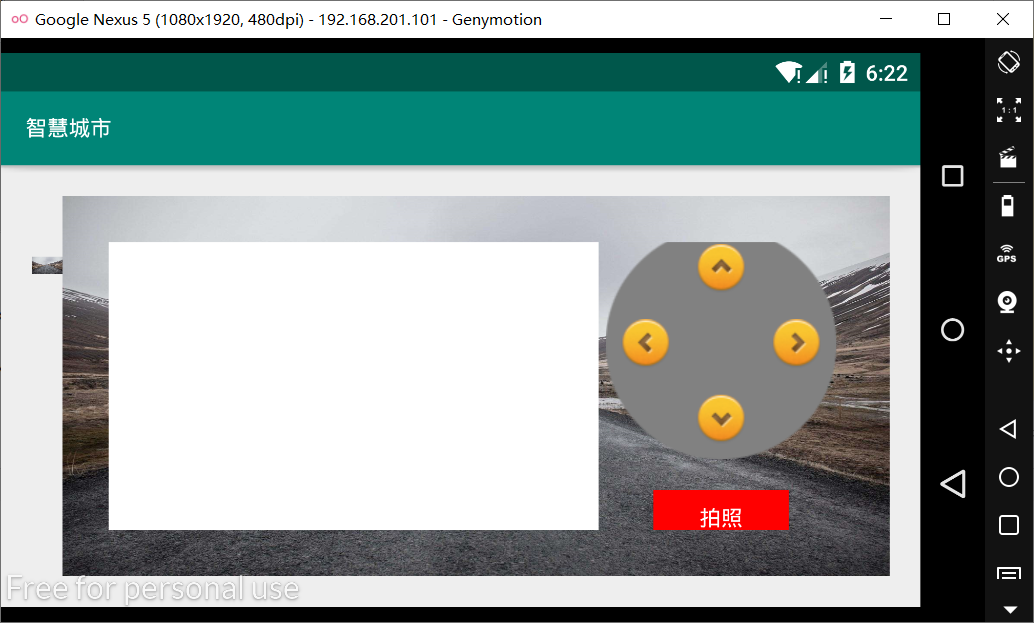

布局代码:
<?xml version="1.0" encoding="utf-8"?>
<RelativeLayout xmlns:android="http://schemas.android.com/apk/res/android"
    xmlns:app="http://schemas.android.com/apk/res-auto"
    xmlns:tools="http://schemas.android.com/tools"
    android:layout_width="fill_parent"
    android:layout_height="fill_parent"
    tools:context=".CameraMonitoring">
    <!--视频监视文字图片-->
    <ImageView
        android:id="@+id/imageView1"
        android:layout_width="20dp"
        android:layout_height="70dp"
        android:layout_marginLeft="20dp"
        android:layout_marginTop="30dp"
        android:src="@drawable/bg_environment"/>
    <!--总体布局-->
    <LinearLayout
        android:layout_width="match_parent"
        android:layout_height="match_parent"
        android:background="@drawable/bg_environment"
        android:padding="30dp"
        android:layout_marginTop="20dp"
        android:layout_marginRight="20dp"
        android:layout_marginBottom="20dp"
        android:layout_toRightOf="@+id/imageView1"
        android:orientation="horizontal">
        <!--两个线性布局管理器中的左边一个-->
        <LinearLayout
            android:layout_width="0.0dp"
            android:layout_height="fill_parent"
            android:layout_weight="2">
            <!--WebView控件-->
            <WebView
                android:id="@+id/webView1"
                android:layout_width="match_parent"
                android:layout_height="match_parent">
            </WebView>
        </LinearLayout>
        <!--两个线性布局管理器中的右边一个-->
        <LinearLayout
            android:layout_width="0.0dp"
            android:layout_height="fill_parent"
            android:layout_weight="1"
            android:orientation="vertical"
            android:gravity="center">
            <!--相对布局管理器,添加4个ImageView控制上下左右-->
            <RelativeLayout
                android:layout_width="150dp"
                android:layout_height="150dp"
                android:background="@drawable/btn__presss_bg">
                <!--右-->
                <ImageView
                    android:layout_width="32dp"
                    android:layout_height="32dp"
                    android:layout_alignParentLeft="true"
                    android:layout_centerVertical="true"
                    android:layout_marginLeft="10dp"
                    android:src="@drawable/btn_left_direction"/>
                <!--下-->
                <ImageView
                    android:layout_width="32dp"
                    android:layout_height="32dp"
                    android:layout_alignParentBottom="true"
                    android:layout_centerHorizontal="true"
                    android:layout_marginBottom="10dp"
                    android:src="@drawable/btn_down_presss"/>
                <!--上-->
                <ImageView
                    android:layout_width="32dp"
                    android:layout_height="32dp"
                    android:layout_alignParentTop="true"
                    android:layout_centerHorizontal="true"
                    android:layout_marginTop="10dp"
                    android:src="@drawable/btn_up_press"/>
                <!--左-->
                <ImageView
                    android:layout_width="32dp"
                    android:layout_height="32dp"
                    android:layout_alignParentRight="true"
                    android:layout_centerVertical="true"
                    android:layout_marginRight="10dp"
                    android:src="@drawable/btn_right_presss"/>
            </RelativeLayout>
            <!--拍照按钮-->
            <Button
                android:layout_width="wrap_content"
                android:layout_height="35dp"
                android:background="@color/red"
                android:textColor="@color/white"
                android:layout_marginTop="20dp"
                android:text="拍照"/>
        </LinearLayout>
    </LinearLayout>
</RelativeLayout>
版权声明:本文内容由互联网用户自发贡献,该文观点仅代表作者本人。本站仅提供信息存储空间服务,不拥有所有权,不承担相关法律责任。如发现本站有涉嫌侵权/违法违规的内容, 请联系我们举报,一经查实,本站将立刻删除。
发布者:全栈程序员-站长,转载请注明出处:https://javaforall.net/150457.html原文链接:https://javaforall.net


