
大家好,又见面了,我是你们的朋友全栈君。
参考 API 和《第一行代码》
- ListView is a view group that displays a list of scrollable items. The list items are automatically inserted to the list using an Adapter that pulls content from a source such as an array or database query and converts each item result into a view that’s placed into the list.
- When the content for your layout is dynamic or not pre-determined, you can use a layout that subclasses AdapterView to populate the layout with views at runtime. A subclass of the AdapterView class uses an Adapter to bind data to its layout. The Adapter behaves as a middleman between the data source and the AdapterView layout—the Adapter retrieves the data (from a source such as an array or a database query) and converts each entry into a view that can be added into the AdapterView layout.
ListView 用来显示一个可以垂直滚动的列表,其中列表的每一项由其相关联的适配器提供,适配器起到一个中间人的作用,即连接列表数据和ListView布局

使用默认 ListView, 先定义一个数组(ArrayList)保存要在ListView里显示的数据,然后新建一个适配器,构造函数传入系统默认的子项目布局( android.R.layout.simple_list_item_1 )–(显示一个 TextView )和数据存在的数组,再直接调用 ListView 的 setAdapter() 方法,传入新建好的适配器,即可显示数据.

使用自定义的 ListView, 可以在子项目中不只显示一个 TextView, 而是可以显示其他自己定义的布局,所以要
- 先新建一个子项目布局,里面可以添加 TextView, Button, ImageView 等控件;
- 后新建一个类 Item 与子项目布局里的控件对应,用作 List<\T> 的范型和要继承的 ArrayAdapter<\T> 的范型,也是要显示的数据类型;
- 自定义 Adapter 类扩展自 ArrayAdapter<\T>, 重写 getView() 方法,先 getItem(position) 获取当前 Item 实例,然后 LayoutInflater.from(getContext()).inflate(resourceId,parent,false) 获取子项目布局 View 实例,再通过 View.findViewById() 获取子项目布局里的控件实例,最后调用 setText() 等控件方法完成控件的操作,返回 View.
- 然后和使用默认 ListView 一样,新建一个自定义的适配器,传入自定义的子项目布局和要显示的数据,再直接调用 ListView 的 setAdapter() 方法,传入新建好的适配器,即可显示数据.
- 要增加新的数据,只需要调用 Adapter.add(Item) 即可.
例 :
public class Item {

    private String text;
    private int button;

    public Item(String text,int button){

        this.text=text;
        this.button=button;
    }
    public String getText(){

        return text;
    }
    public int getButton(){

        return button;
    }
}
public class ItemAdapter extends ArrayAdapter<Item> {
private int resourceId;
public ItemAdapter(Context context,int resource,List<Item> data){
super(context,resource,data);
resourceId=resource;
}
@Override
public View getView(int position, View convertView, ViewGroup parent){
final Item item=getItem(position);
View view;
ViewHolder holder=new ViewHolder(); // viewHolder 是提升 ListView 运行效率
if(convertView==null){
view = LayoutInflater.from(getContext()).inflate(resourceId,parent,false);
holder.tv=view.findViewById(R.id.text_view);
holder.bn=view.findViewById(R.id.button);
view.setTag(holder);
} else {
view = convertView;
holder=(ViewHolder) view.getTag();
}
holder.tv.setText(item.getText());
holder.bn.setOnClickListener(new View.OnClickListener() {
@Override
public void onClick(View v) {
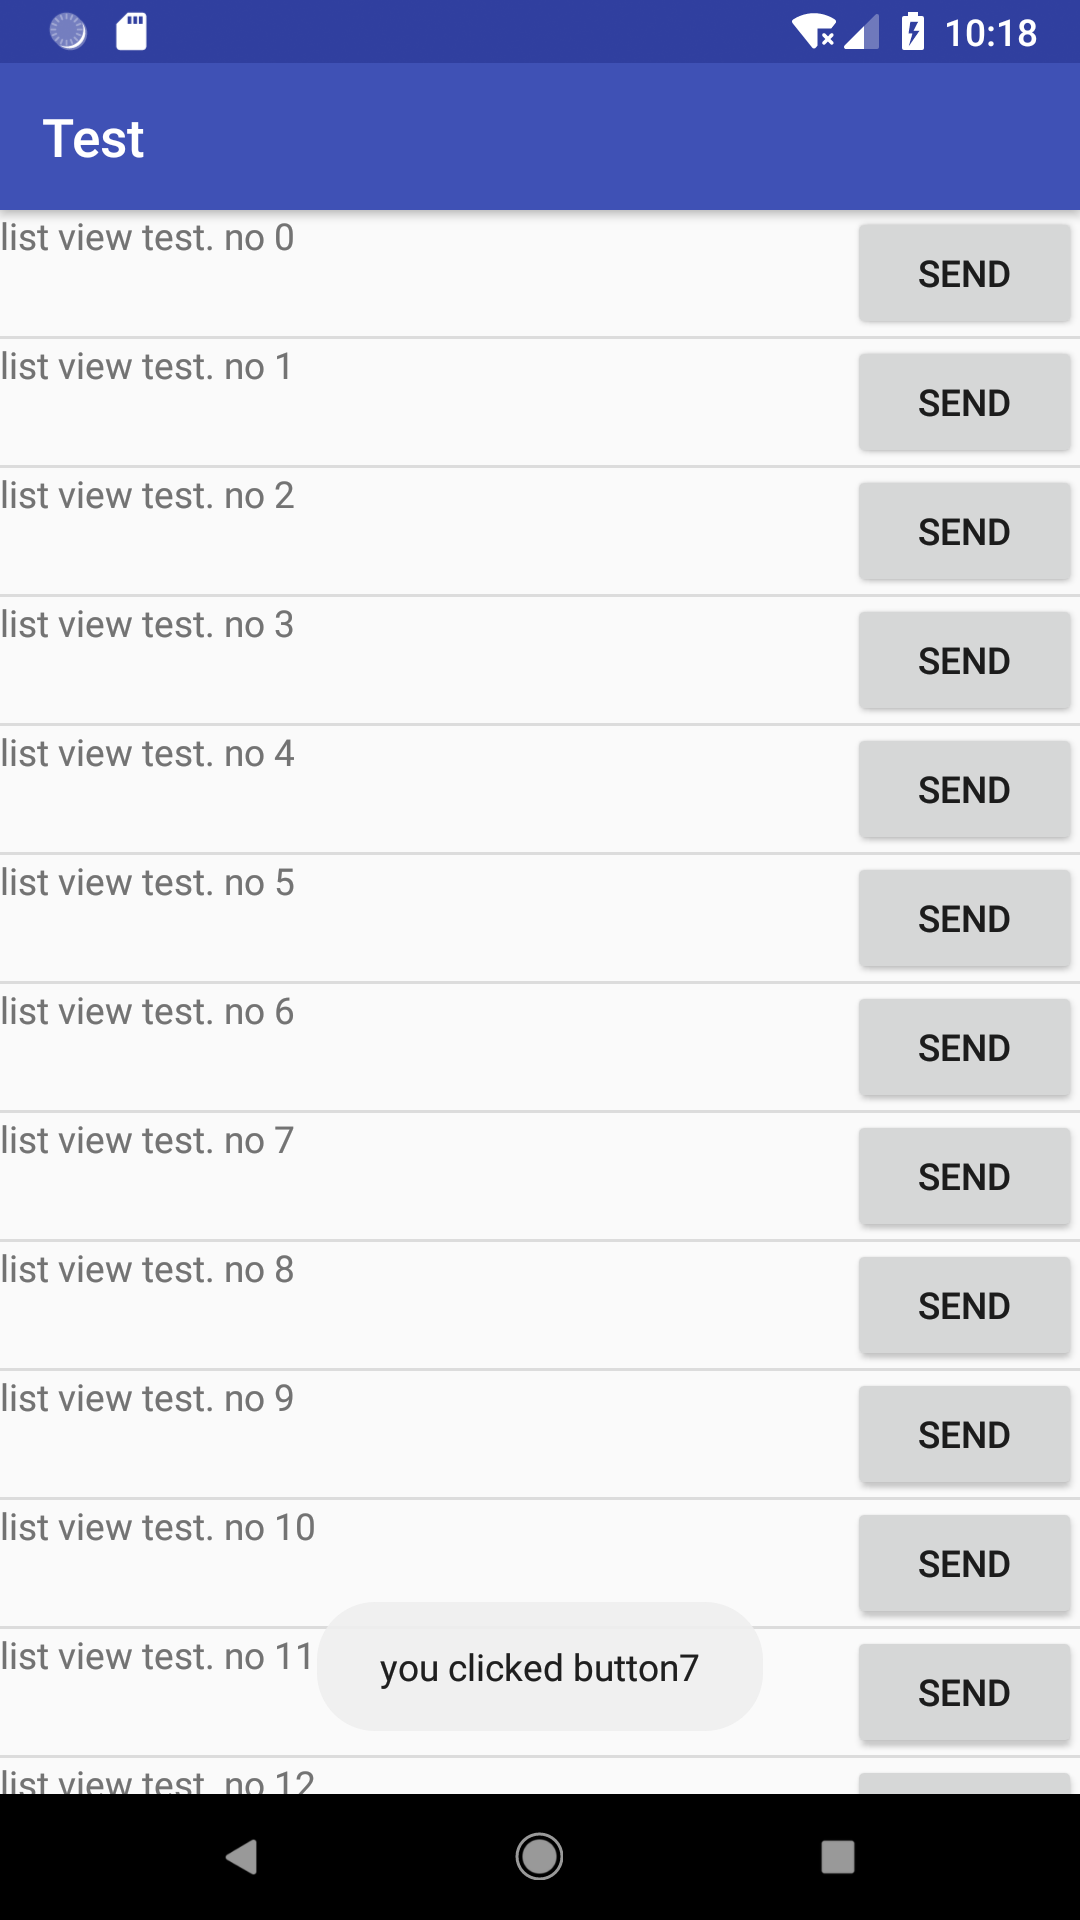
Toast.makeText(getContext(),"you clicked button"+item.getButton(),Toast.LENGTH_SHORT).show();
}
});
return view;
}
class ViewHolder{
TextView tv;
Button bn;
}
}
public class MainActivity extends AppCompatActivity {


    private ArrayList<Item> data=new ArrayList<>();
    @Override
    protected void onCreate(Bundle savedInstanceState) {

        super.onCreate(savedInstanceState);
        setContentView(R.layout.activity_main);
        initData();
        ItemAdapter adapter=new ItemAdapter(this,R.layout.list_view_item,data);
        ListView listView=(ListView) findViewById(R.id.list_view);
        listView.setAdapter(adapter);
    }

    private void initData(){

        for(int i=0;i<20;++i){

            Item a=new Item("list view test. no "+i,i);
            data.add(a);
        }
    }
}
运行效果 :
版权声明:本文内容由互联网用户自发贡献,该文观点仅代表作者本人。本站仅提供信息存储空间服务,不拥有所有权,不承担相关法律责任。如发现本站有涉嫌侵权/违法违规的内容, 请联系我们举报,一经查实,本站将立刻删除。
发布者:全栈程序员-站长,转载请注明出处:https://javaforall.net/163277.html原文链接:https://javaforall.net


