
大家好,又见面了,我是你们的朋友全栈君。如果您正在找激活码,请点击查看最新教程,关注关注公众号 “全栈程序员社区” 获取激活教程,可能之前旧版本教程已经失效.最新Idea2022.1教程亲测有效,一键激活。
Jetbrains全系列IDE稳定放心使用
微信小程序宠物论坛4
帖子详情模块
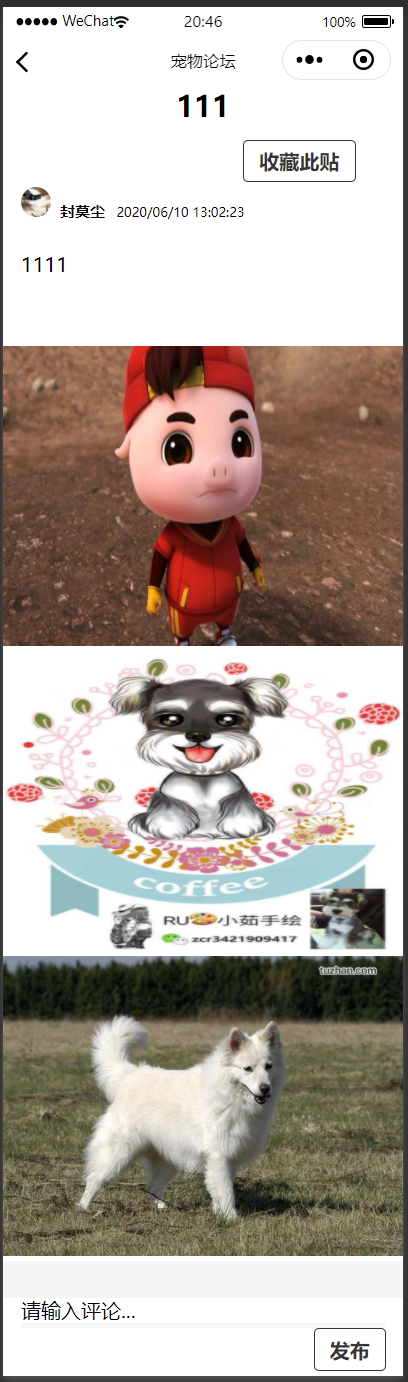
界面图

JS部分
// 初始化数据化
const db = wx.cloud.database();
const cont = db.collection('comment');
const _ = db.command
Page({
  data: {
    value:"请输入评论...",
    id:"",
    post:[],  //帖子信息
    postid: "" , //帖子ID
    time:"", //时间
    content:"",//内容
    userid:"",//发帖人的id
    heads:"",//头像
    nickname:"" ,//昵称
    collect:'', //收藏表返回
    collectid:'',//收藏表ID
  },

  // //下拉刷新加载数据
  // onPullDownRefresh: function () {
  //   wx.showNavigationBarLoading()
  //   wx.hideNavigationBarLoading();
  //   const _ = db.command
  //   const openid=this.data.openid
  //   const id=this.data.id
  //   // 查询收藏表
  //   db.collection('connection').where({
  //     _openid: openid,
  //     postid: id
  //   })
  //     .get({
  //       success: res => {
  //         console.log(res.data)
  //         this.setData({
  //           collect: res.data.length,
  //           collectid: res.data[0]._id
  //         })
  //         console.log(this.data.collect)
  //       },
  //       fail:res=>{
  //         console.log(res.data)
  //       }
  //     })
  //   setTimeout(function () {
  //     wx.hideNavigationBarLoading() //完成停止加载
  //     wx.stopPullDownRefresh() //停止下拉刷新
  //   }, 1500);
  // },

  handlecontentInput(e) {
    const value = e.detail.value
    this.data.content = value
  },

  onLoad: function (options) {
    // 获取用户openid
    wx.cloud.callFunction({
      name: "getopenid",
      success: res => {
         this.setData({
           openid: res.result.openid
         })
        console.log(res.result.openid)
      },
      fail(res) {
        console.log("获取openid失败")
      }
    })
    const openid = this.data.openid   //当前用户ID
    console.log(openid)

  // 获取评论用户的昵称和头像
    db.collection('user').where({
      _openid: openid
    })
      .get({
        success: res => {
          console.log(res.data)
          this.setData({
            nickname: res.data[0].nickname,
            heads: res.data[0].heads
          })
        }
      })


    this.setData({
      postid:options.id,
      id: options.id,
    })

   console.log(this.data.id)
   var id=this.data.id //当前帖子ID

    // 查询收藏表
    db.collection('connection').where({
      _openid: openid,
      postid:id
    })
      .get({
        success: res => {
          console.log(res.data)
          this.setData({
            collect:res.data.length,
            collectid:res.data[0]._id
          })
          console.log(this.data.collectid)
        }
      })

    // 查询当前帖子信息
    db.collection('post').where({
      _id: id
    })
    .get({
      success: res=>{
        console.log(res.data)
        this.setData({
          post: res.data,
          userid:res.data[0]._openid
        })
      }
    })

    //查询评论表
    wx.cloud.callFunction({
      name: 'getpost',
      data: {
        mark: 'getcomment',
        postid: this.data.postid
      }
    }).then(res => {
      console.log(res)
      this.setData({
        comment: res.result.data
      })
    }).catch(err => { })


  },
  //   db.collection('comment').where({
  //     postid: id
  //   })
  //     .get({
  //       success: res => {
  //         console.log(res.data)
  //         this.setData({
  //           comment: res.data,
  //         })
  //       }
  //     })

  //   this.setData({
  //     postid:id1
  //   })
  // },


  // 发表评论
  submit(e){
    const nickname=this.data.nickname
    const heads=this.data.heads

    var util = require('../../utils/util.js');
    const time = util.formatTime(new Date());
    this.setData({
      time: time
    });

    const content=this.data.content
    const postid = this.data.postid
    console.log(postid)
    const userid=this.data.userid

    if(content=='')
    {
      wx.showModal({
        title: '提示',
        content: '请先输入评论再发布',
        success(res) {
          if (res.confirm) {
            console.log('用户点击确定')
          } else if (res.cancel) {
            console.log('用户点击取消')
          }
        }
      })
    }
    else
    {
      // 将评论写入数据库
      db.collection('comment').add({
        data: {
          postid: postid,
          content: content,
          time: time,
          userid: userid,
          nickname: nickname,
          heads: heads,
          review:'0'
        },
        success: function (res) {
          wx.showToast({
            title: '发布成功,请等待审核',
            icon: 'success',
            mask: true,
            duration: 1000,
          })
        },
      })

      //查询评论表
      wx.cloud.callFunction({
        name: 'getpost',
        data: {
          mark: 'getcomment',
          postid: this.data.postid
        }
      }).then(res => {
        console.log(res)
        this.setData({
          comment: res.result.data
        })
      }).catch(err => { })

      // 将评论框中的信息置空
      this.setData({
        value:"请输入评论..."
      })

    }
  },

  // 收藏按钮
  collect(e){

    const postid=this.data.id
    console.log(postid)
    db.collection('connection').add({
      data: {
        postid:postid
      },
      success: function (res) {
        wx.showToast({
          title: '已收藏',
          icon: 'success',
          mask: true,
          duration: 1000,
        })
      }
    })


    // // 查询收藏表
    // const openid=this.data.openid
    // const id=this.data.id
    // db.collection('connection').where({
    //   _openid: openid,
    //   postid: id
    // })
    //   .get({
    //     success: res => {
    //       console.log(res.data)
    //       this.setData({
    //         collect: res.data.length,
    //         collectid: res.data[0]._id
    //       })
    //       console.log(this.data.collectid)
    //     }
    //   })
    this.setData({
      collect:1
    })


  },

  // 取消收藏按钮
  notcollect(e){
    const collectid = this.data.collectid //收藏表ID
    console.log(collectid)

    db.collection('connection').doc(collectid)
      .remove({
      success: function (res) {
        wx.showToast({
          title: '已取消收藏',
          icon: 'success',
          mask: true,
          duration: 1000,
        })
      }
    })
   this.setData({
     collect:0
   })
  }
})
WXML部分
<!-- 帖子显示 -->
<view class="post" wx:for="{
{post}}" wx:key="post">
<!-- 标题 -->
<view class="title">
<text class="title">{
{item.title}}</text>
</view>
<view wx:if="{
{collect==0}}" >
<button class="collect" size="mini" bindtap="collect" plain='true'>收藏此贴</button>
</view>
<view wx:else>
<button class="notcollect" size="mini" bindtap="notcollect" plain='true'>已收藏</button>
</view>
<!-- 头像,昵称,时间 -->
<view class="userinfo" style="flex-direction:row;">
<image class="userinfo-avatar" src="{
{item.heads}}" background-size="cover"></image>
<text decode="true" class="userinfo-nickname"> {
{item.nickname}}</text>
<text decode="true" class="userinfo-time"> {
{item.time}}</text>
</view>
<!-- 内容 -->
<view class="content">{
{item.content}}</view>
<!-- 图片 -->
<view class="images" wx:for="{
{item.images}}" wx:key="*this">
<image mode="heightFix" class="images-image" src="{
{item}}"/>
</view>
</view>
<view class="hr"></view>
<!-- 显示评论 -->
<view class="showcomment" wx:for="{
{comment}}" wx:key="comment" >
<image class="comment-avatar" src="{
{item.heads}}" background-size="cover"></image>
<text class="comment-nickname" decode="true"> {
{item.nickname}}</text>
<text class="comment-time" decode="true"> {
{item.time}}</text>
<view class="comment-content">{
{item.content}}</view>
<view class="line"></view>
</view>
<!-- 评论部分 -->
<view class="comment">
<textarea class="textarea" value="{
{value}}" placeholder-style="color:#b3b3b3;font-size:14px;" style="height: 12rem" maxlength="100" bindinput="handlecontentInput" bindblur="bindTextAreaBlur" auto-height />
<view class="line"></view>
<button class="besure" size="mini" bindtap="submit" plain='true'>发布</button>
</view>
WXSS部分
.title{
  height: 100rpx
}
.title.title{
  text-align:center;
  font-size: 120%;
  font-weight:bold;
}

.userinfo{
  height:120rpx;
  padding-left:4.5%;
  padding-right:4.5%
}

.userinfo-avatar {
  width: 58rpx;
  height: 58rpx;
  border-radius: 50%;
}

.userinfo-nickname {
  font-weight:bold;
  font-size:75%;
  color: black;
  margin-bottom:30px;
}
.userinfo-time{
 font-size:65%;
 padding-bottom:40px
}

.content{
  padding-left:4.5%;
  padding-right:4.5%;
  height: 180rpx;
}
.images{
 justify-content: center;
}
.line {
  border: 2px solid #ccc;
  opacity: 0.2;
}

.hr {
  width: 100%;
  height: 30px;
  background-color: #f4f5f6;
}

.showcomment{
  padding-left:4.5%;
  padding-right:4.5%;
}

.comment{
  padding-left:4.5%;
  padding-right:4.5%;
}
.besure{
  position:relative;
  left:550rpx;
}

.comment-avatar {
  width: 45rpx;
  height: 45rpx;
  border-radius: 50%;
}

.comment-nickname {
  font-weight:bold;
  font-size:75%;
  color: black;
}
.comment-time{
 font-size:65%;
}
.textarea{
margin-right: 200rpx;
}

/* .collect{
  width: 42rpx;
  height: 42rpx;
  margin-top: 20rpx;
  background-color: white;
  color: #999999;
  border-radius: 0rpx;
  display: flex;
  flex-direction: column;
  align-items: center;
  justify-content: center;
  font-size: 30rpx;
}

.collect1 {
  width: 42rpx;
  height: 42rpx;
  position: relative;
  right:200rpx;
  top:20rpx
}

.collect::after {
  border: 0;
} */

.collect{
  position: relative;
  left:60%;
  top:20%
}

.notcollect{
  position: relative;
  left:60%;
  top:20%
}
版权声明:本文内容由互联网用户自发贡献,该文观点仅代表作者本人。本站仅提供信息存储空间服务,不拥有所有权,不承担相关法律责任。如发现本站有涉嫌侵权/违法违规的内容, 请联系我们举报,一经查实,本站将立刻删除。
发布者:全栈程序员-站长,转载请注明出处:https://javaforall.net/184952.html原文链接:https://javaforall.net


