
大家好,又见面了,我是你们的朋友全栈君。如果您正在找激活码,请点击查看最新教程,关注关注公众号 “全栈程序员社区” 获取激活教程,可能之前旧版本教程已经失效.最新Idea2022.1教程亲测有效,一键激活。
Jetbrains全系列IDE稳定放心使用
mysql批量插入大量数据
时间:2020年11月25日
今天遇到了一个批量插入大量数据任务,然后出于小白本能,直接for-each循环插入不就好了,于是手上开始噼里啪啦一顿操作,写好了从读取excel到插入数据库的工作,于是就美滋滋的开始了自己的测试,试了一把,一次通过perfect,然后后面就悲剧了,后面发现数据量稍微大一点,速度就会很慢很慢。于是掏出自己的制胜法典,后来我在知识和海洋中获取到了两种靠谱的方法。下面一点一点讲。
测试的服务器信息 1核2g 5m的阿里云服务器(你懂得),mysql直接装在服务器本机,没有通过docker安装,每次测试之前会通过代码将表截断
一、method-1
原始的也是最笨的方法
 @RequestMapping(value = "/test1", method = RequestMethod.GET)
    public String test1() {


        ArrayList<TestTest> list = new ArrayList<>();
        for (int i = 0; i < 10000; i++) {

            TestTest testTest = new TestTest();
            testTest.setField1("setField1" + i);
            testTest.setField2("setField2" + i);
            testTest.setField3("setField3" + i);
            testTest.setField4("setField4" + i);
            list.add(testTest);
        }

        //执行前截断表,保证每次测试环境的一致性
        testTestMapper.trunCate();

        Long startTime = System.currentTimeMillis();
        list.stream().forEach(test -> {

            testTestMapper.insert(test);
        });
        Long endTime = System.currentTimeMillis();
        System.out.println("OK 耗时:" + (endTime - startTime) + "毫秒");
        return "OK 耗时:" + (endTime - startTime) + "毫秒";
    }
这个速度真真的慢的离谱,所以我只插入1000条给大家看一下效果就好了


这个结果是不是就很离谱。。
二、method-2
用mybatis的方法,拼接插入参数,一次性插入
@RequestMapping(value = "/test2", method = RequestMethod.GET)
    public String test2() {


        ArrayList<TestTest> list = new ArrayList<>();
        for (int i = 0; i < 10000; i++) {

            TestTest testTest = new TestTest();
            testTest.setField1("setField1" + i);
            testTest.setField2("setField2" + i);
            testTest.setField3("setField3" + i);
            testTest.setField4("setField4" + i);
            list.add(testTest);
        }
        //执行前截断表,保证每次测试环境的一致性
        testTestMapper.trunCate();

        Long startTime = System.currentTimeMillis();
        testTestMapper.insertBatch(list);
        Long endTime = System.currentTimeMillis();
        System.out.println("OK 耗时:" + (endTime - startTime) + "毫秒");
        return "OK 耗时:" + (endTime - startTime) + "毫秒";
    }
    <!--批量新增所有列,列表长度不能为0,且列表id统一为null或者统一不为null-->
    <insert id="insertBatch" keyProperty="id" useGeneratedKeys="true" parameterType="list">
        insert into test_test
         (field1, field2, field3, field4)
        values
        <foreach item="item" collection="list" separator="," open="" close="" index="index">
         (<if test="item.id != null">#{item.id,jdbcType=INTEGER},</if>#{item.field1,jdbcType=VARCHAR}, #{item.field2,jdbcType=VARCHAR}, #{item.field3,jdbcType=VARCHAR}, #{item.field4,jdbcType=VARCHAR})
        </foreach>
    </insert>
这个时候我们插入1w条数据进行比较
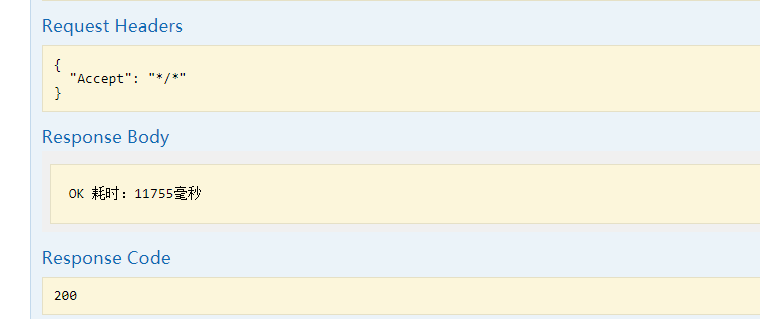
1w条数据插入了11s,比上面不知道快了多少,可是这样插入是有一个弊端的,就是数据量再大一点的话,会报错的,我改成10w去跑一下给你们看一下效果
### Cause: com.mysql.cj.jdbc.exceptions.PacketTooBigException: Packet for query is too large (9,455,639 > 4,194,304). You can change this value on the server by setting the 'max_allowed_packet' variable.
; Packet for query is too large (9,455,639 > 4,194,304). You can change this value on the server by setting the 'max_allowed_packet' variable.; nested exception is com.mysql.cj.jdbc.exceptions.PacketTooBigException: Packet for query is too large (9,455,639 > 4,194,304). You can change this value on the server by setting the 'max_allowed_packet' variable.] with root cause

com.mysql.cj.jdbc.exceptions.PacketTooBigException: Packet for query is too large (9,455,639 > 4,194,304). You can change this value on the server by setting the 'max_allowed_packet' variable.
	at com.mysql.cj.jdbc.exceptions.SQLExceptionsMapping.translateException(SQLExceptionsMapping.java:107)
	at com.mysql.cj.jdbc.ClientPreparedStatement.executeInternal(ClientPreparedStatement.java:970)
	at com.mysql.cj.jdbc.ClientPreparedStatement.execute(ClientPreparedStatement.java:387)
	at com.alibaba.druid.filter.FilterChainImpl.preparedStatement_execute(FilterChainImpl.java:3409)
	at com.alibaba.druid.filter.FilterEventAdapter.preparedStatement_execute(FilterEventAdapter.java:440)
	at com.alibaba.druid.filter.FilterChainImpl.preparedStatement_execute(FilterChainImpl.java:3407)
	at com.alibaba.druid.proxy.jdbc.PreparedStatementProxyImpl.execute(PreparedStatementProxyImpl.java:167)
	at com.alibaba.druid.pool.DruidPooledPreparedStatement.execute(DruidPooledPreparedStatement.java:498)
	at org.apache.ibatis.executor.statement.PreparedStatementHandler.update(PreparedStatementHandler.java:47)
	at org.apache.ibatis.executor.statement.RoutingStatementHandler.update(RoutingStatementHandler.java:74)
	at org.apache.ibatis.executor.SimpleExecutor.doUpdate(SimpleExecutor.java:50)
	at org.apache.ibatis.executor.BaseExecutor.update(BaseExecutor.java:117)
	at org.apache.ibatis.executor.CachingExecutor.update(CachingExecutor.java:76)
这是因为在对mysql进行插入、更新或查询操作时,mysql server接收处理的数据包大小是有限制的,如果太大超过了设置的max_allowed_packet参数的大小,会导致操作失败,我们可以通过命令:show VARIABLES like ‘%max_allowed_packet%’;查看参数值。你也可以去修改mysql的配置文件去解决,但是生产上有时候自己身不由己,所以求人不如求自己,自己再想想办法。
三、method-3
第三种,通过原生的jdbc连接设置,然后打开批量处理的方式去处理数据
MySQL的JDBC连接的url中要加rewriteBatchedStatements参数,并保证5.1.13以上版本的驱动,才能实现高性能的批量插入。
MySQL JDBC驱动在默认情况下会无视executeBatch()语句,把我们期望批量执行的一组sql语句拆散,一条一条地发给MySQL数据库,批量插入实际上是单条插入,直接造成较低的性能。只有把rewriteBatchedStatements参数置为true, 驱动才会帮你批量执行SQL
另外这个选项对INSERT/UPDATE/DELETE都有效。
url上必须加上rewriteBatchedStatements=true
private String url = "jdbc:mysql://39.97.103.5:3306/study?rewriteBatchedStatements=true&characterEncoding=utf-8&serverTimezone=UTC";
private String user = "root";
private String password = "password";

 @RequestMapping(value = "/test3", method = RequestMethod.GET)
    public String test3() {


        ArrayList<TestTest> list = new ArrayList<>();
        for (int i = 0; i < 10000; i++) {

            TestTest testTest = new TestTest();
            testTest.setField1("setField1" + i);
            testTest.setField2("setField2" + i);
            testTest.setField3("setField3" + i);
            testTest.setField4("setField4" + i);
            list.add(testTest);
        }

        //执行前截断表,保证每次测试环境的一致性
        testTestMapper.trunCate();

        Long startTime = System.currentTimeMillis();
        batctMysql(list);
        Long endTime = System.currentTimeMillis();
        System.out.println("OK 耗时:" + (endTime - startTime) + "毫秒");
        return "OK 耗时:" + (endTime - startTime) + "毫秒";
    }

    public void batctMysql(ArrayList<TestTest> list) {

        Connection conn = null;
        PreparedStatement pstm = null;
        try {

            Class.forName("com.mysql.cj.jdbc.Driver");
            conn = DriverManager.getConnection(url, user, password);
            //关闭事务自动提交
            conn.setAutoCommit(false);


            String sql = "INSERT INTO test_test (field1,field2,field3,field4) VALUES(?,?,?,?)";
            pstm = conn.prepareStatement(sql);

            for (TestTest test : list) {

                pstm.setString(1, test.getField1());
                pstm.setString(2, test.getField2());
                pstm.setString(3, test.getField3());
                pstm.setString(4, test.getField4());
                pstm.addBatch();
            }
            //批处理
            pstm.executeBatch();
            //提交事务
            conn.commit();
        } catch (Exception e) {

            e.printStackTrace();
            throw new RuntimeException(e);
        } finally {

            if (pstm != null) {

                try {

                    pstm.close();
                } catch (SQLException e) {

                    e.printStackTrace();
                    throw new RuntimeException(e);
                }
            }
            if (conn != null) {

                try {

                    conn.close();
                } catch (SQLException e) {

                    e.printStackTrace();
                    throw new RuntimeException(e);
                }
            }
        }

    }
测试结果
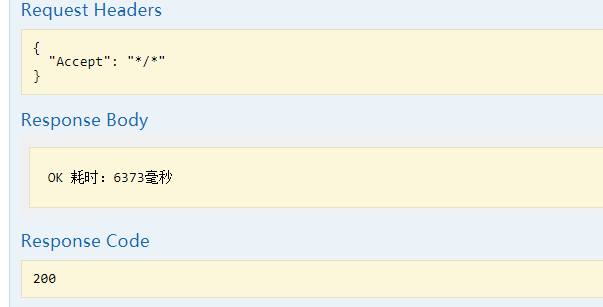
1w条数据只用了6s多,处理速度还是最快的一种
测试一下10w条记录的时间
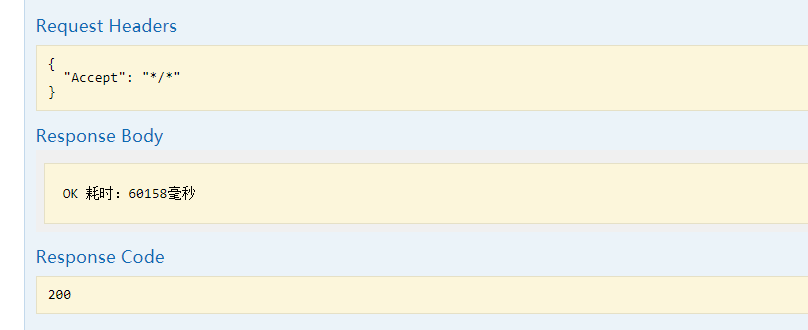
系统没有报错,然后时间还可以接受
四、总结
各位铁子们,千万不要使用第一种方式去处理数据,这样你会糟重的,小心点。至于第二种和第三种方式,如果自己数据量不大的话,也可考虑第二种。但是第三种的效率是真强。
发布者:全栈程序员-站长,转载请注明出处:https://javaforall.net/185548.html原文链接:https://javaforall.net


