
大家好,又见面了,我是你们的朋友全栈君。如果您正在找激活码,请点击查看最新教程,关注关注公众号 “全栈程序员社区” 获取激活教程,可能之前旧版本教程已经失效.最新Idea2022.1教程亲测有效,一键激活。
Jetbrains全系列IDE稳定放心使用
一、服务端
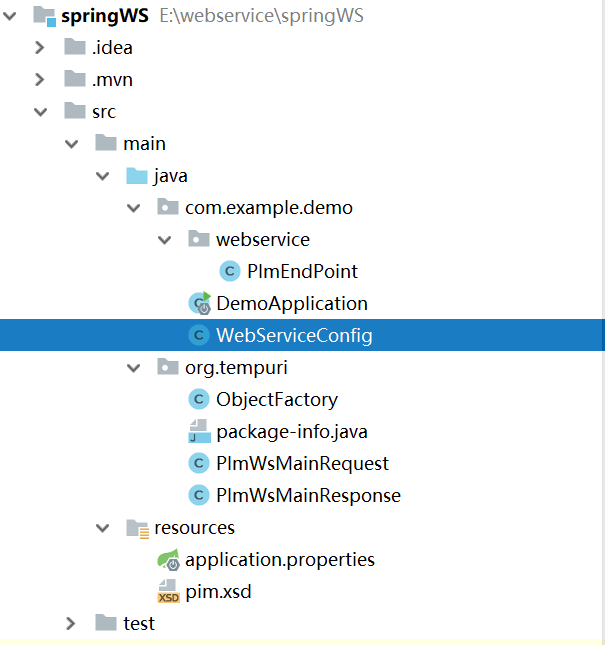
下图 主要目录结构,这个是完整的,下面,我们就来构建

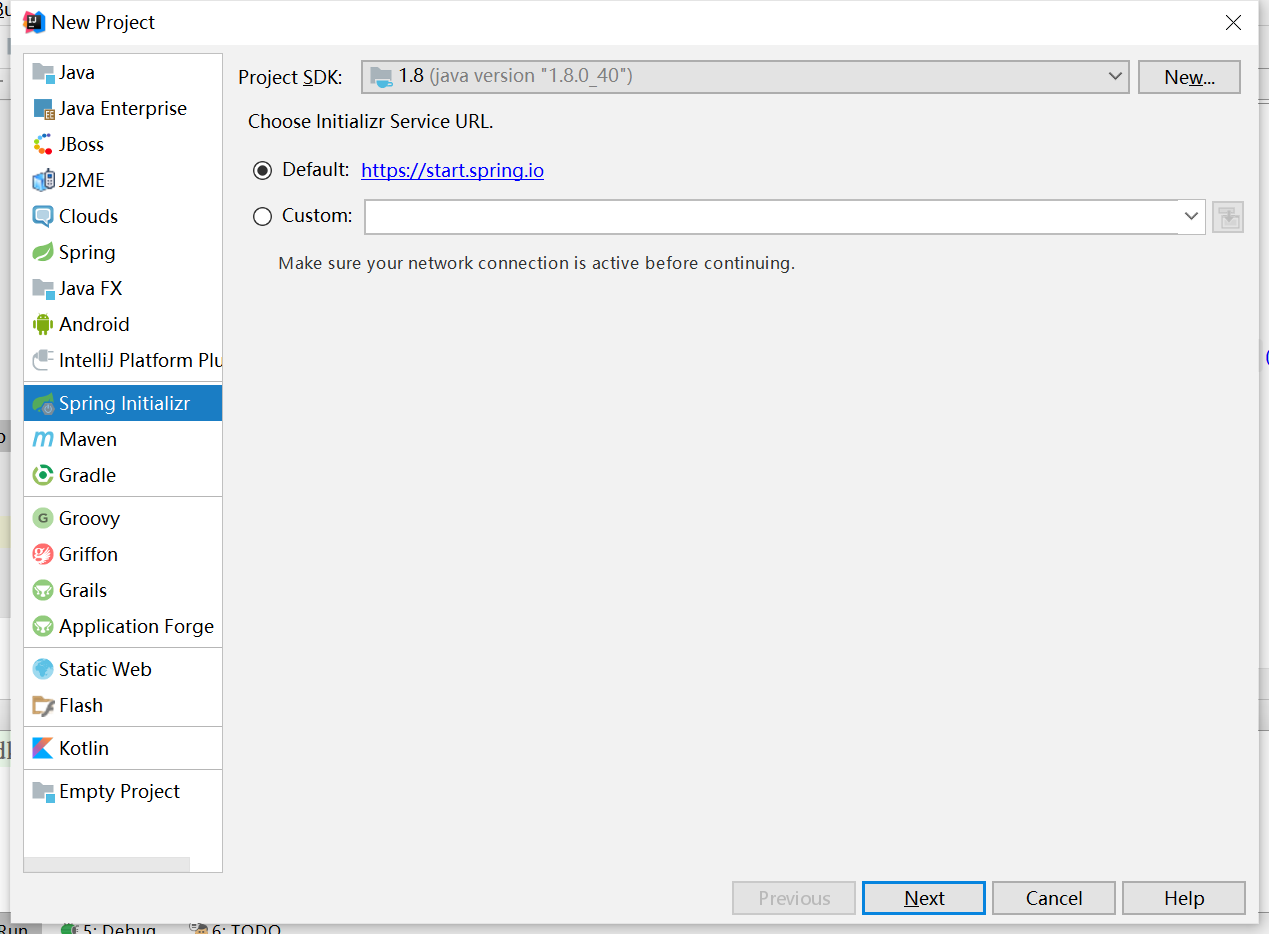
1.1、创建spring initializr,下一步
1.2选中springweb,下一步,最后创建

1.3导入依赖
	<dependencies>
		<dependency>
			<groupId>org.springframework.boot</groupId>
			<artifactId>spring-boot-starter</artifactId>
		</dependency>

		<dependency>
			<groupId>org.springframework.boot</groupId>
			<artifactId>spring-boot-starter-test</artifactId>
			<scope>test</scope>
		</dependency>

		<dependency>
			<groupId>org.springframework.boot</groupId>
			<artifactId>spring-boot-starter-web</artifactId>
		</dependency>
		<dependency>
			<groupId>org.springframework.boot</groupId>
			<artifactId>spring-boot-starter-web-				services</artifactId>
		</dependency>
		<dependency>
			<groupId>org.springframework.ws</groupId>
			<artifactId>spring-ws-core</artifactId>
			<version>2.4.2.RELEASE</version>
		</dependency>
		<dependency>
			<groupId>wsdl4j</groupId>
			<artifactId>wsdl4j</artifactId>
		</dependency>
		<dependency>
			<groupId>org.hibernate</groupId>
			<artifactId>hibernate-validator</artifactId>
			<version>6.0.18.Final</version>
		</dependency>
	<dependencies>


<build>
		<plugins>
			<plugin>
				<groupId>org.apache.maven.plugins</groupId>
				<artifactId>maven-compiler-plugin</artifactId>
			</plugin>
			<plugin>
				<groupId>org.springframework.boot</groupId>
				<artifactId>spring-boot-maven-plugin</artifactId>
				<configuration>
					<fork>true</fork>
				</configuration>
			</plugin>
			<plugin>
				<groupId>org.codehaus.mojo</groupId>
				<artifactId>jaxb2-maven-plugin</artifactId>
				<version>1.6</version>
				<executions>
					<execution>
						<id>xjc</id>
						<goals>
							<goal>xjc</goal>
						</goals>
					</execution>
				</executions>
				<configuration>
					<schemaDirectory>
						${
   project.basedir}/src/main/resources
					</schemaDirectory>
					<outputDirectory>
						${
   project.basedir}/src/main/java
					</outputDirectory>
					<clearOutputDir>
						false
					</clearOutputDir>
					<encoding>utf-8</encoding>
				</configuration>
			</plugin>
		</plugins>
		<resources>
			<resource>
				<directory>src/main/resources</directory>
			</resource>
			<resource>
				<directory>src/main/java</directory>
				<includes>
					<include>**/*.xsd</include> </includes> </resource> </resources> </build>
2.1生成下列基础文件
1、上面添加的依赖,就是配置自动生成下列文件的
<plugin>
				<groupId>org.codehaus.mojo</groupId>
				<artifactId>jaxb2-maven-plugin</artifactId>
				<version>1.6</version>
				<executions>
					<execution>
						<id>xjc</id>
						<goals>
							<goal>xjc</goal>
						</goals>
					</execution>
				</executions>
				<configuration>
					<schemaDirectory>
						${
   project.basedir}/src/main/resources
					</schemaDirectory>
					<outputDirectory>
						${
   project.basedir}/src/main/java
					</outputDirectory>
					<clearOutputDir>
						false
					</clearOutputDir>
					<encoding>utf-8</encoding>
				</configuration>
			</plugin>
2、编写pim.xsd文件,此文件放于resources(springWS\src\main\resources\pim.xsd)
<xs:schema xmlns:xs="http://www.w3.org/2001/XMLSchema"
           targetNamespace="http://tempuri.org/"
           elementFormDefault="qualified">
    <xs:element name="PlmWsMainRequest">
        <xs:complexType>
            <xs:sequence>
                <xs:element name="UserToken" type="xs:string"/>
                <xs:element name="IFaceCode" type="xs:string"/>
                <xs:element name="BatchNumber" type="xs:string"/>
                <xs:element name="Data" type="xs:string"/>
            </xs:sequence>
        </xs:complexType>
    </xs:element>

    <xs:element name="PlmWsMainResponse">
        <xs:complexType>
            <xs:sequence>
                <xs:element name="ResponseData" type="xs:string"/>
                <xs:element name="ReturnCode" type="xs:string"/>
                <xs:element name="ReturnMessage" type="xs:string"/>
            </xs:sequence>
        </xs:complexType>
    </xs:element>

</xs:schema>
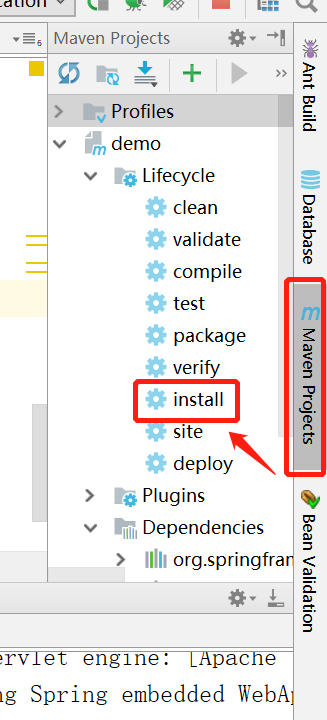
3、运行install即可生成,运行10秒即可停止,不用等全部运行完
2、在包下springWS\src\main\java\org\tempuri生成的文件,其中PlmWsMainRequest和PlmWsMainResponse是用于传输请求的参数和返回的参数
(1)ObjectFactory.java
//
// 此文件是由 JavaTM Architecture for XML Binding (JAXB) 引用实现 v2.2.7 生成的
// 请访问 <a href="http://java.sun.com/xml/jaxb">http://java.sun.com/xml/jaxb</a>
// 在重新编译源模式时, 对此文件的所有修改都将丢失。
// 生成时间: 2021.01.13 时间 05:01:43 PM CST
//


package org.tempuri;

import javax.xml.bind.annotation.XmlRegistry;


/** * This object contains factory methods for each * Java content interface and Java element interface * generated in the org.tempuri package. * <p>An ObjectFactory allows you to programatically * construct new instances of the Java representation * for XML content. The Java representation of XML * content can consist of schema derived interfaces * and classes representing the binding of schema * type definitions, element declarations and model * groups. Factory methods for each of these are * provided in this class. * */
@XmlRegistry
public class ObjectFactory {


    /** * Create a new ObjectFactory that can be used to create new instances of schema derived classes for package: org.tempuri * */
    public ObjectFactory() {

    }

    /** * Create an instance of {@link PlmWsMainResponse } * */
    public PlmWsMainResponse createPlmWsMainResponse() {

        return new PlmWsMainResponse();
    }

    /** * Create an instance of {@link PlmWsMainRequest } * */
    public PlmWsMainRequest createPlmWsMainRequest() {

        return new PlmWsMainRequest();
    }

}
(2)package-info.java
//
// 此文件是由 JavaTM Architecture for XML Binding (JAXB) 引用实现 v2.2.7 生成的
// 请访问 <a href="http://java.sun.com/xml/jaxb">http://java.sun.com/xml/jaxb</a>
// 在重新编译源模式时, 对此文件的所有修改都将丢失。
// 生成时间: 2021.01.13 时间 05:01:43 PM CST
//

@javax.xml.bind.annotation.XmlSchema(namespace = "http://tempuri.org/", elementFormDefault = javax.xml.bind.annotation.XmlNsForm.QUALIFIED)
package org.tempuri;
(3)PlmWsMainRequest.java
//
// 此文件是由 JavaTM Architecture for XML Binding (JAXB) 引用实现 v2.2.7 生成的
// 请访问 <a href="http://java.sun.com/xml/jaxb">http://java.sun.com/xml/jaxb</a>
// 在重新编译源模式时, 对此文件的所有修改都将丢失。
// 生成时间: 2021.01.13 时间 05:01:43 PM CST
//
package org.tempuri;
import javax.xml.bind.annotation.XmlAccessType;
import javax.xml.bind.annotation.XmlAccessorType;
import javax.xml.bind.annotation.XmlElement;
import javax.xml.bind.annotation.XmlRootElement;
import javax.xml.bind.annotation.XmlType;
/** * <p>anonymous complex type的 Java 类。 * * <p>以下模式片段指定包含在此类中的预期内容。 * * <pre> * <complexType> * <complexContent> * <restriction base="{http://www.w3.org/2001/XMLSchema}anyType"> * <sequence> * <element name="UserToken" type="{http://www.w3.org/2001/XMLSchema}string"/> * <element name="IFaceCode" type="{http://www.w3.org/2001/XMLSchema}string"/> * <element name="BatchNumber" type="{http://www.w3.org/2001/XMLSchema}string"/> * <element name="Data" type="{http://www.w3.org/2001/XMLSchema}string"/> * </sequence> * </restriction> * </complexContent> * </complexType> * </pre> * * */
@XmlAccessorType(XmlAccessType.FIELD)
@XmlType(name = "", propOrder = {
"userToken",
"iFaceCode",
"batchNumber",
"data"
})
@XmlRootElement(name = "PlmWsMainRequest")
public class PlmWsMainRequest {
@XmlElement(name = "UserToken", required = true)
protected String userToken;
@XmlElement(name = "IFaceCode", required = true)
protected String iFaceCode;
@XmlElement(name = "BatchNumber", required = true)
protected String batchNumber;
@XmlElement(name = "Data", required = true)
protected String data;
/** * 获取userToken属性的值。 * * @return * possible object is * {@link String } * */
public String getUserToken() {
return userToken;
}
/** * 设置userToken属性的值。 * * @param value * allowed object is * {@link String } * */
public void setUserToken(String value) {
this.userToken = value;
}
/** * 获取iFaceCode属性的值。 * * @return * possible object is * {@link String } * */
public String getIFaceCode() {
return iFaceCode;
}
/** * 设置iFaceCode属性的值。 * * @param value * allowed object is * {@link String } * */
public void setIFaceCode(String value) {
this.iFaceCode = value;
}
/** * 获取batchNumber属性的值。 * * @return * possible object is * {@link String } * */
public String getBatchNumber() {
return batchNumber;
}
/** * 设置batchNumber属性的值。 * * @param value * allowed object is * {@link String } * */
public void setBatchNumber(String value) {
this.batchNumber = value;
}
/** * 获取data属性的值。 * * @return * possible object is * {@link String } * */
public String getData() {
return data;
}
/** * 设置data属性的值。 * * @param value * allowed object is * {@link String } * */
public void setData(String value) {
this.data = value;
}
}
(4)PlmWsMainResponse.java
//
// 此文件是由 JavaTM Architecture for XML Binding (JAXB) 引用实现 v2.2.7 生成的
// 请访问 <a href="http://java.sun.com/xml/jaxb">http://java.sun.com/xml/jaxb</a>
// 在重新编译源模式时, 对此文件的所有修改都将丢失。
// 生成时间: 2021.01.13 时间 05:01:43 PM CST
//
package org.tempuri;
import javax.xml.bind.annotation.XmlAccessType;
import javax.xml.bind.annotation.XmlAccessorType;
import javax.xml.bind.annotation.XmlElement;
import javax.xml.bind.annotation.XmlRootElement;
import javax.xml.bind.annotation.XmlType;
/** * <p>anonymous complex type的 Java 类。 * * <p>以下模式片段指定包含在此类中的预期内容。 * * <pre> * <complexType> * <complexContent> * <restriction base="{http://www.w3.org/2001/XMLSchema}anyType"> * <sequence> * <element name="ResponseData" type="{http://www.w3.org/2001/XMLSchema}string"/> * <element name="ReturnCode" type="{http://www.w3.org/2001/XMLSchema}string"/> * <element name="ReturnMessage" type="{http://www.w3.org/2001/XMLSchema}string"/> * </sequence> * </restriction> * </complexContent> * </complexType> * </pre> * * */
@XmlAccessorType(XmlAccessType.FIELD)
@XmlType(name = "", propOrder = {
"responseData",
"returnCode",
"returnMessage"
})
@XmlRootElement(name = "PlmWsMainResponse")
public class PlmWsMainResponse {
@XmlElement(name = "ResponseData", required = true)
protected String responseData;
@XmlElement(name = "ReturnCode", required = true)
protected String returnCode;
@XmlElement(name = "ReturnMessage", required = true)
protected String returnMessage;
/** * 获取responseData属性的值。 * * @return * possible object is * {@link String } * */
public String getResponseData() {
return responseData;
}
/** * 设置responseData属性的值。 * * @param value * allowed object is * {@link String } * */
public void setResponseData(String value) {
this.responseData = value;
}
/** * 获取returnCode属性的值。 * * @return * possible object is * {@link String } * */
public String getReturnCode() {
return returnCode;
}
/** * 设置returnCode属性的值。 * * @param value * allowed object is * {@link String } * */
public void setReturnCode(String value) {
this.returnCode = value;
}
/** * 获取returnMessage属性的值。 * * @return * possible object is * {@link String } * */
public String getReturnMessage() {
return returnMessage;
}
/** * 设置returnMessage属性的值。 * * @param value * allowed object is * {@link String } * */
public void setReturnMessage(String value) {
this.returnMessage = value;
}
}
3、编写webservice(主要是业务逻辑)
springWS\src\main\java\com\example\demo\webservice\PlmEndPoint.java
package com.example.demo.webservice;


import org.tempuri.PlmWsMainResponse;
import org.tempuri.PlmWsMainRequest;
import org.springframework.ws.server.endpoint.annotation.Endpoint;
import org.springframework.ws.server.endpoint.annotation.PayloadRoot;
import org.springframework.ws.server.endpoint.annotation.RequestPayload;
import org.springframework.ws.server.endpoint.annotation.ResponsePayload;

import java.util.Date;

@Endpoint
public class PlmEndPoint {

    private static final String NAMESPACE_URI = "http://tempuri.org/";
    @PayloadRoot(namespace = NAMESPACE_URI, localPart = "PlmWsMainRequest")
    @ResponsePayload
    public PlmWsMainResponse responsePimData(@RequestPayload PlmWsMainRequest request) {

        Date startTime = new Date();
        PlmWsMainResponse response = new PlmWsMainResponse();
        String batchNumber = request.getBatchNumber();
        String iFaceCode = request.getIFaceCode();
        String xmlInfo =request.getData();
        System.out.println(xmlInfo);

        response.setReturnCode("S");
        response.setReturnMessage("sdfsdfsd");
        response.setResponseData("111");
        return response;
    }
}
4、发布服务,注意:这个发布类最好与启动类同一目录下
package com.example.demo;


import org.springframework.boot.web.servlet.ServletRegistrationBean;
import org.springframework.context.ApplicationContext;
import org.springframework.context.annotation.Bean;
import org.springframework.context.annotation.Configuration;
import org.springframework.core.io.ClassPathResource;
import org.springframework.ws.config.annotation.EnableWs;
import org.springframework.ws.config.annotation.WsConfigurerAdapter;
import org.springframework.ws.transport.http.MessageDispatcherServlet;
import org.springframework.ws.wsdl.wsdl11.DefaultWsdl11Definition;
import org.springframework.xml.xsd.SimpleXsdSchema;
import org.springframework.xml.xsd.XsdSchema;

@EnableWs
@Configuration
public class WebServiceConfig extends WsConfigurerAdapter {

    @Bean
    public ServletRegistrationBean messageDispatcherServlet(ApplicationContext applicationContext) {

        System.out.println("ServletRegistrationBean服务启动");
        MessageDispatcherServlet servlet = new MessageDispatcherServlet();
        servlet.setApplicationContext(applicationContext);
        servlet.setTransformWsdlLocations(true);
        return new ServletRegistrationBean(servlet,"/ws/wsapi/*");

    }
    @Bean(name = "plm")
    public DefaultWsdl11Definition mesWsdl11Definition(XsdSchema mesSchema) {

        DefaultWsdl11Definition wsdl11Definition = new DefaultWsdl11Definition();
        wsdl11Definition.setPortTypeName("PlmPort");
        wsdl11Definition.setLocationUri("/ws/wsapi/plm");
        wsdl11Definition.setSchema(mesSchema);
        return wsdl11Definition;
    }

    @Bean
    public XsdSchema mesSchema() {

        return new SimpleXsdSchema(new ClassPathResource("pim.xsd"));
    }

}
3、启动运行启动类
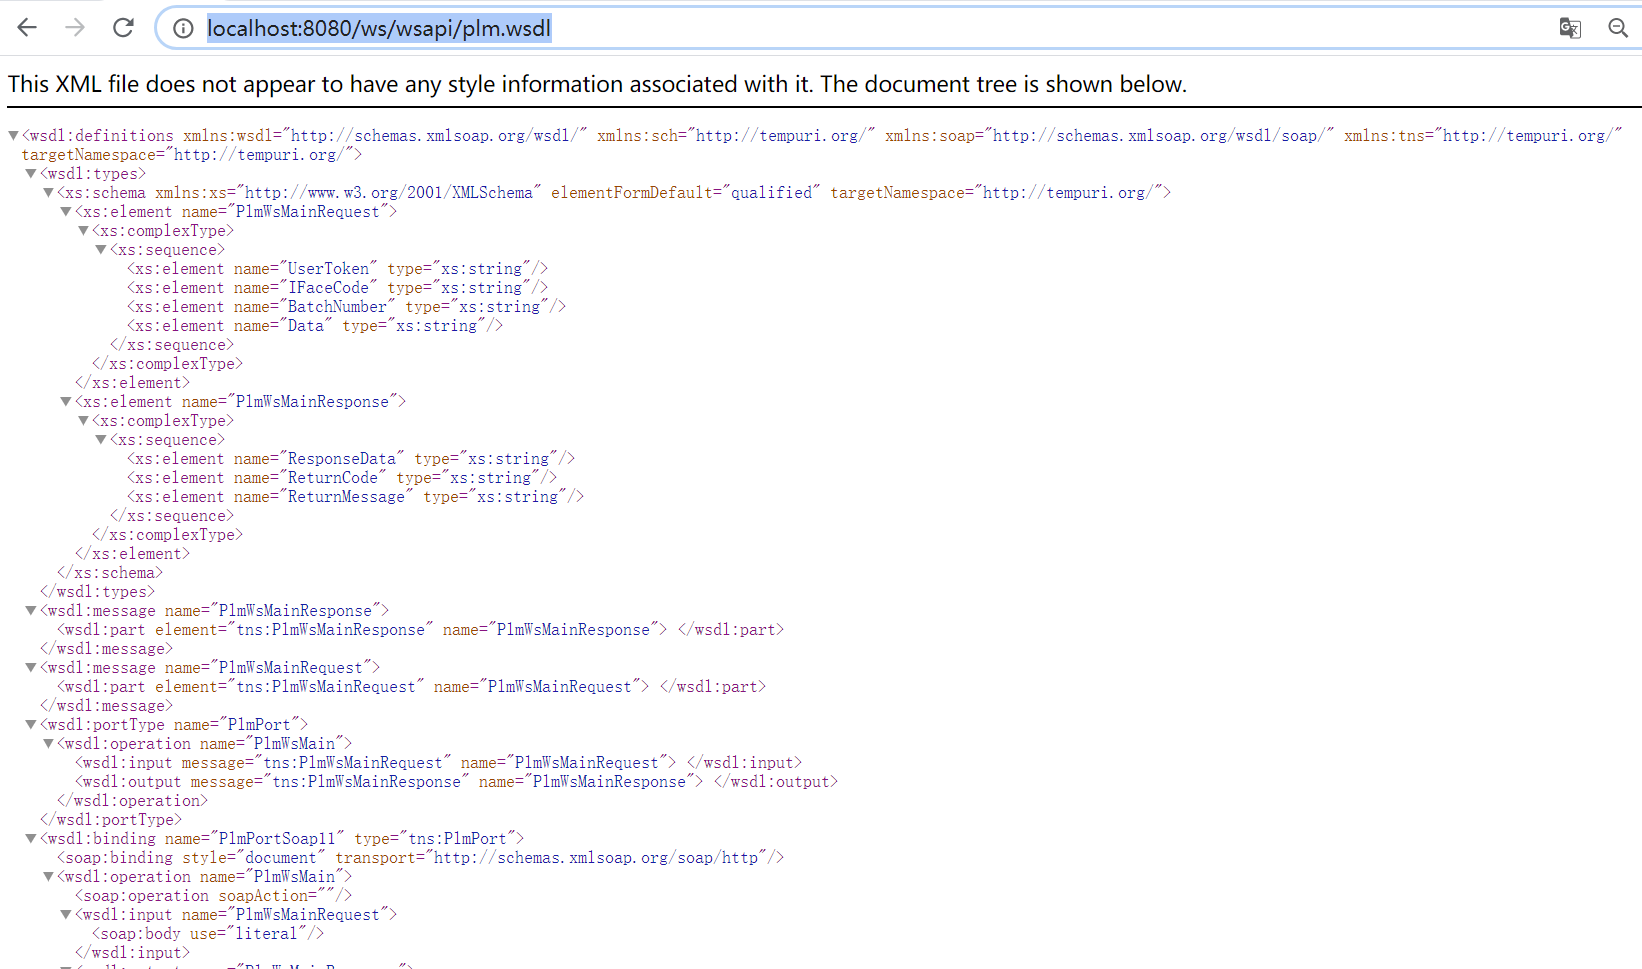
3.1访问http://localhost:8080/ws/wsapi/plm.wsdl,如下图所示,webservice服务端即发布完成
二、创建客户端
1、创建一个简单的spring initializr项目
2、打开服务端的服务(启动启动类)
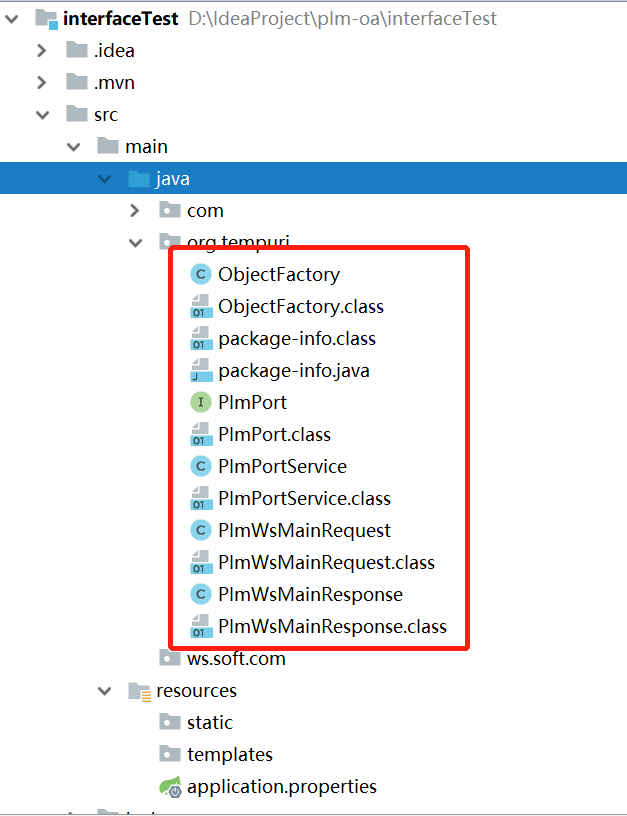
3、指定文件夹,路径在项目下,运行命令
wsimport -keep http://localhost:8080/ws/wsapi/plm.wsdl(本人生成的路径:interfaceTest\src\main\java),运行命令后会在指定文件下生成客户端代码,如下图
4、创建一个main类,进行测试
package com.example.demo.mainTest;
import org.apache.logging.log4j.util.Base64Util;
import org.tempuri.*;
import static org.bouncycastle.crypto.tls.ConnectionEnd.client;
public class SpringWSTest {
public static void main(String[] args) {
PlmPortService plmPortService=new PlmPortService();
PlmPort plmPortSoap11 = plmPortService.getPlmPortSoap11();
PlmWsMainRequest plmWsMainRequest=new PlmWsMainRequest();
plmWsMainRequest.setBatchNumber("batchNum");
plmWsMainRequest.setData(Base64Util.encode("data"));
plmWsMainRequest.setIFaceCode("IFACE_CODE");
plmWsMainRequest.setUserToken("token");
PlmWsMainResponse pimWsMainResponse = plmPortSoap11.plmWsMain(plmWsMainRequest);
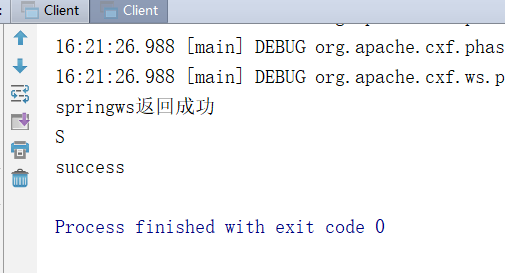
System.out.println(pimWsMainResponse.getReturnMessage());
System.out.println(pimWsMainResponse.getReturnCode()); System.out.println(pimWsMainResponse.getReturnData());
}
}
运行该main方法,控制台如下显示时,yeah,表示成功,
发布者:全栈程序员-站长,转载请注明出处:https://javaforall.net/186479.html原文链接:https://javaforall.net


