
大家好,又见面了,我是你们的朋友全栈君。如果您正在找激活码,请点击查看最新教程,关注关注公众号 “全栈程序员社区” 获取激活教程,可能之前旧版本教程已经失效.最新Idea2022.1教程亲测有效,一键激活。
Jetbrains全系列IDE稳定放心使用
综合案例2.0-久坐提醒系统
简介
长期久坐会损害身体健康,本案例就是为了提醒人们不要坐太久而设计的一个提醒系统。当你长时间在工位上坐着,他会通过顶顶提醒你,让你每隔一段时间活动一下筋骨。久坐提醒设备是通过人体红外检测周围区域是否有人移动,当累计检测时长超过设定值,将会在钉钉群发来提醒,每次回到座位会重新开始计时。并且提醒时间可以自行调节,默认30分钟。
人体红外传感器
-
人体红外传感器是以探测人体辐射为目标的。所以热释电元件对波长为10UM左右的红外辐射必须非常敏感。
-
为了仅仅对人体的红外辐射敏感,在它的辐射照面通常覆盖有特殊的菲泥尔滤光片,使环境的干扰受到明显的控制作用。
-
传感器上有两个调节旋钮
 1、调节距离电位器顺时针旋转,感应距离增大(约 7 米),反之,感应距离减小(约 3 米)。
 2、调节延时电位器顺时针旋转,感应延时加长(约300S),反之,感应延时减短(约 0.5S)。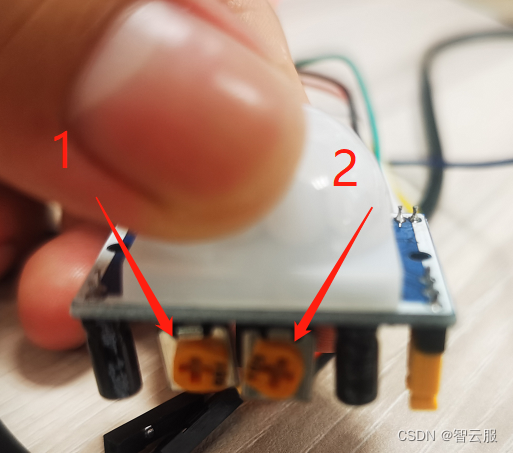

准备
本案例需要的硬件
| 器材 | 数量 |
|---|---|
| HaaS506开发板 | 1 |
| 人体红外传感器 | 1 |
| SIM卡 | 1 |
| 杜邦线 | 若干 |
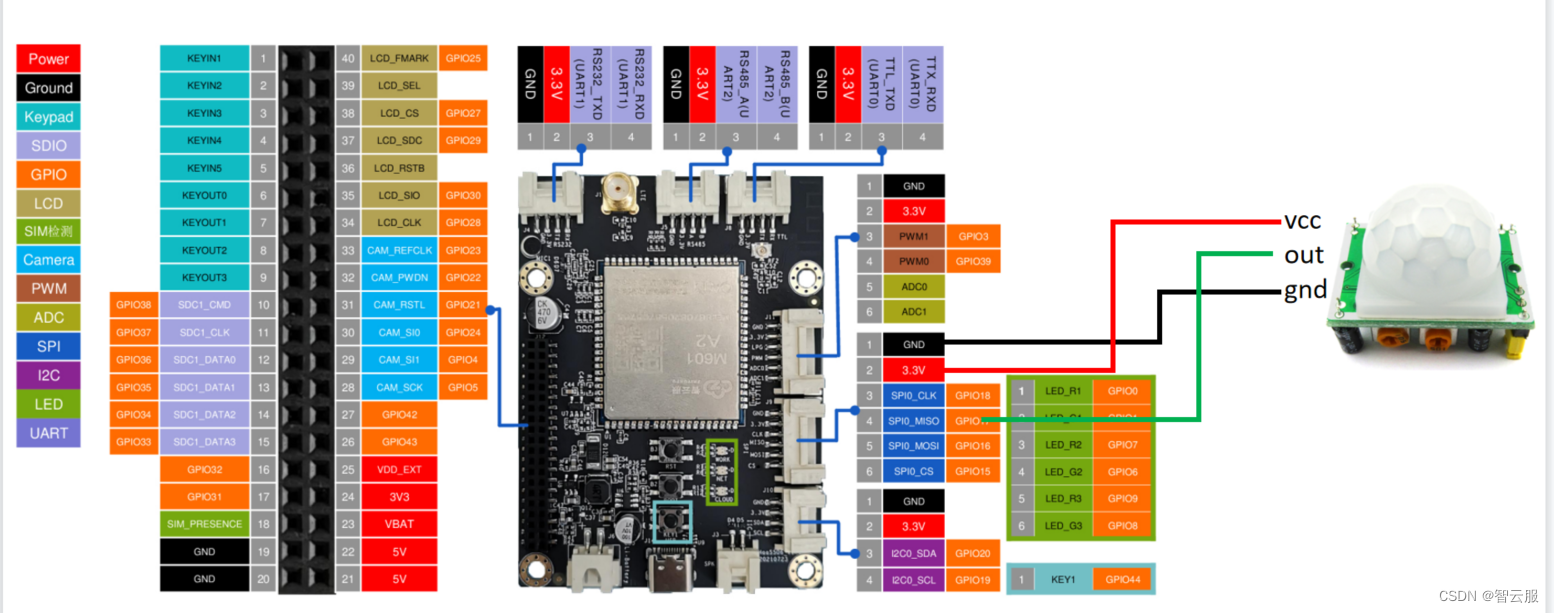
硬件连接图
代码流程
1、连接阿里云平台。
2、传感器检测人体活动,计算人体久坐时间,当时间超过设定值,将信号上传阿里云平台。
3、设置云端与钉钉机器人,当满足条件时发出提醒。
功能实现
1、物联网平台开发
第一次使用物联网平台的读者,需要开通实例后使用物联网平台功能。也可以使用免费的公共实例进行开发,在阿里云物联网平台中,左上角选择‘华东2-上海’,点击‘公共实例’,即可开通。
1、平台产品创建可参考haas506 2.0开发教程-aliyunIoT
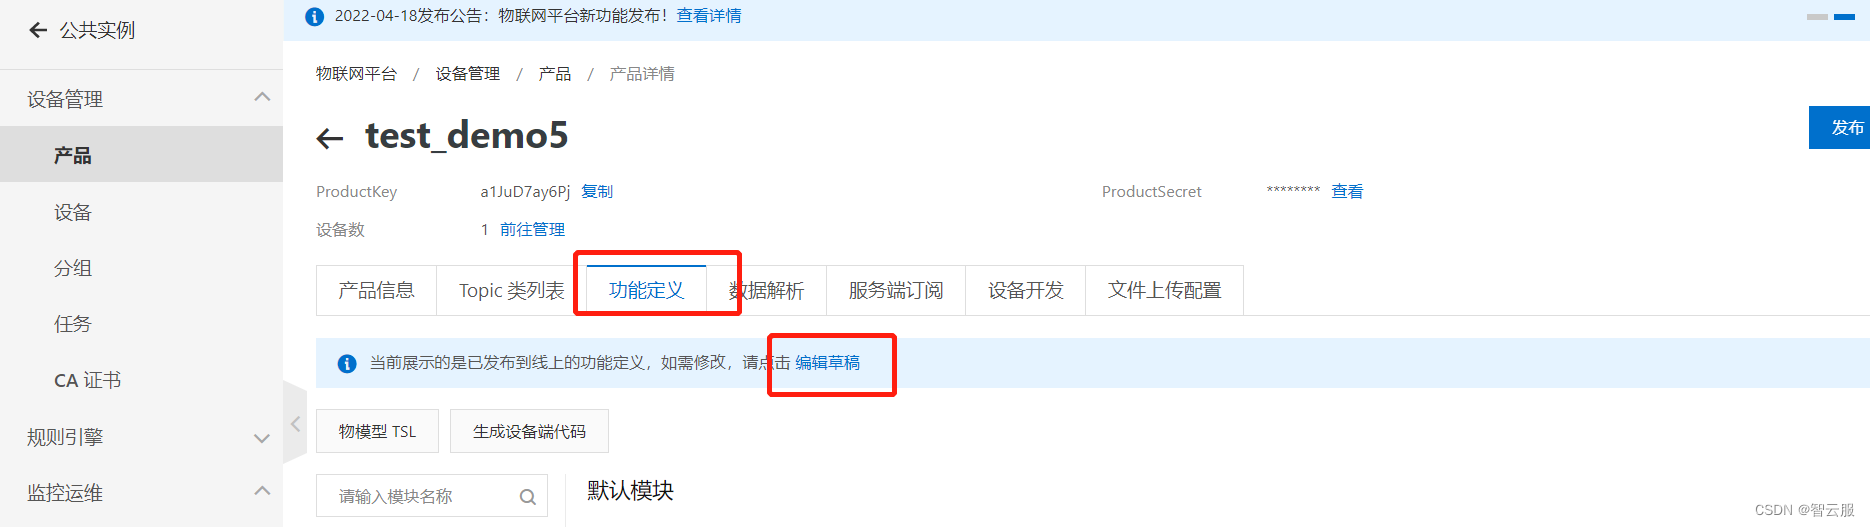
2、创建产品属性(添加物模型)
选择产品功能定义–编辑草稿
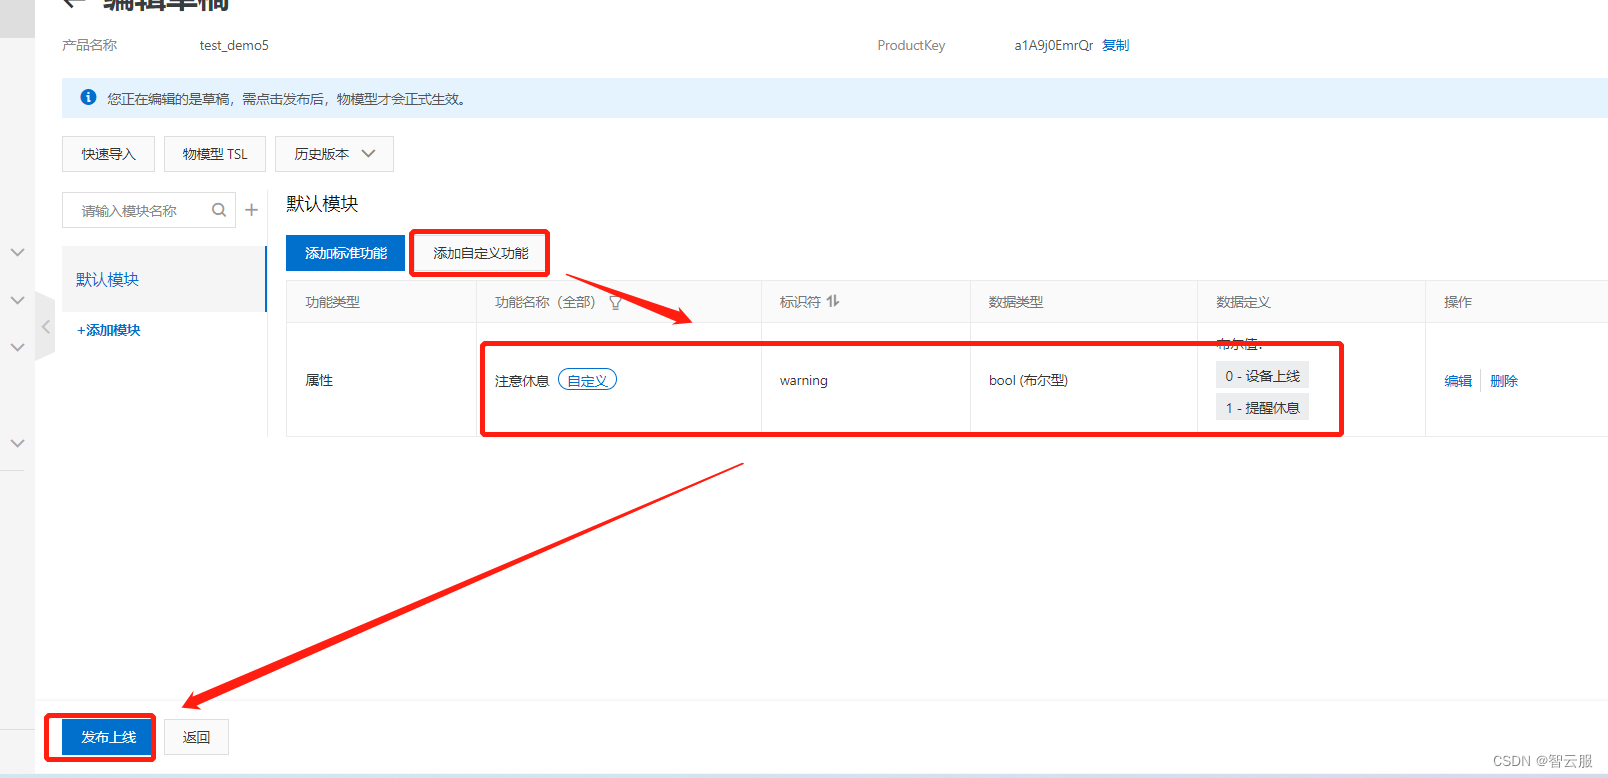
- 添加自定义功能
- 设置标识符、数据类型、读写类型参数,标识符(light)要与代码保持一致。点击确定。
- 发布上线,点击确定。
2、设备端开发
- 第一次使用开发板的读者可以按照haas5062.0开发教程-导学篇搭建开发环境。
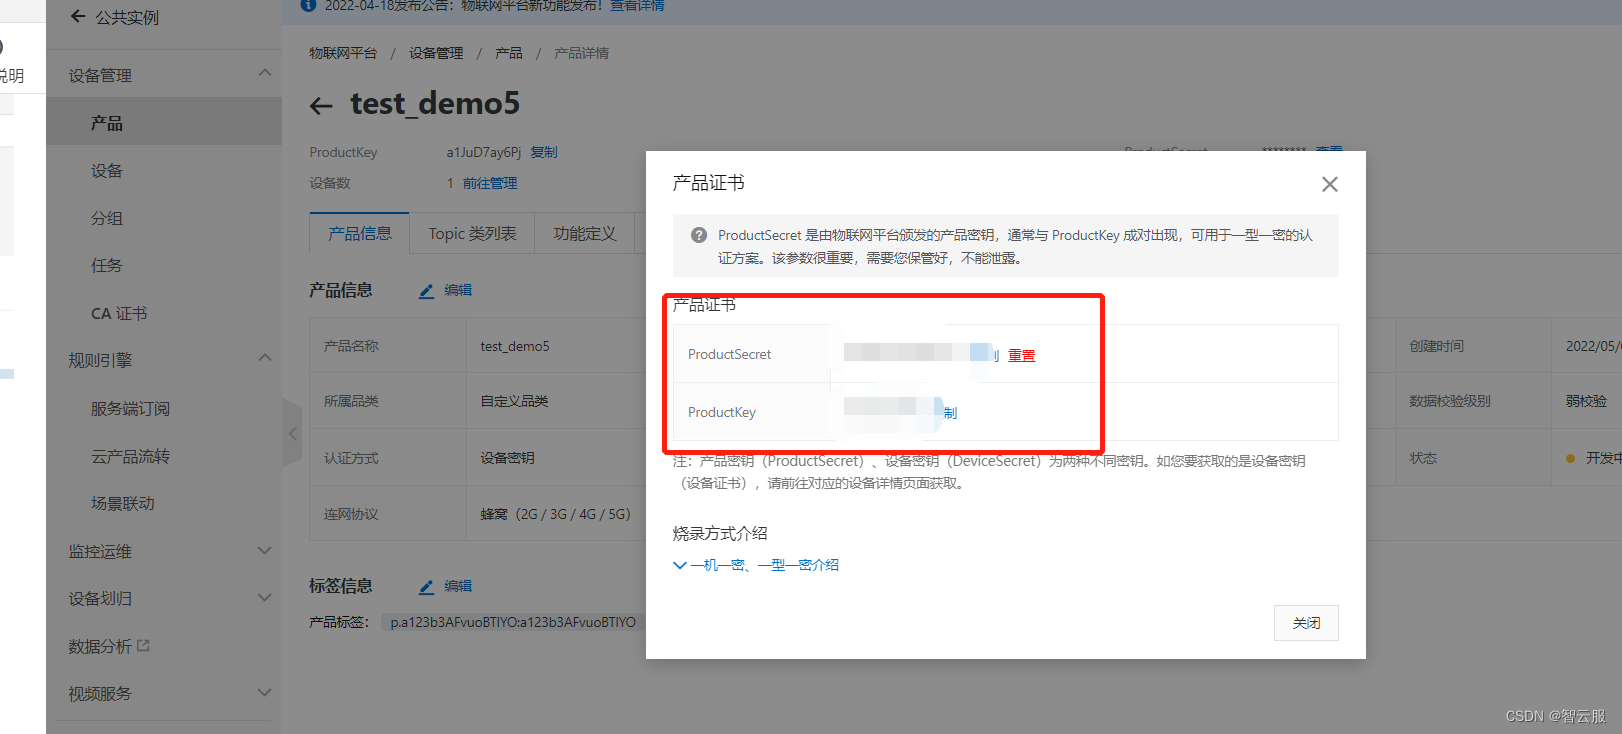
- 搭建完后复制以下代码到Visual Studio Code,复制产品证书到代码相应位置。
- 2.2版本获取IMEI号接口有更新,需要更改以下内容(Ctrl+F 查找modem)
# 获取设备的IMEI 作为deviceName 进行动态注册
deviceName = modem.info.getDevImei()
...
main.py(改149、150行产品信息)
# coding=utf-8
from driver import GPIO
from driver import PWM
from driver import TIMER
import network
import ujson
import utime as time
import modem
from  aliyunIoT import Device
import kv
import sntp
import net


#当iot设备连接到物联网平台的时候触发'connect' 事件
def on_connect(data):
    global module_name,default_ver,productKey,deviceName,deviceSecret,on_trigger,on_download,on_verify,on_upgrade
    print('***** connect lp succeed****')
    data_handle = {
   }
    data_handle['device_handle'] = device.getDeviceHandle()


#当连接断开时,触发'disconnect'事件
def on_disconnect():
    print('linkkit is disconnected')


#当iot云端下发属性设置时,触发'props'事件
def on_props(request):
    global warns
    params=request['params']
    params=eval(params)
    if 'warning' in params:
        warns=params['warning']
        upload_interval()


#当iot云端调用设备service时,触发'service'事件
def on_service(id,request):
    print('clound req id is {} , req is {}'.format(id,request))
#当设备跟iot平台通信过程中遇到错误时,触发'error'事件
def on_error(err):
    print('err msg is {} '.format(err))

#网络连接的回调函数
def on_4g_cb(args):
     global g_connect_status
     pdp = args[0]
     netwk_sta = args[1]
     if netwk_sta == 1:
         g_connect_status = True
     else:
         g_connect_status = False

#网络连接
def connect_network():
     global net,on_4g_cb,g_connect_status
     #NetWorkClient该类是一个单例类,实现网络管理相关的功能,包括初始化,联网,状态信息等.
     net = network.NetWorkClient()
     g_register_network = False
     if net._stagecode is not None and net._stagecode == 3 and net._subcode == 1:
         g_register_network = True
     else:
         g_register_network = False
     if g_register_network:
    #注册网络连接的回调函数on(self,id,func); 1代表连接,func 回调函数 ;return 0 成功
         net.on(1,on_4g_cb)
         net.connect(None)
     else:
         print('网络注册失败')
     while True:
         if g_connect_status:
             print('网络连接成功')
             break
         time.sleep_ms(20)

#动态注册回调函数
def on_dynreg_cb(data):
     global deviceSecret,device_dyn_resigter_succed
     deviceSecret = data
     device_dyn_resigter_succed = True


 # 连接物联网平台
def dyn_register_device(productKey,productSecret,deviceName):
    global on_dynreg_cb,device,deviceSecret,device_dyn_resigter_succed
    key = '_amp_customer_devicesecret'
    deviceSecretdict = kv.get(key)
    print("deviceSecretdict:",deviceSecretdict)
    if isinstance(deviceSecretdict,str):
        deviceSecret = deviceSecretdict

    if deviceSecretdict is None or deviceSecret is None:
        key_info = {

            'productKey': productKey  ,
            'productSecret': productSecret ,
            'deviceName': deviceName
            }
        # 动态注册一个设备,获取设备的deviceSecret
        #下面的if防止多次注册,当前若是注册过一次了,重启设备再次注册就会卡住,
        if not device_dyn_resigter_succed:
            device.register(key_info,on_dynreg_cb)


interval_data = {
   }
def upload_interval():
    global interval_data,warns
    interval_data["warning"]= warns
    interval_data_str=ujson.dumps(interval_data)
    data1={

        'params':interval_data_str
        }
    device.postProps(data1)


turn = 0
def every_second():
    global duration_time,begin_time,interval_time,turn,warns
    if hc.read()==1:
        if turn == 0:
            now_time=time.time()          #获取当前时间
            duration_time = (now_time - begin_time )/60
            print(round(duration_time,2))
            if int(duration_time) >= interval_time:
                warns= 1
                upload_interval()
                time.sleep_ms(500)
                begin_time = time.time()      #获取当前时间
        else:
            begin_time = time.time()      #获取当前时间
            turn = 0
            warns = 0
    else:
        turn +=1
        warns = 0
        print('leave the seat')


if __name__ == '__main__':
    ICCID=None
    g_connect_status = False
    net = None
    device = None
    deviceSecret = None
    deviceName = None
    #替换下列产品信息
    ###################################
    productKey = "a1A9j0EmrQr"
    productSecret = "21ATZN5PR2iuv08w"
    ###################################
    device_dyn_resigter_succed = False

    # 连接网络
    connect_network()
     # 获取设备的IMEI 作为deviceName 进行动态注册
    #2.2版本改为
    #deviceName = modem.info.getDevImei()
    deviceName = modem.getDevImei()
    #获取设备的ICCID
    ICCID=modem.sim.getIccid()
    #初始化物联网平台Device类,获取device实例
    device = Device()
    if deviceName is not None and len(deviceName) > 0 :
     #动态注册一个设备
        dyn_register_device(productKey,productSecret,deviceName)
    else:
        print("获取设备IMEI失败,无法进行动态注册")
    while deviceSecret is None:
        time.sleep(0.2)
    print('动态注册成功:' + deviceSecret)

    key_info = {

        'region' : 'cn-shanghai' ,
        'productKey': productKey ,
        'deviceName': deviceName ,
        'deviceSecret': deviceSecret ,
        'keepaliveSec': 60,
        }
    #打印设备信息
    print(key_info)

    #device.ON_CONNECT 是事件,on_connect是事件处理函数/回调函数
    device.on(device.ON_CONNECT,on_connect)
    device.on(device.ON_DISCONNECT,on_disconnect)
    device.on(device.ON_PROPS,on_props)
    device.on(device.ON_SERVICE,on_service)
    device.on(device.ON_ERROR,on_error)
    device.connect(key_info)

    #
    interval = 0   #初始化提醒bool
    interval_time = 30 #初始化提示时长
    time.sleep(2)
    # 上传提醒
    warns = 0
    upload_interval()
    #传感器使能
    hc=GPIO()
    hc.open('hc')
    sntp.settime()         #sntp 校时
    begin_time=time.time()          #获取当前时间

    while True:
        every_second()
        time.sleep_ms(500)
board.json
{

  "name": "haas506",
  "version": "2.0.0",
  "io": {

    "ADC0": {

      "type": "ADC",
      "port": 0,
      "sampling": 12000000
    },
    "ADC1": {

      "type": "ADC",
      "port": 1,
      "sampling": 12000000
    },
    "ADC2": {

      "type": "ADC",
      "port": 2,
      "sampling": 12000000
    },
    "qma8981": {

      "type": "I2C",
      "port": 1,
      "addrWidth": 7,
      "freq": 400000,
      "mode": "master",
      "devAddr": 18
    },
    "KEY1": {

      "type": "GPIO",
      "port": 44,
      "dir": "irq",
      "pull": "pullup",
      "intMode": "rising"
    },
    "led1": {

      "type": "GPIO",
      "port": 7,
      "dir": "output",
      "pull": "pulldown"
    },
    "led_g": {

      "type": "GPIO",
      "port": 32,
      "dir": "output",
      "pull": "pulldown"
    },
    "cs": {

      "type": "GPIO",
      "port": 15,
      "dir": "output",
      "pull": "pullup"
    },
    "hc":{

      "type":"GPIO",
      "port": 17,
      "dir": "input",
      "pull":"pullup"
    },
    "SPI0": {

      "type": "SPI",
      "port": 0,
      "mode": "master",
      "freq": 2000000
    },
    "serial1": {

      "type": "UART",
      "port": 0,
      "dataWidth": 8,
      "baudRate": 115200,
      "stopBits": 1,
      "flowControl": "disable",
      "parity": "none",
      "timeout": 1000
    },
    "serial2": {

      "type": "UART",
      "port": 1,
      "dataWidth": 8,
      "baudRate": 9600,
      "stopBits": 1,
      "flowControl": "disable",
      "parity": "none",
      "timeout": 1000
    },
    "serial3": {

      "type": "UART",
      "port": 2,
      "dataWidth": 8,
      "baudRate": 115200,
      "stopBits": 1,
      "flowControl": "disable",
      "parity": "none",
      "timeout": 1000
    }
  },
  "debugLevel": "ERROR",
  "repl": "enable",
  "replPort": 0
}
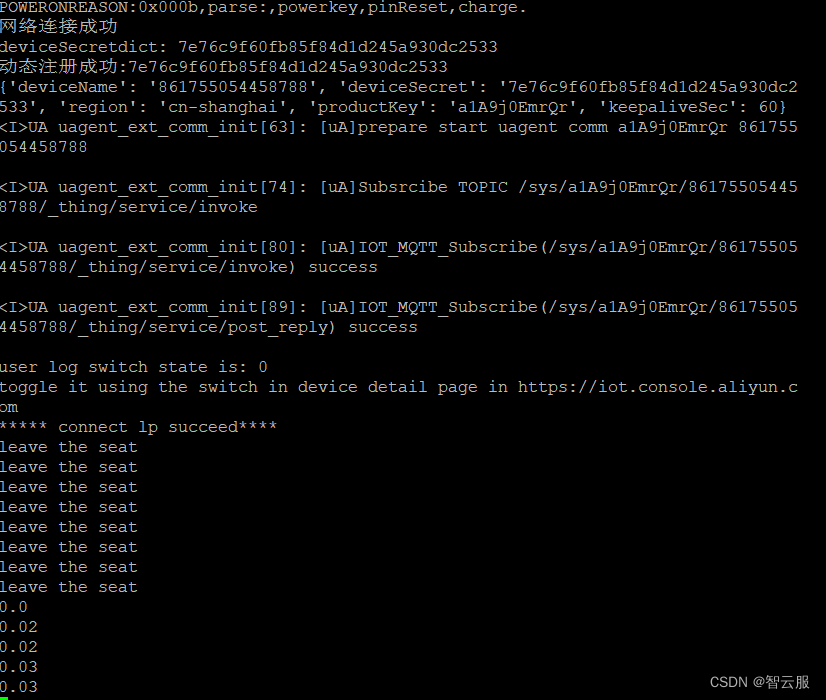
3、调试
1、串口调试工具log,网络连接成功–动态注册成功–打印根据传感器状态打印信息
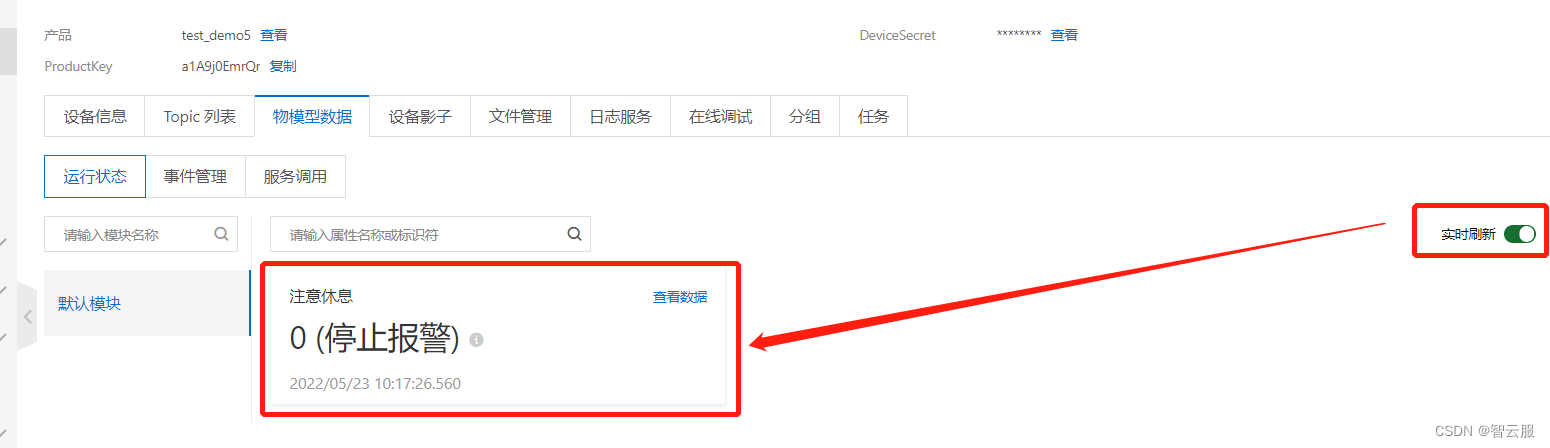
2、阿里云平台,打开实时刷新,物模型会即时显示lLED当前状态。
4、钉钉消息提醒
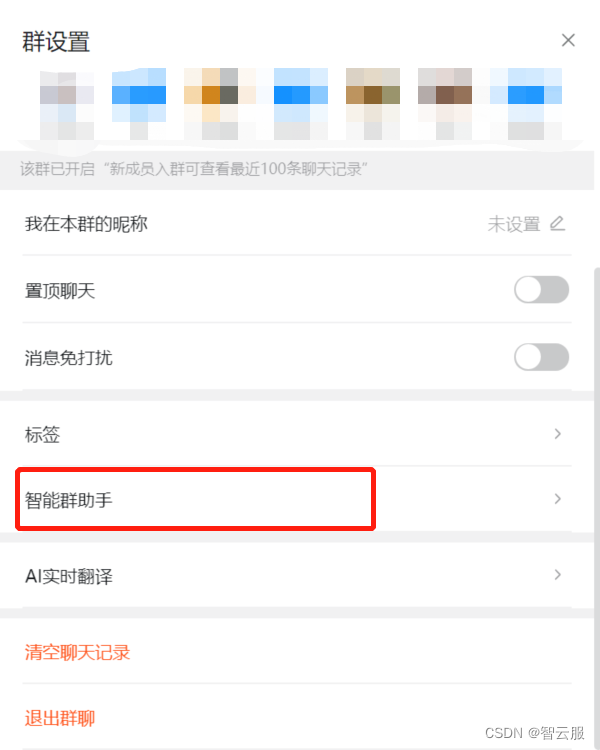
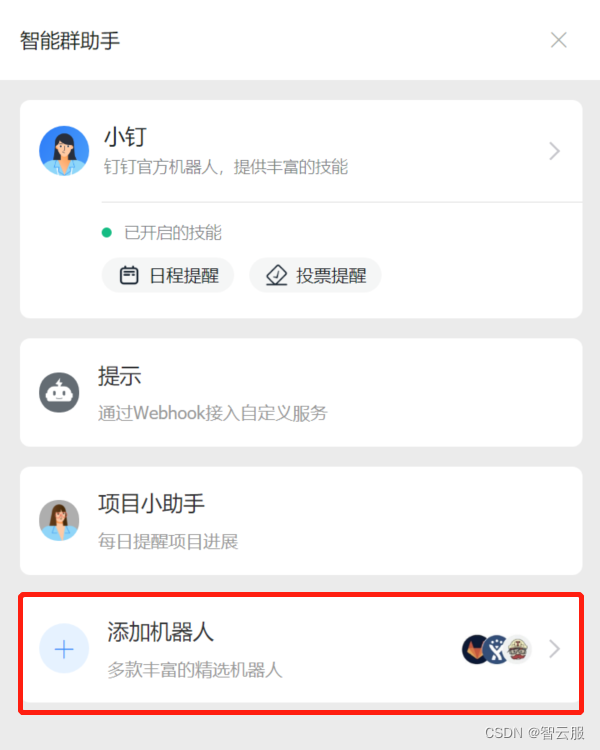
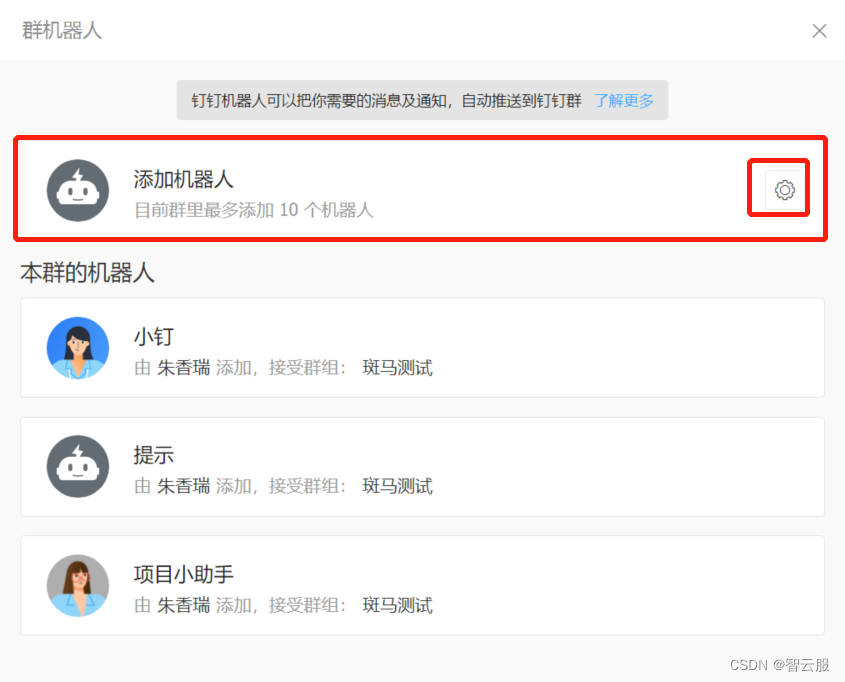
4.1添加钉钉机器人
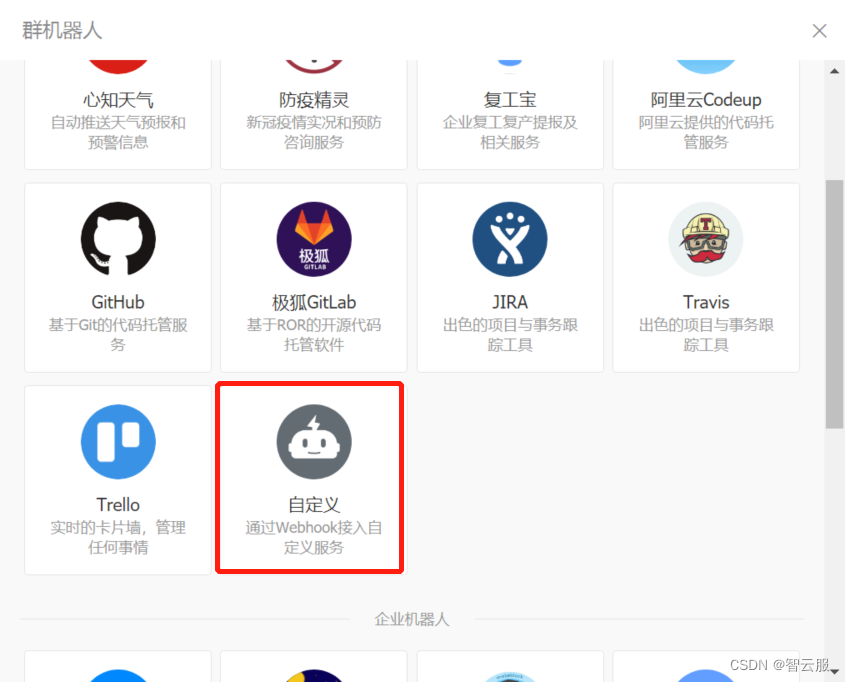
在钉钉创建一个群组并进入群设置→智能助手→添加机器人→自定义。
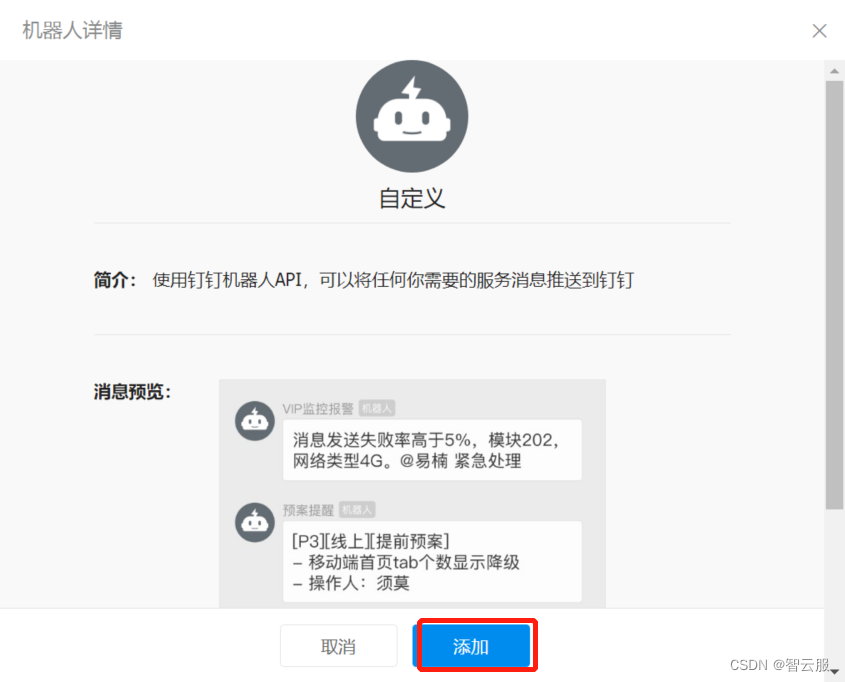
注意:自定义关键词要与平台物模型一致
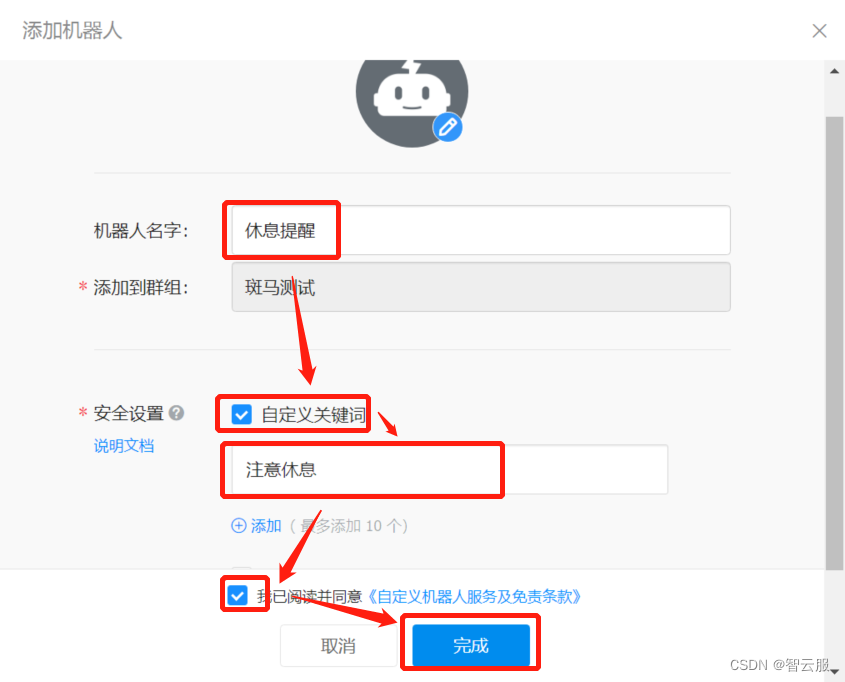
复制webhook地址,后面需要用到。

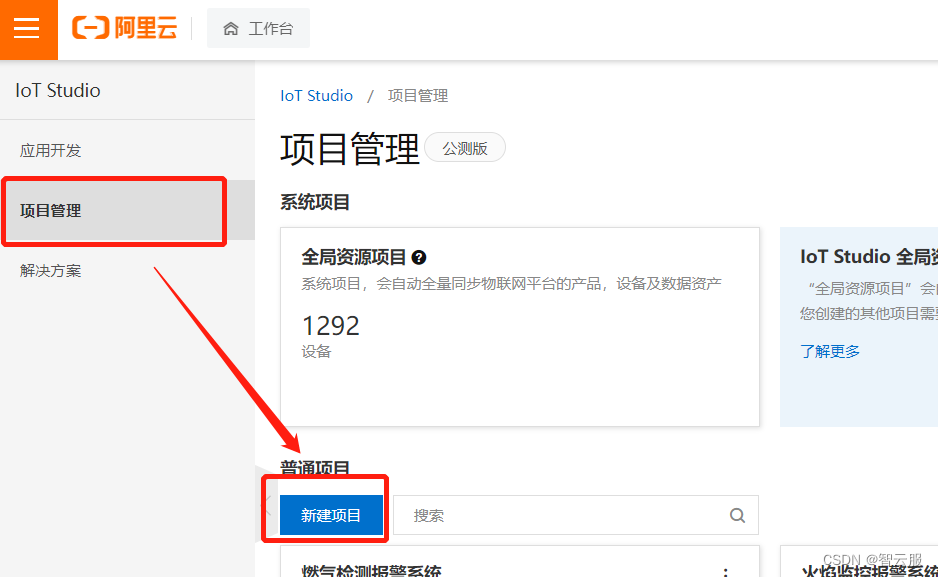
4.2、IoT Studio设置
进入IoT Studio产品页,开通服务后
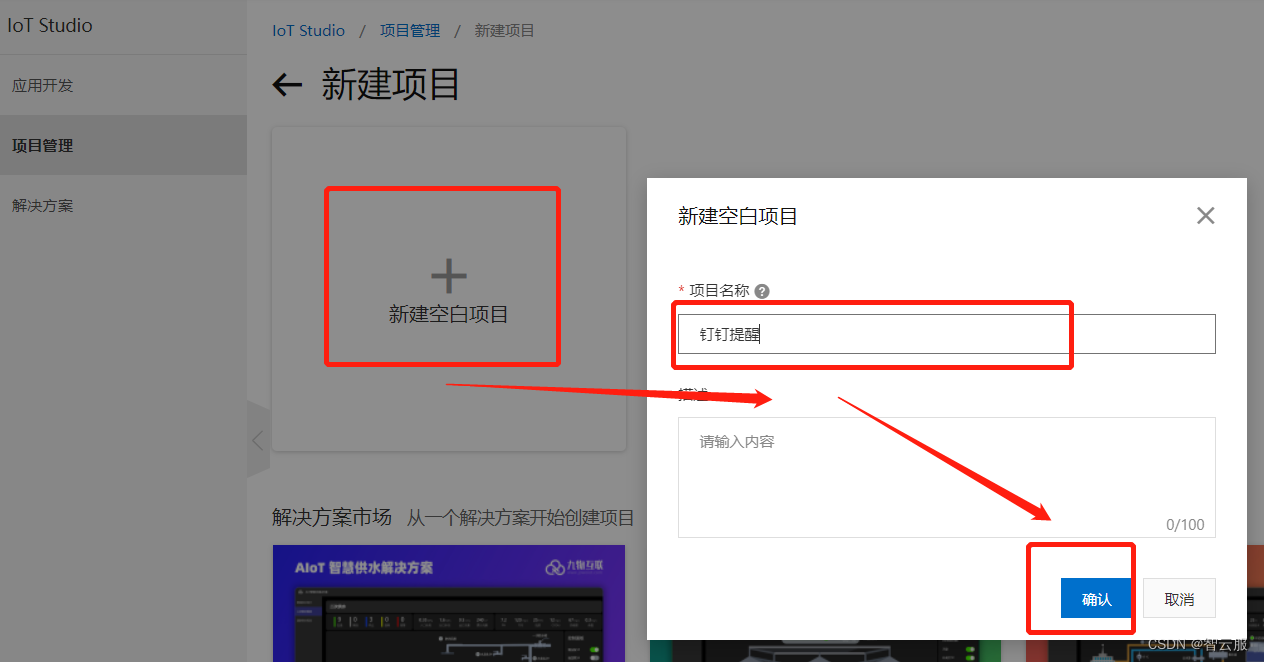
项目管理→新建项目
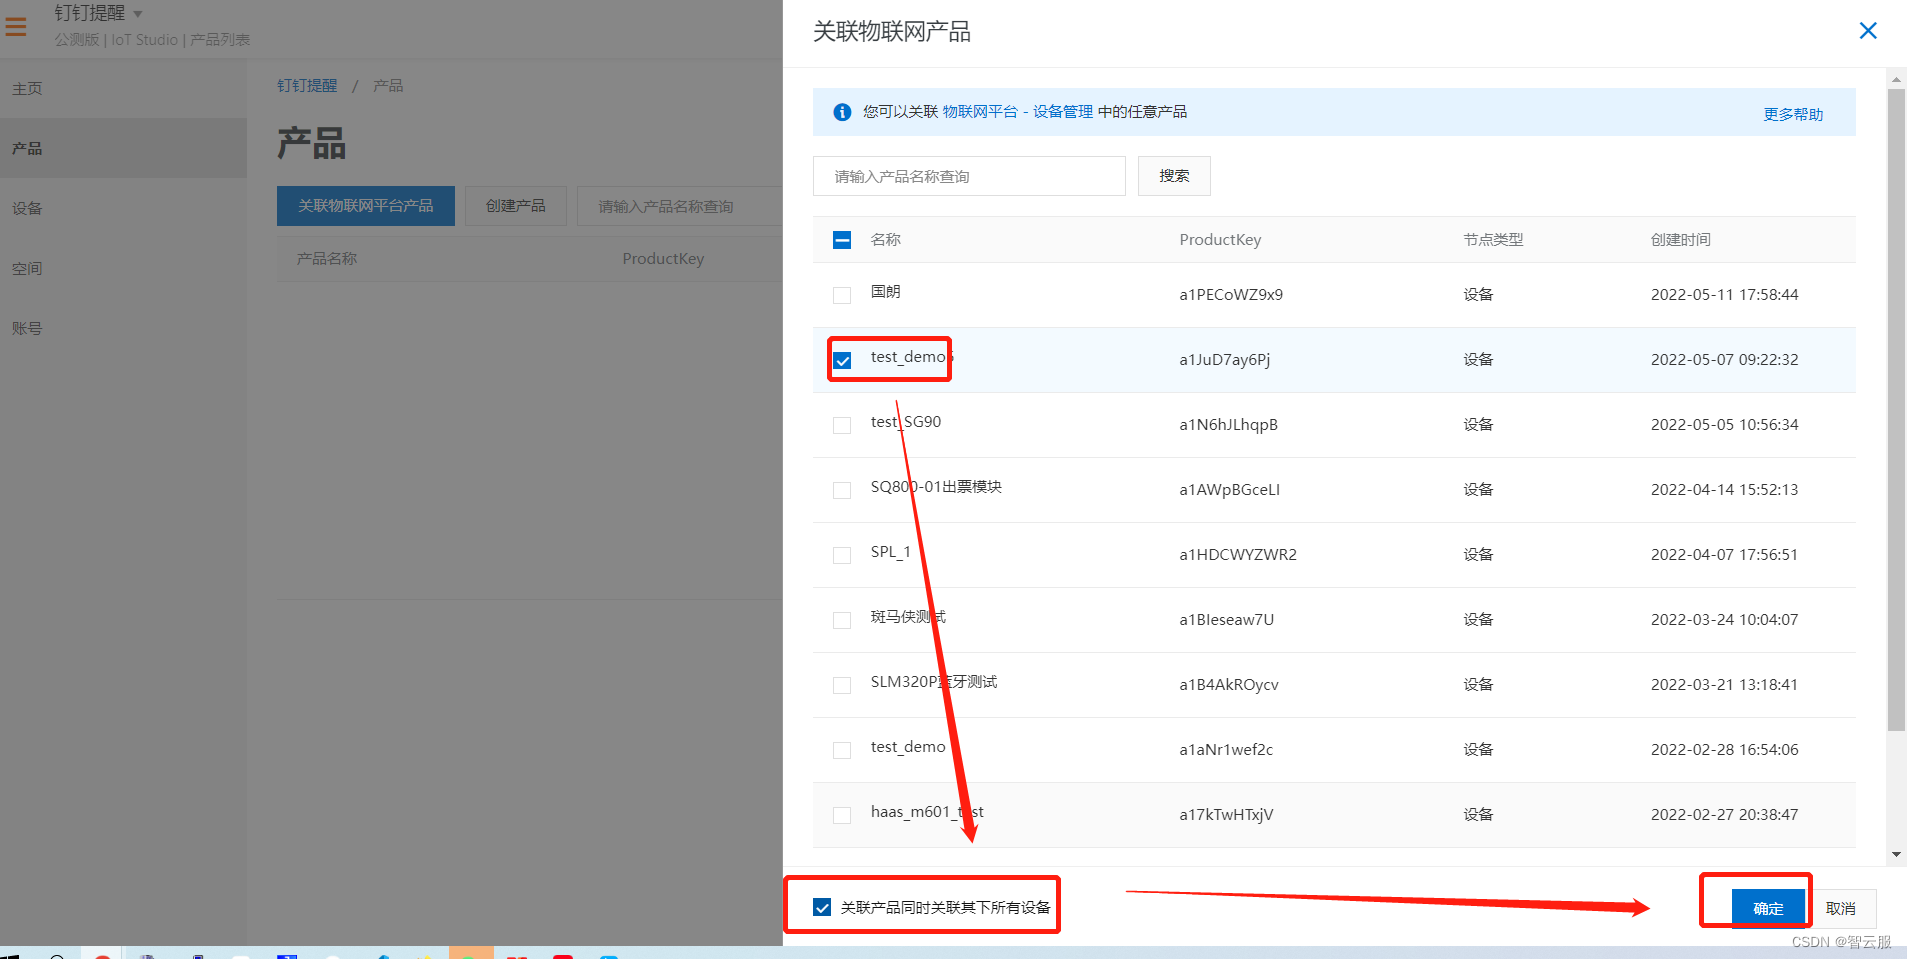
添加关联产品、设备
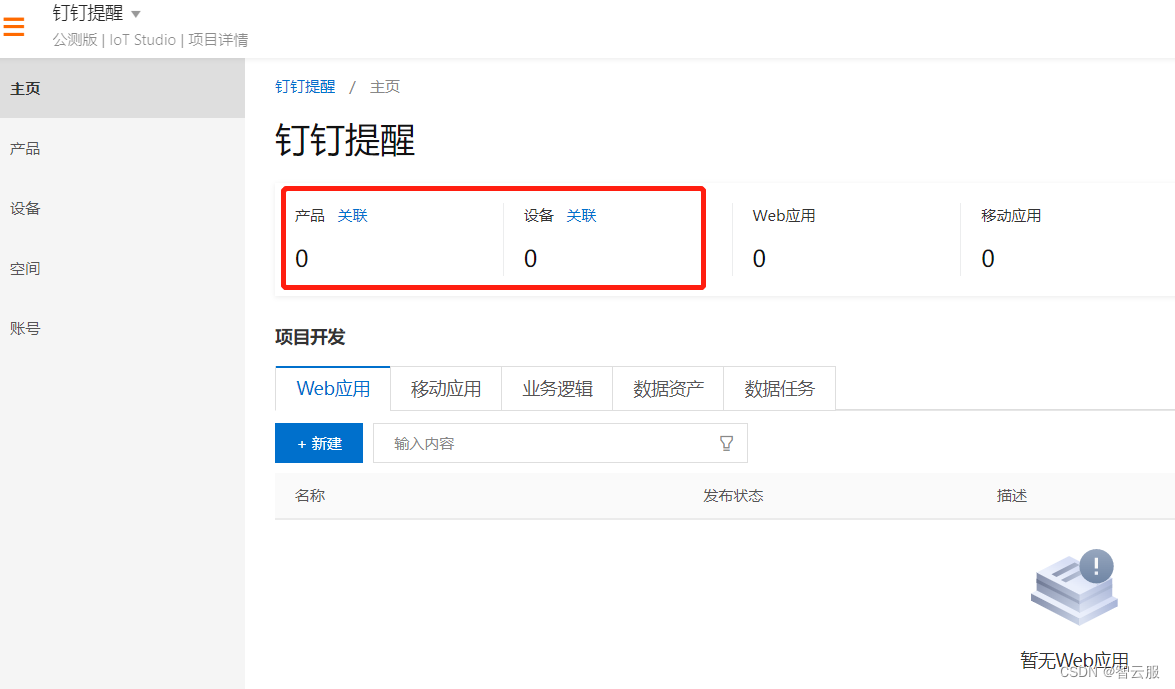
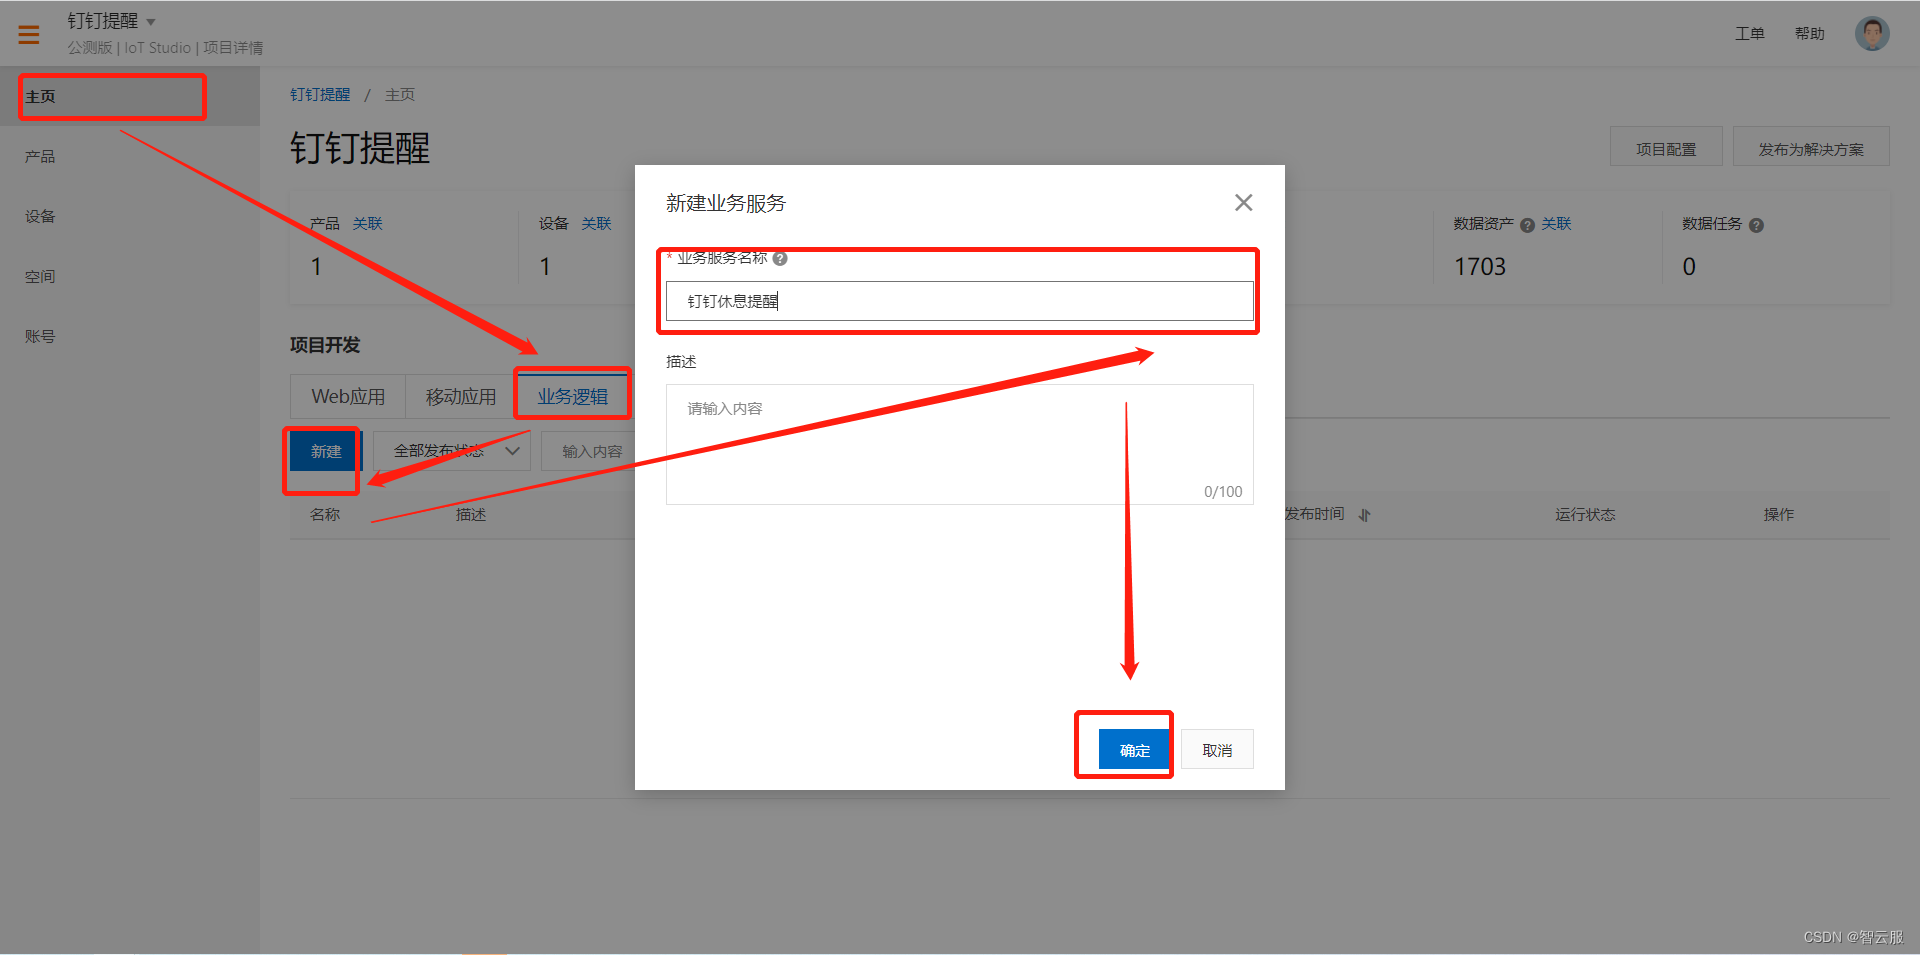
返回主页,新建空白业务逻辑。
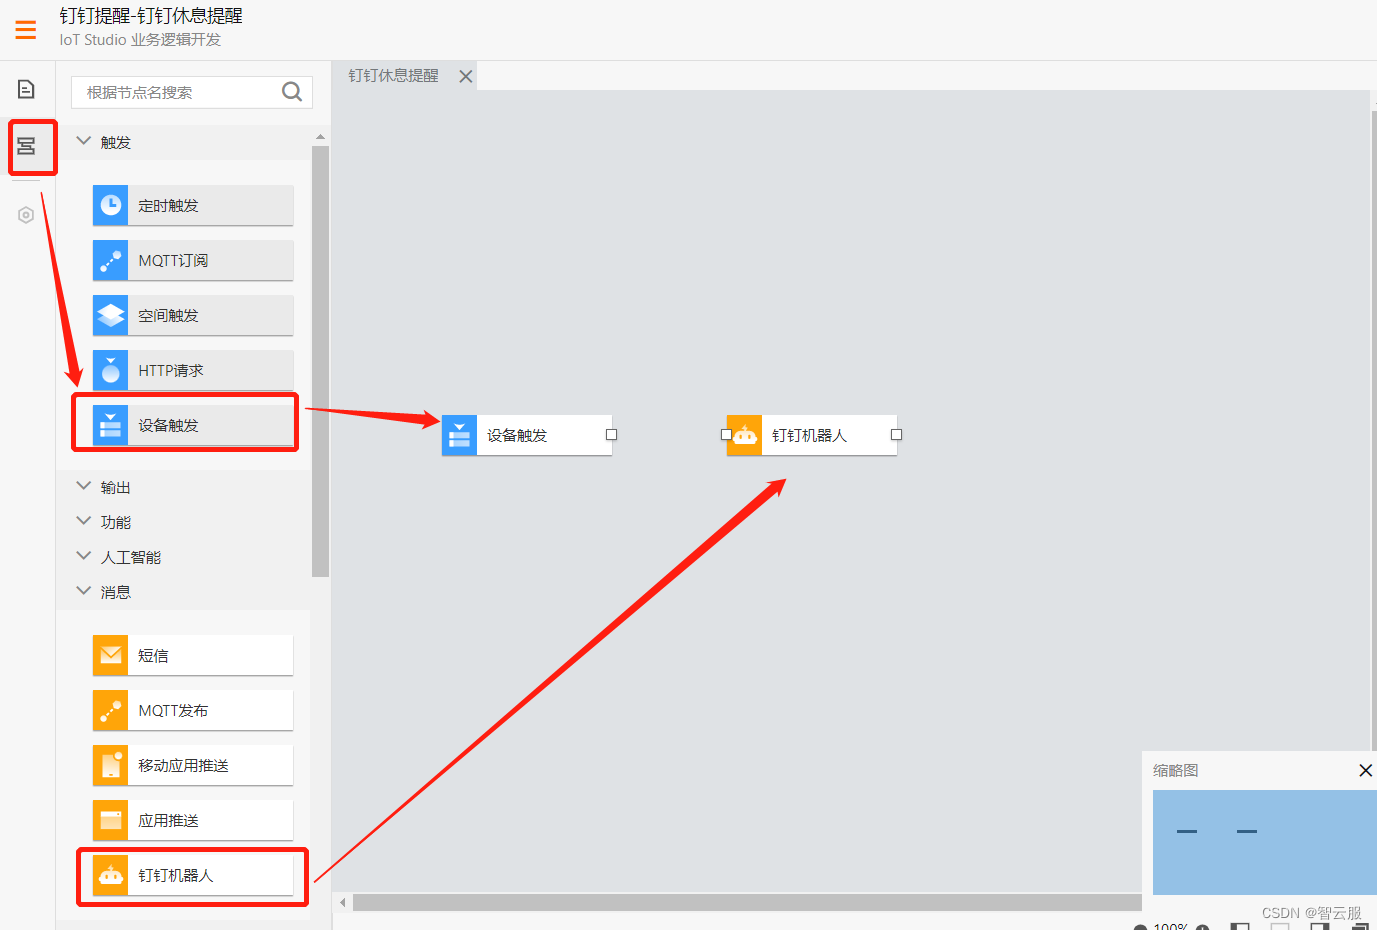
将节点拖入操作区
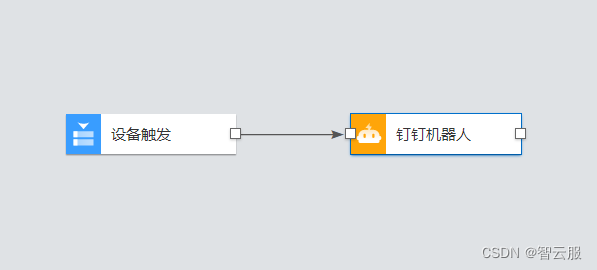
节点用线连接。
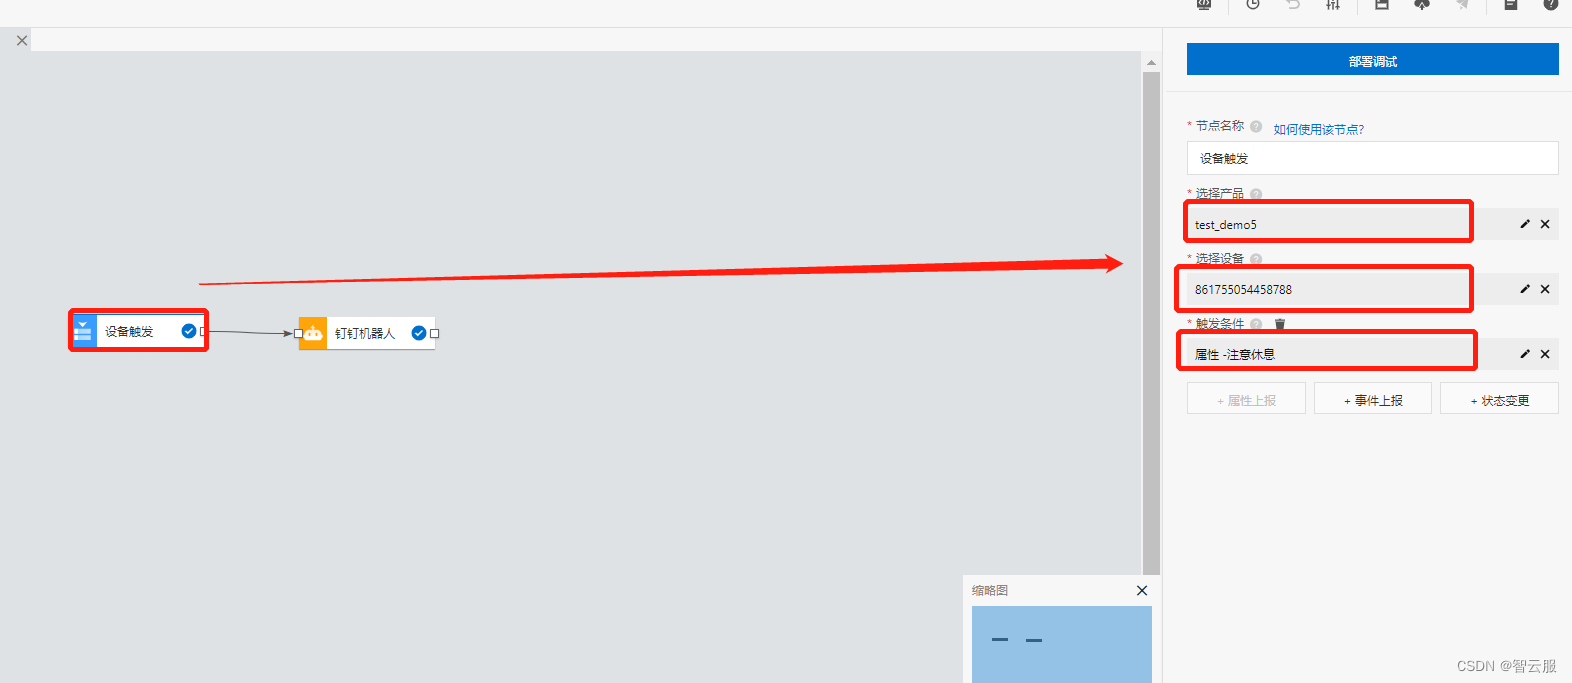
配置设备触发节点
选择调试设备
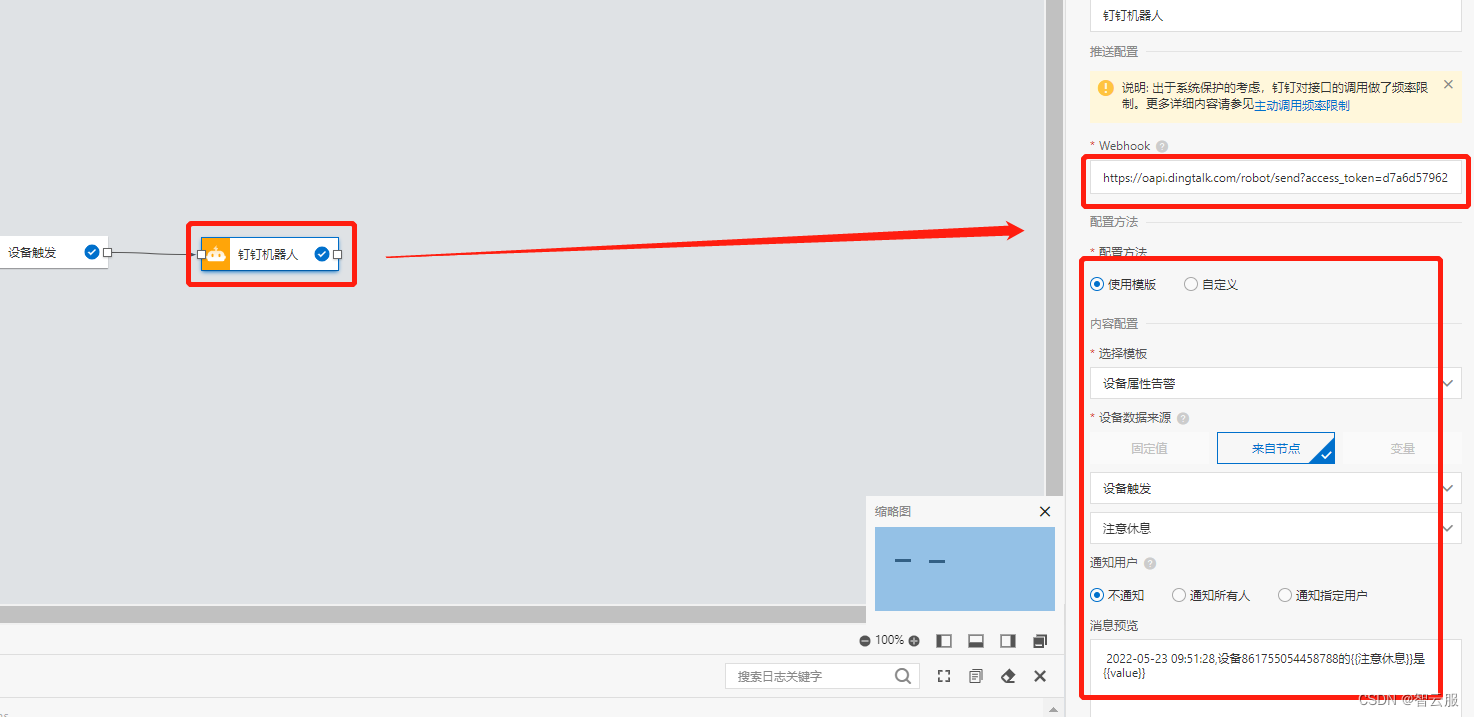
配置钉钉机器人节点,复制钉钉webhook网址。
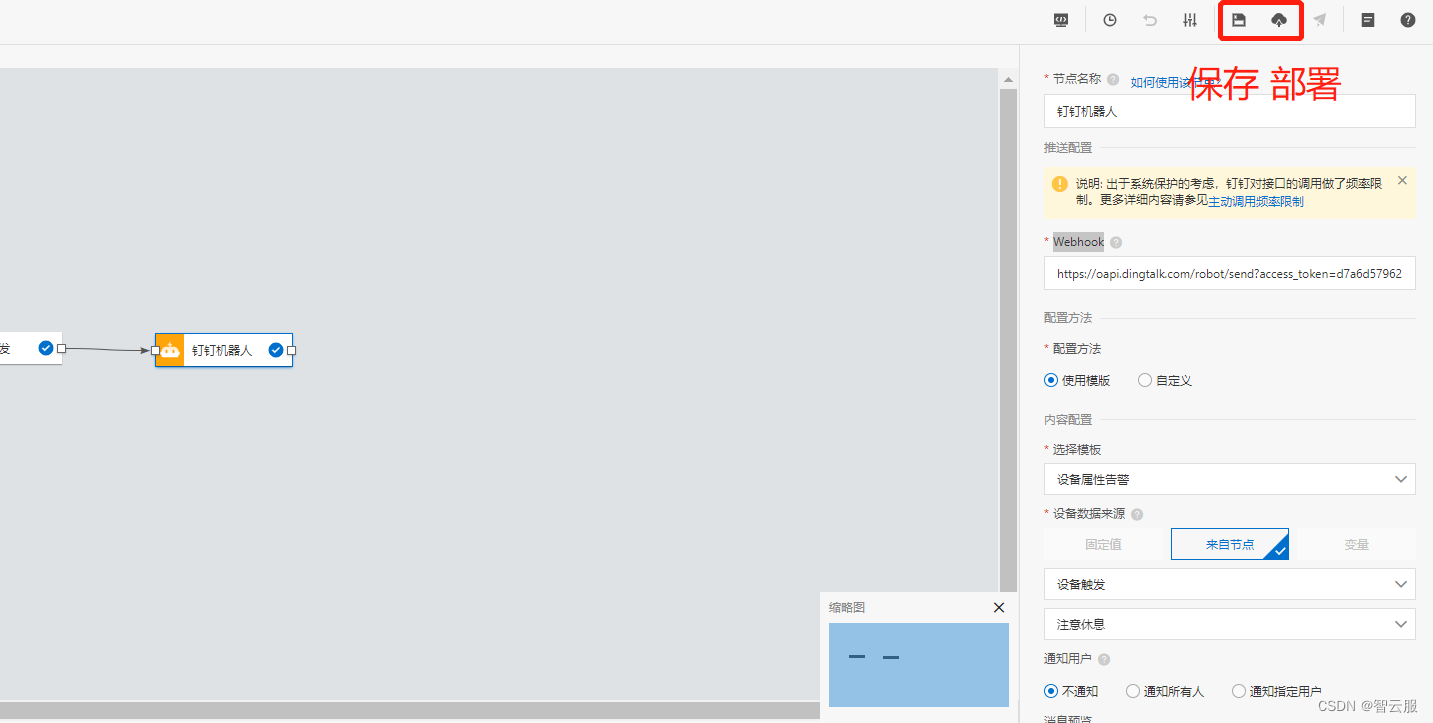
依次点击保存、部署、发布。
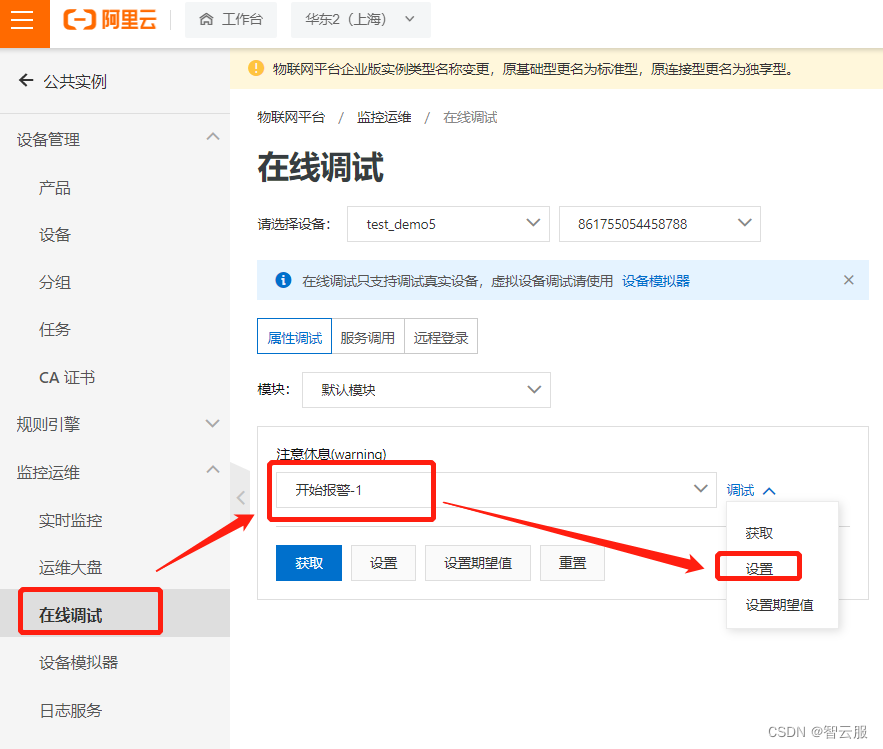
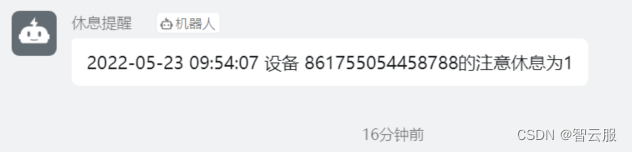
4.3 在线调试
云平台在线调试发送数据1
钉钉群发出消息
发布者:全栈程序员-站长,转载请注明出处:https://javaforall.net/187139.html原文链接:https://javaforall.net


