
大家好,又见面了,我是你们的朋友全栈君。如果您正在找激活码,请点击查看最新教程,关注关注公众号 “全栈程序员社区” 获取激活教程,可能之前旧版本教程已经失效.最新Idea2022.1教程亲测有效,一键激活。
Jetbrains全系列IDE稳定放心使用
本文介绍了Mask Rcnn目标分割项目的搭建及运行过程,并对搭建过程中可能出现的问题进行了解答。
环境:Cuda10.2+tensorflow-gpu1.13.2
Mask R-CNN是一个实例分割算法,可以用来做“目标检测”、“目标实例分割”、“目标关键点检测”。
一、下载项目源码
https://github.com/matterport/Mask_RCNN/releases下载最新版本
Source code (zip):源码压缩包下载。
balloon_dataset.zip:气球数据集,里面的图片并不是很多,几十张。
mask_rcnn_balloon.h5:训练好的气球数据集权重。
mask_rcnn_coco.h5:基于mask rcnn训练好的coco数据集的权重,这个要感谢网友分享的下载链接,这里附上下载地址
mask_rcnn_coco.h5:下载链接如下:
链接:https://pan.baidu.com/s/1Mj9xOj0o8z3Rn-NBo6TRgw
提取码:l3pb
二、需要安装的环境:
numpy
scipy
Pillow
cython
matplotlib
scikit-image
tensorflow>=1.3.0
keras>=2.0.8
opencv-python
h5py
imgaug
关于CUDA+tensorflow-gpu的安装可以参考我的另一篇博文
三、测试
1、Windows下安装cocoapi方法
由于源码基于coco数据集进行的测试,检测代码中包含一些coco相关的模块,要正常运行代码,需要先安装cocoapi,具体步骤如下:
(1)在 Github下载源码并进行解压;https://github.com/philferriere/cocoapi
(2)安装 Visual C++ 2015;http://go.microsoft.com/fwlink/?LinkId=691126(因为我的电脑早就安装了VS,所以这一步骤我直接跳过了)
(3)进入coco源码setup.py所在目录 cocoapi-master\PythonAPI;
(4)执行命令:python setup.py build_ext install(注意是在PythonAPI目录)
2、读取摄像头实时检测
Mydemo_came.py
将mask_rcnn_coco.h5权重文件放到项目文件下
import os
import sys
import random
import math
import numpy as np
import skimage.io
import matplotlib
import matplotlib.pyplot as plt
import cv2
import time
# Root directory of the project
ROOT_DIR = os.path.abspath("./")

# Import Mask RCNN
sys.path.append(ROOT_DIR)  # To find local version of the library
from mrcnn import utils
import mrcnn.model as modellib
from mrcnn import visualize
# Import COCO config
sys.path.append(os.path.join(ROOT_DIR, "samples/coco/"))  # To find local version
import coco


# Directory to save logs and trained model
MODEL_DIR = os.path.join(ROOT_DIR, "logs")

# Local path to trained weights file
COCO_MODEL_PATH = os.path.join(MODEL_DIR ,"mask_rcnn_coco.h5")
# Download COCO trained weights from Releases if needed
if not os.path.exists(COCO_MODEL_PATH):
    utils.download_trained_weights(COCO_MODEL_PATH)
    print("***********************")

# Directory of images to run detection on
IMAGE_DIR = os.path.join(ROOT_DIR, "images")

class InferenceConfig(coco.CocoConfig):
    # Set batch size to 1 since we'll be running inference on
    # one image at a time. Batch size = GPU_COUNT * IMAGES_PER_GPU
    GPU_COUNT = 1
    IMAGES_PER_GPU = 1


config = InferenceConfig()
config.display()


# Create model object in inference mode.
model = modellib.MaskRCNN(mode="inference", model_dir=MODEL_DIR, config=config)

# Load weights trained on MS-COCO
model.load_weights(COCO_MODEL_PATH, by_name=True)

# COCO Class names
# Index of the class in the list is its ID. For example, to get ID of
# the teddy bear class, use: class_names.index('teddy bear')
class_names = ['BG', 'person', 'bicycle', 'car', 'motorcycle', 'airplane',
               'bus', 'train', 'truck', 'boat', 'traffic light',
               'fire hydrant', 'stop sign', 'parking meter', 'bench', 'bird',
               'cat', 'dog', 'horse', 'sheep', 'cow', 'elephant', 'bear',
               'zebra', 'giraffe', 'backpack', 'umbrella', 'handbag', 'tie',
               'suitcase', 'frisbee', 'skis', 'snowboard', 'sports ball',
               'kite', 'baseball bat', 'baseball glove', 'skateboard',
               'surfboard', 'tennis racket', 'bottle', 'wine glass', 'cup',
               'fork', 'knife', 'spoon', 'bowl', 'banana', 'apple',
               'sandwich', 'orange', 'broccoli', 'carrot', 'hot dog', 'pizza',
               'donut', 'cake', 'chair', 'couch', 'potted plant', 'bed',
               'dining table', 'toilet', 'tv', 'laptop', 'mouse', 'remote',
               'keyboard', 'cell phone', 'microwave', 'oven', 'toaster',
               'sink', 'refrigerator', 'book', 'clock', 'vase', 'scissors',
               'teddy bear', 'hair drier', 'toothbrush']
# Load a random image from the images folder
#file_names = next(os.walk(IMAGE_DIR))[2]
#image = skimage.io.imread(os.path.join(IMAGE_DIR, random.choice(file_names)))
cap = cv2.VideoCapture(0)

while(1):
    # get a frame
    ret, frame = cap.read()
    # show a frame
    start =time.clock()
    results = model.detect([frame], verbose=1)
    r = results[0]

    visualize.display_instances(frame, r['rois'], r['masks'], r['class_ids'],
                            class_names, r['scores'])

    cv2.imshow("capture", frame)
    end = time.clock()
    print(end-start)
    if cv2.waitKey(1) & 0xFF == ord('q'):
        break

cap.release()
cv2.destroyAllWindows()

#image= cv2.imread("C:\\Users\\18301\\Desktop\\Mask_RCNN-master\\images\\9.jpg")
## Run detection
#
#results = model.detect([image], verbose=1)
#
#print(end-start)
## Visualize results
#r = results[0]
#visualize.display_instances(image, r['rois'], r['masks'], r['class_ids'],
#                            class_names, r['scores'])
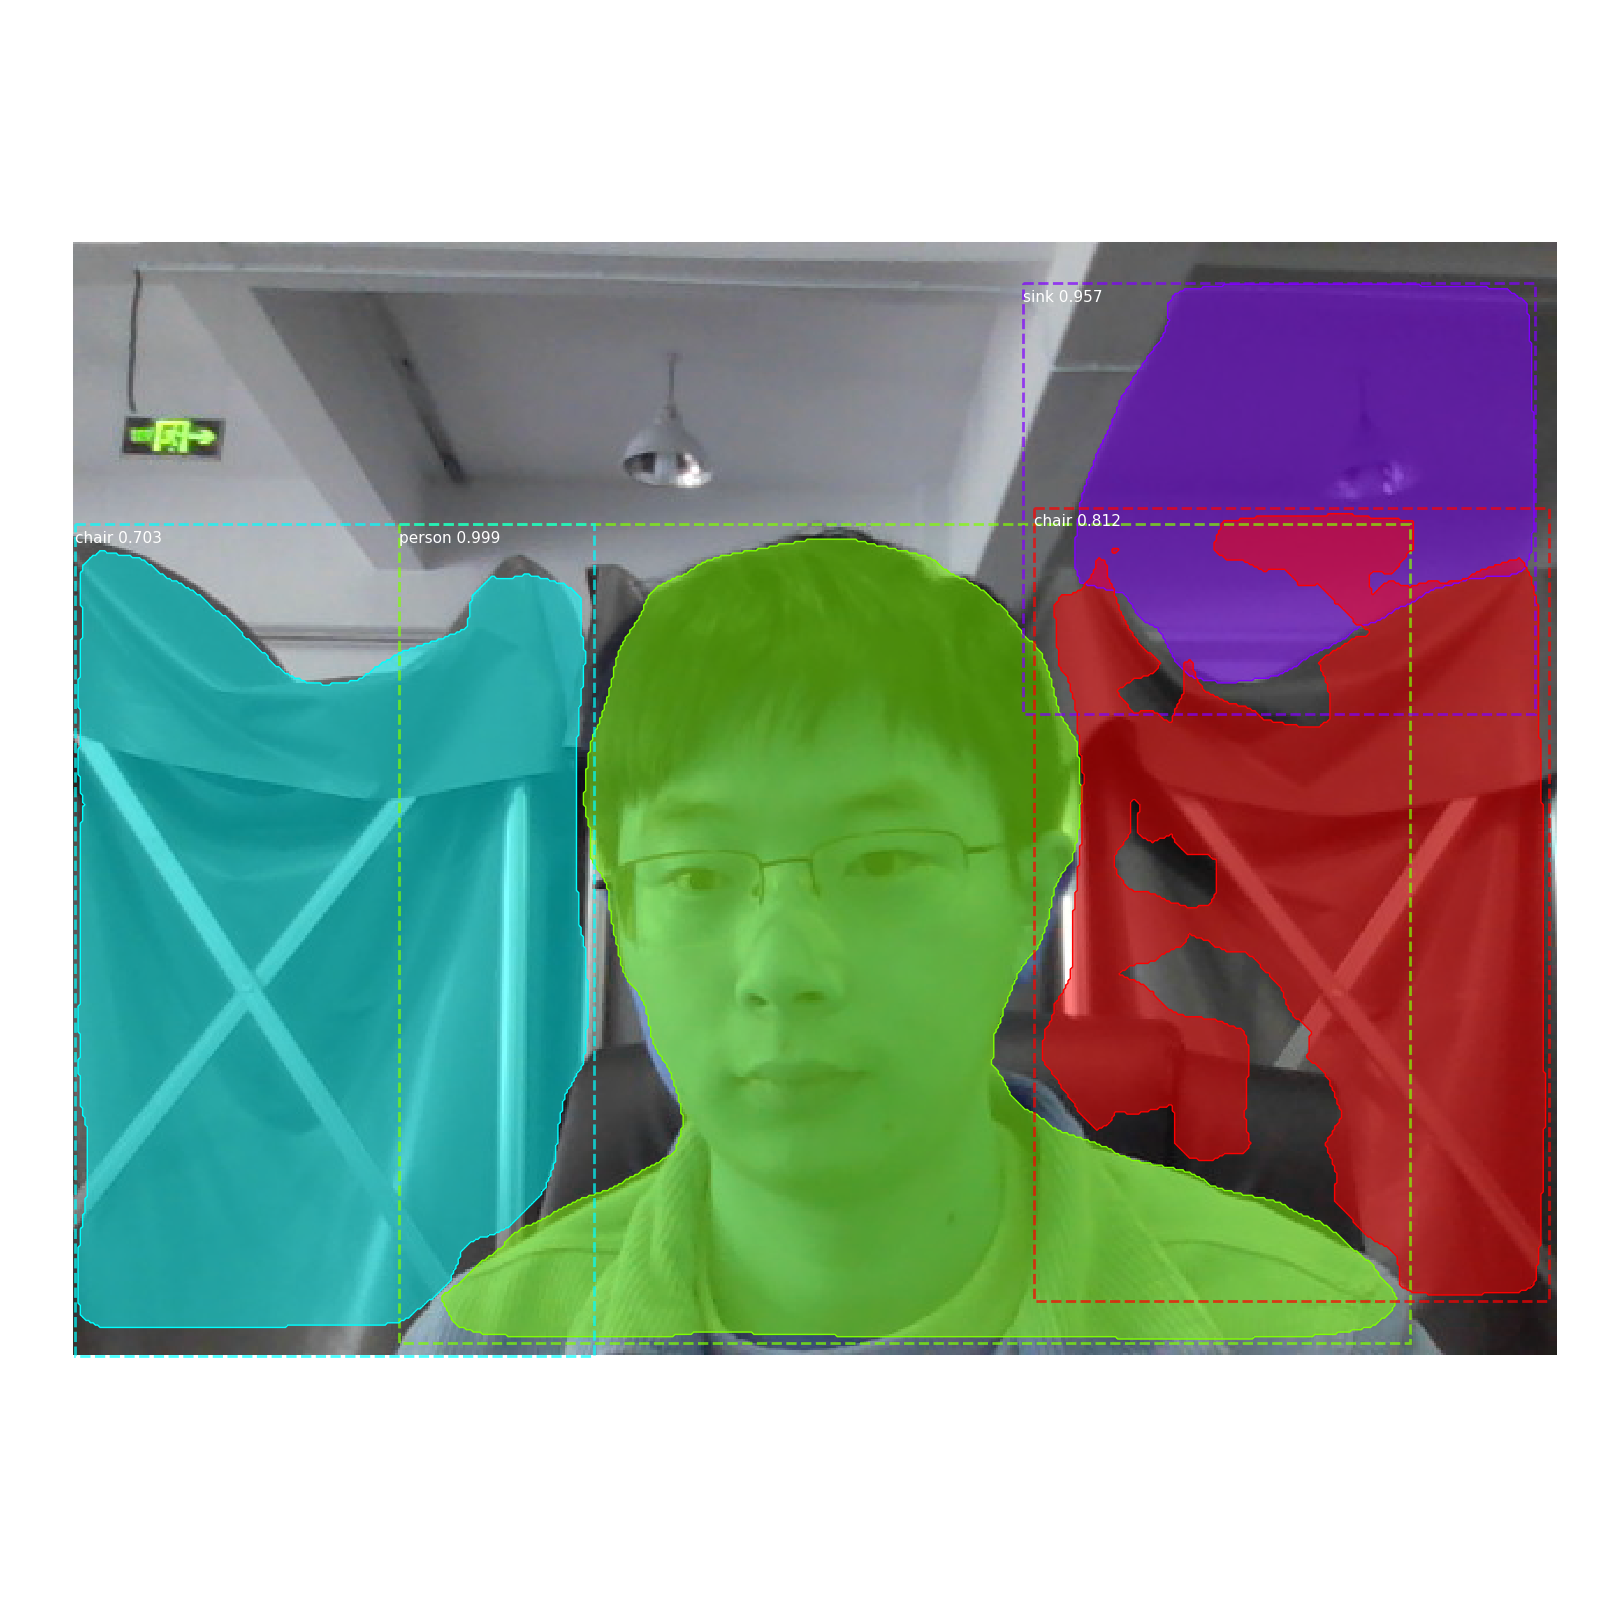
结果如图所示:

3、检测单张图片
可随机检测文件夹内某个图片或指定图片路径进行检测两种方式
Mydemo_pic.py
import os
import sys
import random
import math
import numpy as np
import skimage.io
import matplotlib
import matplotlib.pyplot as plt
import cv2
import time
# Root directory of the project
ROOT_DIR = os.path.abspath("./")

# Import Mask RCNN
sys.path.append(ROOT_DIR)  # To find local version of the library
from mrcnn import utils
import mrcnn.model as modellib
from mrcnn import visualize
# Import COCO config
sys.path.append(os.path.join(ROOT_DIR, "samples/coco/"))  # To find local version
import coco


# Directory to save logs and trained model
MODEL_DIR = os.path.join(ROOT_DIR, "logs")

# Local path to trained weights file
COCO_MODEL_PATH = os.path.join(MODEL_DIR ,"mask_rcnn_coco.h5")
# Download COCO trained weights from Releases if needed
if not os.path.exists(COCO_MODEL_PATH):
    utils.download_trained_weights(COCO_MODEL_PATH)
    print("***********************")

# Directory of images to run detection on
IMAGE_DIR = os.path.join(ROOT_DIR, "images")

class InferenceConfig(coco.CocoConfig):
    # Set batch size to 1 since we'll be running inference on
    # one image at a time. Batch size = GPU_COUNT * IMAGES_PER_GPU
    GPU_COUNT = 1
    IMAGES_PER_GPU = 1


config = InferenceConfig()
config.display()


# Create model object in inference mode.
model = modellib.MaskRCNN(mode="inference", model_dir=MODEL_DIR, config=config)

# Load weights trained on MS-COCO
model.load_weights(COCO_MODEL_PATH, by_name=True)

# COCO Class names
# Index of the class in the list is its ID. For example, to get ID of
# the teddy bear class, use: class_names.index('teddy bear')
class_names = ['BG', 'person', 'bicycle', 'car', 'motorcycle', 'airplane',
               'bus', 'train', 'truck', 'boat', 'traffic light',
               'fire hydrant', 'stop sign', 'parking meter', 'bench', 'bird',
               'cat', 'dog', 'horse', 'sheep', 'cow', 'elephant', 'bear',
               'zebra', 'giraffe', 'backpack', 'umbrella', 'handbag', 'tie',
               'suitcase', 'frisbee', 'skis', 'snowboard', 'sports ball',
               'kite', 'baseball bat', 'baseball glove', 'skateboard',
               'surfboard', 'tennis racket', 'bottle', 'wine glass', 'cup',
               'fork', 'knife', 'spoon', 'bowl', 'banana', 'apple',
               'sandwich', 'orange', 'broccoli', 'carrot', 'hot dog', 'pizza',
               'donut', 'cake', 'chair', 'couch', 'potted plant', 'bed',
               'dining table', 'toilet', 'tv', 'laptop', 'mouse', 'remote',
               'keyboard', 'cell phone', 'microwave', 'oven', 'toaster',
               'sink', 'refrigerator', 'book', 'clock', 'vase', 'scissors',
               'teddy bear', 'hair drier', 'toothbrush']

# Load a random image from the images folder
file_names = next(os.walk(IMAGE_DIR))[2]
image = skimage.io.imread(os.path.join(IMAGE_DIR, random.choice(file_names)))

# Run detection
results = model.detect([image], verbose=1)

# Visualize results
r = results[0]
visualize.display_instances(image, r['rois'], r['masks'], r['class_ids'],
                            class_names, r['scores'])


#image= cv2.imread("C:\\Users\\18301\\Desktop\\Mask_RCNN-master\\images\\9.jpg")
## Run detection
#
#results = model.detect([image], verbose=1)
#
#print(end-start)
## Visualize results
#r = results[0]
#visualize.display_instances(image, r['rois'], r['masks'], r['class_ids'],
#                            class_names, r['scores'])
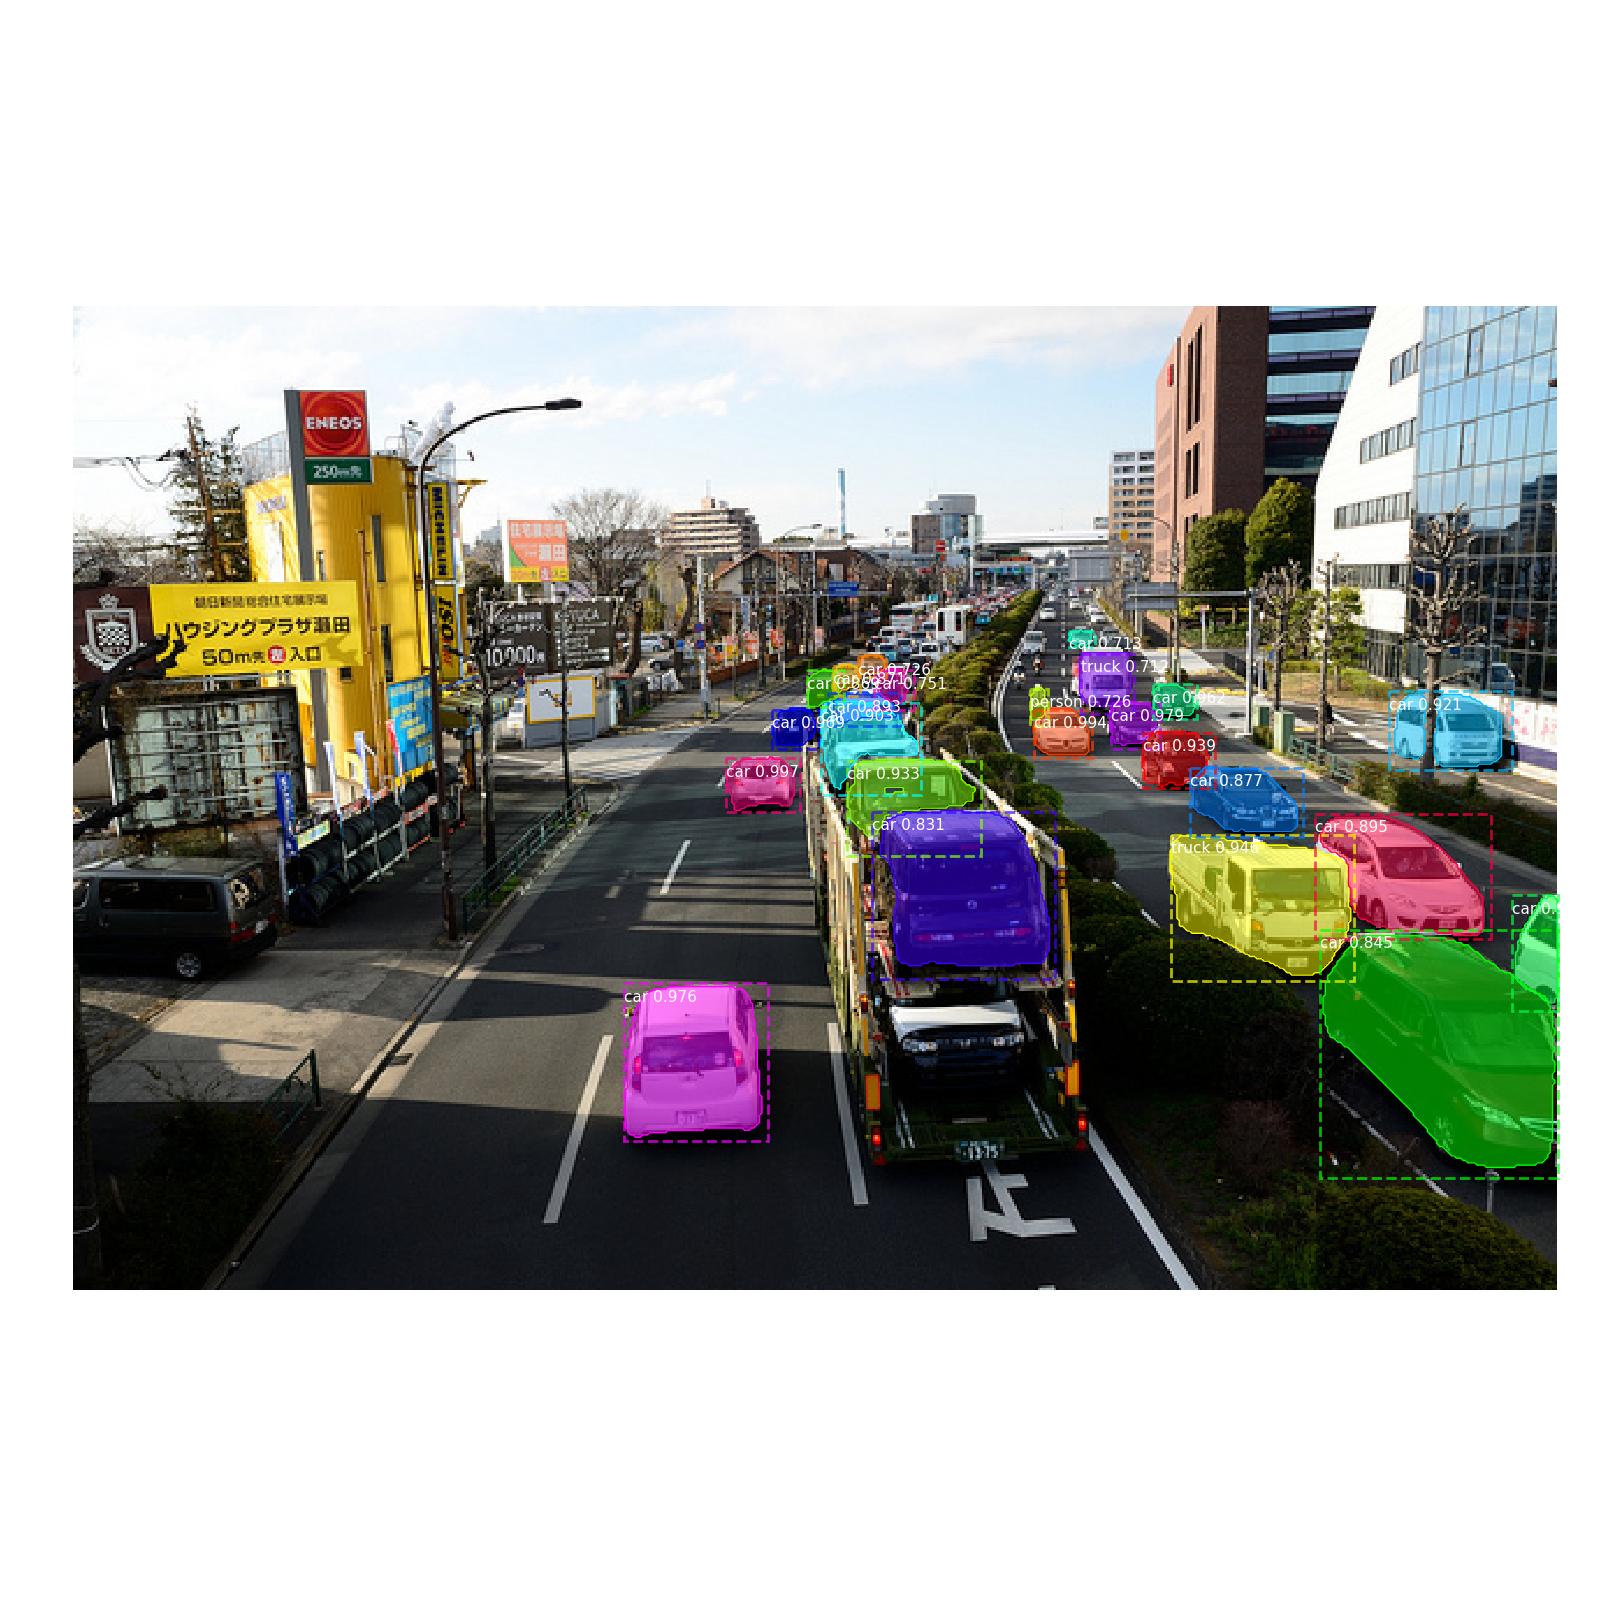
测试结果如图所示:
四、可能出现的报错及解决方法
注意事项:这里首先总结下我在跑代码时遇到的主要问题及解决思路。
(1)由于我之前装了tensorflow2.*最新版本,而原代码是在tensorflow1.3环境下搭建的,所以请中间报的很多错误都是由于版本问题导致的,中间我也尝试过在不降低tensorflow版本的前期下解决问题,结果发现问题一个接着一个,解决了这个马上遇到新的问题,最后没办法只能选择降低tensorflow版本
(2)在安装tensorflow低版本时又遇到了很多问题,主要原因在于我之前安装了很多最新的包,而tensorflow1.3所依赖的一些包可能版本又很低,导致中间出现各种报错,这里建议使用conda install tensorflow***代替pip install tensorflow***(虽然我之前一直用的pip install 也都没有问题,但这次确实是只有conda install 才解决了问题,详细原因也不太清楚,可能是conda安装时会自动添加相关依赖)
(3)如果还是出现一些相关包的功能报错,极大的可能是由于版本问题,最好的方法就是查找该包与tensorflow1.3对应的版本,降低该包当前版本。
具体报错问题:
1、一般报错缺少某个包,直接pip install ***安装就可以
ModuleNotFoundError: No module named ‘Cython’
ModuleNotFoundError: No module named ‘imgaug’
2、AttributeError: module ‘tensorflow’ has no attribute ‘log’
因为我一开始用的tensorflow2.0以上版本,而原代码使用的tensorflow1.3,导致出现了各种问题,
如果是2.0的版本请修改为更低的版本试试,比如1.4或者以下版本
3、from tensorflow.python.eager.context import get_config报错
原因是,keras和tensorflow版本不匹配的问题,我的就是keras直接安装,结果安装的最新版本,和tensorflow不匹配
最后,无赖降低了版本,
4.ImportError: DLL load failed: 找不到指定的模块。
Failed to load the native TensorFlow runtime.
网上有说是protobuf问题。 在自动安装了tensorflow时, protobuf安装的是最新版本3.20.0, 出现了不兼容的问题。更换为 protobuf 3.6.0即可
pip install protobuf==3.6.0
弄了半天还是报错,后来看到说大概应该是因为缺少依赖,还有的相似的问题,可能是因为tensorflow和你的cuda版本不匹配。比如我的电脑上cuda就是10.2版本的,但是需要的tensorflow版本只支持到cuda10.0。如果你用pip安装,这种情况下你就要手动重新配cuda,但是用conda安装,他会自动帮你把需要的cudatoolkit一起安装上。这是用conda安装时,自动装下来的包有cudatoolkit。
所以装这些包的时候能用conda装尽量用conda装。conda install会帮你把需要的依赖一起安装好,而pip install只会帮你装一个你指定的包。
解决方法:
Pip uninstall tensorflow
Conda install tensorflow==1.13.2
5、File “h5py\h5.pyx”, line 1, in init h5py.h5
ImportError: DLL load failed: 找不到指定的程序。
AttributeError: module ‘h5py’ has no attribute ‘File’
由于h5py库的更新,安装过程中会自动安装h5py=3.0.0以上的版本,会导致decode(“utf-8”)的错误!
各位一定要在安装完tensorflow后利用命令装h5py=2.10.0!
6、AttributeError: type object ‘h5py.h5.H5PYConfig’ has no attribute ‘__reduce_cython__’
查看原因说可能存在多个h5py版本,
于是我分别使用conda uninstall
和pip uninstall 卸载了h5py,并在安装目录中删掉了所有h5py包
最后再装了一次,解决了问题
7、报错信息:UserWarning: Matplotlib is currently using agg, which is a non-GUI backend, so cannot show the figure.
网上试了很多方法,有说要加use的,但是我试了都没用
import matplotlib
matplotlib.use(‘Qt5Agg’)#必须显式指明matplotlib的后端
import matplotlib.pyplot as plt
后来我想到可能还是版本过高的问题,我用的是3.版本,于是我卸载了重装了2.版本,解决了问题

8、报错信息:Input image dtype is bool. Interpolation is not defined with bool data type
原因:可能是scikit-image的版本太高,与其他环境不匹配,我卸载当前版本后安装了一个低版本的,解决了问题
解决方案:
pip uninstall scikit-image
pip install scikit-image==0.16.2
发布者:全栈程序员-站长,转载请注明出处:https://javaforall.net/188120.html原文链接:https://javaforall.net


