
大家好,又见面了,我是你们的朋友全栈君。如果您正在找激活码,请点击查看最新教程,关注关注公众号 “全栈程序员社区” 获取激活教程,可能之前旧版本教程已经失效.最新Idea2022.1教程亲测有效,一键激活。
Jetbrains全系列IDE稳定放心使用
1、安装ffmpeg
wget https://ffmpeg.org/releases/ffmpeg-4.1.tar.bz2
tar -xjvf ffmpeg-4.1.tar.bz2
./configure --prefix=/usr/local/ffmpeg --enable-gpl --enable-version3 --enable-nonfree --enable-postproc --enable-pthreads --enable-libfdk-aac --enable-libmp3lame --enable-libtheora --enable-libx264 --enable-libxvid --enable-libvorbis --enable-shared --enable-avfilter

2、
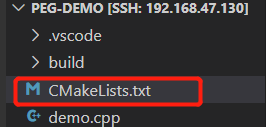
项目根目录下编写CMakeLists.txt文件
# Minimum CMake required
cmake_minimum_required(VERSION 3.14.0)

project(demo)

set(CMAKE_BUILD_TYPE "Debug")
message(STATUS "CMAKE_BUILD_TYPE: ${CMAKE_BUILD_TYPE}")

set(EXTRA_CXX_FLAGS "-std=c++11 -Wall -Wno-unused-function -fPIC")
set(CMAKE_CXX_FLAGS "${CMAKE_CXX_FLAGS} ${EXTRA_CXX_FLAGS}")
message("-- CMAKE_CXX_COMPILER_VERSION: " ${CMAKE_CXX_COMPILER_VERSION})

include_directories(/usr/local/ffmpeg/include)
link_directories(/usr/local/ffmpeg/lib)

add_executable(main demo.cpp)
target_link_libraries(main
    -Wl,--start-group
    avcodec
    avdevice
    avfilter
    avformat
    avutil
    postproc
    swresample
    swscale
    -Wl,--end-group
    pthread)
3、再build文件夹下执行
cmake ..
make
4、配置vscode文件
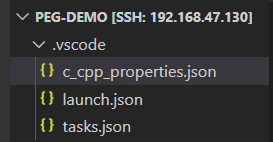
编辑c_cpp_properties.json文件
添加 “/usr/local/ffmpeg/include” 到 “includePath”
{
    "configurations": [
        {
            "name": "Linux",
            "includePath": [
                "${workspaceFolder}/**",
                "/usr/local/ffmpeg/include"
            ],
            "defines": [],
            "compilerPath": "/usr/bin/gcc",
            "cStandard": "gnu11",
            "cppStandard": "gnu++98",
            "intelliSenseMode": "linux-gcc-x64"
        }
    ],
    "version": 4
}
编辑launch.json
{
    // Use IntelliSense to learn about possible attributes.
    // Hover to view descriptions of existing attributes.
    // For more information, visit: https://go.microsoft.com/fwlink/?linkid=830387
    "version": "0.2.0",
    "configurations": [
        {
            "name": "(gdb) Launch",
            "type": "cppdbg",
            "request": "launch",
            "program": "${workspaceRoot}/build/main",
            "args": [],
            "stopAtEntry": false,
            "cwd": "${fileDirname}",
            "environment": [],
            "externalConsole": false,
            "MIMode": "gdb",
            "miDebuggerPath":"/usr/bin/gdb",
            "setupCommands": [
                {
                    "description": "Enable pretty-printing for gdb",
                    "text": "-enable-pretty-printing",
                    "ignoreFailures": true
                }
            ]
        }
    ]
}
版权声明:本文内容由互联网用户自发贡献,该文观点仅代表作者本人。本站仅提供信息存储空间服务,不拥有所有权,不承担相关法律责任。如发现本站有涉嫌侵权/违法违规的内容, 请联系我们举报,一经查实,本站将立刻删除。
发布者:全栈程序员-站长,转载请注明出处:https://javaforall.net/189817.html原文链接:https://javaforall.net


