
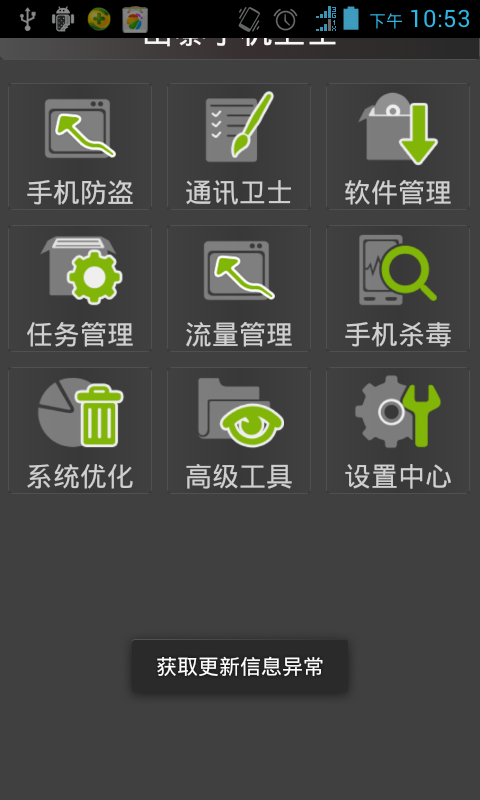
android项目实战手机安全卫士_恢复2345安全卫士主界面
android项目实战手机安全卫士_恢复2345安全卫士主界面主界面的布局文件 大家好,又见面了,我是你们的朋友全栈君。如果您正在找激活码,请点击查看最新教程,关注关注公众号 “全栈程序员社区” 获取激活教程,可能之前旧版本教程已经失效.最新Idea2022.1教程亲测有效,一键激活。 主界面的布局文件
Jetbrains全系列IDE稳定放心使用
<?xml version="1.0" encoding="utf-8"?>
<LinearLayout xmlns:android="http://schemas.android.com/apk/res/android"
    android:layout_width="match_parent"
    android:layout_height="match_parent"
    android:background="@color/backgroundcolor"
    android:orientation="vertical" >

    <LinearLayout
        xmlns:android="http://schemas.android.com/apk/res/android"
        android:layout_width="match_parent"
        android:layout_height="40dip"
        android:background="@drawable/title_background"
        android:gravity="center_horizontal|center_vertical"
        android:orientation="vertical" >
        <TextView
                    android:layout_width="wrap_content"
        android:layout_height="wrap_content"
        android:textColor="#FFF8F8F8"
        android:textSize="22sp"
        android:text="山寨手机卫士"
            />
    </LinearLayout>

    <GridView
        android:id="@+id/gv_main"
        android:layout_width="match_parent"
        android:layout_height="match_parent"
        android:layout_marginTop="10dip"
        android:horizontalSpacing="10dip"
        android:numColumns="3"
        android:verticalSpacing="10dip" >
    </GridView>

</LinearLayout>
适配器
package cn.itcast.mobilesafe.adapter;

import cn.itcast.mobilesafe.R;
import android.content.Context;
import android.content.SharedPreferences;
import android.util.Log;
import android.view.LayoutInflater;
import android.view.View;
import android.view.ViewGroup;
import android.widget.BaseAdapter;
import android.widget.ImageView;
import android.widget.TextView;

public class MainUIAdapter extends BaseAdapter {
	private static final String TAG = "MainUIAdapter";
	private Context context;
	private LayoutInflater inflater;
	private static ImageView iv_icon;
	private static TextView tv_name;
	private SharedPreferences sp;

	public MainUIAdapter(Context context) {
		this.context = context;
		inflater = LayoutInflater.from(context);
		sp = context.getSharedPreferences("config", Context.MODE_PRIVATE);
	}

	private static String[] names = { "手机防盗", "通讯卫士", "软件管理", "任务管理", "流量管理",
			"手机杀毒", "系统优化", "高级工具", "设置中心" };
	private static int[] icons = { R.drawable.widget05, R.drawable.widget02,
			R.drawable.widget01, R.drawable.widget07, R.drawable.widget05,
			R.drawable.widget04, R.drawable.widget06, R.drawable.widget03,
			R.drawable.widget08 };

	public int getCount() {

		return names.length;
	}

	public Object getItem(int position) {

		return position;
	}

	public long getItemId(int position) {
		// TODO Auto-generated method stub
		return position;
	}

	public View getView(int position, View convertView, ViewGroup parent) {
		// getview的方法被调用了多少次?
		// 9
		// gridview 控件bug
		// won't fix
		// 使用静态的变量引用 减少内存中申请的引用的个数

		Log.i(TAG,"getview "+ position);
		View view = inflater.inflate(R.layout.mainscreen_item, null);
		iv_icon =  (ImageView) view.findViewById(R.id.iv_main_icon);
		tv_name =  (TextView) view.findViewById(R.id.tv_main_name);
		iv_icon.setImageResource(icons[position]);
		tv_name.setText(names[position]);
		if(position==0){
			String name = sp.getString("lost_name", null);
			if(name!=null){
				tv_name.setText(name);
			}
		}

		return view;
	}

}
mainscreen_item
<?xml version="1.0" encoding="utf-8"?>
<LinearLayout xmlns:android="http://schemas.android.com/apk/res/android"
    android:layout_width="100dip"
    android:layout_height="100dip"
    android:gravity="center_horizontal"
    android:background="@drawable/item_background"
    android:orientation="vertical" >

    <ImageView
        android:id="@+id/iv_main_icon"
        android:layout_width="60dip"
        android:layout_height="60dip"
        android:scaleType="fitXY"
        android:src="@drawable/ic_launcher" />

    <TextView
        android:id="@+id/tv_main_name"
        android:layout_width="wrap_content"
        android:layout_height="wrap_content"
        android:text="功能名字"
        android:textColor="@color/textcolor"
        android:textSize="18sp" />

</LinearLayout>
样式文件
<?xml version="1.0" encoding="utf-8"?>
<shape xmlns:android="http://schemas.android.com/apk/res/android"
    android:shape="rectangle" >

    <stroke
        android:width="0.5dip"
        android:color="#ff505050" />

    <corners android:radius="2dip" >
    </corners>

	<gradient android:startColor="#ff404040"
	    android:centerColor="#ff383838"
	    android:endColor="#ff404040"
	    />
</shape>
效果

发布者:全栈程序员-站长,转载请注明出处:https://javaforall.net/190157.html原文链接:https://javaforall.net
关于作者

相关推荐
-

让AllocateHwnd接受一般函数地址作参数
让AllocateHwnd接受一般函数地址作参数http://www.xuebuyuan.com/1889769.htmlClasses单元的AllocateHWnd函数是需要传入一个处理消息的类的方法的作为参数的,原型:functionAllo
-
C的TimeSpan介绍
C的TimeSpan介绍TimeSpan 结构 表示一个时间间隔 nbsp 它含有以下四个构造函数 TimeSpan Int64 将 nbsp TimeSpan 结构的新实例初始化为指定的刻度数 DateTime Tick 是计算机的一个计时周期 单位是一百纳秒 即一千万分之一秒 TimeSpan Int32 Int32 Int32 将 nbsp TimeSpan 结构的新实例初始化为指定的小时数 分钟数和秒数 TimeSp
-
RabbitMQ 七战 Kafka,差异立现!
点击上方“全栈程序员社区”,星标公众号 重磅干货,第一时间送达 译者丨王欢,Golang后端工程师,DockOne社区译者 来源 | 分布式实验室(ID:dockeron…
-
-
