
大家好,又见面了,我是你们的朋友全栈君。如果您正在找激活码,请点击查看最新教程,关注关注公众号 “全栈程序员社区” 获取激活教程,可能之前旧版本教程已经失效.最新Idea2022.1教程亲测有效,一键激活。
Jetbrains全系列IDE使用 1年只要46元 售后保障 童叟无欺
鸿蒙
鸿蒙发布在gitee上
https://gitee.com/openHarmony
入门指导,以Hi3516DV300为例
https://gitee.com/openharmony/docs/tree/master/quick-start
搭建环境
在ubuntu18.4上,环境搭建可参考gitee上的入门的指导,编译顺利通过后,回头重点理一下:
- 安装Python
sudo apt install -y python
sudo apt install -y python3
- 下载编译工具
wget http://tools.harmonyos.com/mirrors/gn/1523/linux/gn.1523.tar
wget http://tools.harmonyos.com/mirrors/ninja/1.9.0/linux/ninja.1.9.0.tar
wget http://tools.harmonyos.com/mirrors/clang/9.0.0-34042/linux/llvm-linux-9.0.0-34042.tar
wget http://tools.harmonyos.com/mirrors/hc-gen/0.65/linux/hc-gen-0.65-linux.tar
- 解压
   tar -xvf gn.1523.tar -C ~/
   tar -xvf ninja.1.9.0.tar -C ~/
   tar -xvf llvm-linux-9.0.0-34042.tar -C ~/
   tar -xvf llvm-linux-9.0.0-34042.tar -C ~/
   tar -xvf hc-gen-0.65-linux.tar -C ~/
- 设置环境变量:
vim ~/.bashrc
export PATH=~/gn:$PATH
export PATH=~/ninja:$PATH
export PATH=~/llvm/bin:$PATH
export PATH=~/hc-gen:$PATH
export PATH=~/hc-gen:$PATH
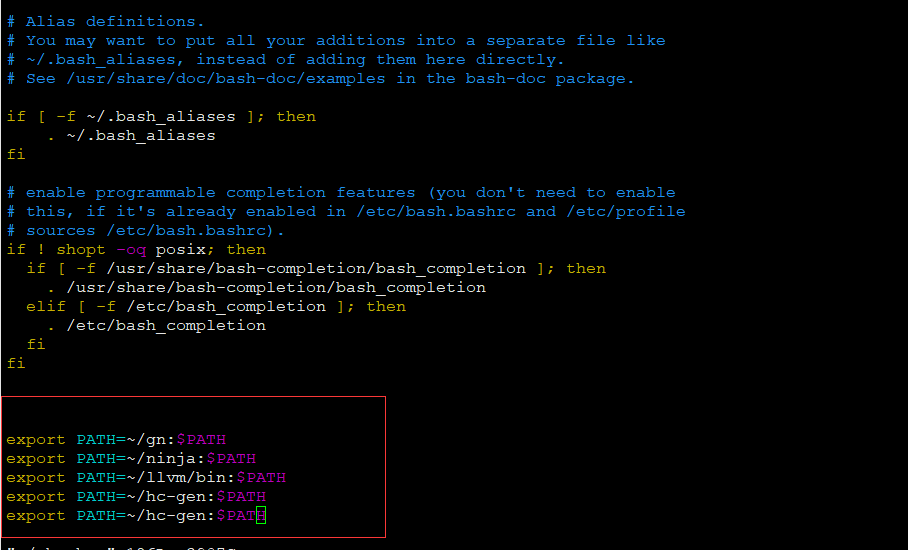

最后别忘了 source ~/.bashrc 使得环境变量生效
系统源码编译
下载系统源码
wget http://tools.harmonyos.com/mirrors/os/1.0/code-1.0.tar.gz
解压后,编译:
python build.py ipcamera_hi3516dv300 -b debug
编译需要等多几分钟:
conformance/interfaces/timer_settime/5-1 compile PASSED
make[2]: Entering directory '/usr/dopi/harmony/third_party/ltp/testcases/open_posix_testsuite/conformance/interfaces/timer_settime/speculative'
conformance/interfaces/timer_settime/speculative/12-3 compile PASSED
conformance/interfaces/timer_settime/speculative/12-1 compile PASSED
conformance/interfaces/timer_settime/speculative/12-2 compile PASSED
make[2]: Leaving directory '/usr/dopi/harmony/third_party/ltp/testcases/open_posix_testsuite/conformance/interfaces/timer_settime/speculative'
make[1]: Leaving directory '/usr/dopi/harmony/third_party/ltp/testcases/open_posix_testsuite/conformance/interfaces/timer_settime'
make: Leaving directory '/usr/dopi/harmony/third_party/ltp/testcases/open_posix_testsuite/conformance/interfaces'
[1328/1338] STAMP obj/test/xts/acts/open_posix_testsuite/conformance/interfaces/prebuild_ActsOpenPosixTest.stamp
[1329/1338] ACTION //test/xts/acts/open_posix_testsuite/conformance/interfaces:ActsOpenPosixTest(//build/lite/toolchain:linux_x86_64_clang)
[1330/1338] STAMP obj/test/xts/acts/open_posix_testsuite/conformance/interfaces/ActsOpenPosixTest.stamp
[1331/1338] STAMP obj/test/xts/acts/acts_compoment.stamp
[1332/1338] COPY bin/query.bin suites/acts/resource/tools/query.bin
[1333/1338] STAMP obj/test/xts/acts/query_copy.stamp
[1334/1338] ACTION //test/xts/acts:acts(//build/lite/toolchain:linux_x86_64_clang)
[1335/1338] STAMP obj/test/xts/acts/acts.stamp
[1336/1338] STAMP obj/build/lite/ohos.stamp
[1337/1338] ACTION //build/lite:gen_rootfs(//build/lite/toolchain:linux_x86_64_clang)
[1338/1338] STAMP obj/build/lite/gen_rootfs.stamp
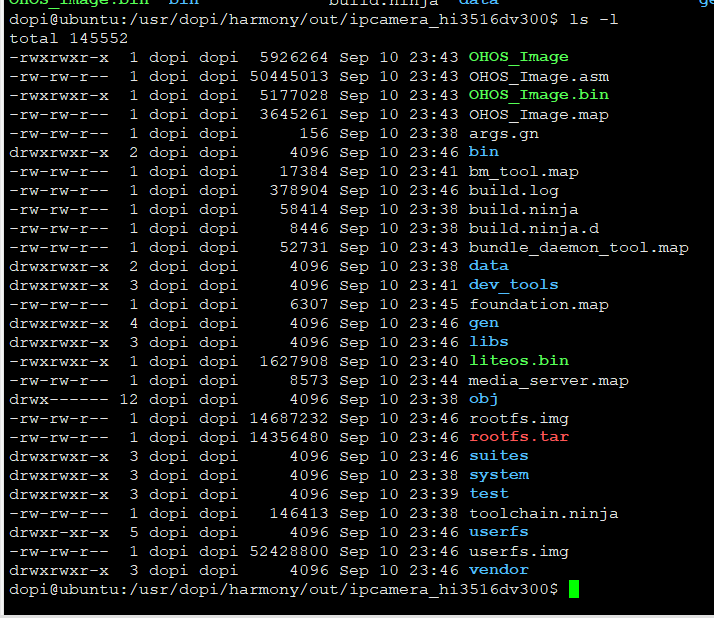
ohos ipcamera_hi3516dv300 build success!
看到 ohos ipcamera_hi3516dv300 build success! 应该是编译完成了。
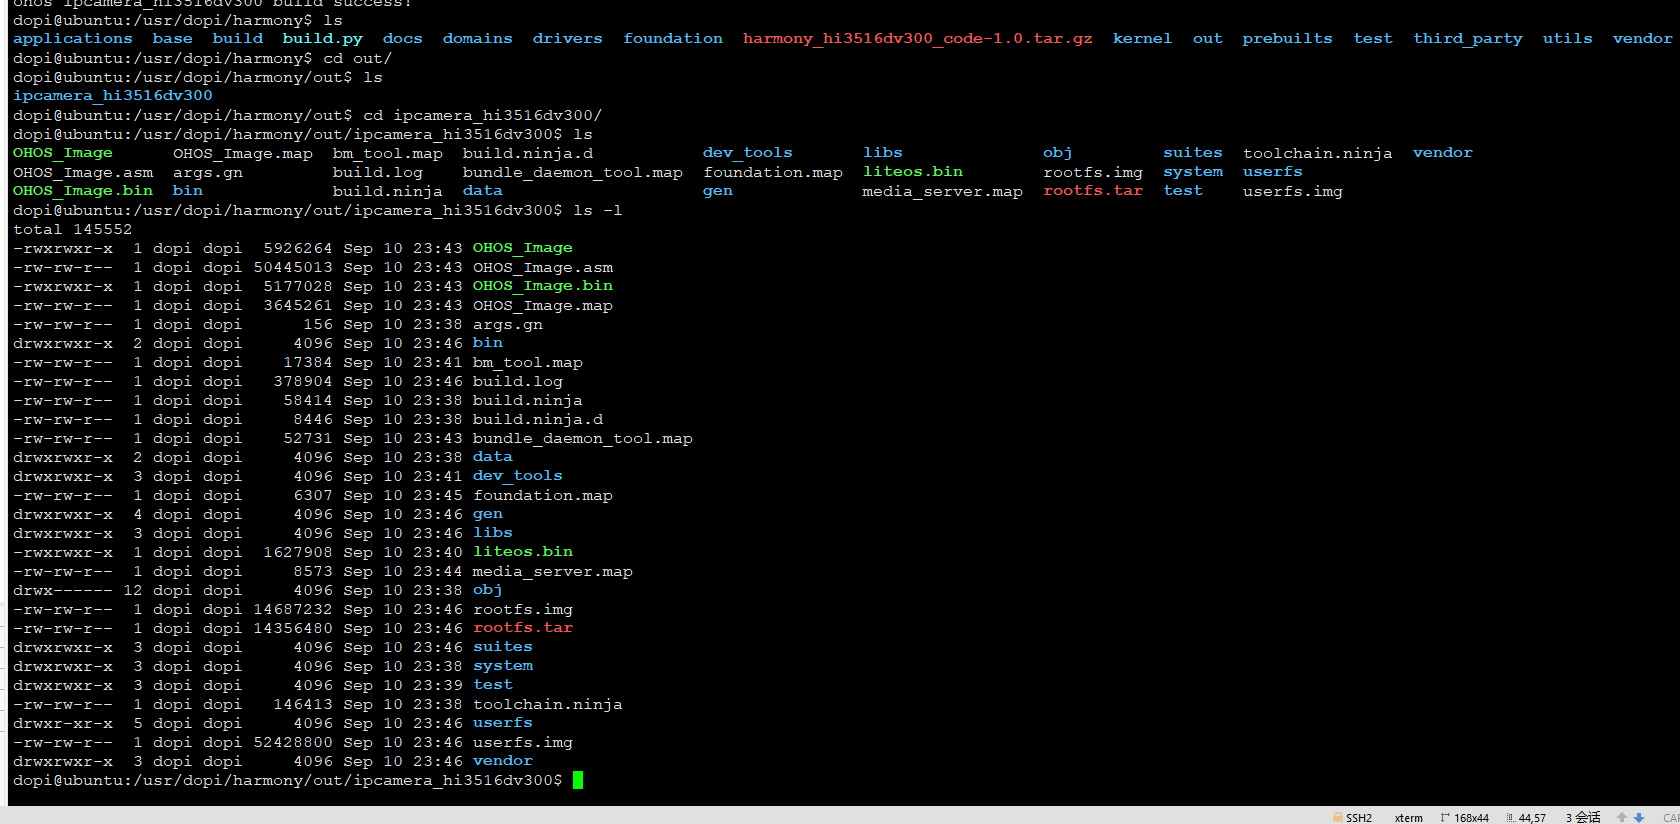
下载源码时,就疑惑,鸿蒙和liteOS的关系,编译后,还有liteos.bin,疑惑。
烧录
访问 鸿蒙的IDE网站,里面有详细的介绍:
https://device.harmonyos.com/cn/ide
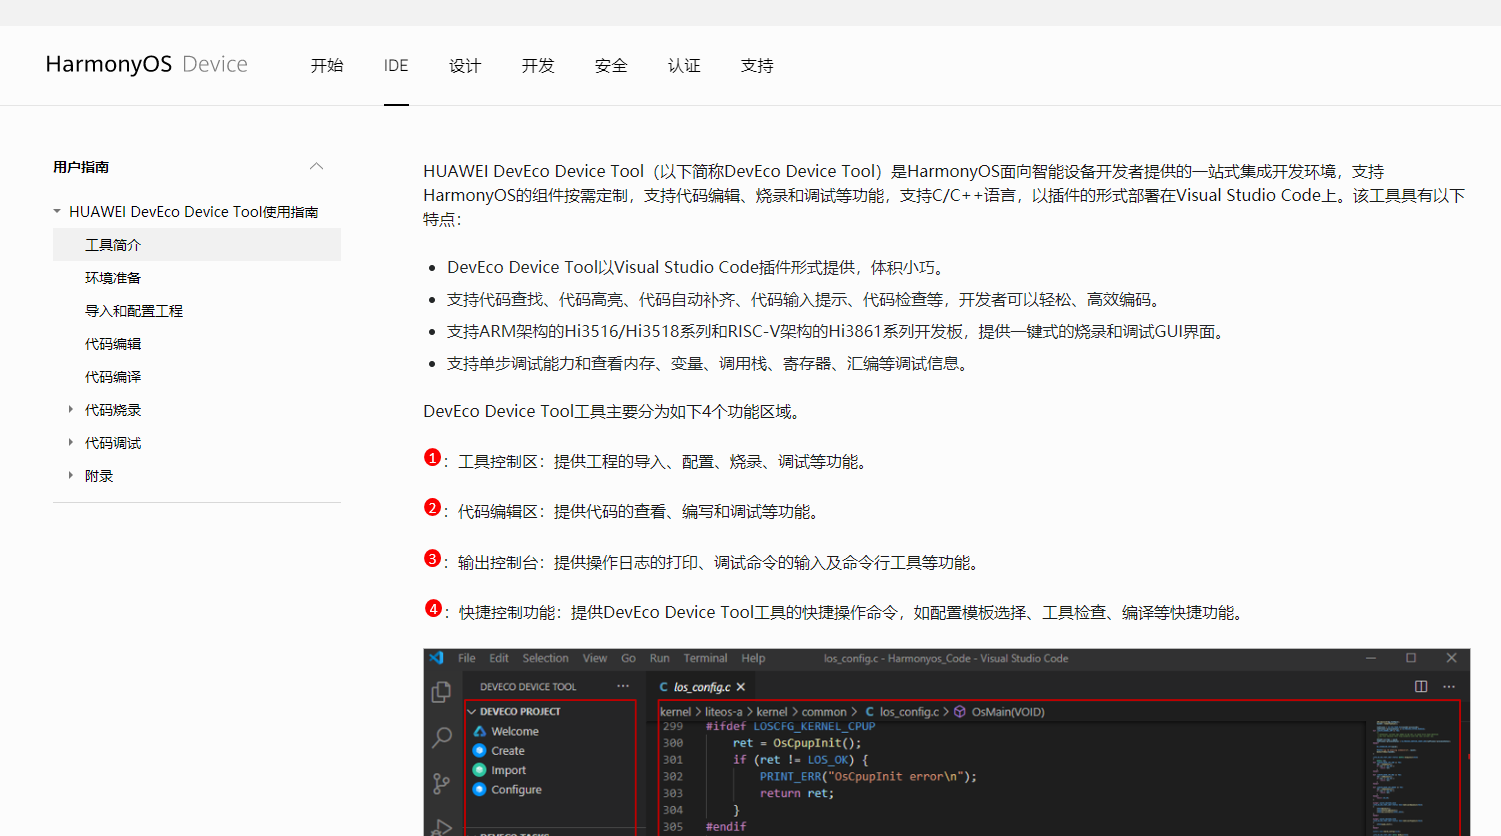
总结下烧录工具:
- vs code
- node.js
https://nodejs.org/dist/v12.18.3/node-v12.18.3-x64.msi - JDK1.8
链接:https://pan.baidu.com/s/1u6TMZaQ8D-9nIFUSEX1RiA
提取码:ie59
安装教程
https://blog.csdn.net/bestsongs/article/details/104905060
主要是设置环境变量。
4. npm
打开window的命令行工具:
npm install -g @ohos/hpm-cli
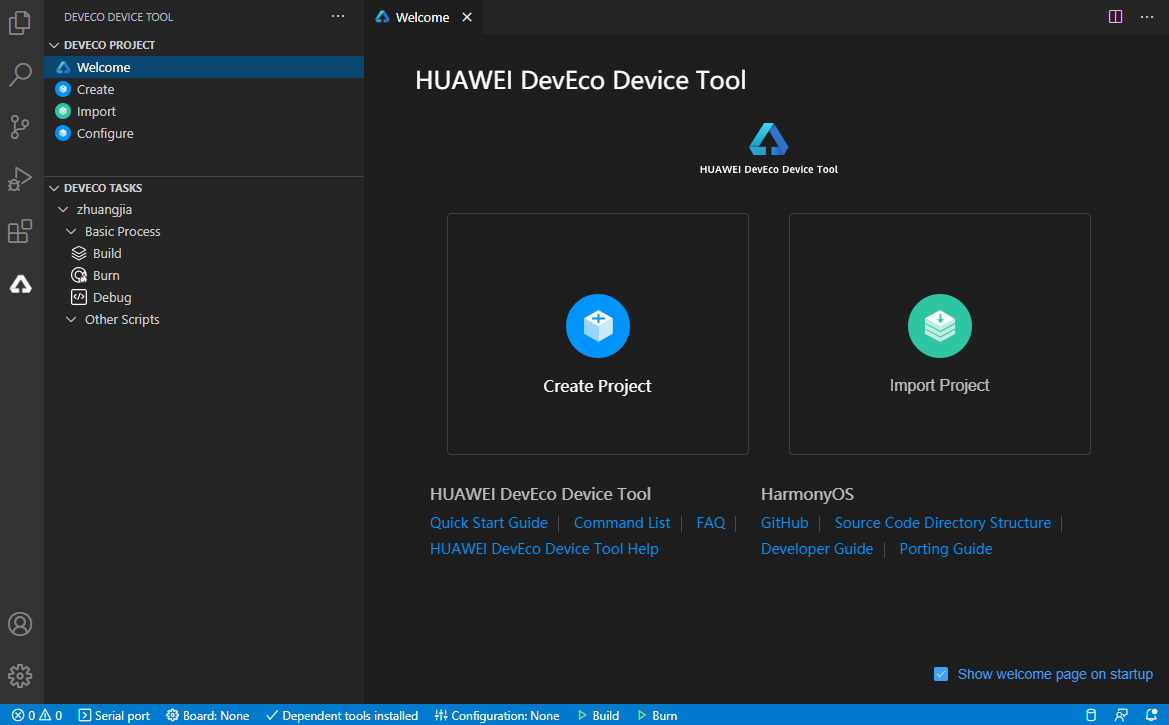
5.下载DevEcoDeviceTool-1.0.0
访问:https://device.harmonyos.com/cn/ide这一步,需要华为账户,有点烦。不过里面有指导如何在vs code上安装DevEcoDeviceTool的文档。

安装完成后:
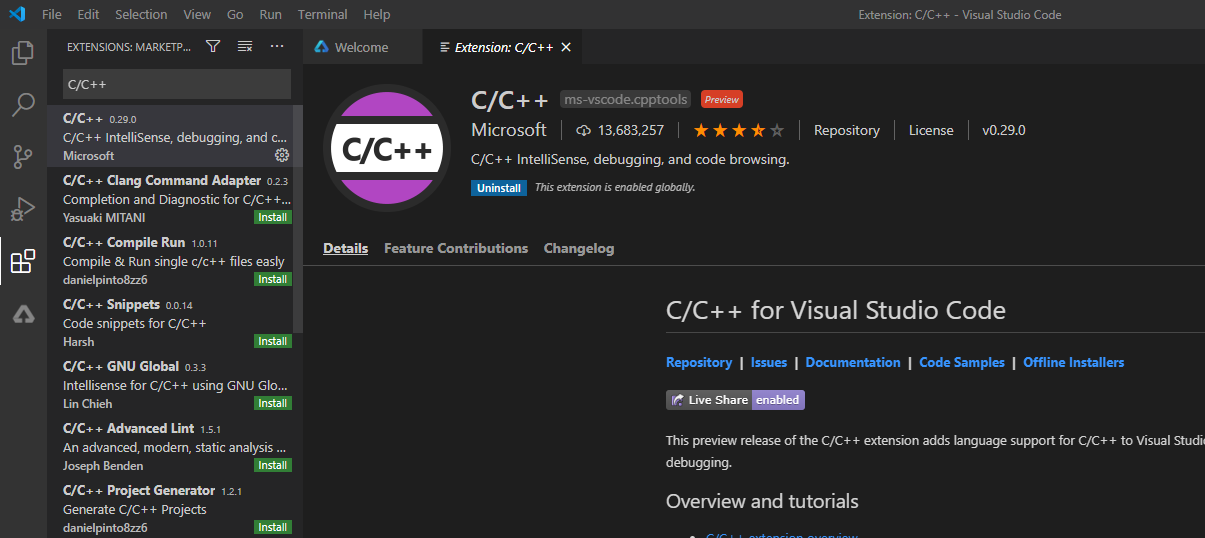
安装C/C++
- 导入代码
ubuntu中设置共享文件夹
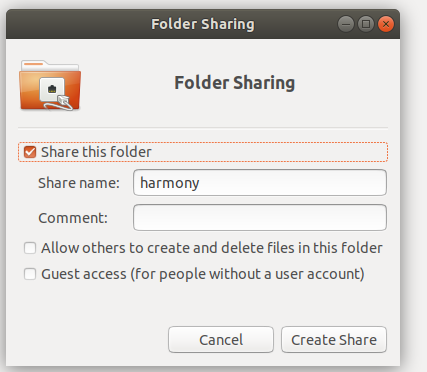
windows中能直接通过网络访问ubuntu中的文件夹
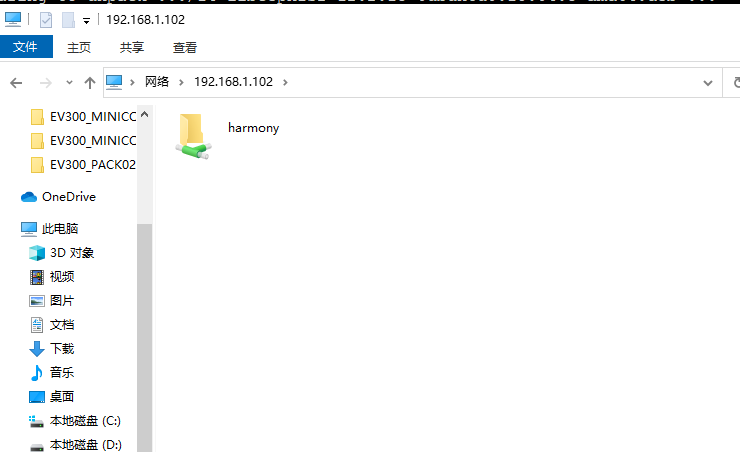
添加驱动网络映射器
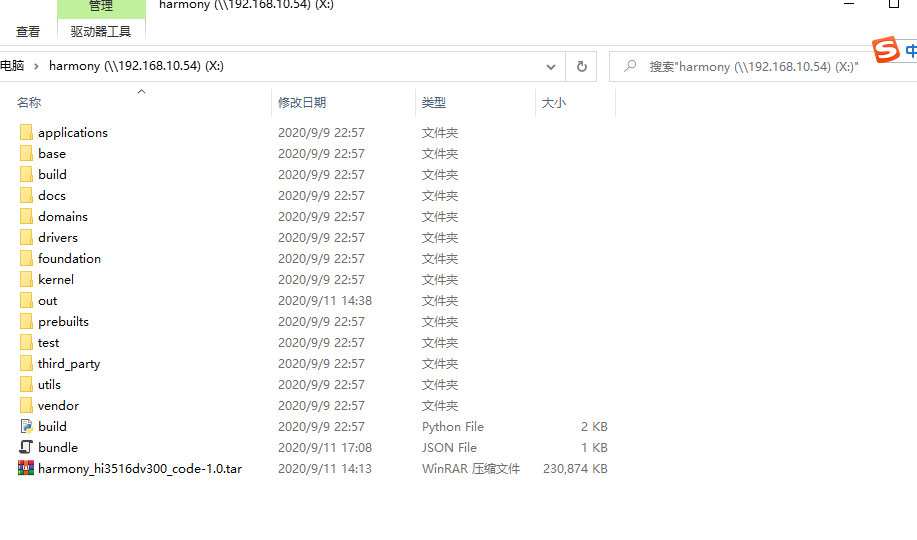
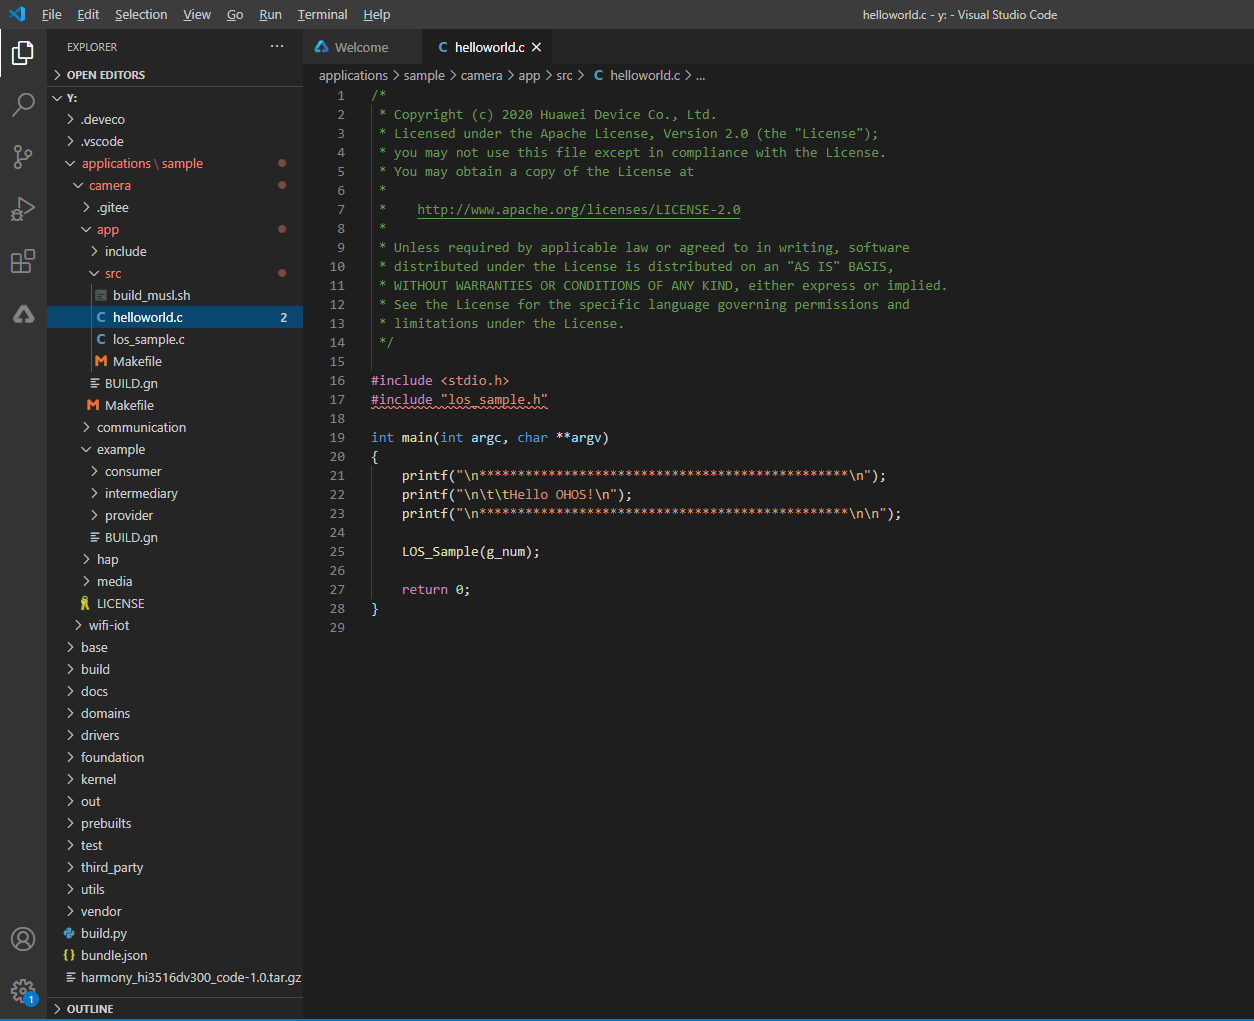
按照IDE的指导导入ubuntu共享的文件夹到vscode
未完待续…
发布者:全栈程序员-站长,转载请注明出处:https://javaforall.net/192797.html原文链接:https://javaforall.net


