
大家好,又见面了,我是你们的朋友全栈君。如果您正在找激活码,请点击查看最新教程,关注关注公众号 “全栈程序员社区” 获取激活教程,可能之前旧版本教程已经失效.最新Idea2022.1教程亲测有效,一键激活。
Jetbrains全系列IDE使用 1年只要46元 售后保障 童叟无欺


labelme
Image Polygonal Annotation with Python


![]()


Description
Labelme is a graphical image annotation tool inspired by http://labelme.csail.mit.edu.
It is written in Python and uses Qt for its graphical interface.
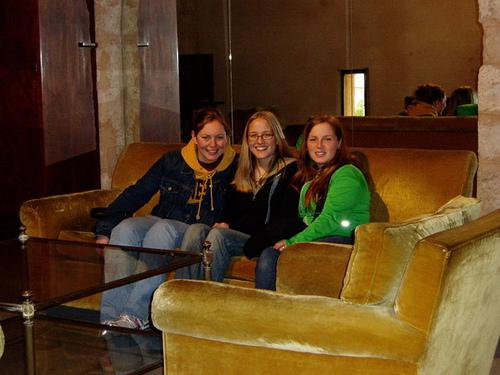
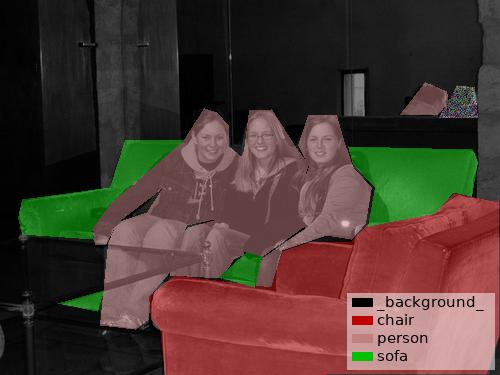
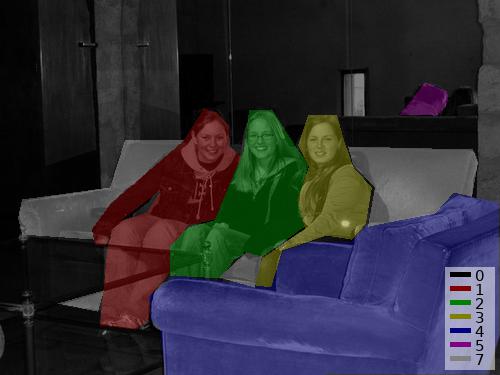
VOC dataset example of instance segmentation.
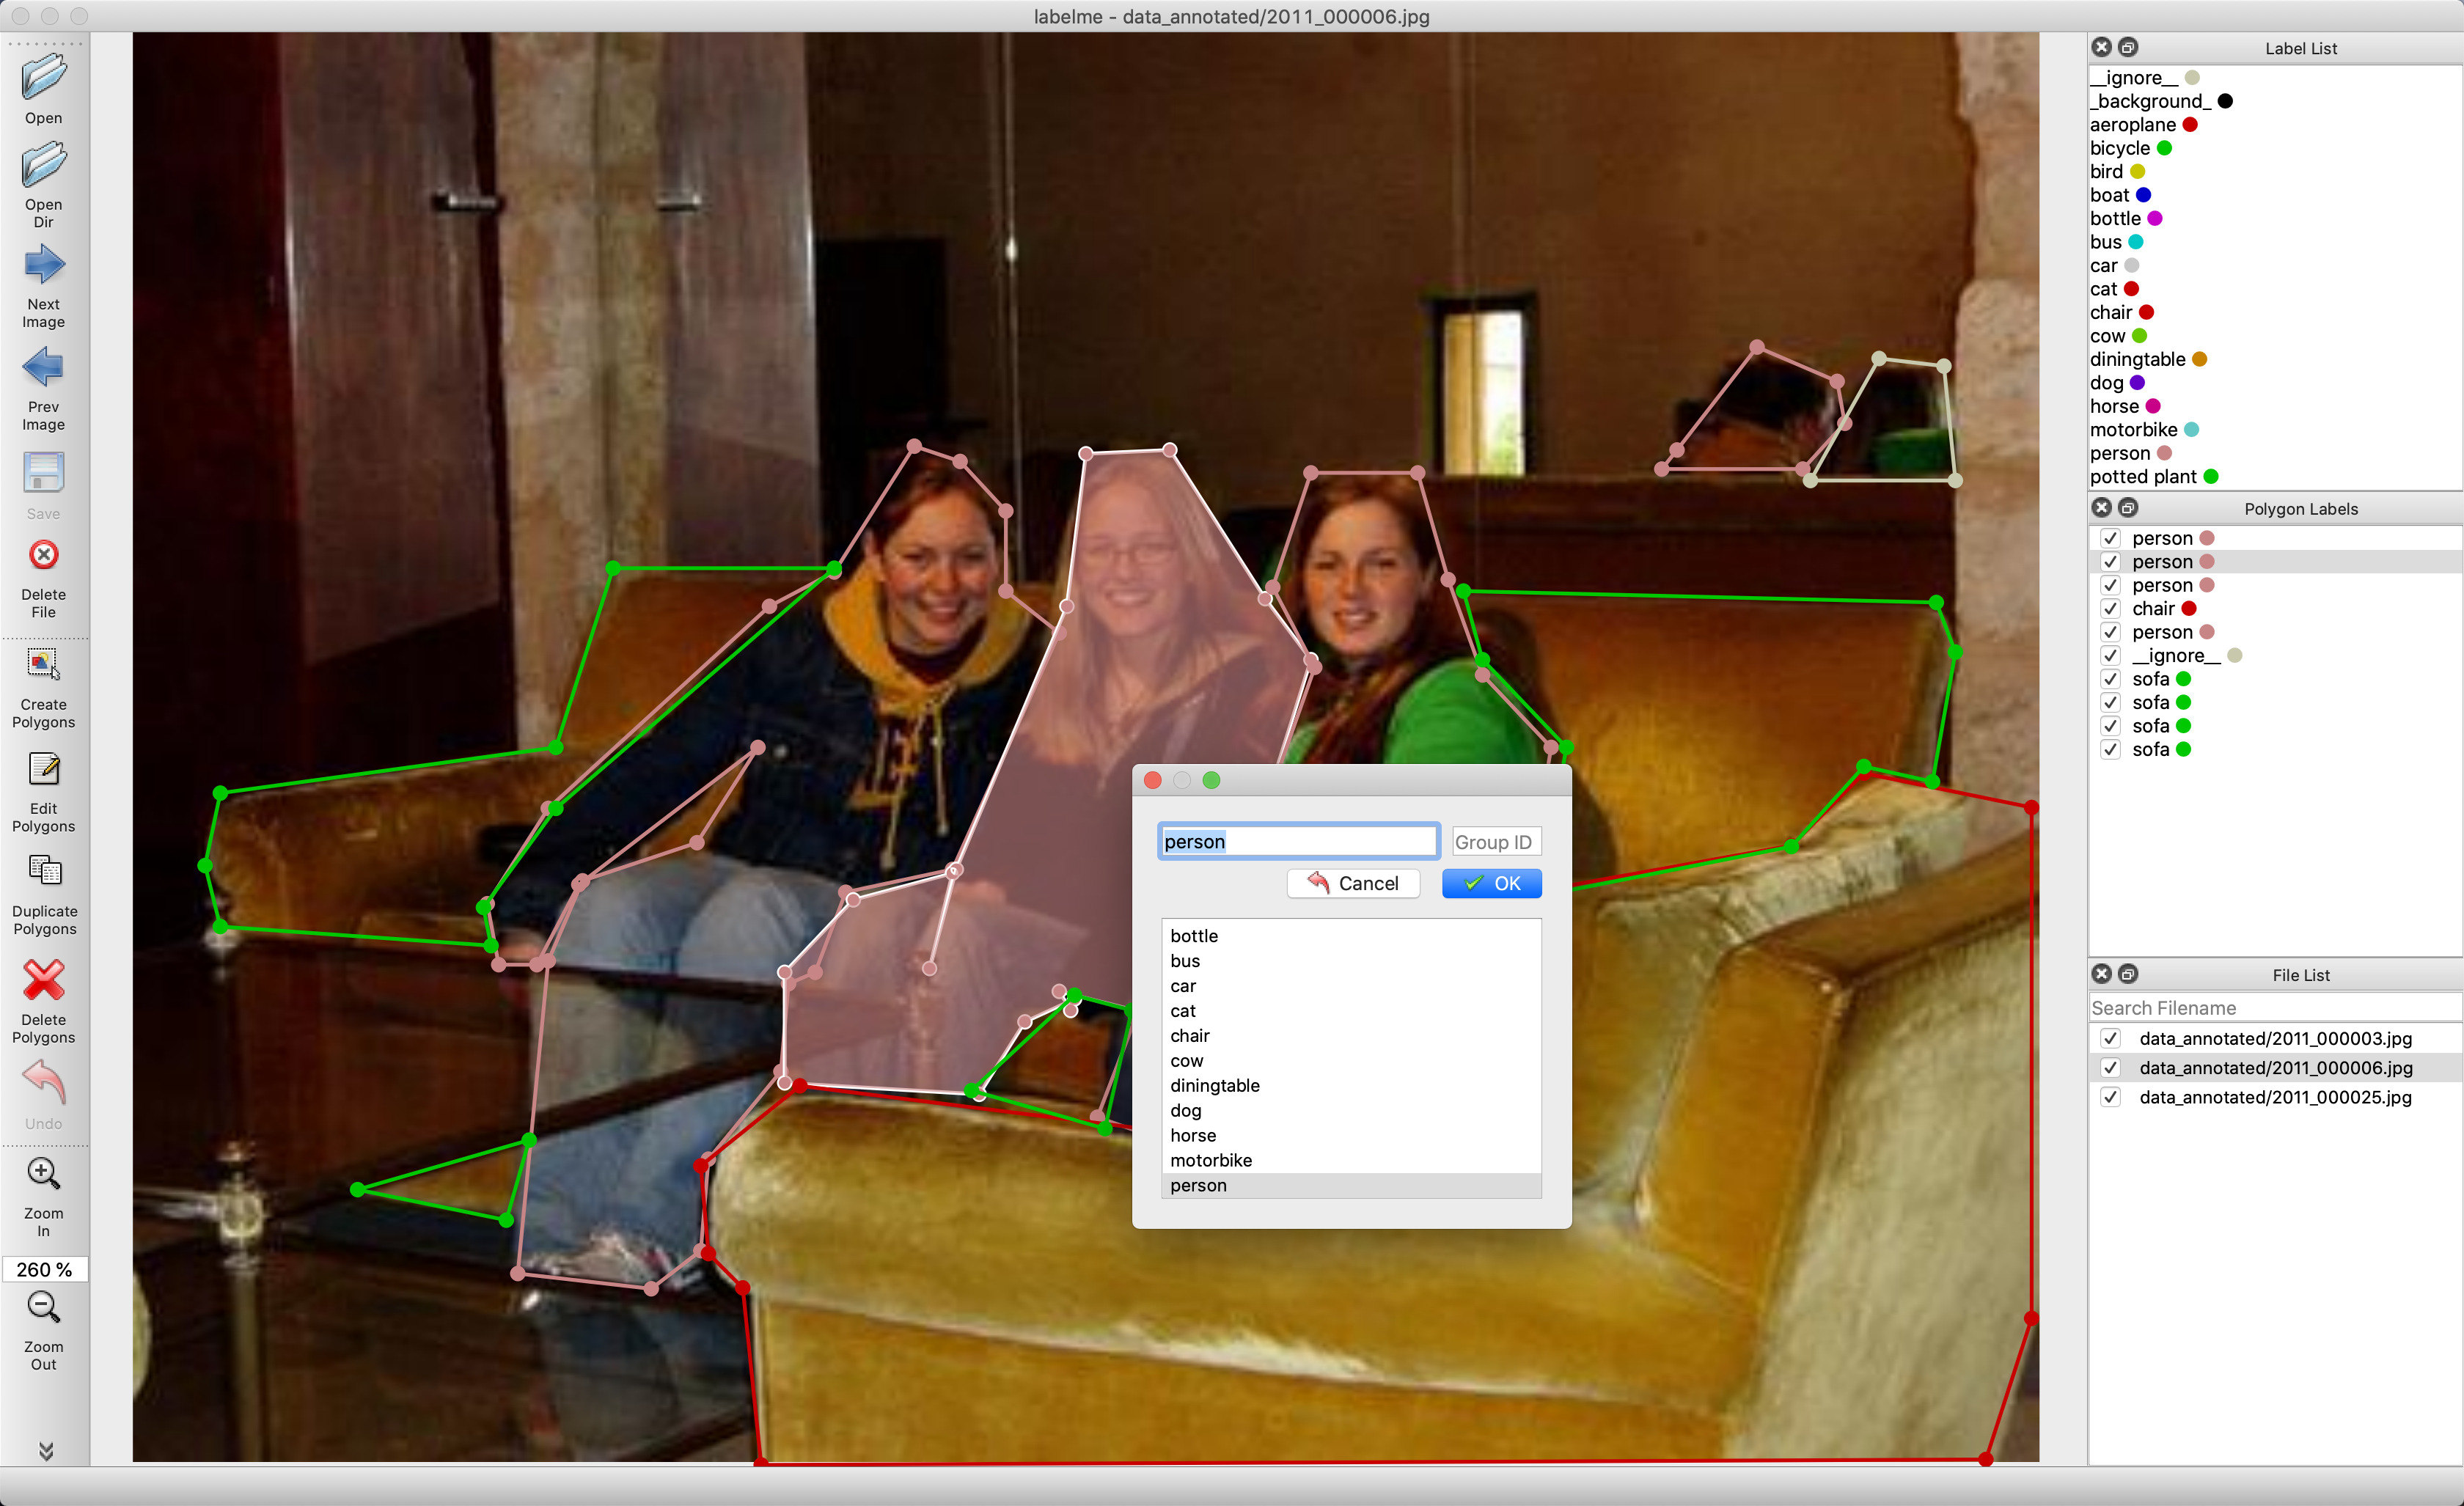

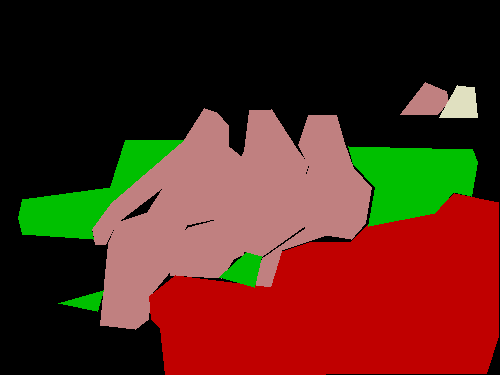
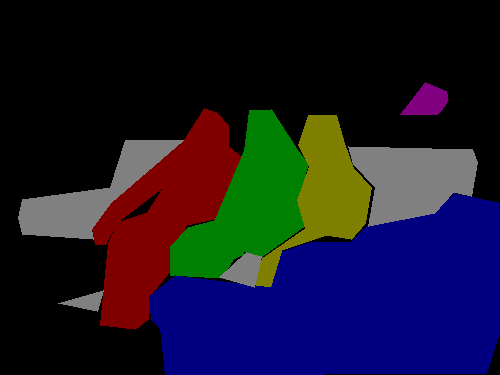
Other examples (semantic segmentation, bbox detection, and classification).
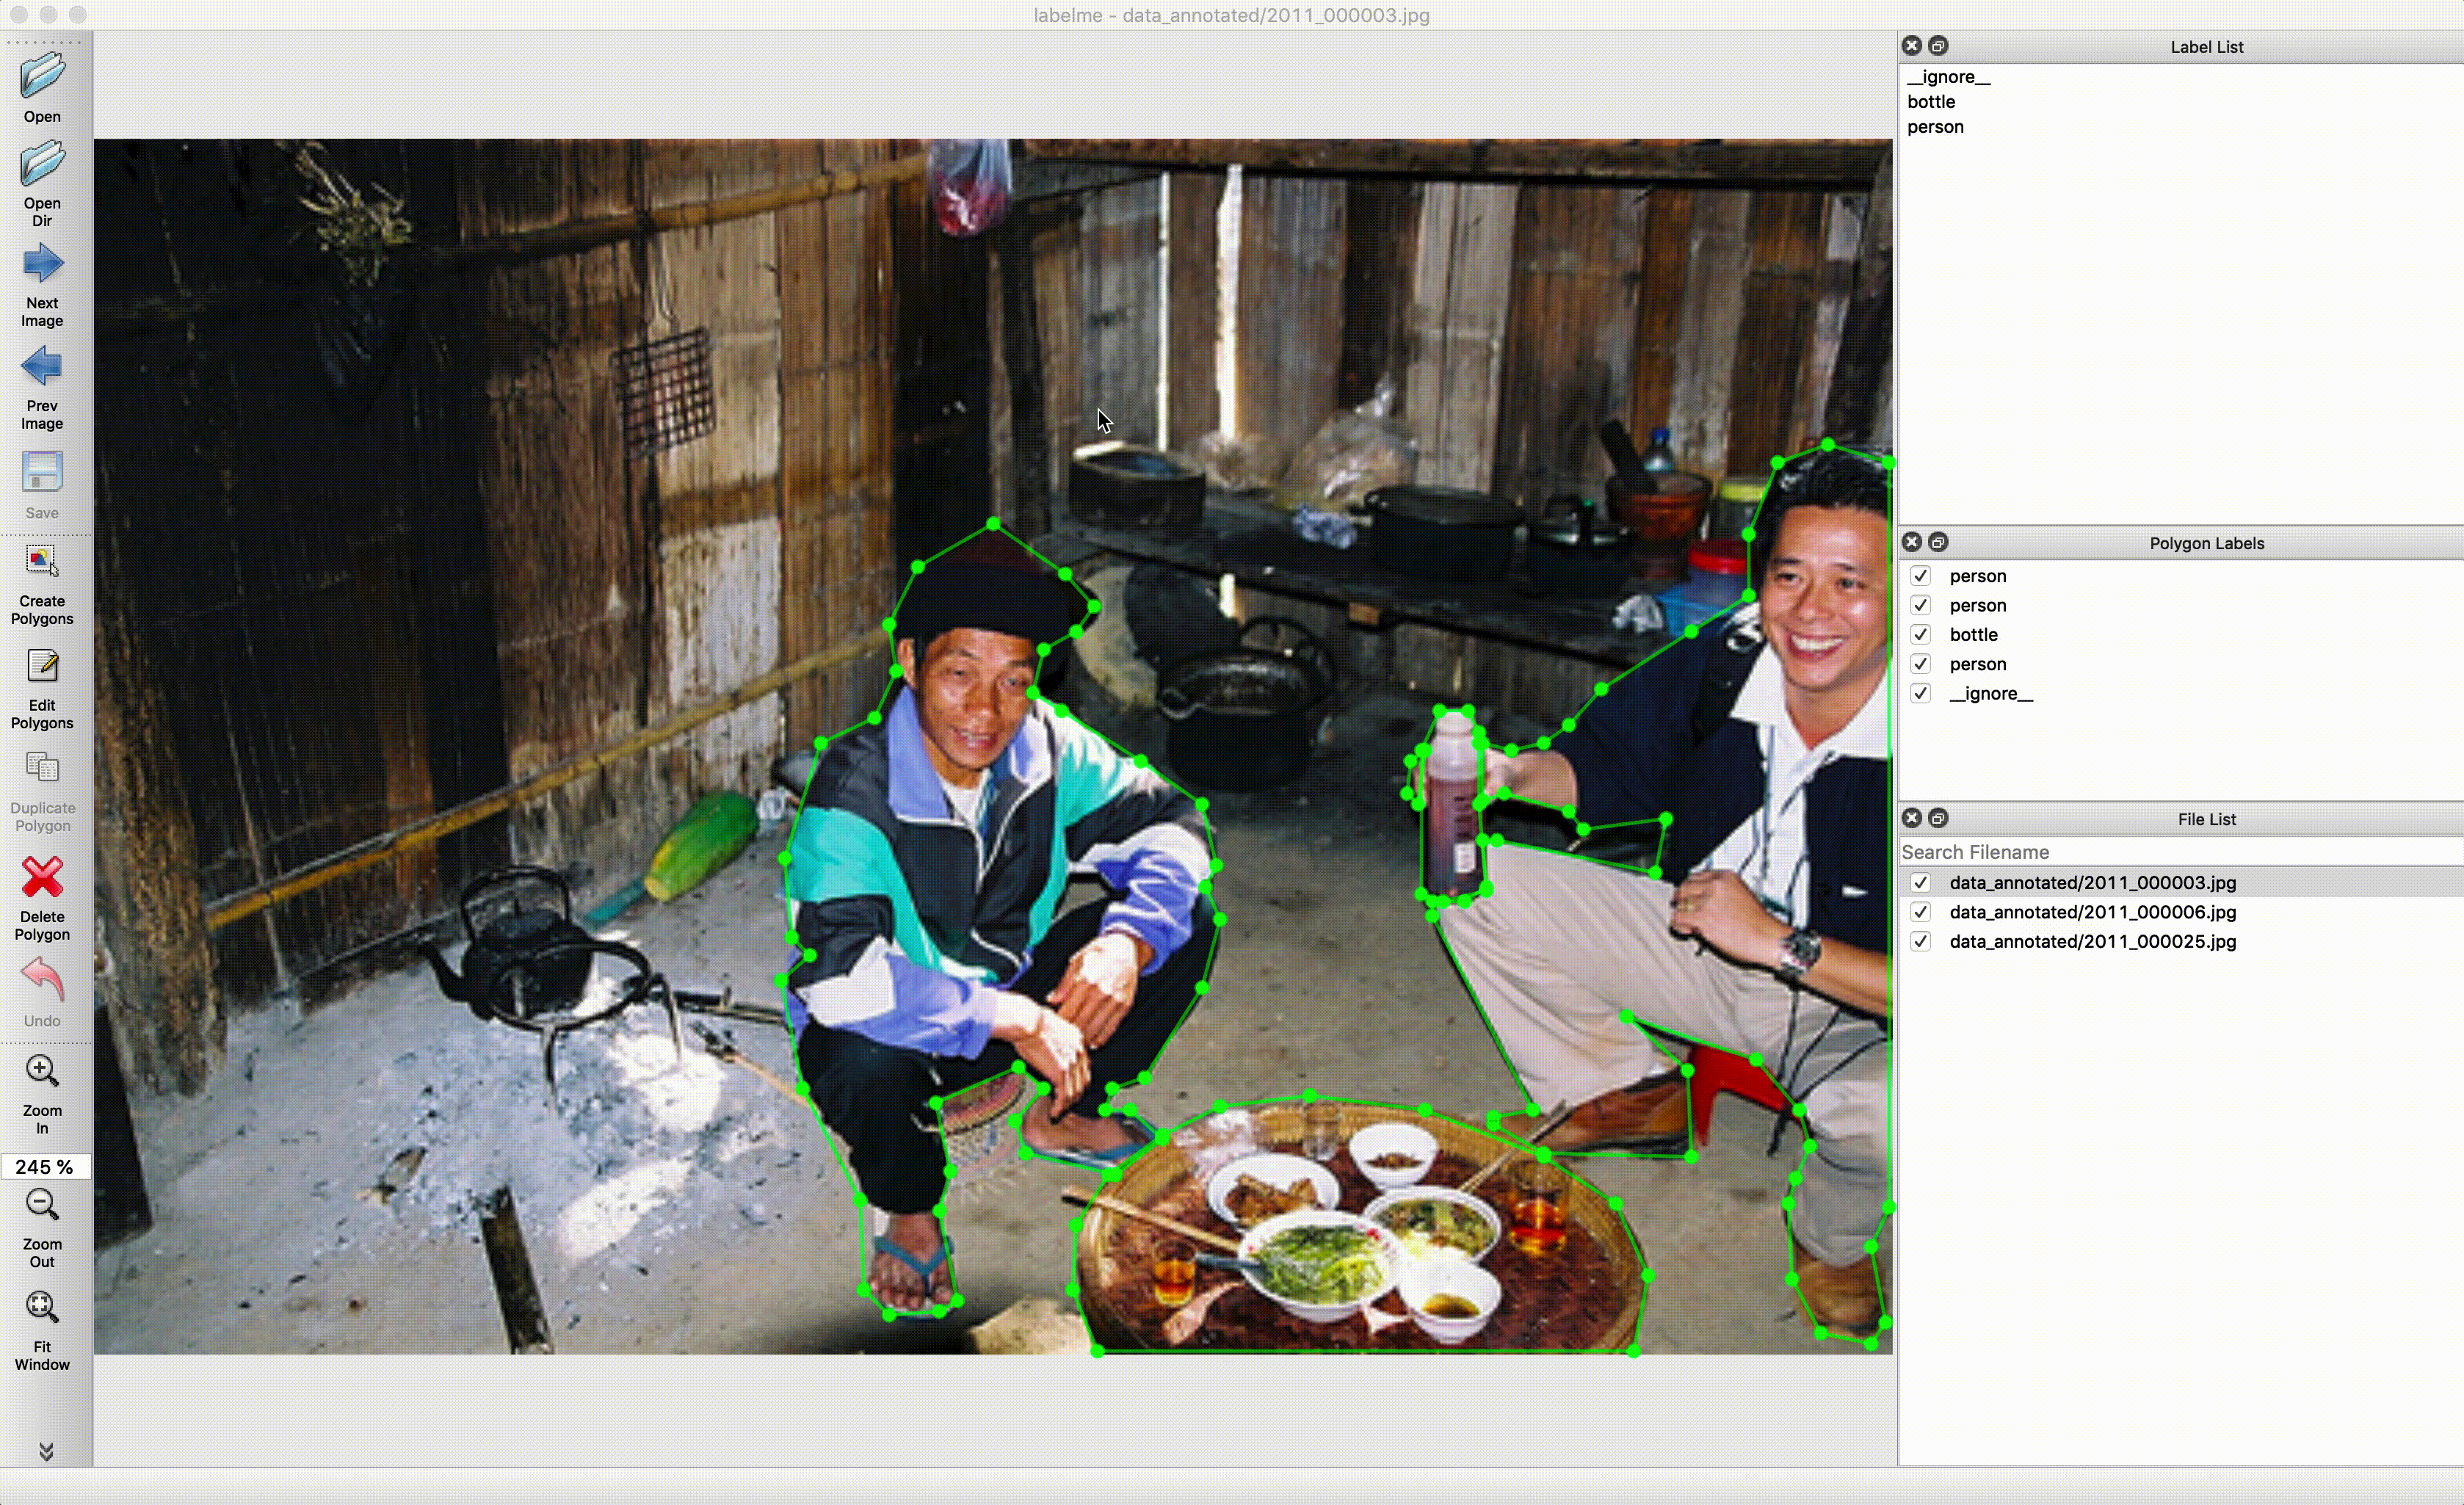
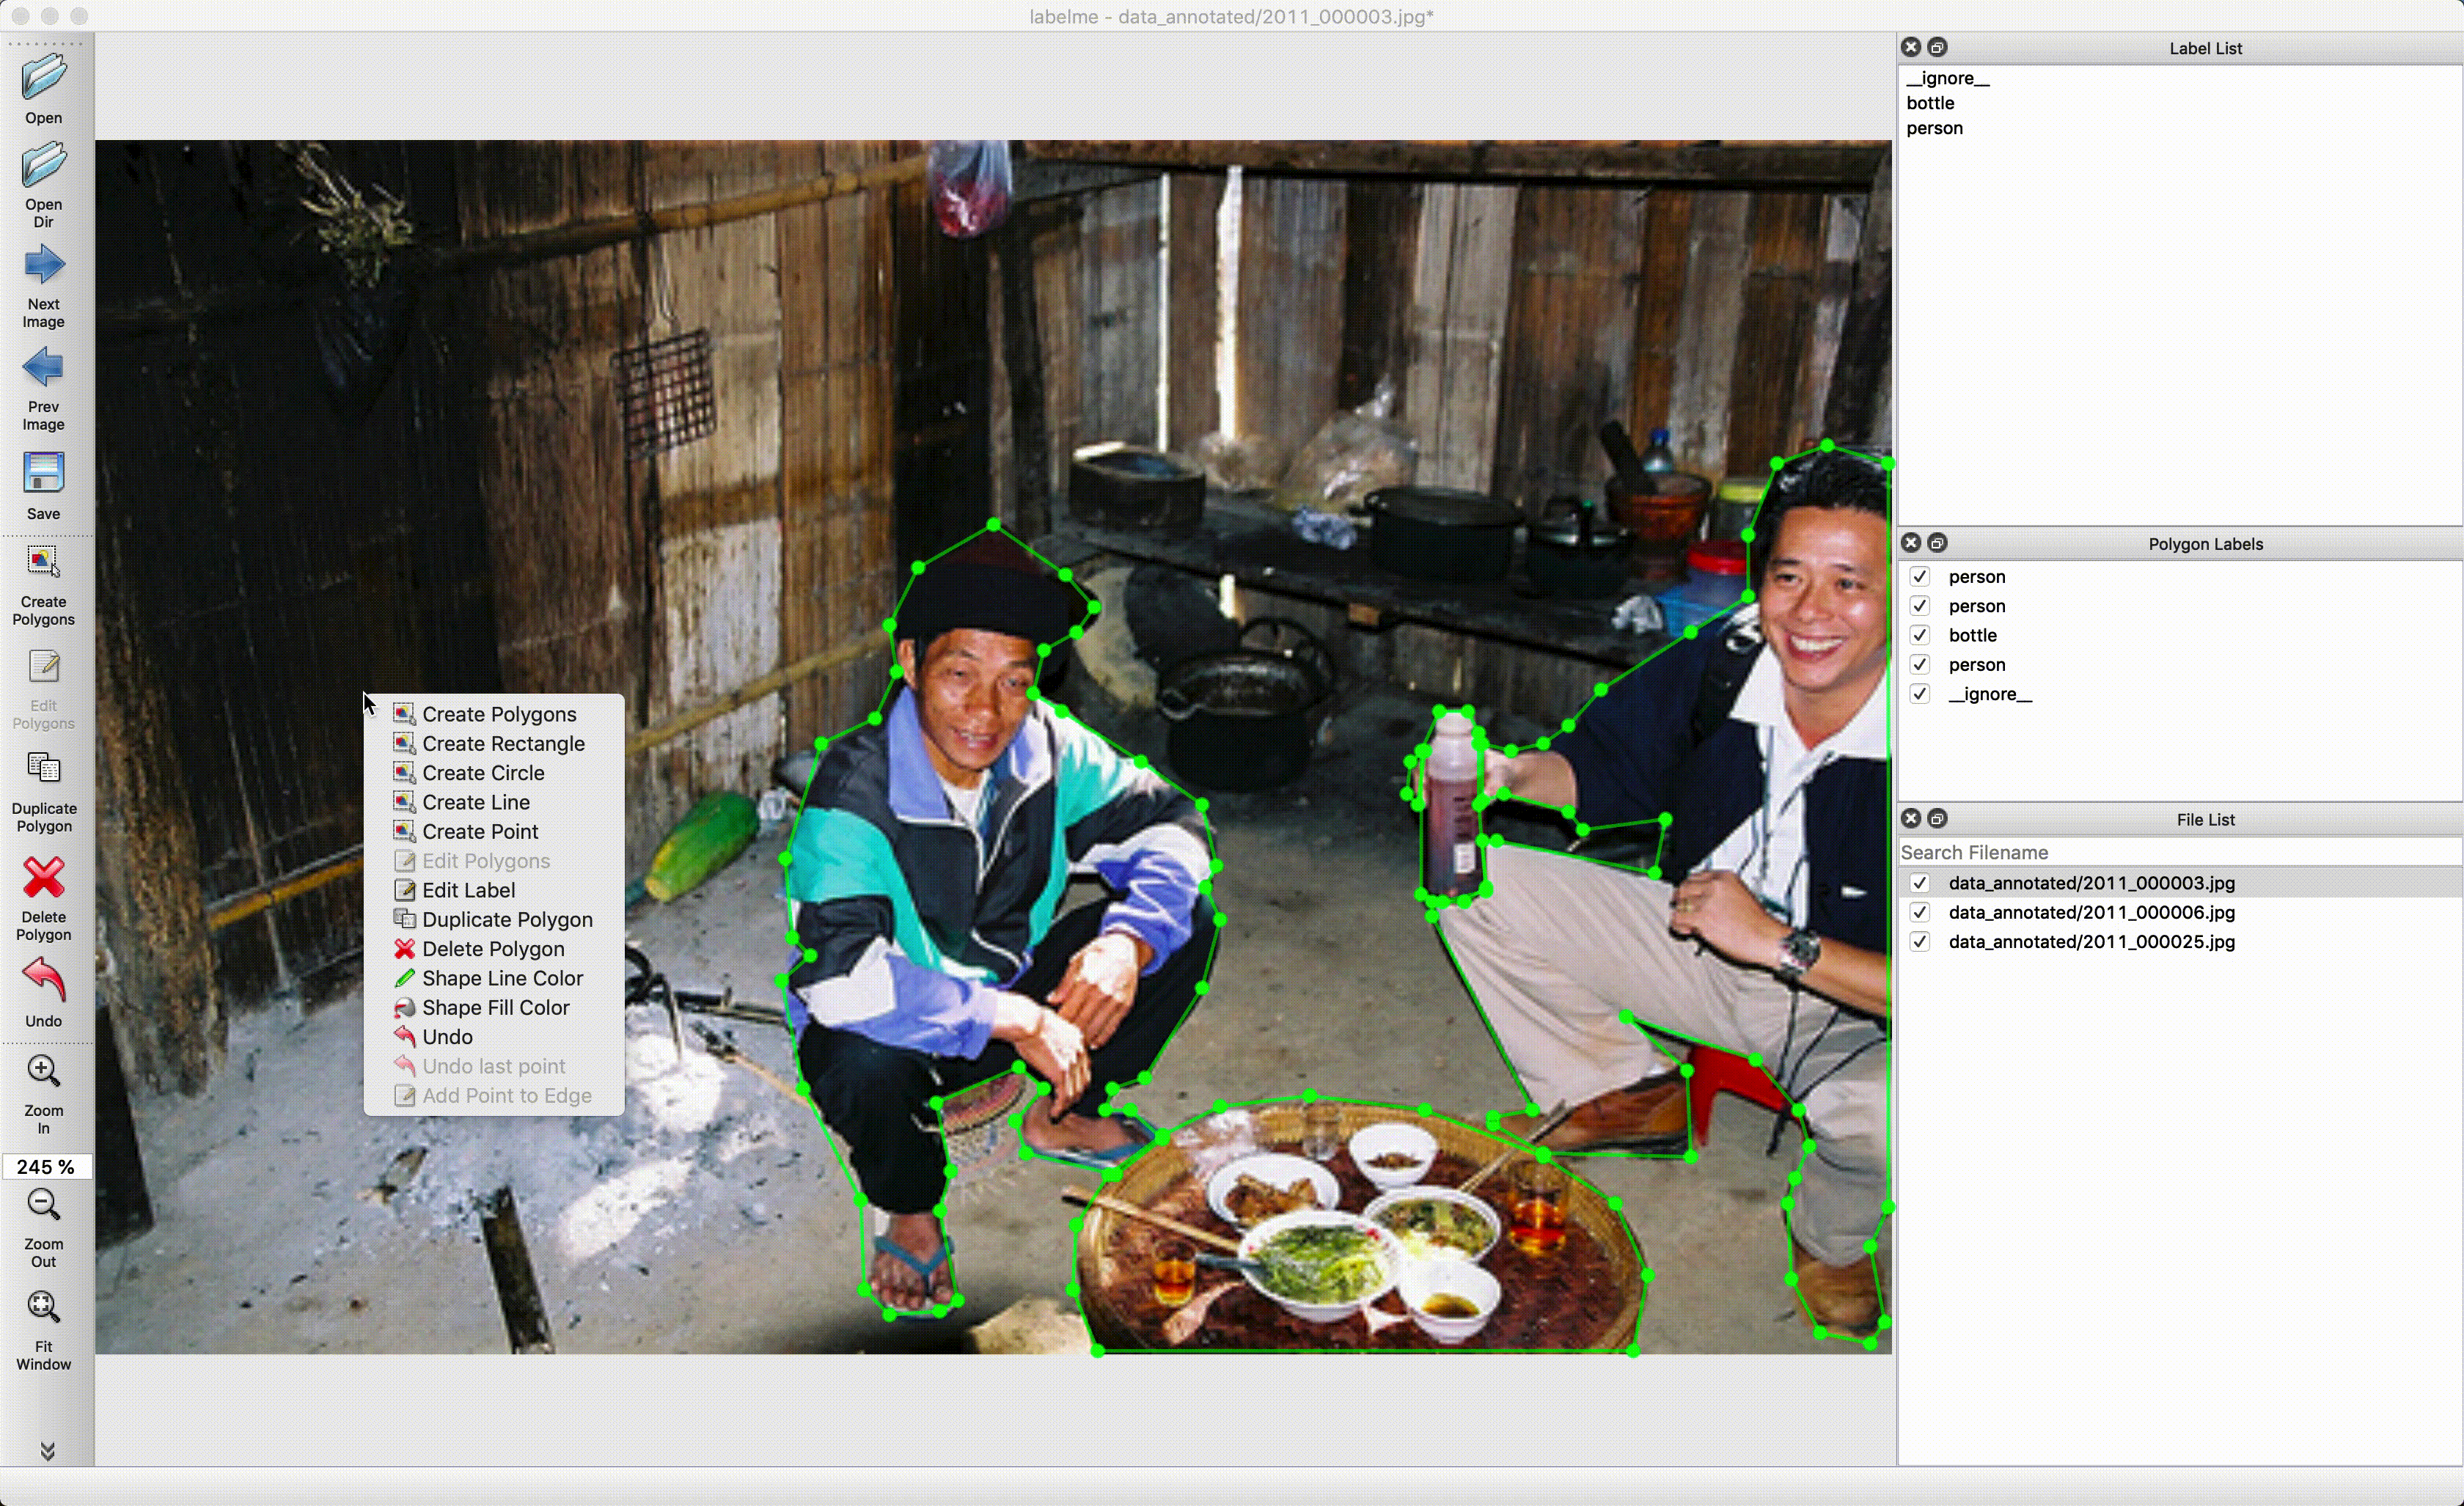
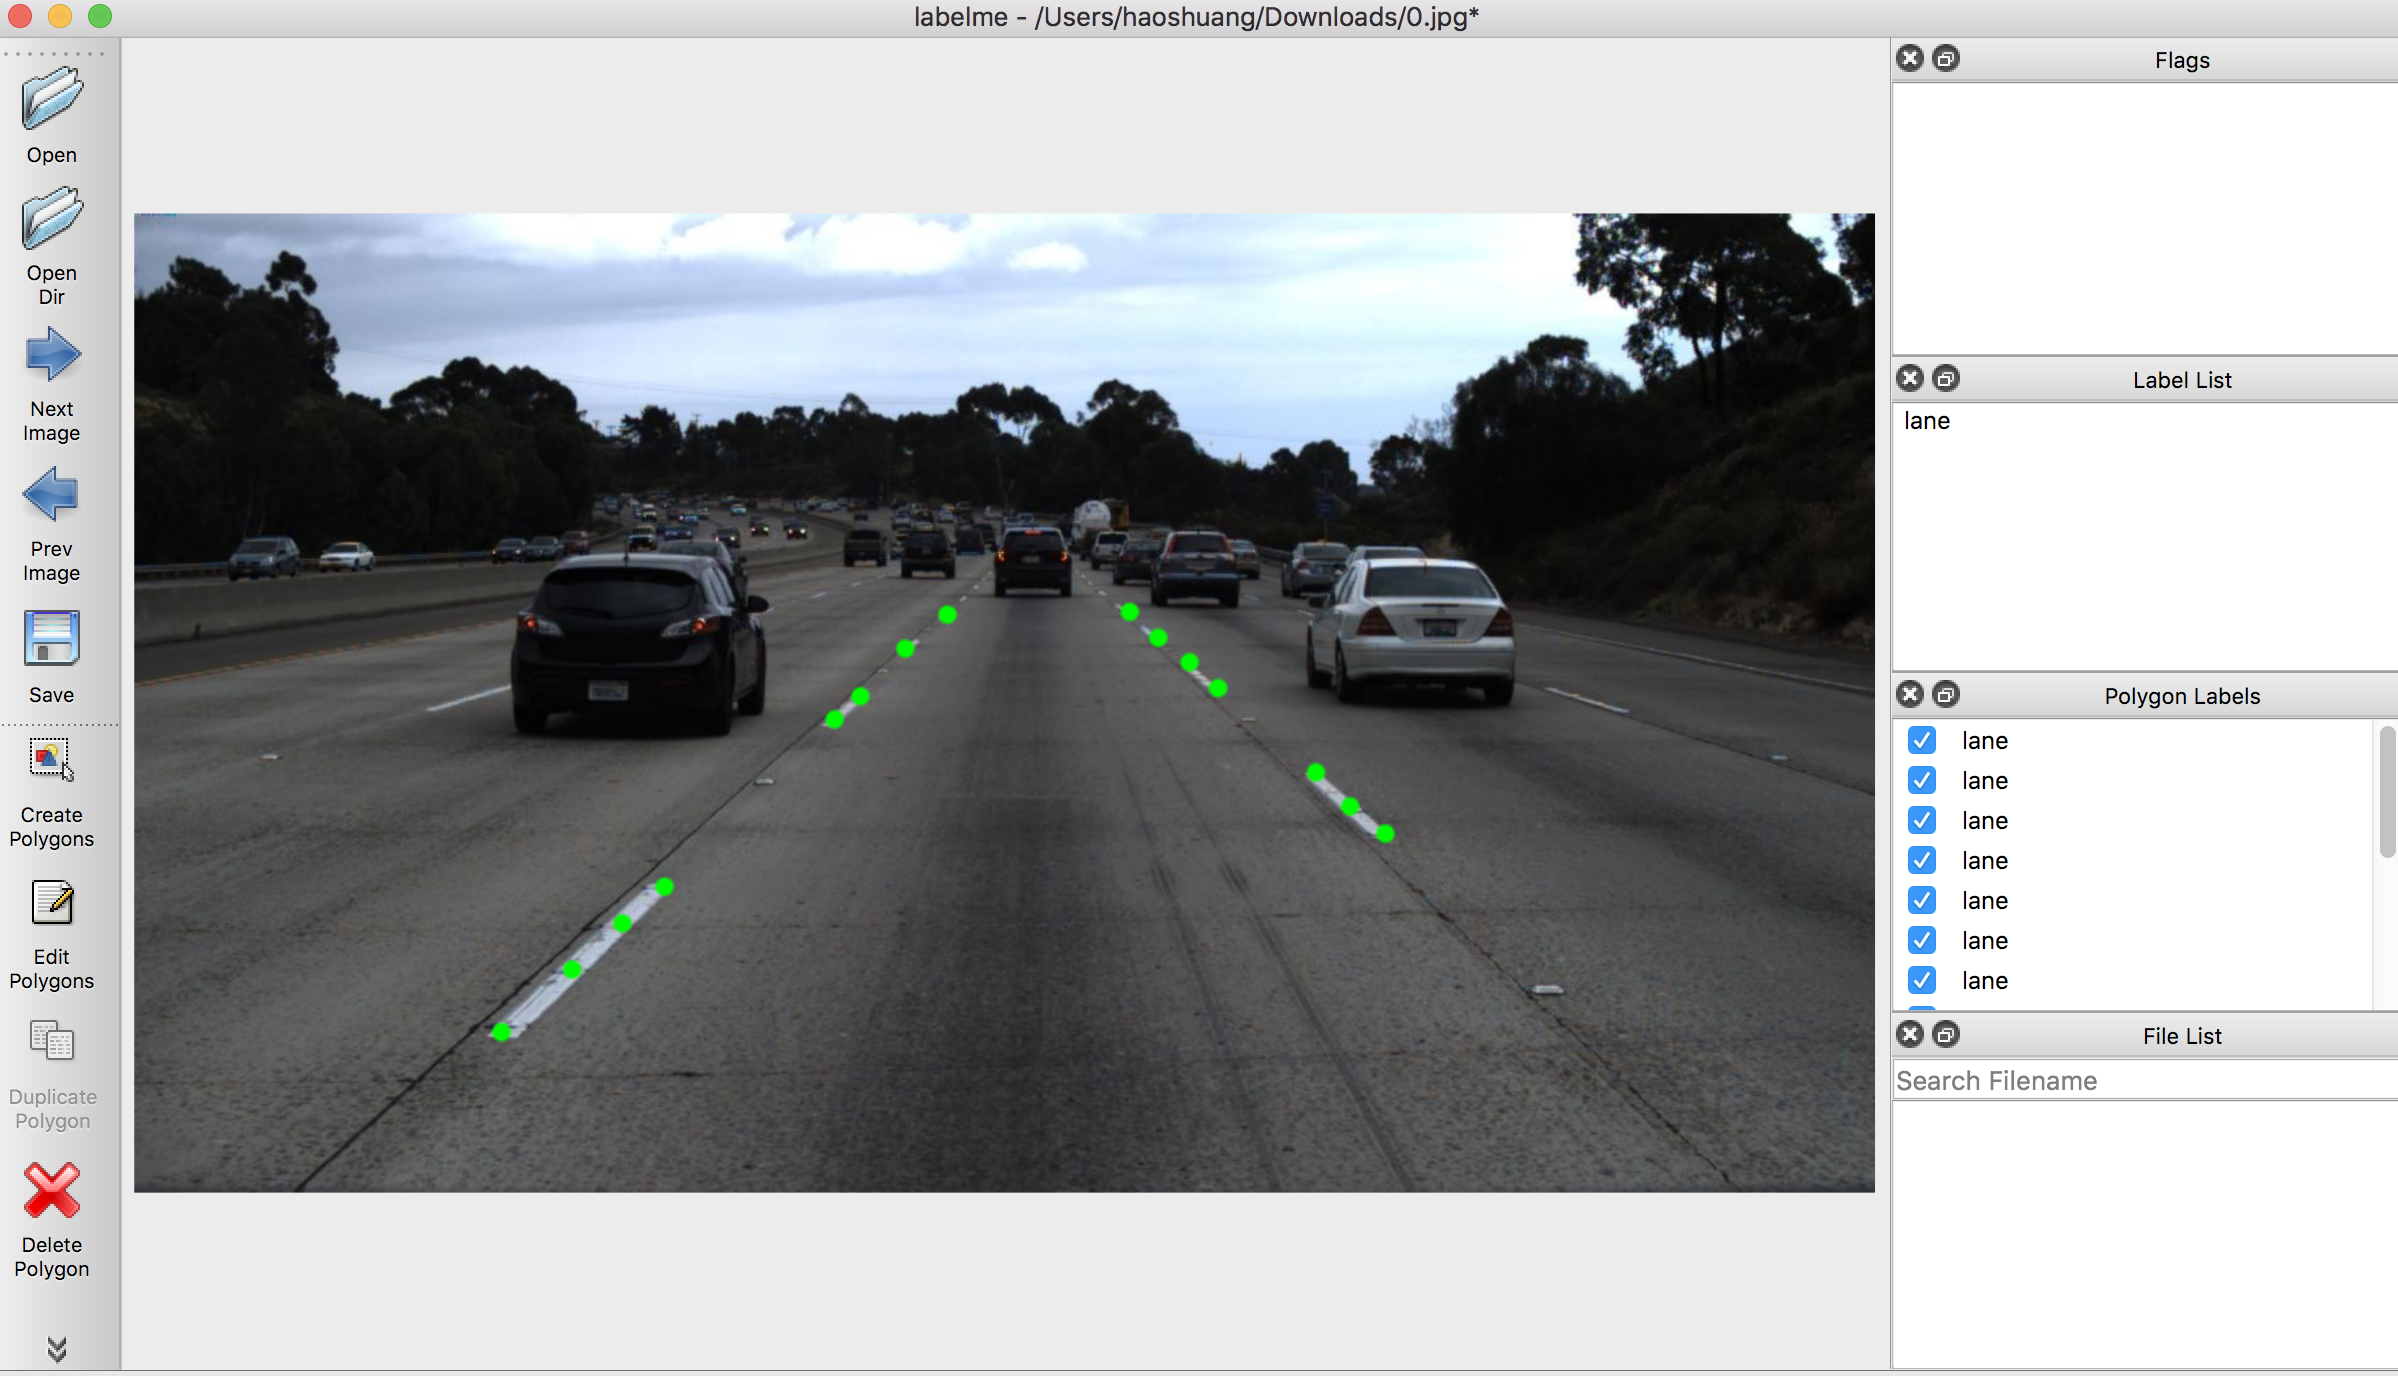
Various primitives (polygon, rectangle, circle, line, and point).
Features
Image annotation for polygon, rectangle, circle, line and point. (tutorial)
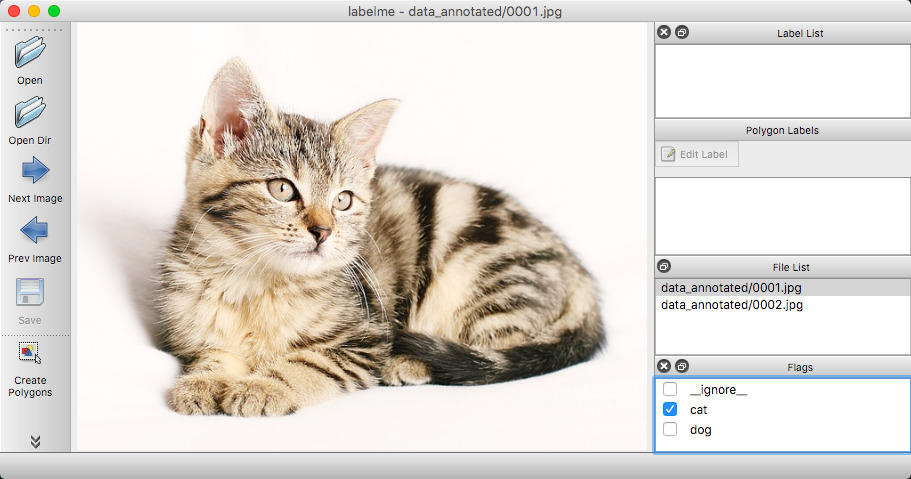
Image flag annotation for classification and cleaning. (#166)
Video annotation. (video annotation)
GUI customization (predefined labels / flags, auto-saving, label validation, etc). (#144)
Exporting VOC-format dataset for semantic/instance segmentation. (semantic segmentation, instance segmentation)
Exporting COCO-format dataset for instance segmentation. (instance segmentation)
Requirements
Ubuntu / macOS / Windows
Python2 / Python3
Installation
There are options:
Platform agonistic installation: Anaconda, Docker
Platform specific installation: Ubuntu, macOS, Windows
Anaconda
You need install Anaconda, then run below:
# python2
conda create –name=labelme python=2.7
sourceactivate labelme
# conda install -c conda-forge pyside2
conda installpyqt
pip installlabelme
# if you’d like to use the latest version. run below:
# pip install git+https://github.com/wkentaro/labelme.git
# python3
conda create –name=labelme python=3.6
sourceactivate labelme
# conda install -c conda-forge pyside2
# conda install pyqt
# pip install pyqt5 # pyqt5 can be installed via pip on python3
pip installlabelme
# or you can install everything by conda command
# conda install labelme -c conda-forge
Docker
You need install docker, then run below:
# on macOS
socat TCP-LISTEN:6000,reuseaddr,fork UNIX-CLIENT:\”$DISPLAY\” &
docker run -it -v /tmp/.X11-unix:/tmp/.X11-unix -e DISPLAY=docker.for.mac.host.internal:0 -v $(pwd):/root/workdir wkentaro/labelme
# on Linux
xhost +
docker run -it -v /tmp/.X11-unix:/tmp/.X11-unix -e DISPLAY=:0 -v $(pwd):/root/workdir wkentaro/labelme
Ubuntu
# Ubuntu 14.04 / Ubuntu 16.04
# Python2
# sudo apt-get install python-qt4 # PyQt4
sudoapt-get installpython-pyqt5 # PyQt5
sudopip installlabelme
# Python3
sudoapt-get installpython3-pyqt5 # PyQt5
sudopip3 installlabelme
Ubuntu 19.10+ / Debian (sid)
sudoapt-get installlabelme
macOS
# macOS Sierra
brew installpyqt # maybe pyqt5
pip installlabelme # both python2/3 should work
# or install standalone executable / app
# NOTE: this only installs the `labelme` command
brew installwkentaro/labelme/labelme
brew cask installwkentaro/labelme/labelme
Windows
Install Anaconda, then in an Anaconda Prompt run:
# python3
conda create –name=labelme python=3.6
conda activate labelme
pip installlabelme
Usage
Run labelme –help for detail.
The annotations are saved as a JSON file.
labelme # just open gui
# tutorial (single image example)
cdexamples/tutorial
labelme apc2016_obj3.jpg # specify image file
labelme apc2016_obj3.jpg -O apc2016_obj3.json # close window after the save
labelme apc2016_obj3.jpg –nodata # not include image data but relative image path in JSON file
labelme apc2016_obj3.jpg \
–labels highland_6539_self_stick_notes,mead_index_cards,kong_air_dog_squeakair_tennis_ball # specify label list
# semantic segmentation example
cdexamples/semantic_segmentation
labelme data_annotated/ # Open directory to annotate all images in it
labelme data_annotated/ –labels labels.txt # specify label list with a file
For more advanced usage, please refer to the examples:
Command Line Arguments
–output specifies the location that annotations will be written to. If the location ends with .json, a single annotation will be written to this file. Only one image can be annotated if a location is specified with .json. If the location does not end with .json, the program will assume it is a directory. Annotations will be stored in this directory with a name that corresponds to the image that the annotation was made on.
The first time you run labelme, it will create a config file in ~/.labelmerc. You can edit this file and the changes will be applied the next time that you launch labelme. If you would prefer to use a config file from another location, you can specify this file with the –config flag.
Without the –nosortlabels flag, the program will list labels in alphabetical order. When the program is run with this flag, it will display labels in the order that they are provided.
Flags are assigned to an entire image. Example
Labels are assigned to a single polygon. Example
FAQ
How to convert JSON file to numpy array? See examples/tutorial.
How to load label PNG file? See examples/tutorial.
How to get annotations for semantic segmentation? See examples/semantic_segmentation.
How to get annotations for instance segmentation? See examples/instance_segmentation.
Testing
pip installhacking pytest pytest-qt
flake8 .
pytest -v tests
Developing
git clone https://github.com/wkentaro/labelme.git
cdlabelme
# Install anaconda3 and labelme
curl -L https://github.com/wkentaro/dotfiles/raw/master/local/bin/install_anaconda3.sh | bash -s .
source .anaconda3/bin/activate
pip install -e .
How to build standalone executable
Below shows how to build the standalone executable on macOS, Linux and Windows.
Also, there are pre-built executables in
the release section.
# Setup conda
conda create –name labelme python==3.6.0
conda activate labelme
# Build the standalone executable
pip install .
pip installpyinstaller
pyinstaller labelme.spec
dist/labelme –version
Acknowledgement
This repo is the fork of mpitid/pylabelme,
whose development has already stopped.
Cite This Project
If you use this project in your research or wish to refer to the baseline results published in the README, please use the following BibTeX entry.
@misc{labelme2016,
author = {Kentaro Wada},
title = {
{labelme: Image Polygonal Annotation with Python}},
howpublished = {\url{https://github.com/wkentaro/labelme}},
year = {2016}
}
发布者:全栈程序员-站长,转载请注明出处:https://javaforall.net/194785.html原文链接:https://javaforall.net


