
一、创建平台应用
运行效果图


二、创建及配置项目
maven {
url "https://jitpack.io" } 
然后在app模块下的build.gradle中添加网络访问依赖库和其他的依赖
//网络访问 implementation 'com.squareup.okhttp3:okhttp:3.10.0' //下拉框 implementation 'com.github.arcadefire:nice-spinner:1.4.3' //卡片视图 implementation 'androidx.cardview:cardview:1.0.0' //GSON解析 implementation 'com.squareup.retrofit2:converter-gson:2.4.0' 
而其中okhttp是一个你做Android开发必须要知道的一个库,很多公司在面试的时候都会问这个库的底层原理,有想法可以详细的去官网了解,这是github上的地址:okhttp,有兴趣就可以去了解。文章中只是简单的使用而已,这里先说明,然后Sync。
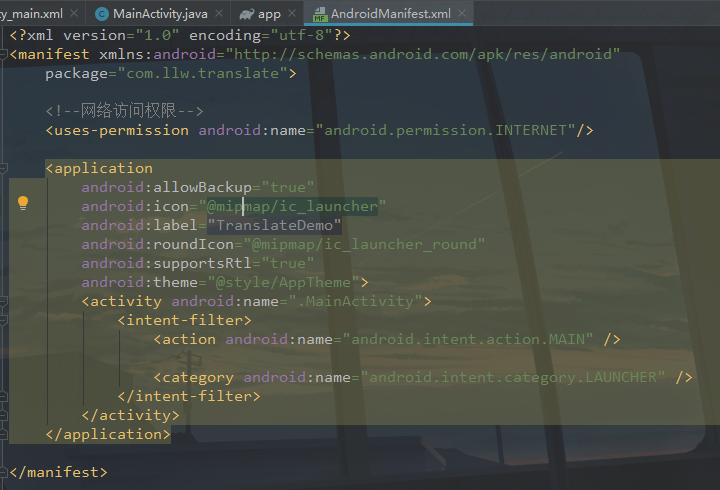
然后在AndroidManifest.xml中添加网络访问权限
    android
   :name=
   "android.permission.INTERNET"/>
下面可以进入到正式的编码环节了。激动的心,颤抖的手,我相信你已经迫不及待了吧,当然我会尽我所能的讲清楚每一个环节,哪怕你觉得我啰嗦也好。
三、编码
1. 修改外观与布局
这里我将主题样式的颜色从原谅绿改成了白色,并且NoActionBar去掉动作栏。然后你再运行一下

emmm…怎么说呢,感觉怪怪的,不行,还得再改改。打开MainActivity,在onCreate中增加如下代码:
//设置亮色状态栏模式 systemUiVisibility在Android11中弃用了,可以尝试一下。 getWindow().getDecorView().setSystemUiVisibility(View.SYSTEM_UI_FLAG_LAYOUT_FULLSCREEN | View.SYSTEM_UI_FLAG_LIGHT_STATUS_BAR);
  "1.0" encoding="utf-8"?>

    xmlns
   :android=
   "http://schemas.android.com/apk/res/android"
   xmlns
   :app=
   "http://schemas.andr oid.com/apk/res-auto"
   xmlns
   :tools=
   "http://schemas.android.com/tools"
   android
   :layout_width=
   "match_parent"
   android
   :layout_height=
   "match_parent"
   android
   :fitsSystemWindows=
   "true"
   android
   :orientation=
   "vertical"
   tools
   :context=
   ".MainActivity">


     android
    :layout_width=
    "match_parent"
    android
    :layout_height=
    "?attr/actionBarSize"
    android
    :background=
    "#FFF"
    android
    :elevation=
    "3dp">

      android
     :layout_width=
     "wrap_content"
     android
     :layout_height=
     "wrap_content"
     android
     :layout_gravity=
     "center"
     android
     :text=
     "在线翻译"
     android
     :textColor=
     "#000"
     android
     :textSize=
     "18sp" />


     android
    :layout_width=
    "match_parent"
    android
    :layout_height=
    "match_parent"
    android
    :overScrollMode=
    "never">


      android
     :layout_width=
     "match_parent"
     android
     :layout_height=
     "match_parent"
     android
     :orientation=
     "vertical"
     android
     :padding=
     "20dp">


       android
      :id=
      "@+id/before_lay"
      android
      :layout_width=
      "match_parent"
      android
      :layout_height=
      "wrap_content"
      android
      :background=
      "#FFF"
      android
      :foreground=
      "@drawable/stroke_gray">


        android
       :id=
       "@+id/sp_language"
       android
       :layout_width=
       "match_parent"
       android
       :layout_height=
       "48dp"
       app
       :arrowTint=
       "#000"
       app
       :textTint=
       "#000" />


       android
      :id=
      "@+id/after_lay"
      android
      :layout_width=
      "match_parent"
      android
      :layout_height=
      "wrap_content"
      android
      :gravity=
      "center_vertical"
      android
      :orientation=
      "horizontal"
      android
      :visibility=
      "gone">

        android
       :layout_width=
       "0dp"
       android
       :layout_height=
       "wrap_content"
       android
       :layout_weight=
       "1"
       android
       :background=
       "#FFF"
       app
       :cardCornerRadius=
       "5dp">


         android
        :id=
        "@+id/tv_from"
        android
        :layout_width=
        "match_parent"
        android
        :layout_height=
        "40dp"
        android
        :background=
        "@drawable/stroke_black_radus"
        android
        :gravity=
        "center"
        android
        :textColor=
        "#000"
        android
        :textSize=
        "14sp" />


        android
       :layout_width=
       "30dp"
       android
       :layout_height=
       "30dp"
       android
       :layout_marginLeft=
       "10dp"
       android
       :layout_marginRight=
       "10dp"
       android
       :src=
       "@mipmap/icon_change" />

         android
        :layout_width=
        "0dp"
        android
        :layout_height=
        "wrap_content"
        android
        :layout_weight=
        "1"
        android
        :background=
        "#FFF"
        app
        :cardCornerRadius=
        "5dp">


          android
         :id=
         "@+id/tv_to"
         android
         :layout_width=
         "match_parent"
         android
         :layout_height=
         "40dp"
         android
         :background=
         "@drawable/stroke_black_radus"
         android
         :gravity=
         "center"
         android
         :textColor=
         "#000"
         android
         :textSize=
         "14sp" />


       android
      :layout_width=
      "match_parent"
      android
      :layout_height=
      "150dp"
      android
      :layout_marginTop=
      "20dp"
      android
      :background=
      "#FFF">


        android
       :id=
       "@+id/ed_content"
       android
       :layout_width=
       "match_parent"
       android
       :layout_height=
       "150dp"
       android
       :background=
       "@drawable/stroke_gray"
       android
       :gravity=
       "top"
       android
       :hint=
       "请输入要翻译的文字内容"
       android
       :maxLength=
       "6000"
       android
       :paddingLeft=
       "10dp"
       android
       :paddingTop=
       "10dp"
       android
       :paddingRight=
       "30dp"
       android
       :paddingBottom=
       "10dp"
       android
       :textColor=
       "#000"
       android
       :textColorLink=
       "#ABABAB"
       android
       :textCursorDrawable=
       "@drawable/cursor_style" />


         android
        :id=
        "@+id/iv_clear_tx"
        android
        :layout_width=
        "20dp"
        android
        :layout_height=
        "20dp"
        android
        :layout_alignParentRight=
        "true"
        android
        :layout_alignParentBottom=
        "true"
        android
        :layout_marginRight=
        "8dp"
        android
        :layout_marginBottom=
        "8dp"
        android
        :src=
        "@mipmap/icon_delete"
        android
        :visibility=
        "gone" />


       android
      :visibility=
      "gone"
      android
      :id=
      "@+id/result_lay"
      android
      :layout_width=
      "match_parent"
      android
      :layout_height=
      "wrap_content"
      android
      :layout_marginTop=
      "20dp"
      android
      :orientation=
      "vertical">

        android
       :layout_width=
       "wrap_content"
       android
       :layout_height=
       "wrap_content"
       android
       :text=
       "翻译结果"
       android
       :textColor=
       "#000"
       android
       :textSize=
       "14sp" />

         android
        :layout_width=
        "match_parent"
        android
        :layout_height=
        "wrap_content"
        android
        :layout_marginTop=
        "10dp"
        android
        :background=
        "#FFF"
        android
        :orientation=
        "vertical">


          android
         :id=
         "@+id/tv_result"
         android
         :layout_width=
         "match_parent"
         android
         :layout_height=
         "wrap_content"
         android
         :padding=
         "10dp"
         android
         :textColor=
         "#000" />

           android
          :layout_width=
          "match_parent"
          android
          :layout_height=
          "wrap_content"
          android
          :gravity=
          "right"
          android
          :orientation=
          "horizontal">


            android
           :id=
           "@+id/iv_copy_tx"
           android
           :layout_width=
           "24dp"
           android
           :layout_height=
           "24dp"
           android
           :layout_marginRight=
           "4dp"
           android
           :layout_marginBottom=
           "4dp"
           android
           :padding=
           "4dp"
           android
           :src=
           "@mipmap/icon_copy" />


       android
      :layout_width=
      "match_parent"
      android
      :layout_height=
      "wrap_content"
      android
      :layout_marginTop=
      "20dp"
      android
      :background=
      "#FFF"
      app
      :cardCornerRadius=
      "5dp">

        android
       :id=
       "@+id/tv_translation"
       android
       :layout_width=
       "match_parent"
       android
       :layout_height=
       "48dp"
       android
       :background=
       "@drawable/stroke_black_radus"
       android
       :foreground=
       "?android:attr/selectableItemBackground"
       android
       :gravity=
       "center"
       android
       :padding=
       "10dp"
       android
       :text=
       "翻译"
       android
       :textColor=
       "#000"
       android
       :textColorLink=
       "#ABABAB"
       android
       :textSize=
       "16sp" />
2. 初始化控件
在MainActivity中,声明变量
private LinearLayout beforeLay;//翻译之前的布局 private NiceSpinner spLanguage;//语言选择下拉框 private LinearLayout afterLay;//翻译之后的布局 private TextView tvFrom;//翻译源语言 private TextView tvTo;//翻译目标语言 private EditText edContent;//输入框(要翻译的内容) private ImageView ivClearTx;//清空输入框按钮 private TextView tvTranslation;//翻译 private LinearLayout resultLay;//翻译结果布局 private TextView tvResult;//翻译的结果 private ImageView ivCopyTx;//复制翻译的结果 private String fromLanguage = "auto";//目标语言 private String toLanguage = "auto";//翻译语言 private ClipboardManager myClipboard;//复制文本 private ClipData myClip; //剪辑数据 private String appId = "";//APP ID 来源于百度翻译平台 请使用自己的 private String key = "6vjmDnNxypmebgbzKxul";//秘钥 来源于百度翻译平台 请使用自己的 //配置初始数据 private List<String> data = new LinkedList<>(Arrays.asList( "自动检测语言", "中文 → 英文", "英文 → 中文", "中文 → 繁体中文", "中文 → 粤语", "中文 → 日语", "中文 → 韩语", "中文 → 法语", "中文 → 俄语", "中文 → 阿拉伯语", "中文 → 西班牙语 ", "中文 → 意大利语")); 然后新写一个initView的方法。在这里对控件进行初始化并给予点击事件,并且数据赋值,
 / * 初始化控件视图 */ private void initView() {
    //设置亮色状态栏模式 systemUiVisibility在Android11中弃用了,可以尝试一下。 getWindow().getDecorView().setSystemUiVisibility(View.SYSTEM_UI_FLAG_LAYOUT_FULLSCREEN | View.SYSTEM_UI_FLAG_LIGHT_STATUS_BAR); //控件初始化 beforeLay = findViewById(R.id.before_lay); spLanguage = findViewById(R.id.sp_language); afterLay = findViewById(R.id.after_lay); tvFrom = findViewById(R.id.tv_from); tvTo = findViewById(R.id.tv_to); edContent = findViewById(R.id.ed_content); ivClearTx = findViewById(R.id.iv_clear_tx); tvTranslation = findViewById(R.id.tv_translation); resultLay = findViewById(R.id.result_lay); tvResult = findViewById(R.id.tv_result); ivCopyTx = findViewById(R.id.iv_copy_tx); //点击时间 ivClearTx.setOnClickListener(this); ivCopyTx.setOnClickListener(this); tvTranslation.setOnClickListener(this); //设置下拉数据 spLanguage.attachDataSource(data); editTextListener();//输入框监听 spinnerListener();//下拉框选择监听 //获取系统粘贴板服务 myClipboard = (ClipboardManager) this.getSystemService(CLIPBOARD_SERVICE); }
3. 输入框监听
editTextListener方法代码:
 / * 输入监听 */ private void editTextListener() {
    edContent.addTextChangedListener(new TextWatcher() {
    @Override public void beforeTextChanged(CharSequence s, int start, int count, int after) {
    ivClearTx.setVisibility(View.VISIBLE);//显示清除按钮 } @Override public void onTextChanged(CharSequence s, int start, int before, int count) {
    ivClearTx.setVisibility(View.VISIBLE);//显示清除按钮 } @Override public void afterTextChanged(Editable s) {
    ivClearTx.setVisibility(View.VISIBLE);//显示清除按钮 String content = edContent.getText().toString().trim(); if (content.isEmpty()) {
   //为空 resultLay.setVisibility(View.GONE); tvTranslation.setVisibility(View.VISIBLE); beforeLay.setVisibility(View.VISIBLE); afterLay.setVisibility(View.GONE); ivClearTx.setVisibility(View.GONE); } } }); }
4. 语言选择监听
spinnerListener方法代码如下:
 / * 语言类型选择 */ private void spinnerListener() {
    spLanguage.setOnSpinnerItemSelectedListener(new OnSpinnerItemSelectedListener() {
    @Override public void onItemSelected(NiceSpinner parent, View view, int position, long id) {
    switch (position) {
    case 0://自动检测 fromLanguage = "auto"; toLanguage = fromLanguage; break; case 1://中文 → 英文 fromLanguage = "zh"; toLanguage = "en"; break; case 2://英文 → 中文 fromLanguage = "en"; toLanguage = "zh"; break; case 3://中文 → 繁体中文 fromLanguage = "zh"; toLanguage = "cht"; break; case 4://中文 → 粤语 fromLanguage = "zh"; toLanguage = "yue"; break; case 5://中文 → 日语 fromLanguage = "zh"; toLanguage = "jp"; break; case 6://中文 → 韩语 fromLanguage = "zh"; toLanguage = "kor"; break; case 7://中文 → 法语 fromLanguage = "zh"; toLanguage = "fra"; break; case 8://中文 → 俄语 fromLanguage = "zh"; toLanguage = "ru"; break; case 9://中文 → 阿拉伯语 fromLanguage = "zh"; toLanguage = "ara"; break; case 10://中文 → 西班牙语 fromLanguage = "zh"; toLanguage = "spa"; break; case 11://中文 → 意大利语 fromLanguage = "zh"; toLanguage = "it"; break; default: break; } } }); }
5. 页面点击事件
 / * 页面点击事件 * @param v */ @Override public void onClick(View v) {
    switch (v.getId()) {
    case R.id.iv_clear_tx://清空输入框 edContent.setText("");//清除文本 ivClearTx.setVisibility(View.GONE);//清除数据之后隐藏按钮 break; case R.id.iv_copy_tx://复制翻译后的结果 String inviteCode = tvResult.getText().toString(); myClip = ClipData.newPlainText("text", inviteCode); myClipboard.setPrimaryClip(myClip); showMsg("已复制"); break; case R.id.tv_translation://翻译 translation();//翻译 break; default: break; } } / * Toast提示 * @param msg */ private void showMsg(String msg) {
    Toast.makeText(this,msg,Toast.LENGTH_SHORT).show(); }
下面重点来看看这个翻译的方法,这里面的东西还挺多的。
6. 翻译
既然是翻译首先获取到输入的文字,如下所示:
 / * 翻译 */ private void translation() {
    //获取输入的内容 String inputTx = edContent.getText().toString().trim(); //判断输入内容是否为空 if (!inputTx.isEmpty() || !"".equals(inputTx)) {
   //不为空 tvTranslation.setText("翻译中..."); tvTranslation.setEnabled(false);//不可更改,同样就无法点击 String salt = num(1);//随机数 //拼接一个字符串然后加密 String spliceStr = appId + inputTx + salt + key;//根据百度要求 拼接 String sign = stringToMD5(spliceStr);//将拼接好的字符串进行MD5加密 作为一个标识 //异步Get请求访问网络 asyncGet(inputTx, fromLanguage, toLanguage, salt, sign); } else {
   //为空 showMsg("请输入要翻译的内容!"); } }
这里先判断了输入框的值是否为null或者“”,不是则改变翻译按钮的文字显示,并且不可点击,给用户一种正在翻译的假象。之后就是生成一个随机数,这个是按照百度的要求来的,方法很简单,就不过多解释了。
 / * 随机数 (根据百度的要求需要一个随机数) */ public static String num(int a) {
    Random r = new Random(a); int ran1 = 0; for (int i = 0; i < 5; i++) {
    ran1 = r.nextInt(100); System.out.println(ran1); } return String.valueOf(ran1); }
然后拼接一个字符串spliceStr,然后通过md5进行小写加密,加密后的值也是作为访问百度翻译API的一个参数。加密方法如下:
 / * 将字符串转成MD5值 * * @param string 需要加密的内容 * @return 加密后的字符串 */ public static String stringToMD5(String string) {
    byte[] hash; try {
    hash = MessageDigest.getInstance("MD5").digest(string.getBytes("UTF-8")); } catch (NoSuchAlgorithmException e) {
    e.printStackTrace(); return null; } catch (UnsupportedEncodingException e) {
    e.printStackTrace(); return null; } StringBuilder hex = new StringBuilder(hash.length * 2); for (byte b : hash) {
    if ((b & 0xFF) < 0x10) {
    hex.append("0"); } hex.append(Integer.toHexString(b & 0xFF)); } return hex.toString(); }
网络请求作为耗时操作,所以通常不会在主线程中进行,所以写一个异步Get请求访问网络的方法,传入刚才写进去的一些参数。
 / * 异步Get请求 * * @param content 要翻译的内容 * @param fromType 翻译源语言 * @param toType 翻译后语言 * @param salt 随机数 * @param sign 标识 */ private void asyncGet(String content, String fromType, String toType, String salt, String sign) {
    //通用翻译API HTTP地址: //http://api.fanyi.baidu.com/api/trans/vip/translate //通用翻译API HTTPS地址: //https://fanyi-api.baidu.com/api/trans/vip/translate String httpStr = "http://api.fanyi.baidu.com/api/trans/vip/translate"; String httpsStr = "https://fanyi-api.baidu.com/api/trans/vip/translate"; //拼接请求的地址 String url = httpsStr + "?appid=" + appId + "&q=" + content + "&from=" + fromType + "&to=" + toType + "&salt=" + salt + "&sign=" + sign; OkHttpClient okHttpClient = new OkHttpClient(); final Request request = new Request.Builder() .url(url) .get()//默认就是GET请求,可以不写 .build(); Call call = okHttpClient.newCall(request); call.enqueue(new Callback() {
    @Override public void onFailure(Call call, final IOException e) {
    //异常返回 goToUIThread(e.toString(), 0); } @Override public void onResponse(Call call, Response response) throws IOException {
    //正常返回 goToUIThread(response.body().string(), 1); } }); }
这里就是OkHttp的简单使用了,而这里我写了两个访问地址,区别就是一个是https一个是http,不知道这两个区别的自行百度,没有解释的必要。你可能会问这个和Android有什么关系,别着急,会让你看到的。GET请求常规的操作就是把参数拼接到URL后面,我这里也是这么找的,
//拼接请求的地址 String url = httpsStr + "?appid=" + appId + "&q=" + content + "&from=" + fromType + "&to=" + toType + "&salt=" + salt + "&sign=" + sign; URL的第一个参数要用?开头,后续参数使用&,其他的就是字符串的拼接了,一目了然。然后将地址放入到Request,里面完成请求体的构建,然后通过Call构建一个新的请求回调。在请求队列里监听请求的结果,结果只有两种,成功和失败。之前我是通过异步请求网络的,那么它的回调自然也不会是在主线程中,但是我又要在回调里面控制页面的UI。那么就需要切换到主线程或者UI线程中进行。于是你看到我在成功和失败的返回中都调用了goToUIThread,里面第一个参数作为一个Object对象,失败时传入错误信息,成功时传入返回数据。方法如下:
 / * 接收到返回值后,回到UI线程操作页面变化 * * @param object 接收一个返回对象 * @param key 表示正常还是异常 */ private void goToUIThread(final Object object, final int key) {
    //切换到主线程处理数据 MainActivity.this.runOnUiThread(new Runnable() {
    @Override public void run() {
    tvTranslation.setText("翻译"); tvTranslation.setEnabled(true); if (key == 0) {
   //异常返回 showMsg("异常信息:" + object.toString()); Log.e("MainActivity",object.toString()); } else {
   //正常返回 //通过Gson 将 JSON字符串转为实体Bean final TranslateResult result = new Gson().fromJson(object.toString(), TranslateResult.class); tvTranslation.setVisibility(View.GONE); //显示翻译的结果 tvResult.setText(result.getTrans_result().get(0).getDst()); resultLay.setVisibility(View.VISIBLE); beforeLay.setVisibility(View.GONE); afterLay.setVisibility(View.VISIBLE); //翻译成功后的语言判断显示 initAfter(result.getFrom(), result.getTo()); } } }); }
这种写代码的方式虽然像是套娃一样,一层一层的,看起来好像很复杂的样子,但是其实是有一个思路串联起来的,由上到下,思路清晰就很好理解,我个人觉得比把所有代码写在一个方法里要好。而在上面的代码中,通过传进来的key来区别是成功还是失败。失败里面就是提示失败信息通过打印失败信息。成功里面,通过Gson将返回的JSON字符串转换成实体Bean。TranslateResult代码如下:
package com.llw.translate; import java.util.List; / * 翻译结果 * @author llw */ public class TranslateResult {
    / * from : zh * to : en * trans_result : [{"src":"早上","dst":"morning"}] */ private String from; private String to; private List<TransResultBean> trans_result; public String getFrom() {
    return from; } public void setFrom(String from) {
    this.from = from; } public String getTo() {
    return to; } public void setTo(String to) {
    this.to = to; } public List<TransResultBean> getTrans_result() {
    return trans_result; } public void setTrans_result(List<TransResultBean> trans_result) {
    this.trans_result = trans_result; } public static class TransResultBean {
    / * src : 早上 * dst : morning */ private String src; private String dst; public String getSrc() {
    return src; } public void setSrc(String src) {
    this.src = src; } public String getDst() {
    return dst; } public void setDst(String dst) {
this.dst = dst; } } } 后面就是一些控件的隐藏和显示了,请结合GIF示例图来看,会让你有一个清晰的认识。然后还有最后initAfter一个方法要讲一下:
 / * 翻译成功后的语言判断显示 */ private void initAfter(String from, String to) {
    if (("zh").equals(from)) {
    tvFrom.setText("中文"); } else if (("en").equals(from)) {
    tvFrom.setText("英文"); } else if (("yue").equals(from)) {
    tvFrom.setText("粤语"); } else if (("cht").equals(from)) {
    tvFrom.setText("繁体中文"); } else if (("jp").equals(from)) {
    tvFrom.setText("日语"); } else if (("kor").equals(from)) {
    tvFrom.setText("韩语"); } else if (("fra").equals(from)) {
    tvFrom.setText("法语"); } else if (("ru").equals(from)) {
    tvFrom.setText("俄语"); } else if (("ara").equals(from)) {
    tvFrom.setText("阿拉伯语"); } else if (("spa").equals(from)) {
    tvFrom.setText("西班牙语"); } else if (("it").equals(from)) {
    tvFrom.setText("意大利语"); } if (("zh").equals(to)) {
    tvTo.setText("中文"); } else if (("en").equals(to)) {
    tvTo.setText("英文"); } else if (("yue").equals(to)) {
    tvTo.setText("粤语"); } else if (("cht").equals(to)) {
    tvTo.setText("繁体中文"); } else if (("jp").equals(to)) {
    tvTo.setText("日语"); } else if (("kor").equals(to)) {
    tvTo.setText("韩语"); } else if (("fra").equals(to)) {
    tvTo.setText("法语"); } else if (("ru").equals(to)) {
    tvTo.setText("俄语"); } else if (("ara").equals(to)) {
    tvTo.setText("阿拉伯语"); } else if (("spa").equals(to)) {
    tvTo.setText("西班牙语"); } else if (("it").equals(to)) {
    tvTo.setText("意大利语"); } }
  "1.0" encoding="utf-8"?>


     "true" >


       "system" />
当然如果你的代码有报错,不妨试试运行我的源码看看,这也可以作为一个排错的方向。
四、源码地址
写作不易,如果这篇文章对你有帮助的话,不妨点个赞鼓励一下作者,举手之劳而已。
这是APK下载二维码,如果你下载后运行没有问题,那么你的代码运行不了就是你自己的问题,无可争议。
疑难杂症: 有部分读者运行了我的源码,然后发现点击翻译之后会闪退,报错如下
java.lang.NullPointerException: Attempt to invoke interface method 'java.lang.Object java.util.List.get(int)' on a null object reference at com.llw.translate.MainActivity$4.run(MainActivity.java:329) 这是报错的原因是翻译是成功的,但是没有获取到翻译后的数据,也可以说是数据为空,然后用这个数据去赋值显示出来,就报错了,那么为什么会为空呢?我也是百思不得其解,因为我的代码我运行在手机或者是模拟器上都是正常的,从来不会闪退。所以我怀疑是百度搞的鬼。问题可能是:① 百度翻译服务可能限制了访问的ip。② 开发者账号需要做个人开发者认证,认证后的appid和密码才能供其他开发者使用。
不过这两个问题没有依据。反正就是一个现象,我运行没有问题,其他人运行就闪退,我能怎么办?只能慢慢跟踪,回头问问百度的开发人员看是怎么回事。
发布者:全栈程序员-站长,转载请注明出处:https://javaforall.net/199860.html原文链接:https://javaforall.net


