
介绍一个最简单的方式进行认证指纹,老规矩文章最后附上DEMO
现在很多设备都还没有真正的将指纹使用起来,用得最多就是屏幕解锁,和微信支付宝的支付时使用,其他应用发现很少使用,其实指纹认证目前已经很成熟。
这里用代码来介绍:登录界面(指纹认证)->指纹认证成功主界面
1、登录界面
/ * https://blog.csdn.net/generallizhong */ public class LoginActivity extends Activity { private static final String DEFAULT_KEY_NAME = "default_key"; KeyStore keyStore; @Override protected void onCreate(Bundle savedInstanceState) { super.onCreate(savedInstanceState); setContentView(R.layout.activity_login); if (supportFingerprint()) { initKey(); initCipher(); } } //检测设备 public boolean supportFingerprint() { if (Build.VERSION.SDK_INT < 23) { Toast.makeText(this, "您的系统版本过低,不支持指纹功能", Toast.LENGTH_SHORT).show(); return false; } else { KeyguardManager keyguardManager = getSystemService(KeyguardManager.class); FingerprintManager fingerprintManager = getSystemService(FingerprintManager.class); if (!fingerprintManager.isHardwareDetected()) { Toast.makeText(this, "您的手机不支持指纹功能", Toast.LENGTH_SHORT).show(); return false; } else if (!keyguardManager.isKeyguardSecure()) { Toast.makeText(this, "您还未设置锁屏,请先设置锁屏并添加一个指纹", Toast.LENGTH_SHORT).show(); return false; } else if (!fingerprintManager.hasEnrolledFingerprints()) { Toast.makeText(this, "您至少需要在系统设置中添加一个指纹", Toast.LENGTH_SHORT).show(); return false; } } return true; } @TargetApi(23) private void initKey() { try { keyStore = KeyStore.getInstance("AndroidKeyStore"); keyStore.load(null); KeyGenerator keyGenerator = KeyGenerator.getInstance(KeyProperties.KEY_ALGORITHM_AES, "AndroidKeyStore"); KeyGenParameterSpec.Builder builder = new KeyGenParameterSpec.Builder(DEFAULT_KEY_NAME, KeyProperties.PURPOSE_ENCRYPT | KeyProperties.PURPOSE_DECRYPT) .setBlockModes(KeyProperties.BLOCK_MODE_CBC) .setUserAuthenticationRequired(true) .setEncryptionPaddings(KeyProperties.ENCRYPTION_PADDING_PKCS7); keyGenerator.init(builder.build()); keyGenerator.generateKey(); } catch (Exception e) { throw new RuntimeException(e); } } @TargetApi(23) private void initCipher() { try { SecretKey key = (SecretKey) keyStore.getKey(DEFAULT_KEY_NAME, null); Cipher cipher = Cipher.getInstance(KeyProperties.KEY_ALGORITHM_AES + "/" + KeyProperties.BLOCK_MODE_CBC + "/" + KeyProperties.ENCRYPTION_PADDING_PKCS7); cipher.init(Cipher.ENCRYPT_MODE, key); showFingerPrintDialog(cipher); } catch (Exception e) { throw new RuntimeException(e); } } private void showFingerPrintDialog(Cipher cipher) { FingerprintDialogFragment fragment = new FingerprintDialogFragment(); fragment.setCipher(cipher); fragment.show(getFragmentManager(), "fingerprint"); } public void onAuthenticated() { Intent intent = new Intent(this, MainActivity.class); startActivity(intent); finish(); }首先在onCreate()方法中,调用了supportFingerprint()方法来判断当前设备是否支持指纹认证功能。这一点是非常重要的,因为当设备不支持指纹认证的时候,还需要及时切换到如图案、密码等其他的认证方式。
当设备支持指纹认证的时候,再分为两步,第一步生成一个对称加密的Key,第二步生成一个Cipher对象,这都是Android指纹认证API要求的标准用法。得到了Cipher对象之后,我们创建FingerprintDialogFragment的实例,并将Cipher对象传入,再将FingerprintDialogFragment显示出来就可以了。
2、指纹认证的相关逻辑在这里完成
public class FingerprintDialogFragment extends DialogFragment { private FingerprintManager fingerprintManager; private CancellationSignal mCancellationSignal; private Cipher mCipher; private LoginActivity mActivity; private TextView errorMsg; / * 标识是否是用户主动取消的认证。 */ private boolean isSelfCancelled; public void setCipher(Cipher cipher) { mCipher = cipher; } @Override public void onAttach(Context context) { super.onAttach(context); mActivity = (LoginActivity) getActivity(); } @Override public void onCreate(Bundle savedInstanceState) { super.onCreate(savedInstanceState); fingerprintManager = getContext().getSystemService(FingerprintManager.class); setStyle(DialogFragment.STYLE_NORMAL, android.R.style.Theme_Material_Light_Dialog); } @Nullable @Override public View onCreateView(LayoutInflater inflater, @Nullable ViewGroup container, Bundle savedInstanceState) { View v = inflater.inflate(R.layout.fingerprint_dialog, container, false); errorMsg = v.findViewById(R.id.error_msg); TextView cancel = v.findViewById(R.id.cancel); cancel.setOnClickListener(new View.OnClickListener() { @Override public void onClick(View v) { dismiss(); stopListening(); } }); return v; } @Override public void onResume() { super.onResume(); // 开始指纹认证监听 startListening(mCipher); } @Override public void onPause() { super.onPause(); // 停止指纹认证监听 stopListening(); } //监听认证成功与失败 private void startListening(Cipher cipher) { isSelfCancelled = false; mCancellationSignal = new CancellationSignal(); fingerprintManager.authenticate(new FingerprintManager.CryptoObject(cipher), mCancellationSignal, 0, new FingerprintManager.AuthenticationCallback() { @Override public void onAuthenticationError(int errorCode, CharSequence errString) { if (!isSelfCancelled) { errorMsg.setText(errString); if (errorCode == FingerprintManager.FINGERPRINT_ERROR_LOCKOUT) { Toast.makeText(mActivity, errString, Toast.LENGTH_SHORT).show(); dismiss(); } } } @Override public void onAuthenticationHelp(int helpCode, CharSequence helpString) { errorMsg.setText(helpString); } @Override public void onAuthenticationSucceeded(FingerprintManager.AuthenticationResult result) { Toast.makeText(mActivity, "指纹认证成功", Toast.LENGTH_SHORT).show(); mActivity.onAuthenticated();//认证成功后就可以写成功后的代码逻辑 } @Override public void onAuthenticationFailed() { errorMsg.setText("指纹认证失败,请再试一次"); } }, null); } private void stopListening() { if (mCancellationSignal != null) { mCancellationSignal.cancel(); mCancellationSignal = null; isSelfCancelled = true; } }
最后的最后,当指纹认证成功之后,会在FingerprintDialogFragment的回调当中调用LoginActivity的onAuthenticated()方法,然后界面会跳转到MainActivity
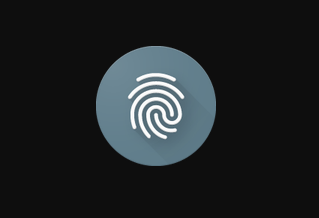
在使用中可能会出现很多开发或厂商自行使用指纹认证图片,这样就造成五花八门的指纹认证如,建议统一使用官方提供图标图标下载,

文中的指纹认证Demo实现过程很简单,但是切记它是不能单独使用的,必须要配合着图案或其他认证方式一起来使用,因为一定要提供一个在设备不支持指纹情况下的其他认证方式
DEMO下载:
CSDN:下载
百度网盘:下载 提取码: 447q
发布者:全栈程序员-站长,转载请注明出处:https://javaforall.net/206907.html原文链接:https://javaforall.net


