
目录
1.项目建立
File->New->Project..
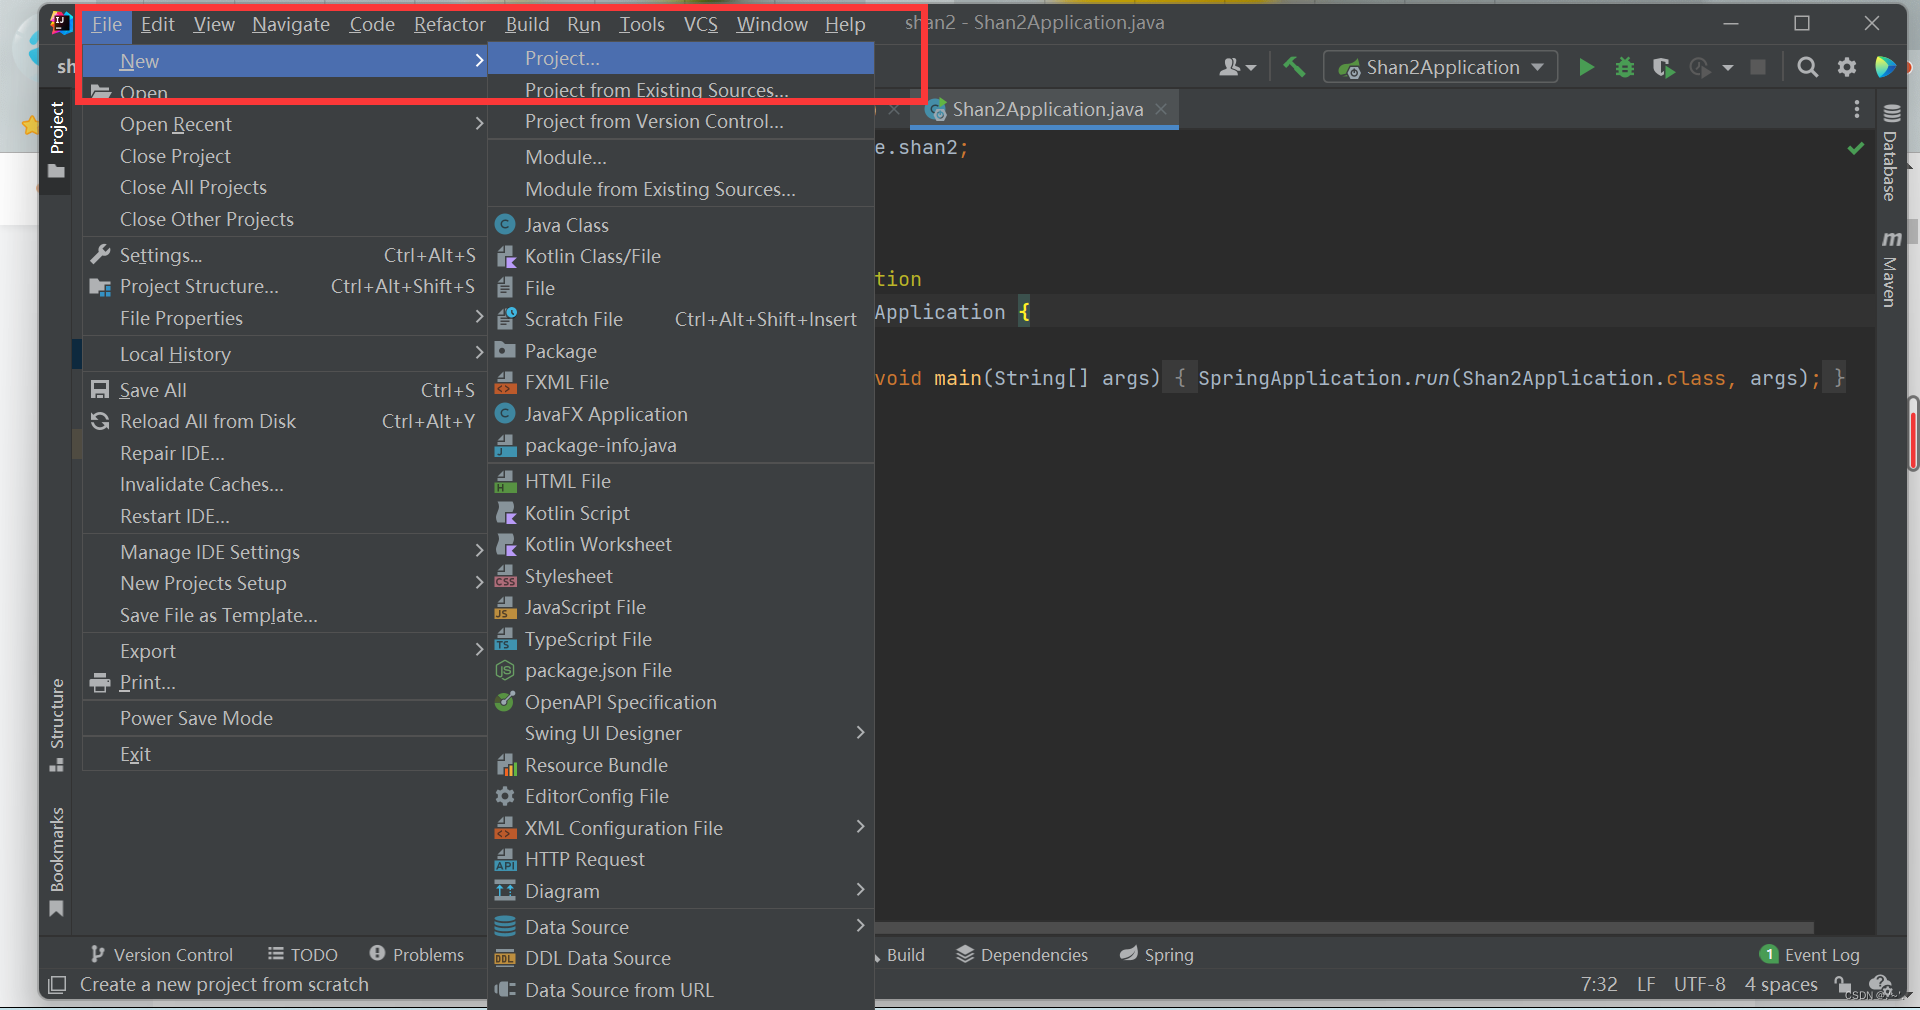

设置好项目名等。
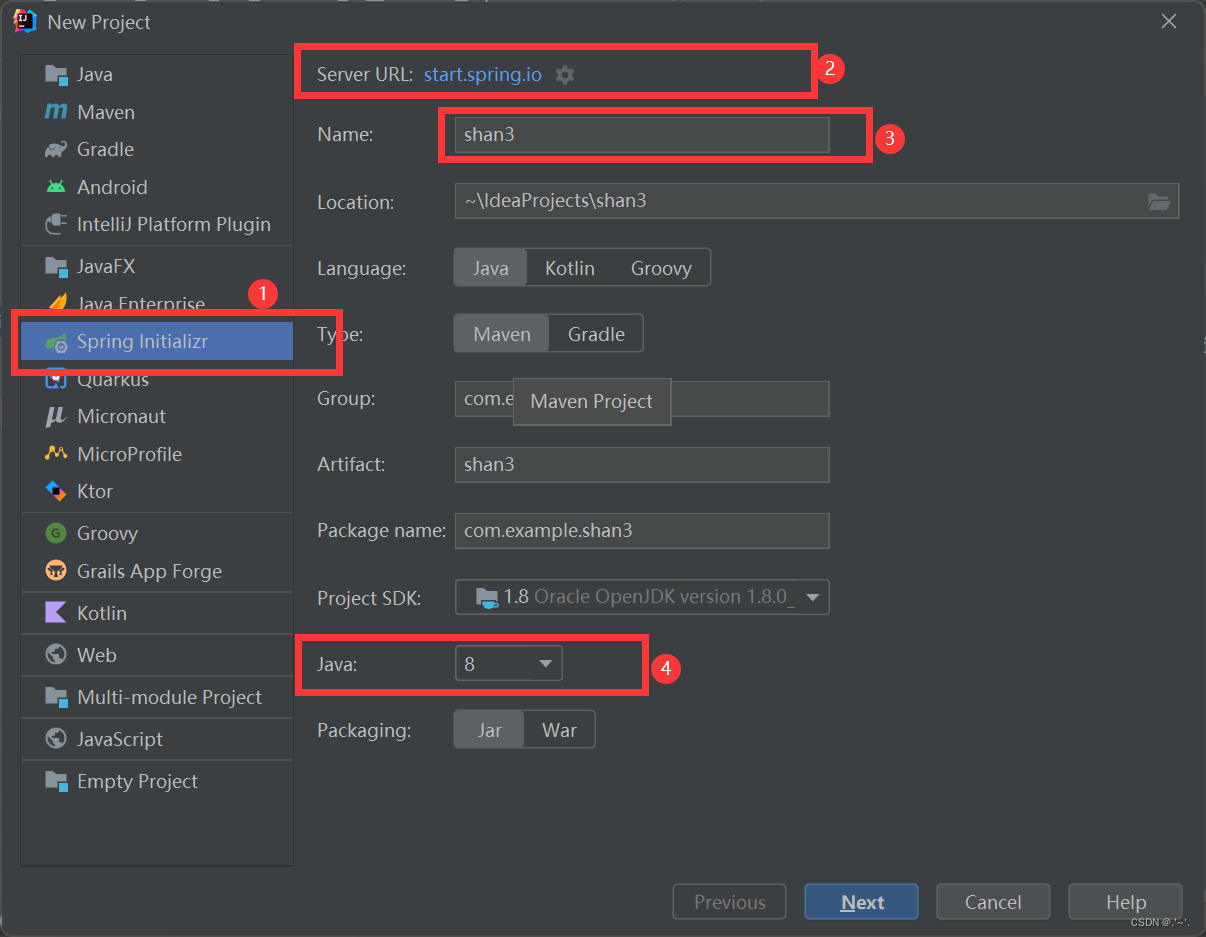
② 此处的URL :https://start.spring.io 可能会出现访问不了的情况而无法下一步,此时点击旁边的设置(齿轮),将其修改为阿里云官网,阿里云提供的springboot版本:https://start.aliyun.com/
点击next,再分别选择好① ② ③所示这几项(如果使用的URL为阿里云的,以下选项部分会是中文名,但也容易找到那几项),点击Finish等待加载完毕即可,③我多添加了一些依赖,以防功成之后需要:
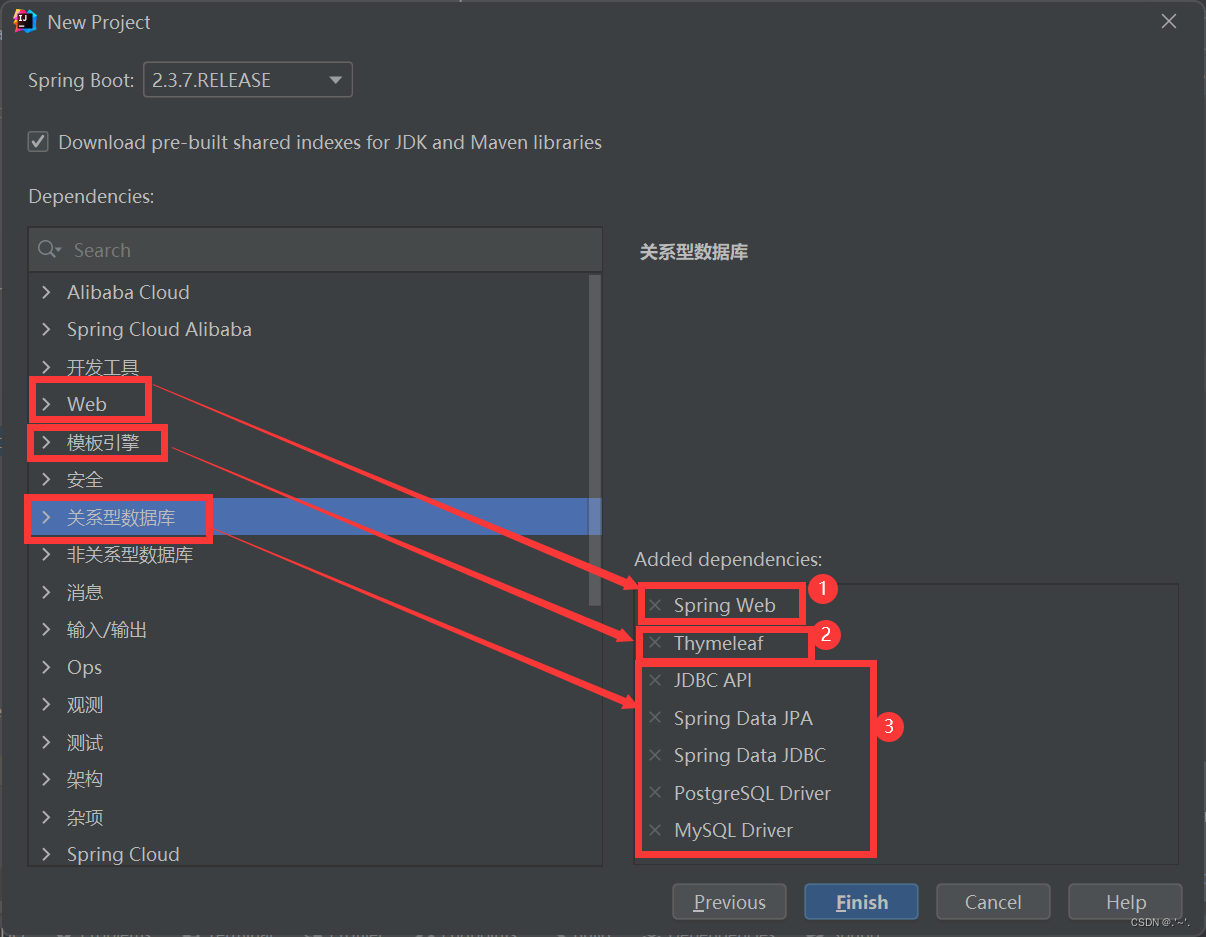
等待项目资源下载的时候可能会出现以下报错,将前面说的URL修改为阿里云的即可,

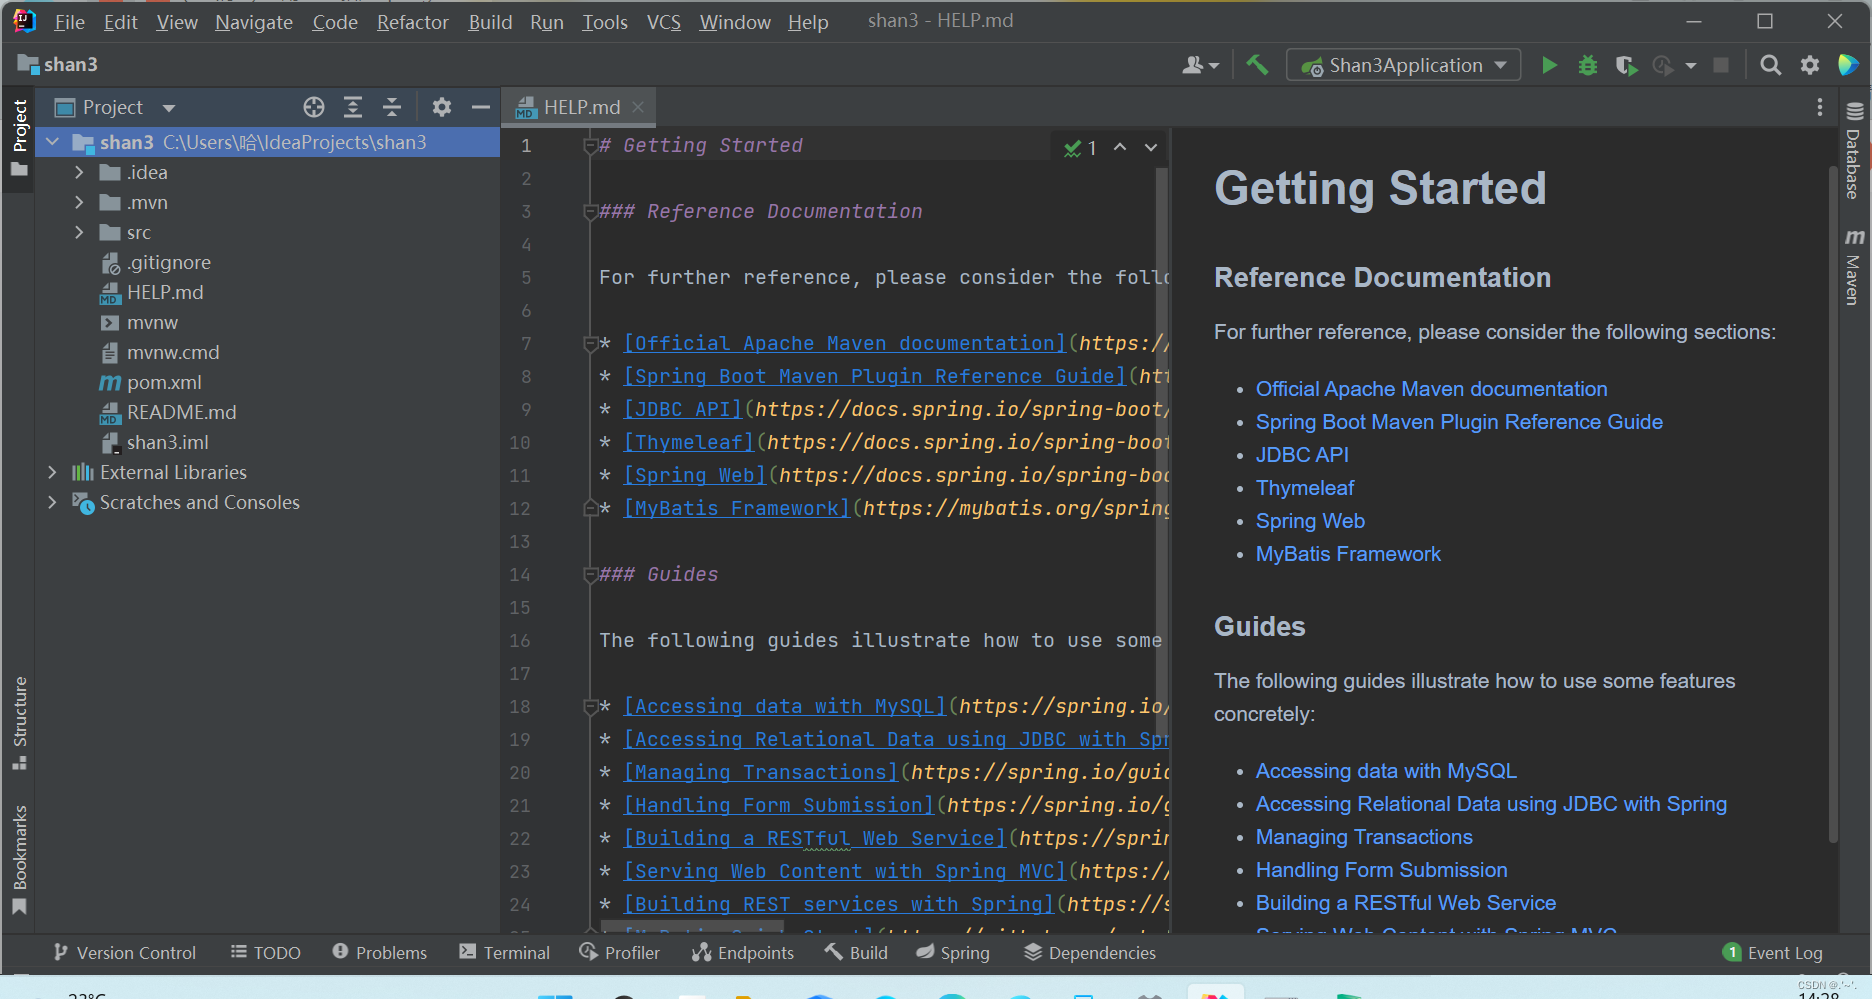
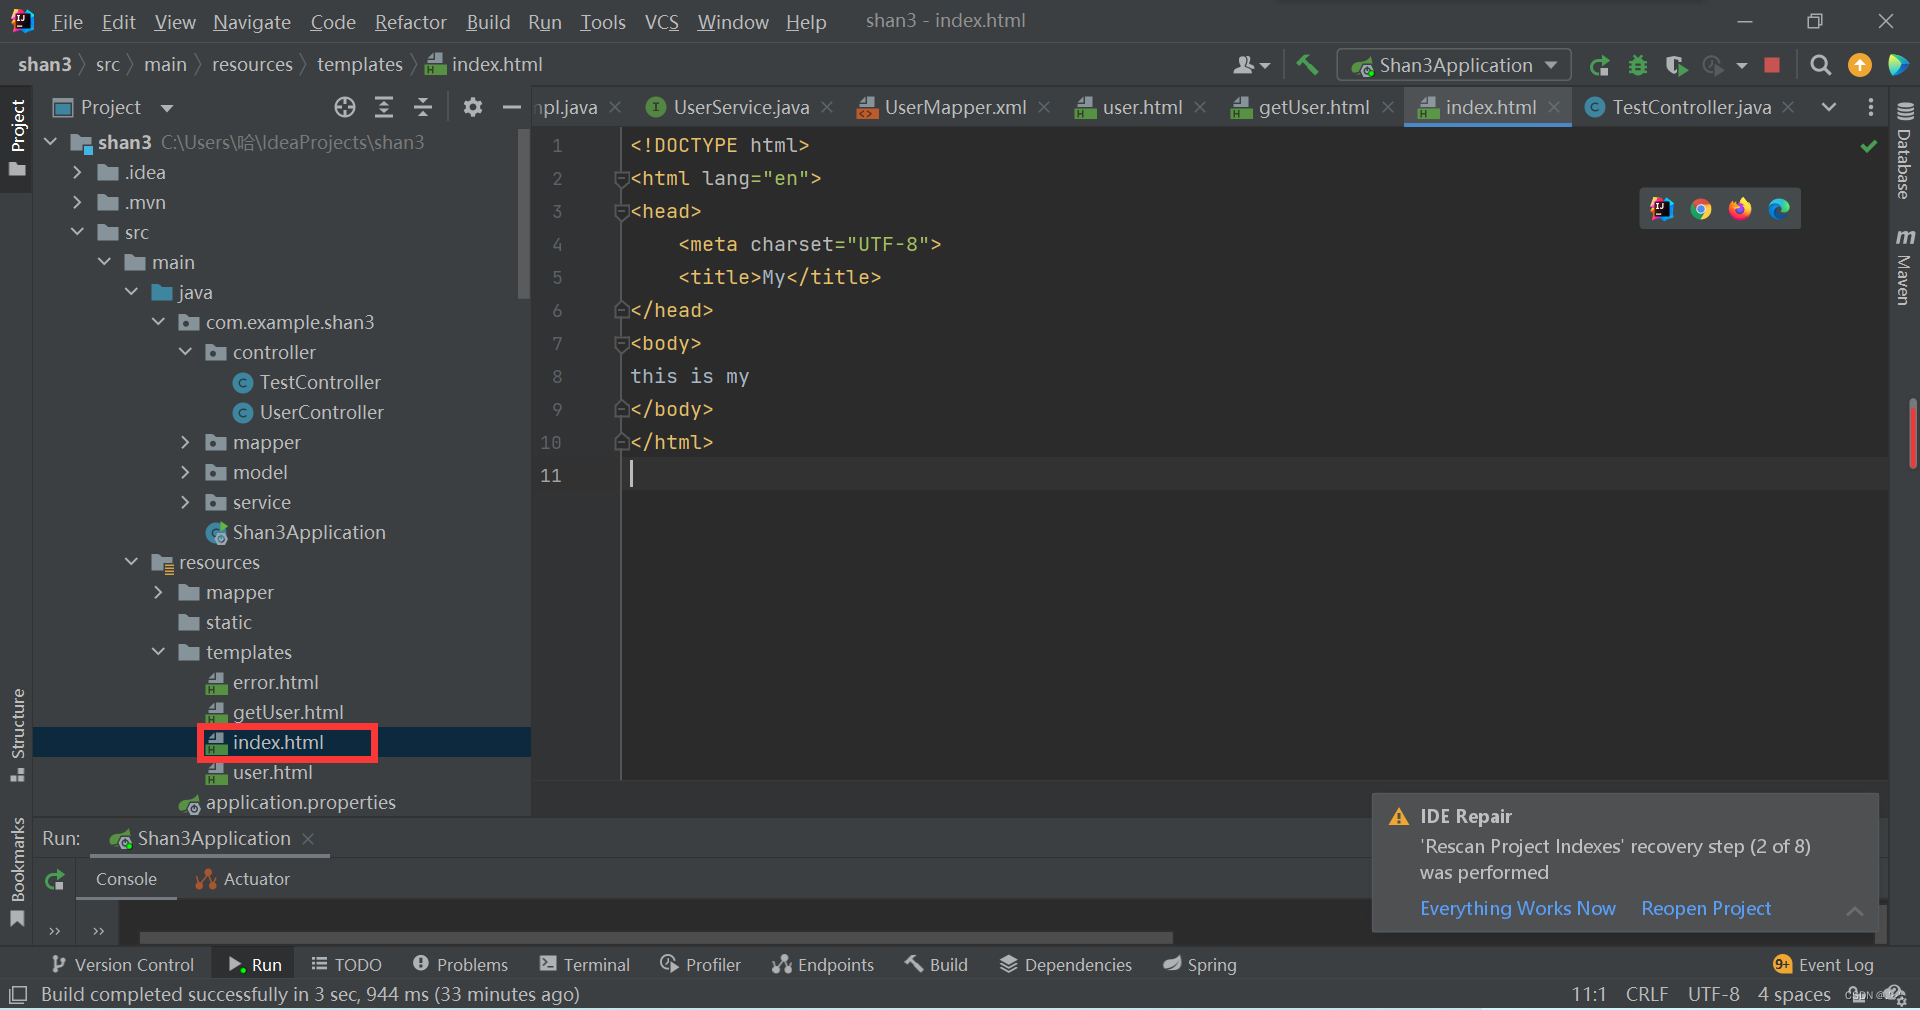
创建完成后,项目结构如图:
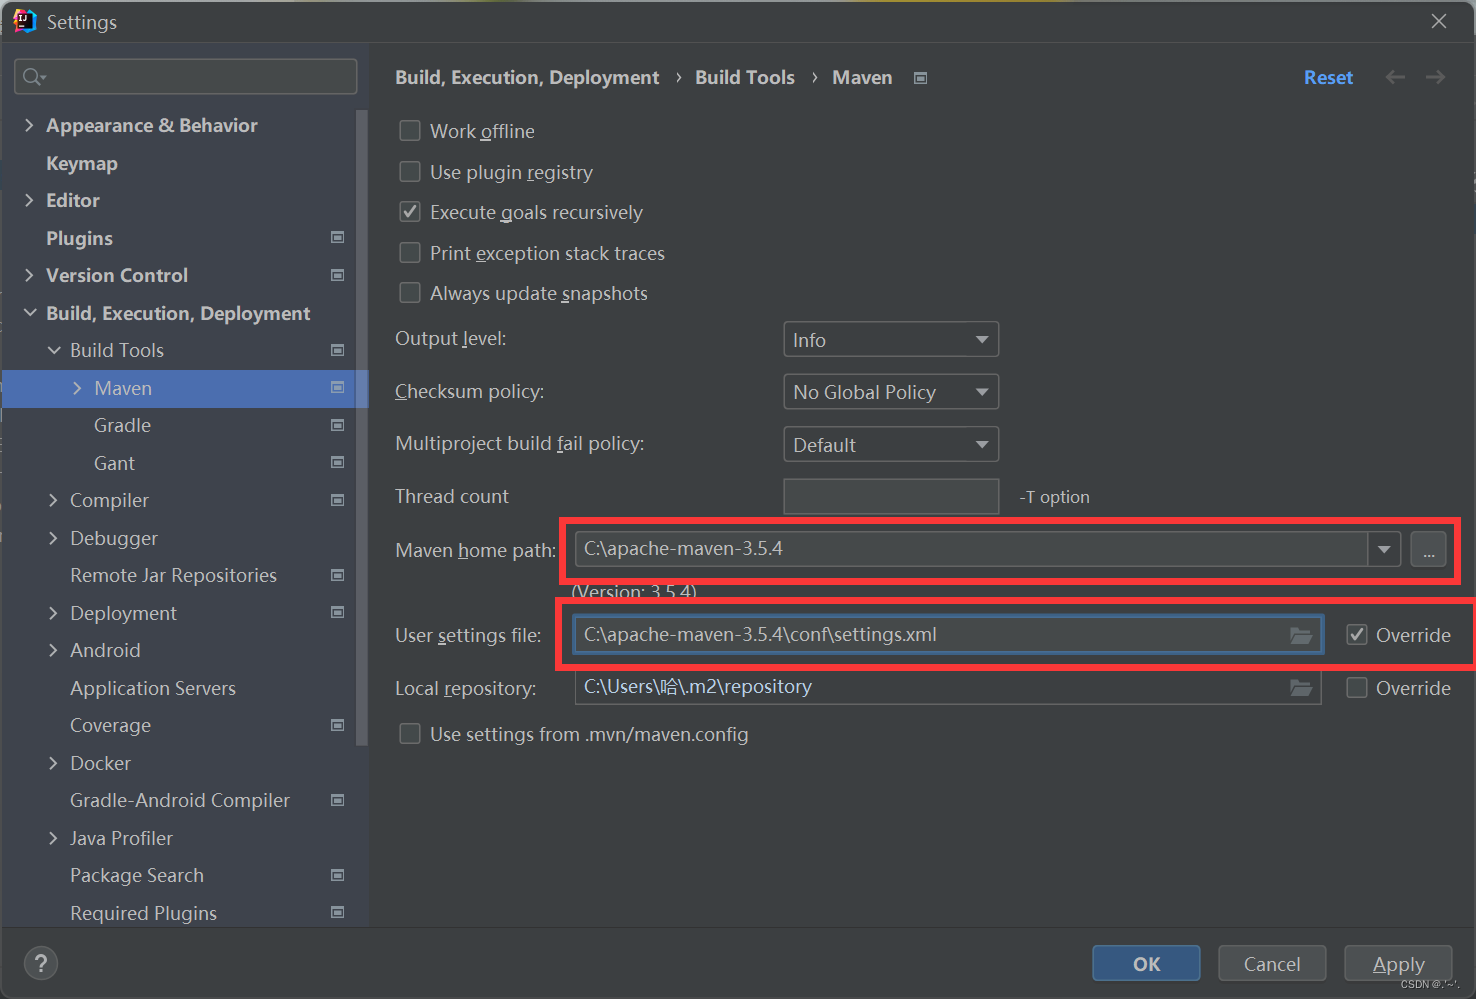
2.配置Maven
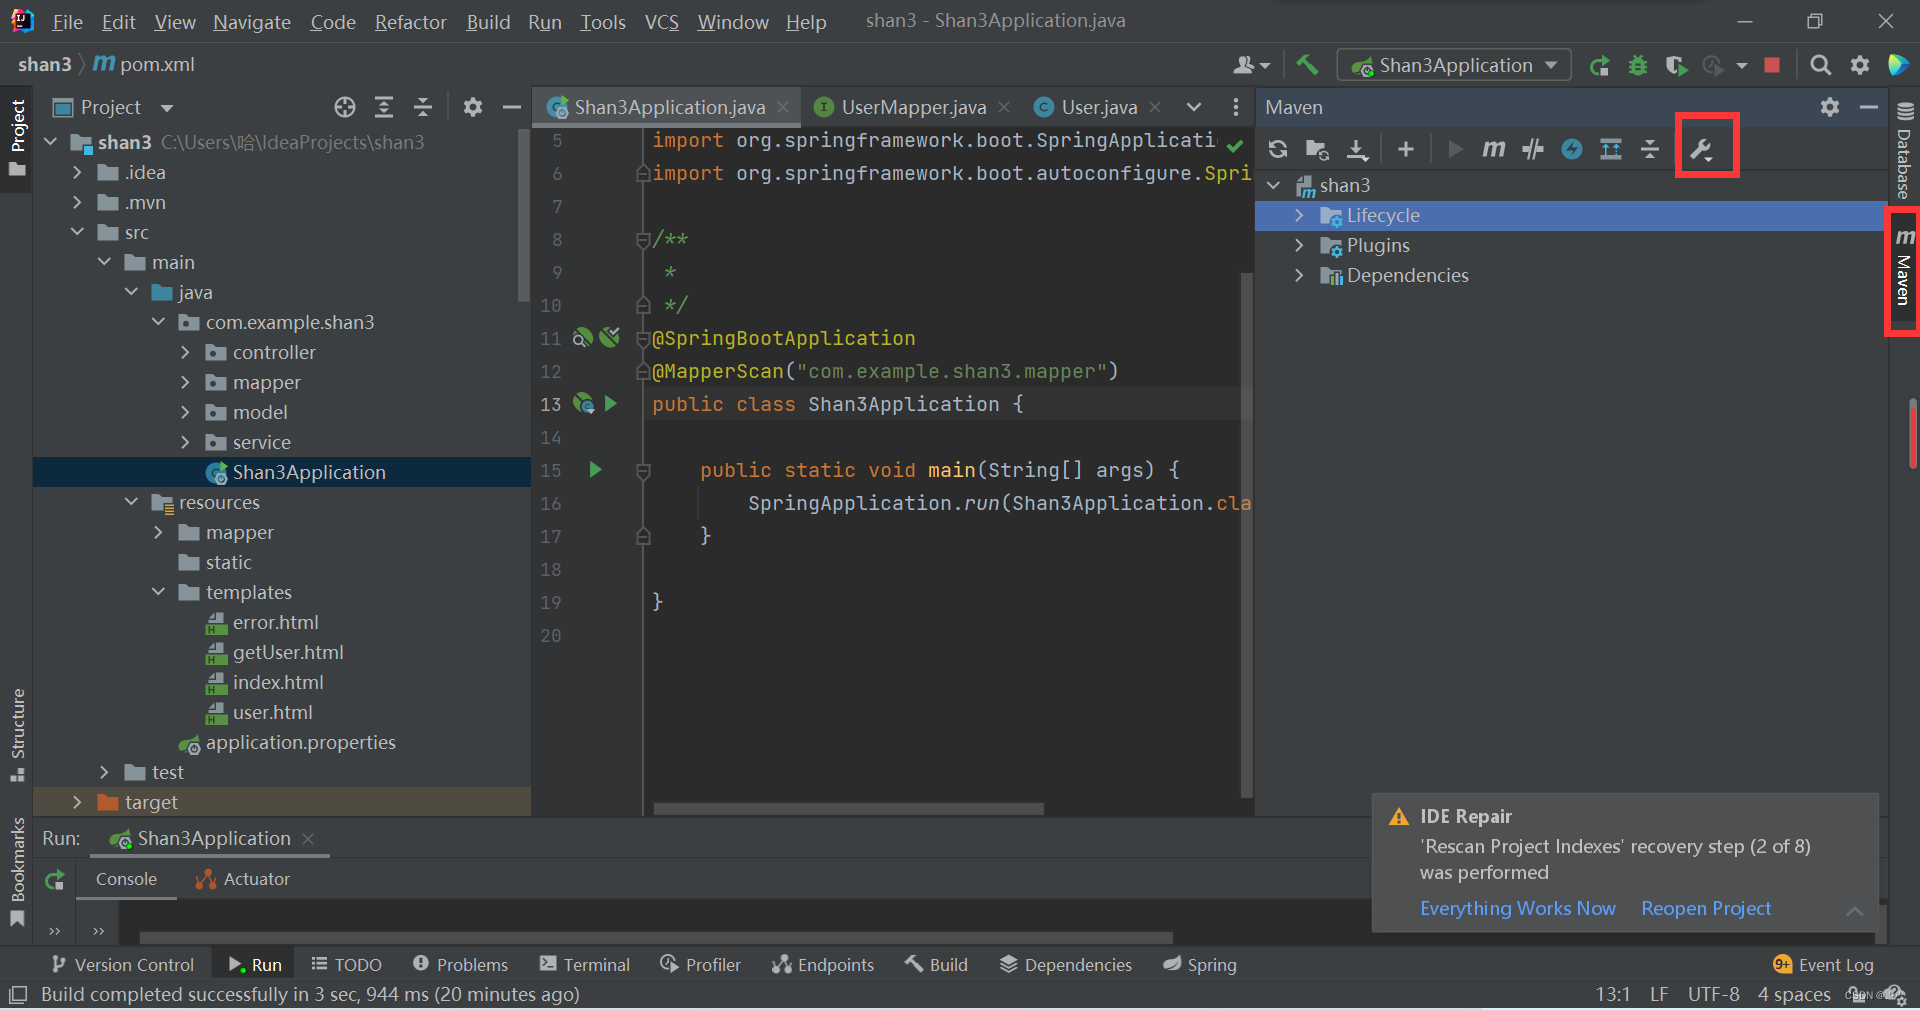
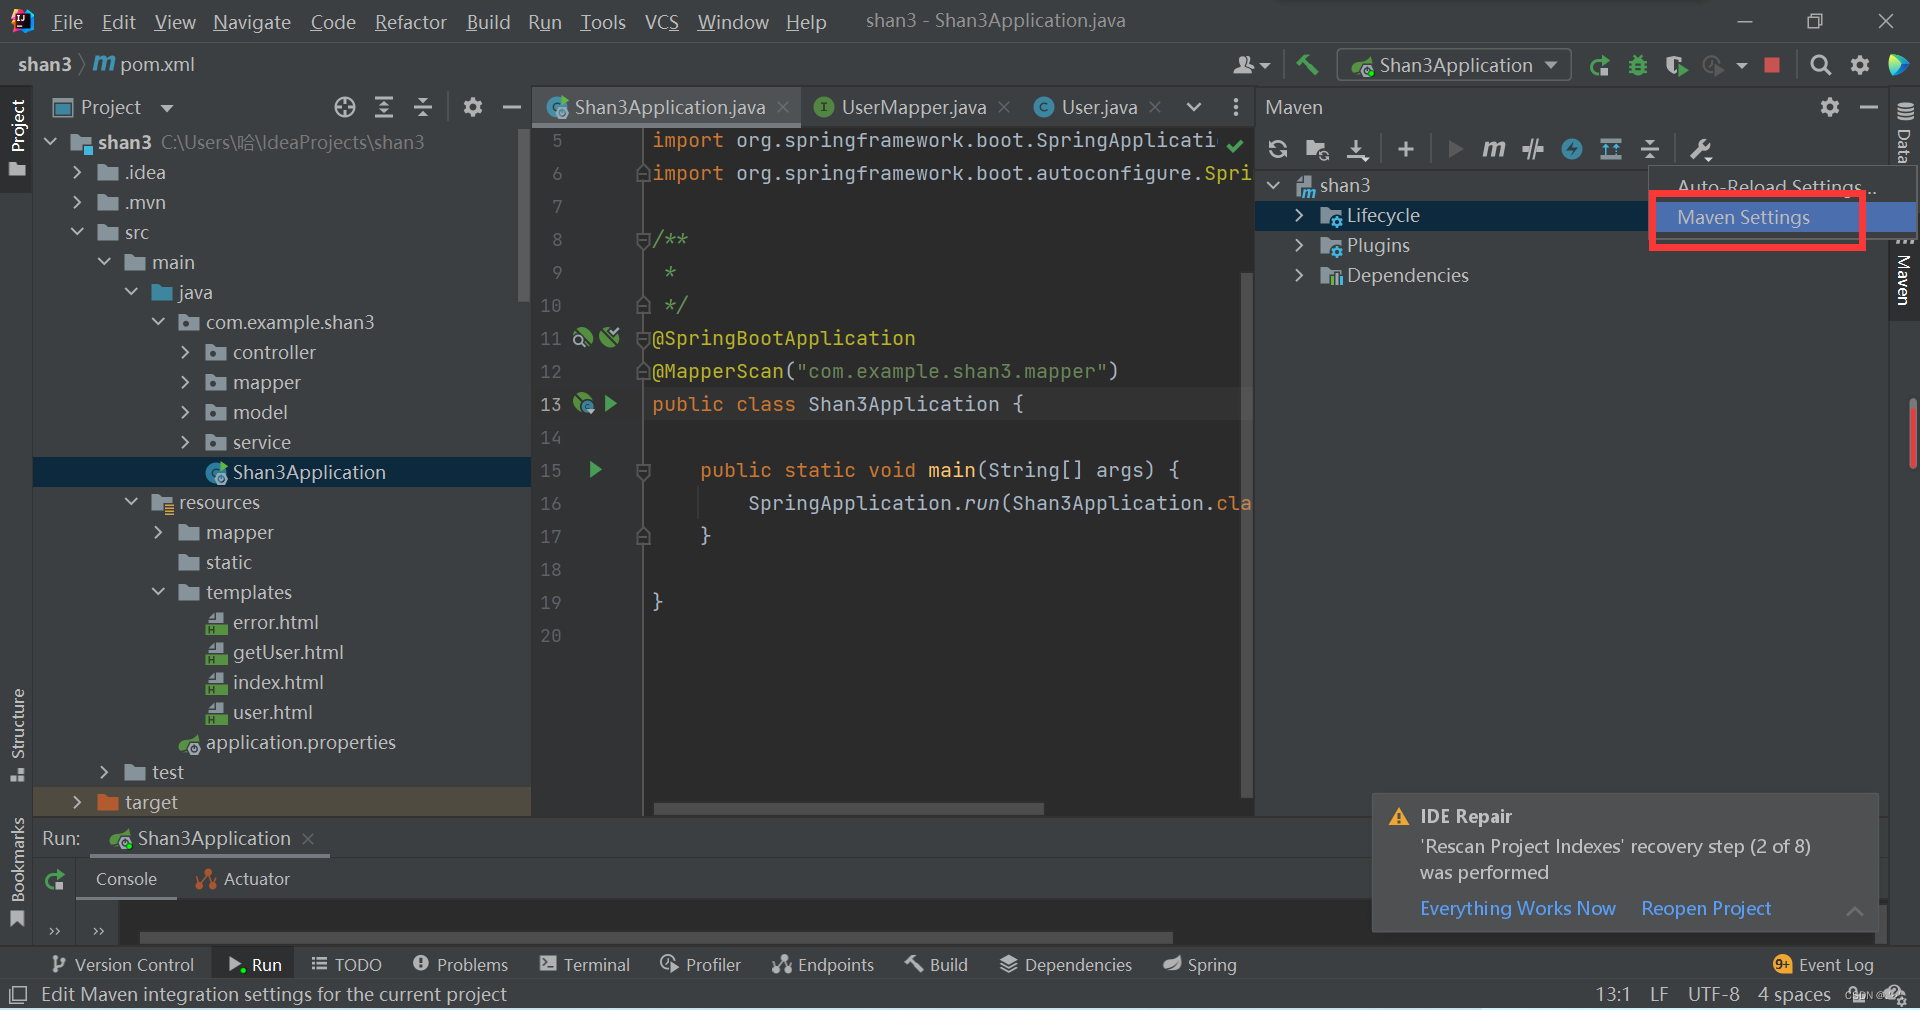
分别选择好Maven根目录和目录下conf中的settings.xml文件即可(需要勾选Oveeride)。
配置完后,可能会有以下报错:
1) Unresolved plugin: ‘org.apache.maven.plugins:maven-compiler-plugin:3.8.1’
maven配置问题
2) role: org.apache.maven.model.validation.ModelValidator
mavne和idea版本不兼容,下载较低版本maven等
3.测试
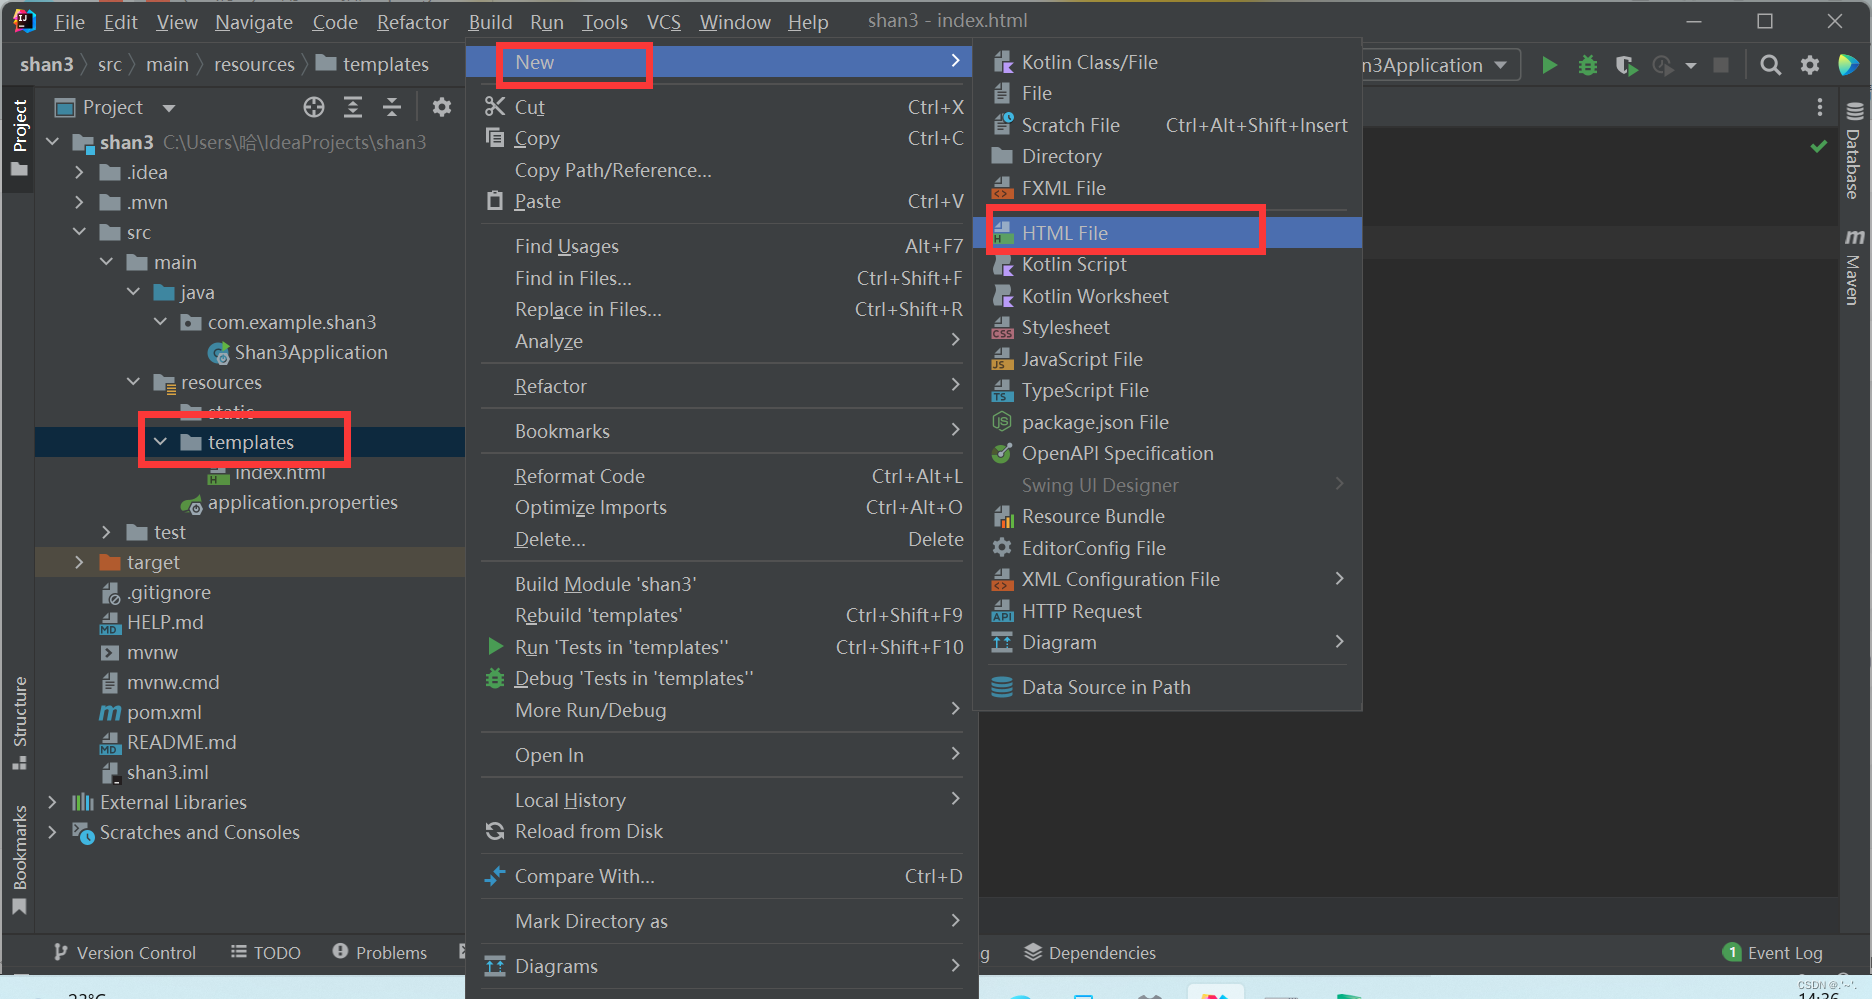
新建一个名 index 的 HTML 文件,网页标题,内容自己随意填写就可。
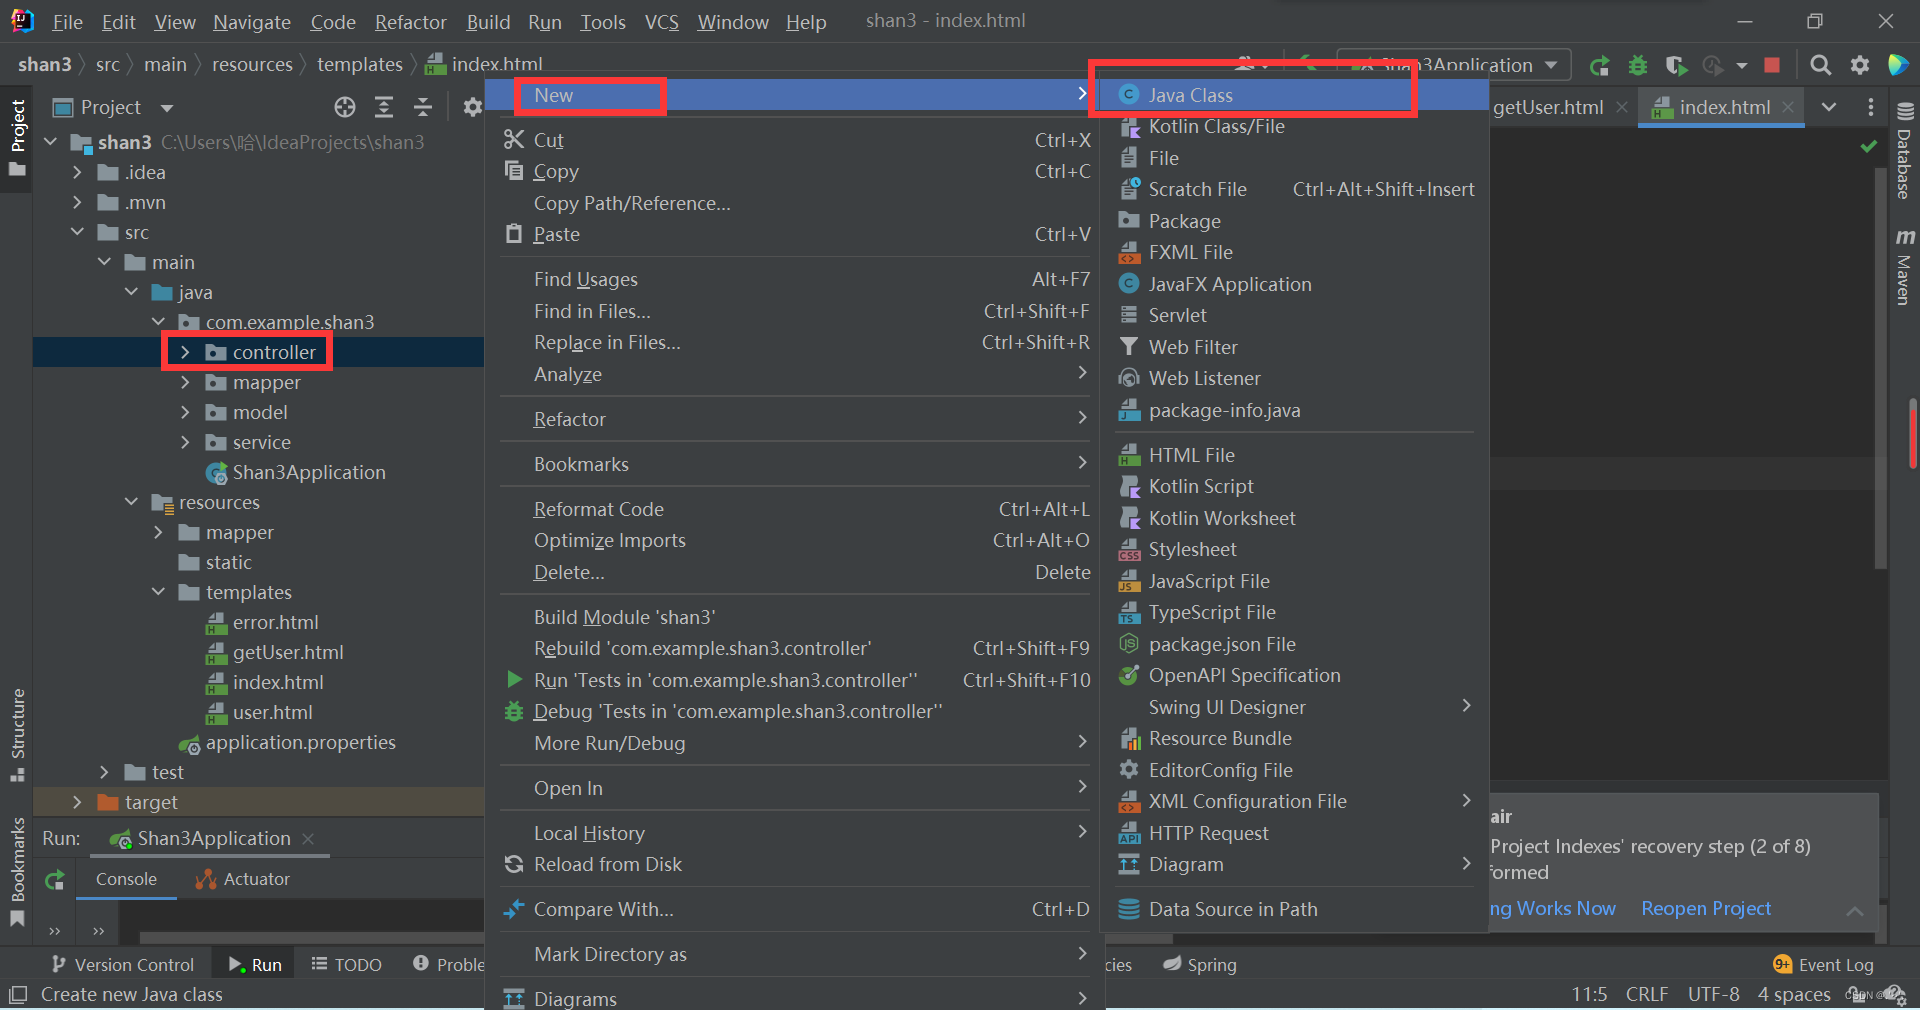
按图新建controller包,包名为controller

在controller文件夹包下新建类,名称为TestController
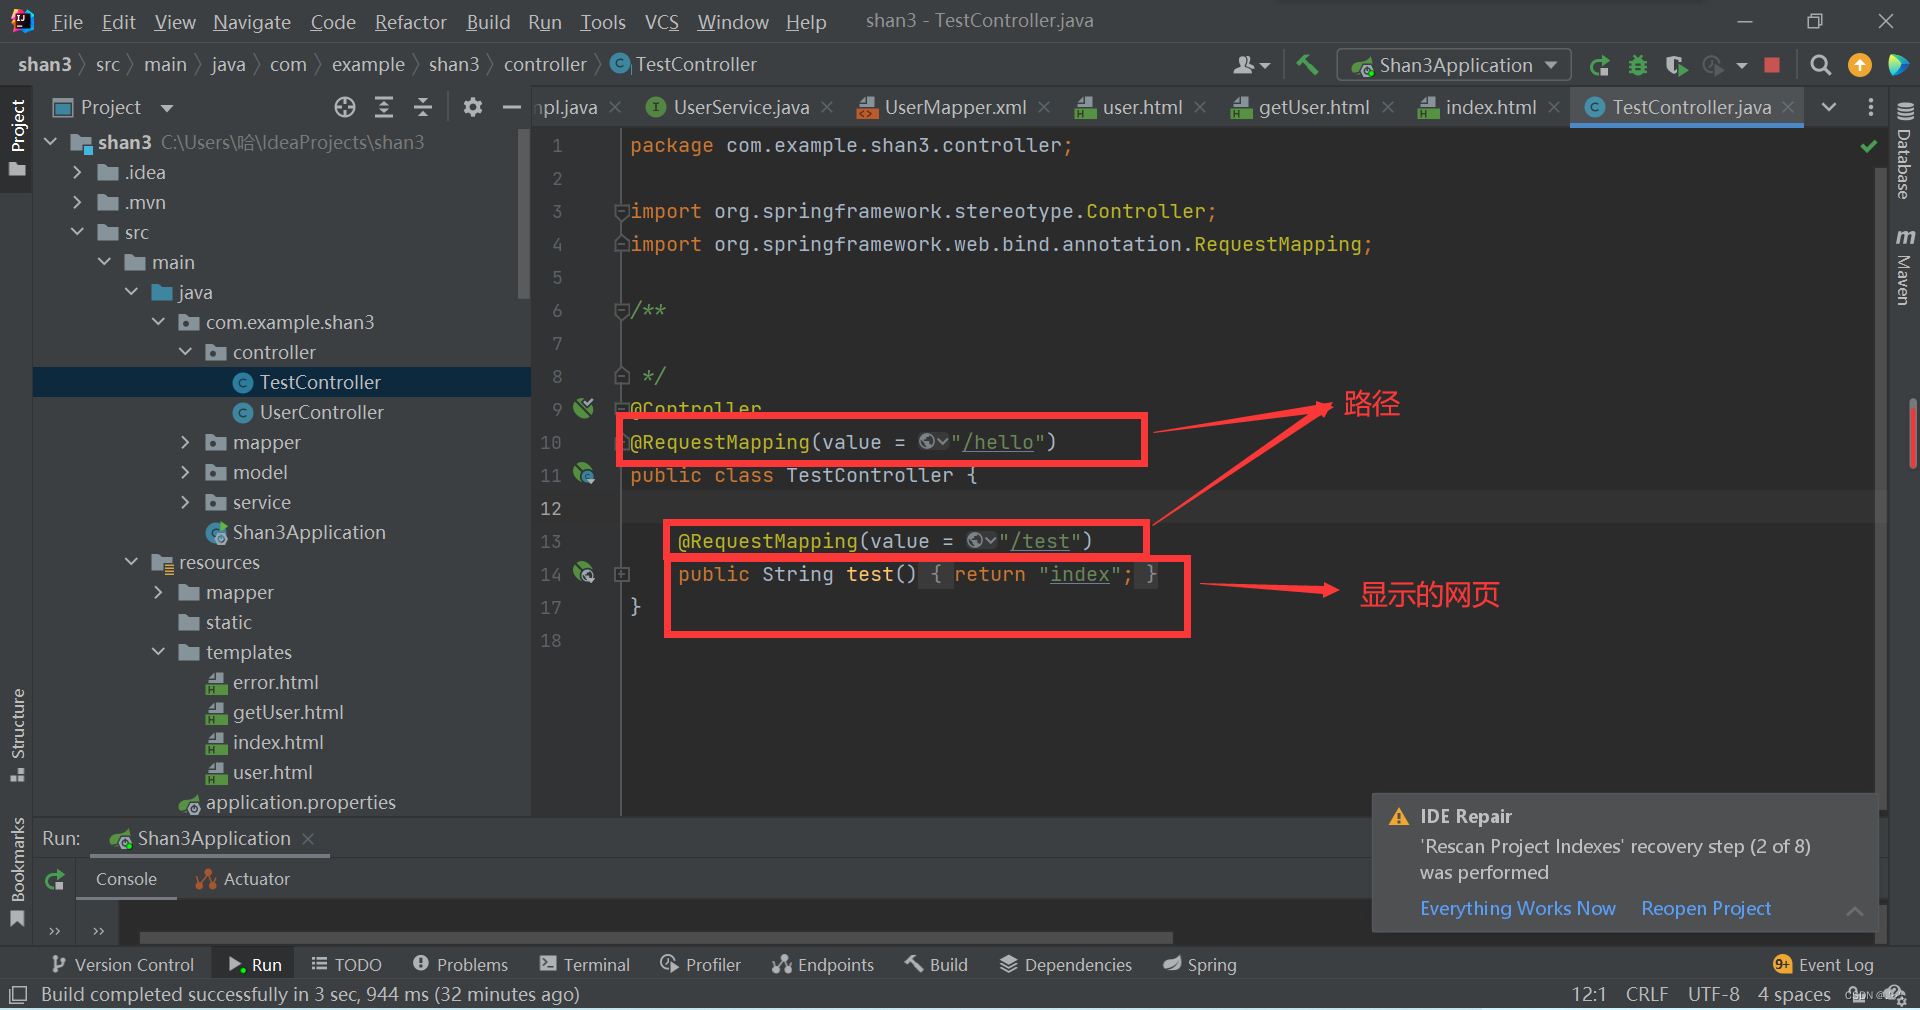
TestController类代码如下:
package com.example.shan3.controller; import org.springframework.stereotype.Controller; import org.springframework.web.bind.annotation.RequestMapping; / */ @Controller @RequestMapping(value = "/hello") public class TestController { @RequestMapping(value = "/test") public String test(){ return "index"; } } 注意修改代码中的包名为自己包名:

运行,选择 Application 类,点击运行

访问项目地址 localhost:8080/hello/test,成功看到自己设置的网页即成功。
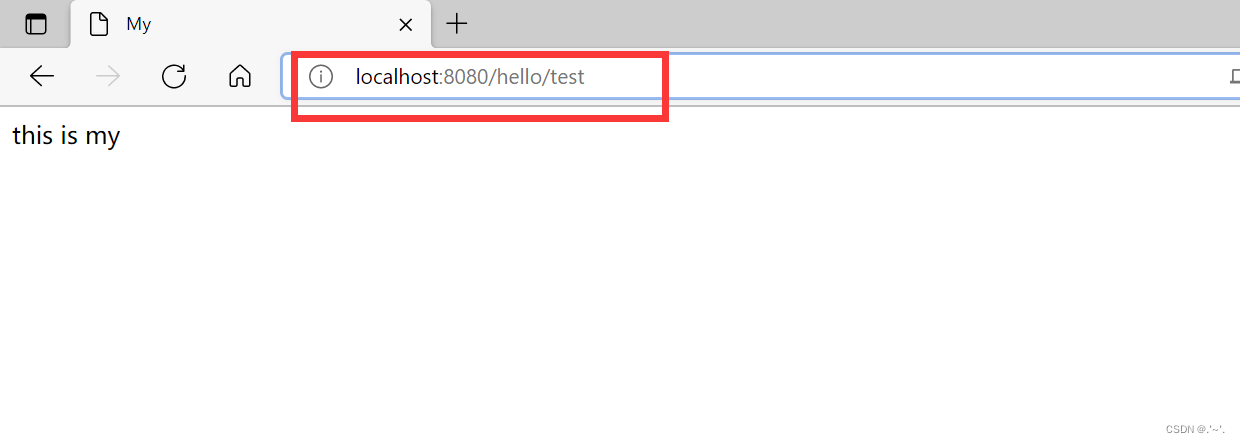
hello为上面 @Requestmapping(value=”/hello”)设置的父路径
test为上面@Requestmapping(value=”/test”)设置的子路径
4.连接数据库
Idea自带连接数据库,我这里是连接远程数据库,数据库数据已经建立好了(不做演示),按图选择pgsql(不同数据库使用的不一样)后配置连接后等待连接就可以看到连接的数据库了。

配置数据库连接:


两处的代码为:
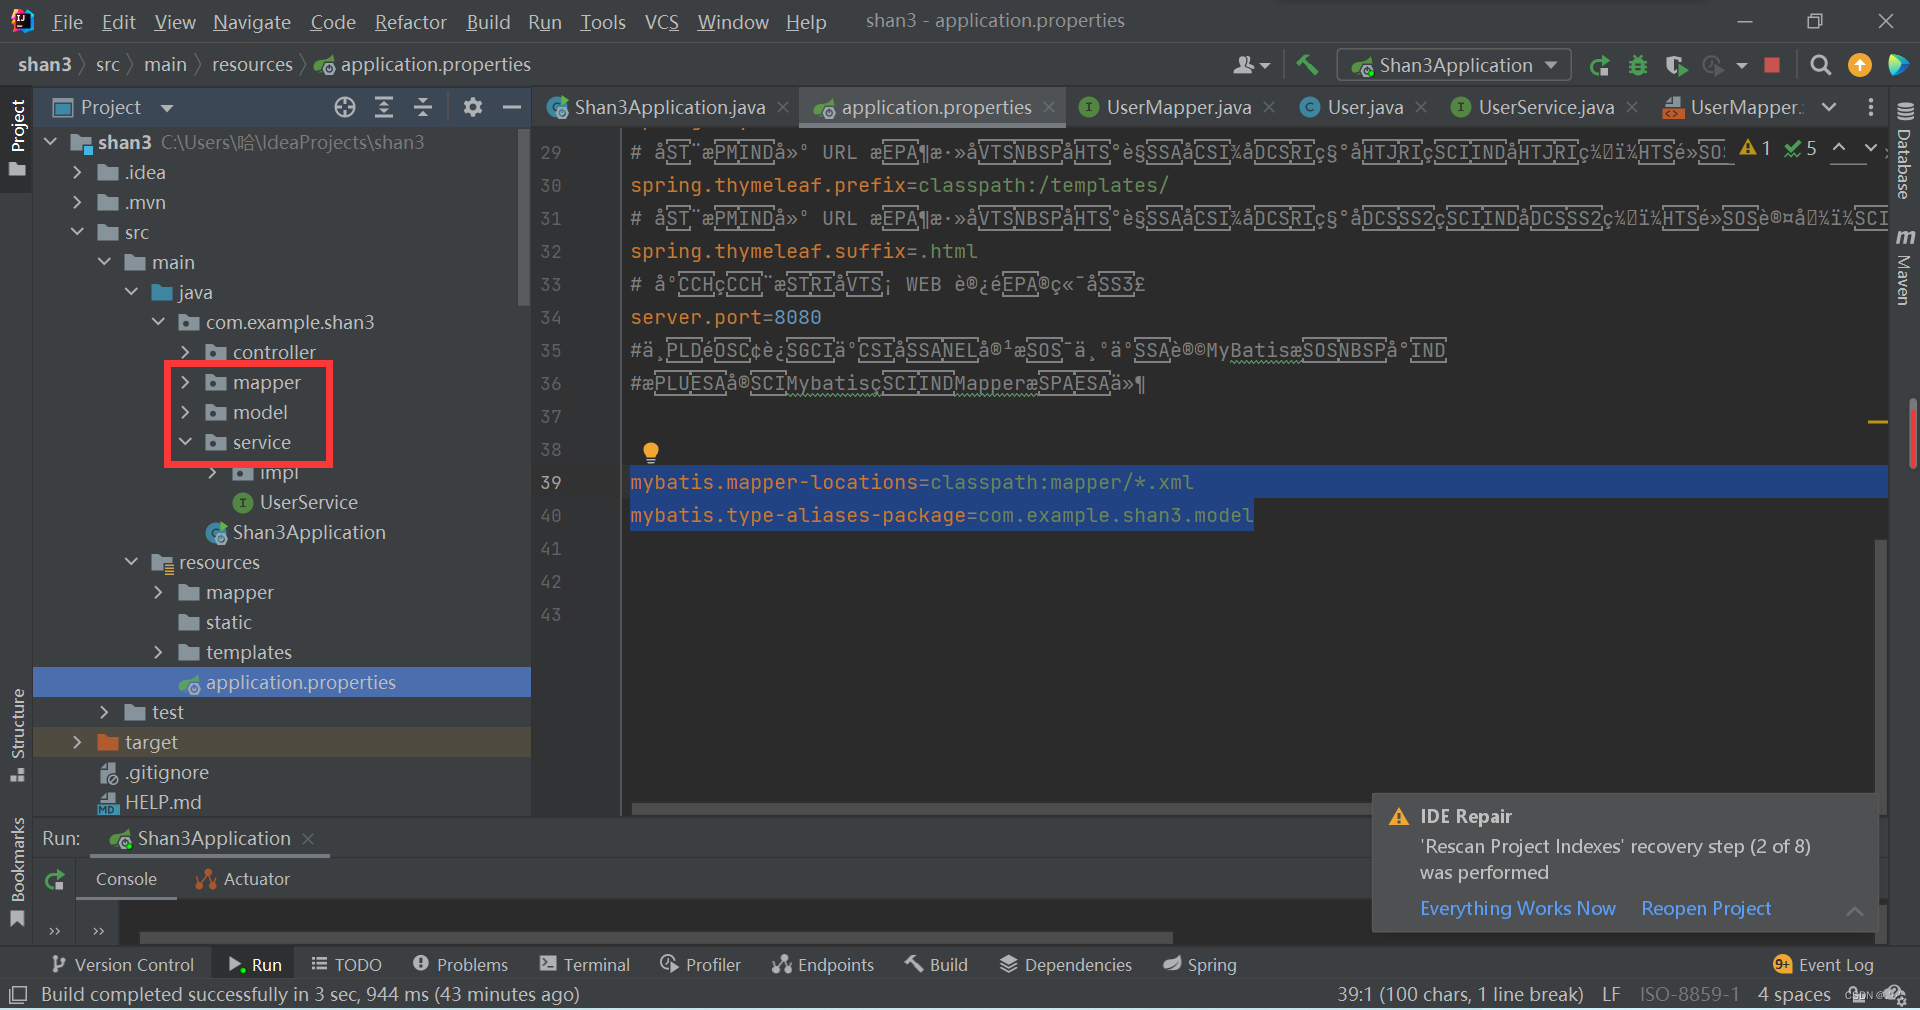
spring.application.name=shan3 spring.datasource.name=test_db1 spring.datasource.url=填写你的URL spring.datasource.username=用户名 spring.datasource.password=密码 spring.datasource.driverClassName=org.postgresql.Driver spring.jpa.properties.hibernate.dialect=org.hibernate.dialect.PostgreSQLDialect spring.jpa.properties.hibernate.hbm2ddl.auto=updatemybatis.mapper-locations=classpath:mapper/*.xml mybatis.type-aliases-package=com.example.shan3.model功能实现代码:
如图创建model包,mapper包,service包,controller包上面已经建立完成。
分别在这些包中新建以下类 UserController,UserMapper,User,UserService 。

UserController:
package com.example.shan3.controller; import com.example.shan3.model.User; import com.example.shan3.service.UserService; import org.springframework.beans.factory.annotation.Autowired; import org.springframework.stereotype.Controller; import org.springframework.ui.Model; import org.springframework.web.bind.annotation.PostMapping; import org.springframework.web.bind.annotation.RequestMapping; / */ @Controller @RequestMapping(value = "/user") public class UserController { / * 将UserService注入controller层 */ @Autowired private UserService userService; @RequestMapping(value = "/show") public String show(){ //返回user页面显示内容 return "user"; } @PostMapping(value = "/getUser") public String getUser(Integer id, Model model) { User user = userService.selectUserById(id); model.addAttribute("users",user); if(user!=null){ return "getUser"; }else { return "error"; } } } UserMapper:
package com.example.shan3.mapper; import com.example.shan3.model.User; import org.springframework.stereotype.Repository; / */ @Repository public interface UserMapper { / * 根据id查询用户 * @param id * @return */ User selectUserById(Integer id); } User:
package com.example.shan3.model; / */ public class User { private String id; private String xm; private String dh; private String yy; public String getId() { return id; } public void setId(String id) { this.id = id; } public String getXm() { return xm; } public void setXm(String xm) { this.xm = xm; } public String getDh() { return dh; } public void setDh(String dh) { this.dh = dh; } public String getYy() { return yy; } public void setYy(String yy) { this.yy = yy; } }UserService:
package com.example.shan3.service; import com.example.shan3.model.User; / */ public interface UserService { / * 根据id查询用户 * @param id * @return */ User selectUserById(Integer id); } 在service包下新建impl包,并在impl包中新建 UserServiceImpl 类
package com.example.shan3.service.impl; import com.example.shan3.mapper.UserMapper; import com.example.shan3.model.User; import com.example.shan3.service.UserService; import org.springframework.beans.factory.annotation.Autowired; import org.springframework.stereotype.Service; / */ @Service public class UserServiceImpl implements UserService { / * 注入mapper到service层 */ @Autowired private UserMapper userMapper; @Override public User selectUserById(Integer id) { return userMapper.selectUserById(id); } } 修改 Application 类中的代码:
package com.example.shan3; import org.mybatis.spring.annotation.MapperScan; import org.springframework.boot.SpringApplication; import org.springframework.boot.autoconfigure.SpringBootApplication; / * */ @SpringBootApplication @MapperScan("com.example.shan3.mapper") public class Shan3Application { public static void main(String[] args) { SpringApplication.run(Shan3Application.class, args); } } 
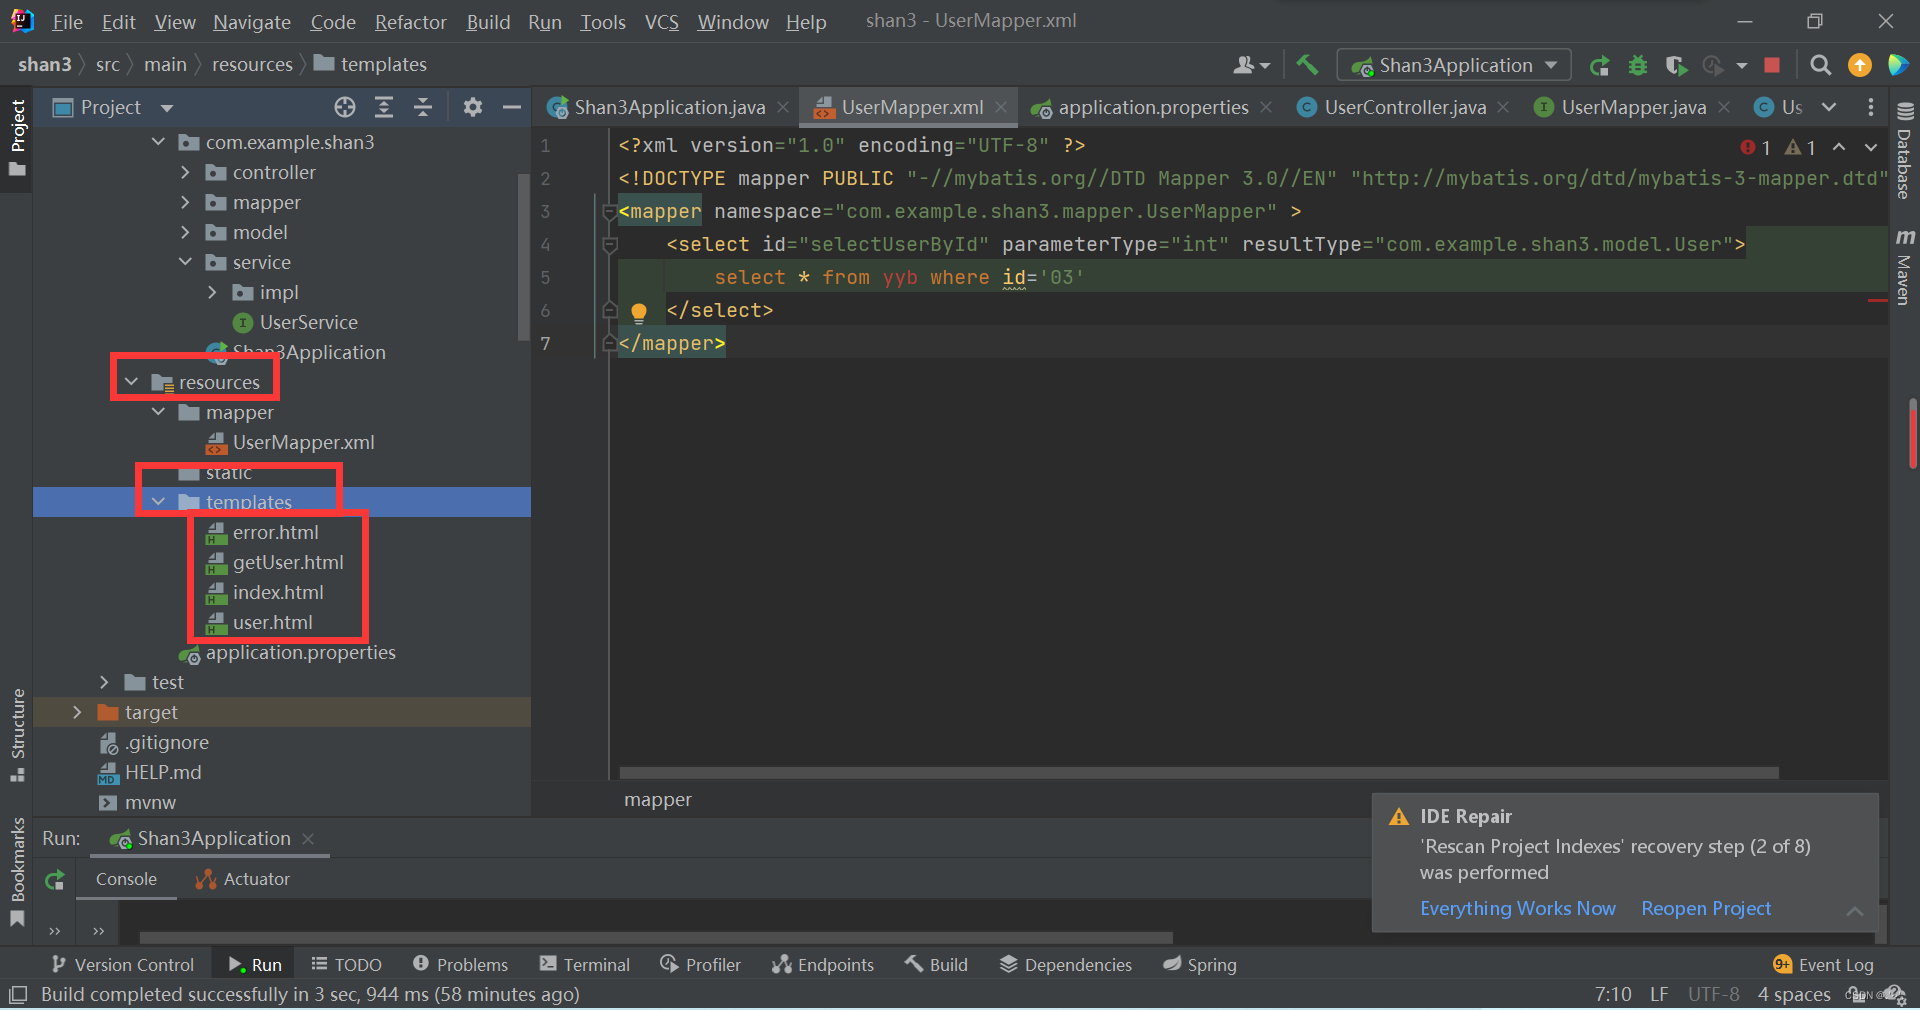
在resources文件夹下新建mapper文件夹,在mapper文件夹下新建 UserMapper.xml 文件

UserMapper:此处固定了查询对象为 id=‘03’ 。select * from yyb where id=’03’ 查询语句的实现,修改 id 等于的值可以改变查询结果。动态输入查询涉及变量类型问题,就化繁为简了,先实现功能再说。
注:以上所有代码注意包名都要换成自己的包名,代码中也有地方需要注意。
界面显示代码:
在resources文件夹下templates文件夹下新建user.html,getUser.html,error.html文件:
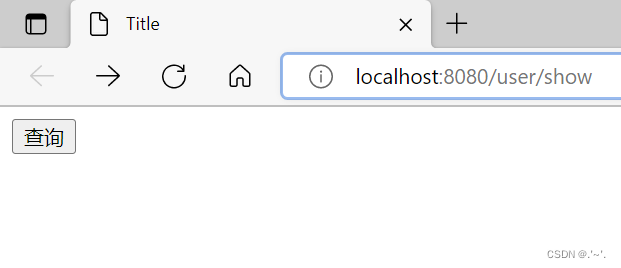
user.html:初始界面
Title
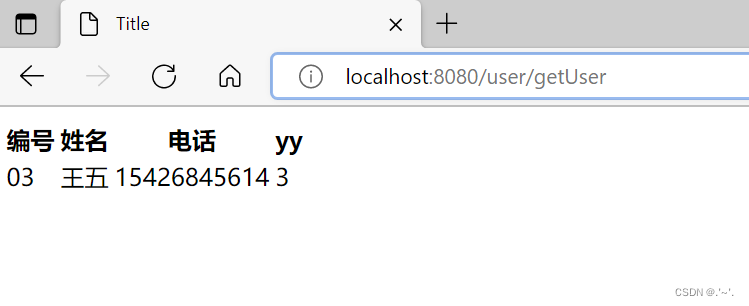
getUser.html :查询结果存在页面
    Title


       编号
       姓名
       电话
       yy
error.html :查询结果不存在显示页面
Title 查无此人
在浏览器输入 loalhost:8080/user/show 即可运行出结果:
感谢大神的博客(讲解更为详细):
使用IDEA搭建SpringBoot(详细版)_哪吒三太子的博客-CSDN博客_idea springboot
发布者:全栈程序员-站长,转载请注明出处:https://javaforall.net/212391.html原文链接:https://javaforall.net

![goland 2102激活(JetBrains全家桶)2022.01.26[通俗易懂]](https://javaforall.net/wp-content/uploads/2020/11/2020110817443450-480x300.jpg)
