
一、19/7/18版本

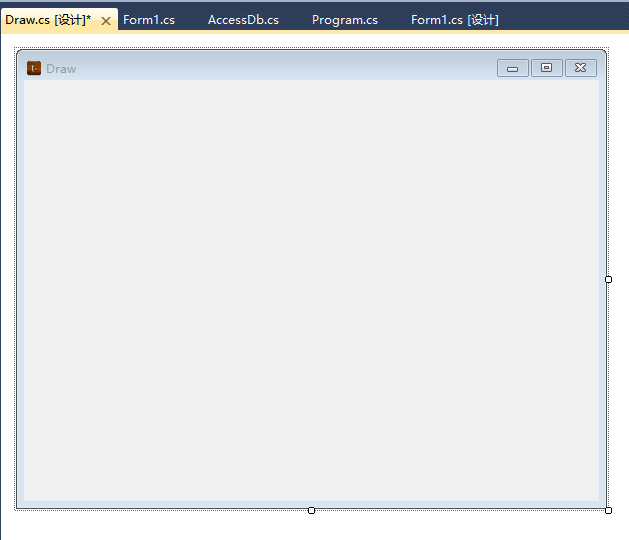
建好后,就会出现一个窗体设计界面,可以在属性栏更改其名字,图标,Text……如下图2所示:
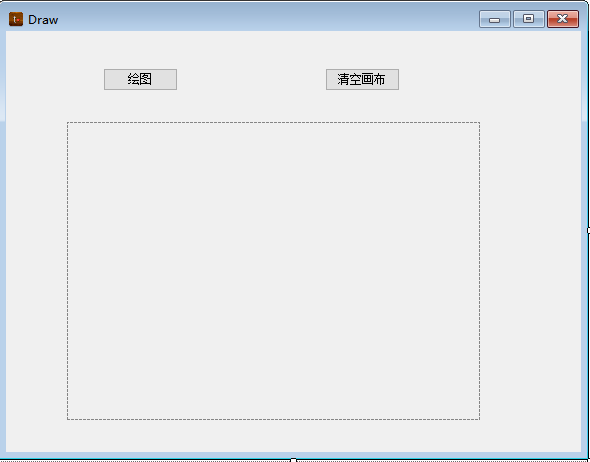
2.添加控件 “picturebox” 和 “button” 如图3所示(可根据需要更改名字):
3.双击 “绘图” 按钮添加事件响应函数;
在此之前,首先要明白如何从绘图坐标系转换为我们常用的坐标系,如下图3所示:
黑色的是绘图坐标系,红色的是我们常用的坐标系,简单画下图就可得到图中所示公式

本来想画个写轮眼,可最后成了下图4的样子(笑哭):

要画好看一点要仔细研究点在哪里,这里就简单介绍一下在 picturebox 中怎样画线,画椭圆,“绘图按钮”点击函数中有:
private void button1_Click(object sender, EventArgs e) { Graphics g1 = pictureBox1.CreateGraphics();//画布 g1.Clear(Color.White); Pen p = new Pen(Color.Red, 2);//画笔 Pen p1 = new Pen(Color.Black, 2); Pen p2 = new Pen(Color.Brown, 5); Pen p3 = new Pen(Color.Black, 20); Font f = new Font("宋体", 10);//字体 int a = pictureBox1.Size.Height; int b = pictureBox1.Size.Width; g1.DrawLine(p1, 0, a, 0, 0);//画线 g1.DrawLine(p1, 0, a, b, a); g1.DrawLine(p1, 0, 0, 5, 10); g1.DrawLine(p1, b, a, b - 10, a - 5); g1.DrawString("O", f, Brushes.Black, 3, a - 20); g1.DrawString("正北X", f, Brushes.Black, 3, 3); g1.DrawString("正东Y", f, Brushes.Black, b - 50, a - 20); Point1[] Pt=new Point1[20]; Point1[] Pt1 = new Point1[20]; Pt[0] = new Point1("0", 400, 200); Pt[1] = new Point1("1", 250, 250); Pt[2] = new Point1("2", 200, 400); Pt[3] = new Point1("3", 150, 250); Pt[4] = new Point1("4", 0, 200); Pt[5] = new Point1("5", 150, 150); Pt[6] = new Point1("6", 200, 0); Pt[7] = new Point1("7", 250, 150); Pt[9] = new Point1("8",200,a-200); int i = 0; for (i = 0; i < 8; i++) { Pt1[i] = new Point1(Pt[i].name, Pt[i].y, a - Pt[i].x); } g1.FillEllipse(Brushes.Black, Pt[9].x-200, Pt[9].y-200, 400, 400); g1.FillEllipse(Brushes.Red, Pt[9].x - 170, Pt[9].y - 170, 340, 340); g1.FillEllipse(Brushes.Brown, Pt[9].x - 120, Pt[9].y - 120, 240, 240); g1.FillEllipse(Brushes.Red, Pt[9].x - 105, Pt[9].y - 105, 210, 210); g1.FillEllipse(Brushes.Black, Pt[9].x - 80, Pt[9].y - 80, 160, 160); g1.FillEllipse(Brushes.Red, Pt[9].x - 65, Pt[9].y - 65, 130, 130); g1.FillEllipse(Brushes.Black, Pt[9].x - 25, Pt[9].y - 25, 50, 50); i = 0; while (Pt1[i + 1] != null) { g1.DrawLine(p2, Pt1[i].x, Pt1[i].y, Pt1[i + 1].x, Pt1[i + 1].y); i++; } g1.DrawLine(p2, Pt1[0].x, Pt1[0].y, Pt1[i].x, Pt1[i].y); i = 1; while (i<=7) { g1.FillEllipse(Brushes.Black, Pt1[i].x - 25, Pt1[i].y - 25, 60, 60); g1.FillEllipse(Brushes.Red, Pt1[i].x - 20, Pt1[i].y - 20, 40, 40); //g1.DrawString(Pt1[i].name, f, Brushes.Black, Pt1[i].x - 5, Pt1[i].y + 5); i=i+2; } g1.DrawLine(p3, Pt1[0].x, Pt1[0].y, 200, a-280); g1.DrawLine(p3, Pt1[2].x, Pt1[2].y, 280, a - 200); g1.DrawLine(p3, Pt1[4].x, Pt1[4].y, 200, a - 120); g1.DrawLine(p3, Pt1[6].x, Pt1[6].y, 120, a - 200); g1.Dispose(); } 4.双击“清空画布”按钮,添加响应事件:
private void button2_Click(object sender, EventArgs e) { Graphics g = pictureBox1.CreateGraphics(); g.Clear(Color.White); } 点击运行,OK!
二、20/6/13版本
 private void Draft_Paint(object sender, PaintEventArgs e) {
    } private void pB_Paint(object sender, PaintEventArgs e) {
    }
Graphics 的属性和方法有很多,可以看看:
MSDN:https://docs.microsoft.com/zh-cn/dotnet/api/system.drawing.graphics?view=netcore-3.1
本来想截个长图放这里的,可是那实在是太长辽,朋友们可以自己去读一读。这里就简单介绍几个常用的绘图方法吧
1.预备知识
1.1 Color
public struct Color : IEquatable<System.Drawing.Color> 系统自带了好多颜色:
https://docs.microsoft.com/zh-cn/dotnet/api/system.drawing.color?view=netcore-3.1
1.2 GraphicsPath
public sealed class GraphicsPath : MarshalByRefObject, ICloneable, IDisposable https://docs.microsoft.com/zh-cn/dotnet/api/system.drawing.drawing2d.graphicspath?view=netcore-3.1
1.3 Single
public struct Single : IComparable, IComparable<float>, IConvertible, IEquatable<float>, IFormattable 2.一些方法简介
1.清除整个绘图面并以指定背景色填充。 public void Clear (System.Drawing.Color color); 2.释放此 Graphics 使用的所有资源。 public void Dispose ();//前面这俩应该是绘图必用的 3.绘制一段弧线,它表示由一对坐标、宽度和高度指定的椭圆部分。 DrawArc //有四个重载,吐槽一下,和我的脑回路很不同,很费解,可以看看我之前写的一篇博客(链接见下) 4.绘制由 4 个 Point 结构定义的贝塞尔样条。 DrawBezier(Pen, Point, Point, Point, Point);//3重载,挺高大上的,目前没用过 5.绘制由 Point 结构的数组定义的闭合基数样条。 DrawClosedCurve(Pen, Point[], Single, FillMode) 6.绘制经过一组指定的 Point 结构的基数样条。 DrawCurve(Pen, Point[]) 7.绘制一个由边框(该边框由一对坐标、高度和宽度指定)定义的椭圆。 DrawEllipse(Pen, Rectangle) 8.在指定坐标处绘制由指定的 Icon 表示的图像。 DrawIcon(Icon, Int32, Int32) 9.在指定位置并且按原始大小绘制指定的 Image。 DrawImage 10.绘制一条连接由坐标对指定的两个点的线条。 DrawLine(Pen, PointF, PointF) 11.绘制一系列连接一组 Point 结构的线段。 DrawLines(Pen, PointF[]) 12.绘制 GraphicsPath。 public void DrawPath (System.Drawing.Pen pen, System.Drawing.Drawing2D.GraphicsPath path); 13.绘制一个扇形,该形状由一个坐标对、宽度、高度以及两条射线所指定的椭圆定义。 DrawPie(Pen, Single, Single, Single, Single, Single, Single) 14.绘制由一组 Point 结构定义的多边形。 DrawPolygon(Pen, PointF[]) 15.绘制由坐标对、宽度和高度指定的矩形。 DrawRectangle(Pen, Single, Single, Single, Single) 16.绘制一系列由 Rectangle 结构指定的矩形。 DrawRectangles(Pen, Rectangle[]) 17.在指定位置并且用指定的 Brush 和 Font 对象绘制指定的文本字符串。 DrawString(String, Font, Brush, Single, Single, StringFormat) 18.填充边框所定义的椭圆的内部,该边框由一对坐标、一个宽度和一个高度指定。 FillEllipse(Brush, Single, Single, Single, Single) 19.填充由一对坐标、一个宽度、一个高度以及两条射线指定的椭圆所定义的扇形区的内部。 FillPie(Brush, Single, Single, Single, Single, Single, Single) 20.填充 Point 结构指定的点数组所定义的多边形的内部。 FillPolygon(Brush, PointF[]) 21.填充由一对坐标、一个宽度和一个高度指定的矩形的内部。 FillRectangle(Brush, Rectangle) 22.填充 Region 的内部。 public void FillRegion (System.Drawing.Brush brush, System.Drawing.Region region); 23.测量用指定的 Font 绘制的指定字符串。 MeasureString(String, Font) DrawArc :https://blog.csdn.net/Gou_Hailong/article/details/
3.使用示例
将这些代码贴到Paint 函数中
 Graphics g = e.Graphics; g.Clear(Color.White);//1 PointF[] pt = new PointF[4]; pt[0] = new PointF(50, 50); pt[1] = new PointF(50, 100); pt[2] = new PointF(70, 110); pt[3] = new PointF(100, 100); // create pen. Pen p = new Pen(Color.Blue, 2); g.DrawBezier(p, pt[0], pt[1], pt[2], pt[3]);//4 for (int i = 0; i < 4; i++) {
    pt[i].Y += 60;} g.DrawClosedCurve(p, pt);//5 for (int i = 0; i < 4; i++) {
    pt[i].Y += 60; } g.DrawCurve(p, pt);//6 g.DrawEllipse(p, 100, 100, 60, 100);//7 for (int i = 0; i < 4; i++) {
    pt[i].Y += 60; } g.DrawLine(p, pt[1], pt[3]);//10 for (int i = 0; i < 4; i++) {
    pt[i].Y += 60; } g.DrawPie(p, pt[0].X, pt[0].Y, 60, 50, 60, 250);//13 for (int i = 0; i < 4; i++) {
    pt[i].Y += 60; } g.DrawPolygon(p, pt);//14 p.Color = Color.Yellow; for (int i = 0; i < 4; i++) {
    pt[i].Y -= 60 * 5; pt[i].X += 60; } g.DrawRectangle(p, pt[3].X, pt[3].Y, 100, 50);//15 for (int i = 0; i < 4; i++) {
    pt[i].X += 60; } Font f = new Font("宋体", 15); Brush b = Brushes.Cyan; g.DrawString("Stay Hungry", f, b, pt[2]);//17 b = Brushes.DarkOrange; for (int i = 0; i < 4; i++) {
    pt[i].X += 60; } g.FillEllipse(b, pt[1].X, pt[1].Y, 20, 20);//18 for (int i = 0; i < 4; i++) {
    pt[i].Y += 60; } g.FillPie(b, pt[3].X, pt[3].Y, 60, 50, 60, 250);//19 for (int i = 0; i < 4; i++) {
    pt[i].Y += 60; } g.FillPolygon(b, pt);//20 for (int i = 0; i < 4; i++) {
    pt[i].Y += 60; } g.FillRectangle(b, pt[3].X, pt[3].Y, 100, 50);//21 g.Dispose();//2
4.问题
参考
https://docs.microsoft.com/zh-cn/dotnet/api/system.drawing.graphics?view=netcore-3.1
发布者:全栈程序员-站长,转载请注明出处:https://javaforall.net/215233.html原文链接:https://javaforall.net

![[SUS]SAP ERP传入SUS的采购订单查询不到的问题原因及解决方案](https://javaforall.net/wp-content/uploads/2020/11/2020110817443450-480x300.jpg)
