
Spark Streaming 实现 word count
一、一个receiver接收一个输入源端口
1.1 数据源端口
yum install -y nc 使用测试端口: 9999
nc -lk 9999 1.2 spark streaming 接收处理数据
① spark shell 本地模式运行
- 启动spark shell命令行
spark-shell 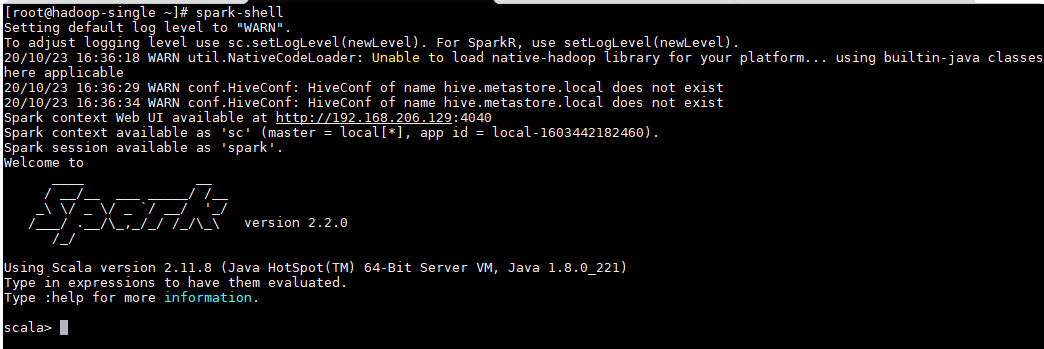

- 导包
scala> import org.apache.spark._ import org.apache.spark._ scala> import org.apache.spark.streaming._ import org.apache.spark.streaming._ - 创建 spark streaming context对象
注: 需先停止默认的 Spark context 对象 sc,因为一个JVM线程中只能创建一个 SparkContext对象,默认创建的 Spark context 对象没有定义窗口信息、线程等其他配置项,而需要自定义一些配置项时,就必须要新创建一个 Spark context 对象,设置配置信息,所以要先停止 sc
local [ n ] 中的 n 要大于receiver 的数量
scala> sc.stop scala> val conf = new SparkConf().setMaster("local[2]").setAppName("workWC1") conf: org.apache.spark.SparkConf = org.apache.spark.SparkConf@5d08a65c // 设置窗口期时间为3s scala> val ssc = new StreamingContext(conf,Seconds(3)) ssc: org.apache.spark.streaming.StreamingContext = org.apache.spark.streaming.StreamingContext@44a0e68f - 使用 socketTextStream 连接上端口 9999
scala> val lines = ssc.socketTextStream("localhost",9999) lines: org.apache.spark.streaming.dstream.ReceiverInputDStream[String] = org.apache.spark.streaming.dstream.SocketInputDStream@ - 使用 flatMap(_.split()) 切分展开数据源输入的每条数据
scala> val words = lines.flatMap(_.split(" ")) words: org.apache.spark.streaming.dstream.DStream[String] = org.apache.spark.streaming.dstream.FlatMappedDStream@22f756c5 - 将切分每条数据的每个元素组成元组形式的 (key,1)
scala> val pairs = words.map(word => (word,1)) pairs: org.apache.spark.streaming.dstream.DStream[(String, Int)] = org.apache.spark.streaming.dstream.MappedDStream@6a16ee0d - 使用 reduceByKey(+) 对每个key聚合,统计key的数量
scala> val wordCounts = pairs.reduceByKey(_+_) wordCounts: org.apache.spark.streaming.dstream.DStream[(String, Int)] = org.apache.spark.streaming.dstream.ShuffledDStream@7b031f53 - 打印输出结果
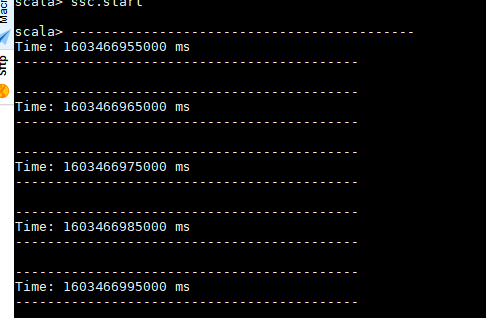
scala> wordCounts.print() - 启动 spark streaming
ssc.start() - 在测试端口 9999 输入测试数据:
hello word hello tom hello jerry hello word 
- 输入
ctrl + D结束任务
② java高级API运行
- 配置pom文件:pom.xml
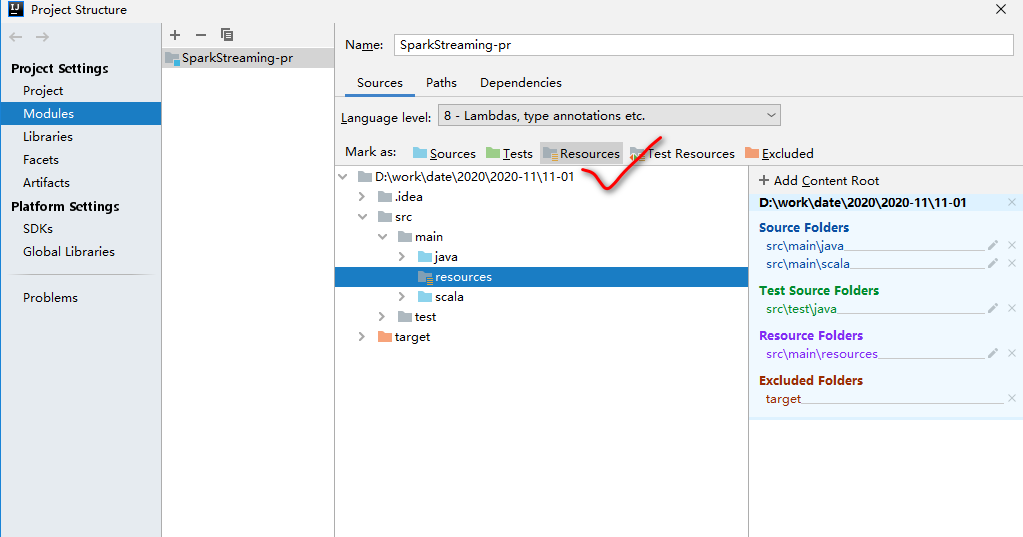
<?xml version="1.0" encoding="UTF-8"?> <project xmlns="http://maven.apache.org/POM/4.0.0" xmlns:xsi="http://www.w3.org/2001/XMLSchema-instance" xsi:schemaLocation="http://maven.apache.org/POM/4.0.0 http://maven.apache.org/xsd/maven-4.0.0.xsd"> <modelVersion>4.0.0</modelVersion> <groupId>org.example</groupId> <artifactId>SparkStreaming-pr</artifactId> <version>1.0-SNAPSHOT</version> <properties> <maven.compiler.source>1.8</maven.compiler.source> <maven.compiler.target>1.8</maven.compiler.target> <encoding>UTF-8</encoding> <scala.version>2.11.8</scala.version> <spark.version>2.2.0</spark.version> <hadoop.version>2.7.1</hadoop.version> <scala.compat.version>2.11</scala.compat.version> </properties> <dependencies> <dependency> <groupId>org.scala-lang</groupId> <artifactId>scala-library</artifactId> <version>${scala.version}</version> </dependency> <dependency> <groupId>org.apache.spark</groupId> <artifactId>spark-core_2.11</artifactId> <version>${spark.version}</version> </dependency> <dependency> <groupId>org.apache.spark</groupId> <artifactId>spark-sql_2.11</artifactId> <version>${spark.version}</version> </dependency> <dependency> <groupId>org.apache.spark</groupId> <artifactId>spark-streaming_2.11</artifactId> <version>${spark.version}</version> </dependency> <dependency> <groupId>org.apache.spark</groupId> <artifactId>spark-streaming-flume_2.11</artifactId> <version>2.2.0</version> </dependency> <dependency> <groupId>org.apache.spark</groupId> <artifactId>spark-streaming-kafka-0-10_2.11</artifactId> <version>2.2.0</version> </dependency> <dependency> <groupId>junit</groupId> <artifactId>junit</artifactId> <version>4.11</version> <scope>test</scope> </dependency> </dependencies> <build> <sourceDirectory>src/main/scala</sourceDirectory> <!--<testSourceDirectory>src/test/scala</testSourceDirectory>--> <plugins> <plugin> <groupId>net.alchim31.maven</groupId> <artifactId>scala-maven-plugin</artifactId> <version>3.2.2</version> <executions> <execution> <goals> <goal>compile</goal> <goal>testCompile</goal> </goals> <configuration> <args> <arg>-dependencyfile</arg> <arg>${project.build.directory}/.scala_dependencies</arg> </args> </configuration> </execution> </executions> </plugin> <plugin> <groupId>org.apache.maven.plugins</groupId> <artifactId>maven-shade-plugin</artifactId> <version>2.4.3</version> <executions> <execution> <phase>package</phase> <goals> <goal>shade</goal> </goals> <configuration> <filters> <filter><artifact>*:*</artifact> <excludes> <exclude>META-INF/*.SF</exclude> <exclude>META-INF/*.DSA</exclude> <exclude>META-INF/*.RSA</exclude> </excludes> </filter> </filters> <transformers> <transformer implementation="org.apache.maven.plugins.shade.resource.ManifestResourceTransformer"> <mainClass></mainClass> </transformer> </transformers> </configuration> </execution> </executions> </plugin> </plugins> </build> </project> - 创建main目录下创建 resources 文件夹,拷贝一份 log4j.properties 文件
’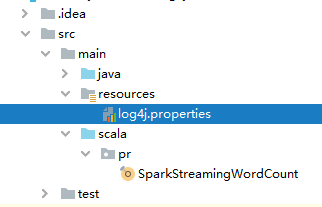
设置为资源目录:
log4j.properties
# contributor license agreements. See the NOTICE file distributed with # this work for additional information regarding copyright ownership. # The ASF licenses this file to You under the Apache License, Version 2.0 # (the "License"); you may not use this file except in compliance with # the License. You may obtain a copy of the License at # # http://www.apache.org/licenses/LICENSE-2.0 # # Unless required by applicable law or agreed to in writing, software # distributed under the License is distributed on an "AS IS" BASIS, # WITHOUT WARRANTIES OR CONDITIONS OF ANY KIND, either express or implied. # See the License for the specific language governing permissions and # limitations under the License. # # Set everything to be logged to the console log4j.rootCategory= WARN, console log4j.appender.console=org.apache.log4j.ConsoleAppender log4j.appender.console.target=System.err log4j.appender.console.layout=org.apache.log4j.PatternLayout log4j.appender.console.layout.ConversionPattern=%d{yy/MM/dd HH:mm:ss} %p %c{1}: %m%n - 创建测试类:SparkStreamingWordCount.scala
package pr import org.apache.spark.SparkConf import org.apache.spark.streaming.dstream.{
   DStream, ReceiverInputDStream} import org.apache.spark.streaming.{
   Seconds, StreamingContext} object SparkStreamingWordCount extends App{
//todo 创建一个spark StreamingContext对象 val conf: SparkConf = new SparkConf().setMaster("local[2]").setAppName("demo1") val ssc = new StreamingContext(conf, Seconds(5)) //todo 使用spark streaming进行word count val inputDstream: ReceiverInputDStream[String] = ssc.socketTextStream("hadoop-single", 9999) //todo 对输入流进行操作 val wordDstream: DStream[String] = inputDstream.flatMap(_.split(" ")) val wordAndOneDstream: DStream[(String, Int)] = wordDstream.map((_, 1)) val wordcounts: DStream[(String, Int)] = wordAndOneDstream.reduceByKey(_ + _) wordcounts.print() //todo 通过start() 启动消息采集和处理 ssc.start() //todo 等待程序终止 ssc.awaitTermination() } - 运行程序
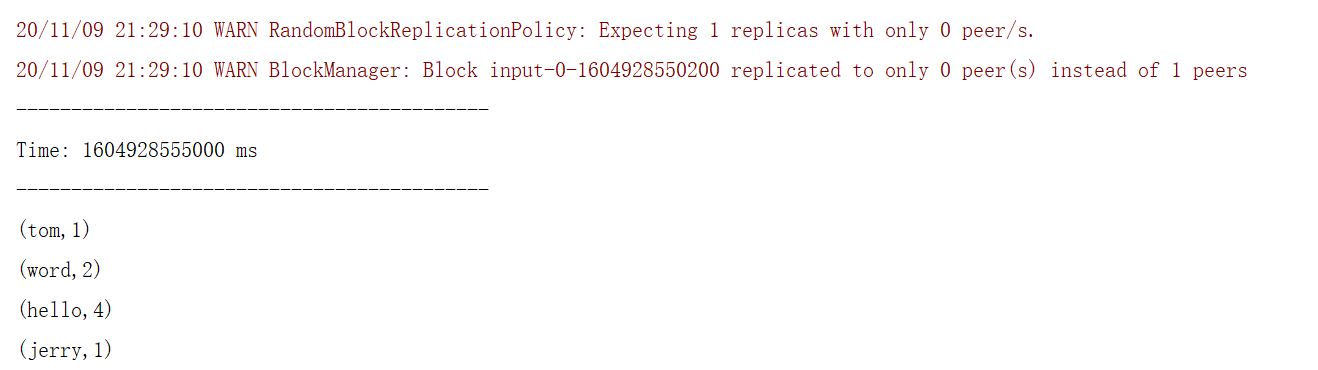
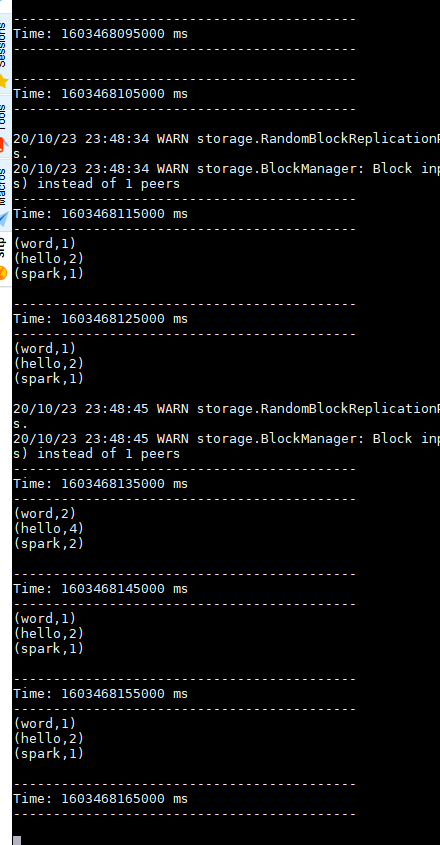
- 在测试端口 9999 输入测试数据:
hello word hello tom hello jerry hello word - IDEA控制台打印结果如下:
二、两个receiver接收两个输入源端口
2.1 测试源端口
- 测试端口1: 9999
nc -lk 9999 - 测试端口2: 3333
nc -lk 3333 2.2 spark streaming 接收处理数据
spark shell 命令行:
scala> sc.stop scala> import org.apache.spark._ import org.apache.spark._ scala> import org.apache.spark.streaming._ import org.apache.spark.streaming._ scala> val conf = new SparkConf().setMaster("local[3]").setAppName("workWC2") conf: org.apache.spark.SparkConf = org.apache.spark.SparkConf@7d95a717 scala> val ssc = new StreamingContext(conf,Seconds(3)) ssc: org.apache.spark.streaming.StreamingContext = org.apache.spark.streaming.StreamingContext@58d4fe33 // 使用 union 联合两个receiver scala> val lines = ssc.socketTextStream("localhost",9999).union(ssc.socketTextStream("localhost",3333)) lines: org.apache.spark.streaming.dstream.DStream[String] = org.apache.spark.streaming.dstream.UnionDStream@5263f554 scala> val words = lines.flatMap(_.split(" ")) words: org.apache.spark.streaming.dstream.DStream[String] = org.apache.spark.streaming.dstream.FlatMappedDStream@ scala> val pairs = words.map(word => (word,1)) pairs: org.apache.spark.streaming.dstream.DStream[(String, Int)] = org.apache.spark.streaming.dstream.MappedDStream@386ec37d scala> val wordCounts = pairs.reduceByKey(_+_) wordCounts: org.apache.spark.streaming.dstream.DStream[(String, Int)] = org.apache.spark.streaming.dstream.ShuffledDStream@50d02417 scala> wordCounts.print() scala> ssc.start() 分别在 9999 和 3333 窗口同时输入
hello word hello spark 可以看到词频统计 union 在了一起
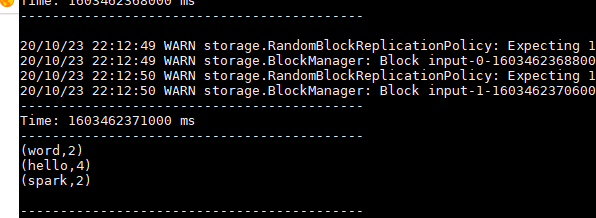
如果在3s窗口期只输入一次数据,那么只会统计一次词频
注: receiver也可以先分开写再 union
val lines1 = ssc.socketTextStream("localhost",9999) val lines2 = ssc.socketTextStream("localhost",3333) val lines = lines1.union(lines2) 三、设置窗口的时长与步长统计(一个receiver一个socket)
3.1 测试源端口
- 测试端口1: 9999
nc -lk 9999 3.2 spark streaming 接收处理数据
spark shell 命令行:
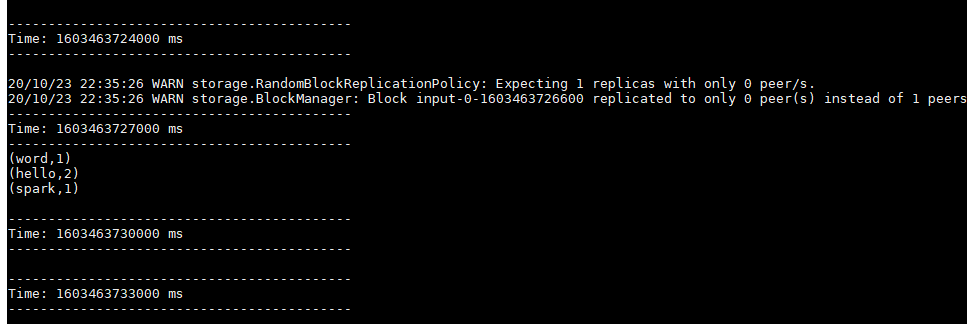
- 设置窗口时间30s,移动长度10s
reduceByKeyAndWindow(x:Int,y:Int) => x+y,Seconds(30),Seconds(10))
sc.stop import org.apache.spark._ import org.apache.spark.streaming._ val conf = new SparkConf().setMaster("local[2]").setAppName("workWC3") val ssc = new StreamingContext(conf,Seconds(5)) val lines = ssc.socketTextStream("localhost",9999) val wcStream = lines.flatMap(_.split(" ")).map(x => (x,1)).reduceByKeyAndWindow((x:Int,y:Int) => x+y,Seconds(30),Seconds(10)) wcStream.print() ssc.start 在 9999 端口输入:
hello word hello spark 可以看到 虽然spark streaming context 对象设置了窗口期为5秒,但是 reduceByKeyAndWindow 设置了窗口的移动不出为10秒,这里会以美10秒一个步长显示统计词频
四、读取hdfs上的数据实现WordCount
- hdfs上创建文件夹
hdfs dfs -mkdir -p /SparkStreaming/test - 创建测试类: HDFSInputDStreamDemo.scala
package pr import org.apache.spark.SparkConf import org.apache.spark.streaming.dstream.DStream import org.apache.spark.streaming.{
     Seconds, StreamingContext} object HDFSInputDStreamDemo extends App{
val conf: SparkConf = new SparkConf().setMaster("local[*]").setAppName("hdfsDemo") val ssc = new StreamingContext(conf, Seconds(5)) //todo 创建一个输入流,读取文件系统上的数据(文件在hdfs中需要是新放入的,已经存在文件夹中的文件是不会读的) val lines: DStream[String] = ssc.textFileStream("hdfs://hadoop-single:9000/SparkStreaming/test") val wordcounts: DStream[(String, Int)] = lines.flatMap(_.split(" ")).map((_, 1)).reduceByKey(_ + _) wordcounts.print() ssc.start() ssc.awaitTermination() } - 启动程序
- 将文本数据放至hdfs指定文件夹中:
注意: 文件在hdfs中需要是新放入的,已经存在文件夹中的文件是不会读的
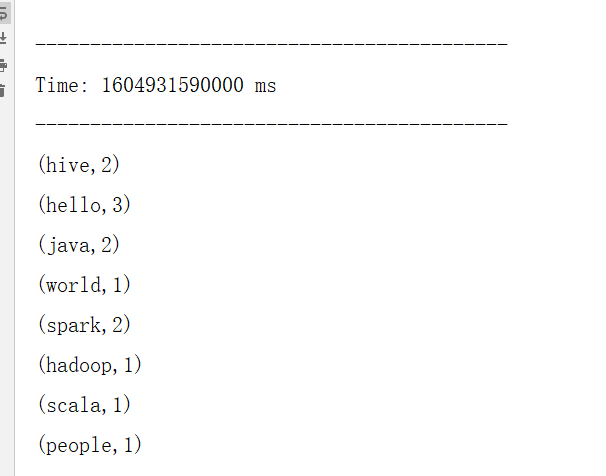
wordCount.txt
hello world hello people hello java hadoop scala spark hive java spark hive 上传文件:
hdfs dfs -put wordCounts.txt /SparkStreaming/test - IDEA控制台打印结果如下:
五、两个InputDStream join连接
- 创建测试类: JoinDemo.scala
package pr import org.apache.spark.{
     SparkConf, SparkContext} import org.apache.spark.streaming.{
     Seconds, StreamingContext} object JoinDemo extends App {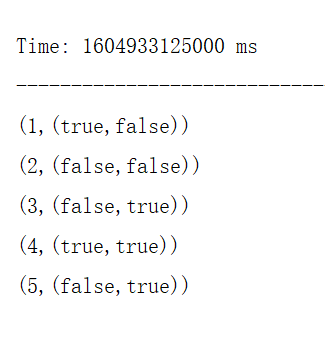
val conf: SparkConf = new SparkConf().setMaster("local[*]").setAppName("JoinDemo") val ssc = new StreamingContext(conf,Seconds(5)) val sc: SparkContext = ssc.sparkContext val input1 = List((1, true), (2, false), (3, false), (4, true), (5, false)) val input2 = List((1, false), (2, false), (3, true), (4, true), (5, true)) val rdd1 = sc.parallelize(input1) val rdd2 = sc.parallelize(input2) import scala.collection.mutable //todo 通过queueStream的方式创建InputDStream,一般测试的环境下使用 val ds1 = ssc.queueStream[(Int, Boolean)](mutable.Queue(rdd1)) val ds2 = ssc.queueStream[(Int, Boolean)](mutable.Queue(rdd2)) val ds = ds1.join(ds2) ds.print() ssc.start() ssc.awaitTerminationOrTimeout(5000) } - 运行程序
- IDEA控制台打印结果如下:
版权声明:本文内容由互联网用户自发贡献,该文观点仅代表作者本人。本站仅提供信息存储空间服务,不拥有所有权,不承担相关法律责任。如发现本站有涉嫌侵权/违法违规的内容, 请联系我们举报,一经查实,本站将立刻删除。
发布者:全栈程序员-站长,转载请注明出处:https://javaforall.net/233128.html原文链接:https://javaforall.net


