
大家好,又见面了,我是你们的朋友全栈君。
RTSP视频流显示(海康威视)
本文目的主要是想要实时显示海康威视的摄像头数据,笔者尝试了如下几种方式(部分未做完):
- VLC
- SDK(C++)
- ffmpeg+Nginx
- ffmpeg直接解码RTSP
- AppEmit
- WebComponentsKit插件
VLC
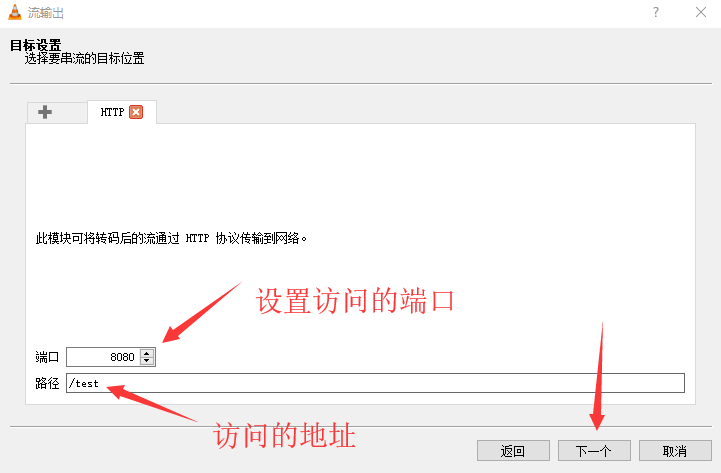
如果使用插件需要注意谷歌浏览器版本,本文是在官网下载的软件,下载下来安装并运行:
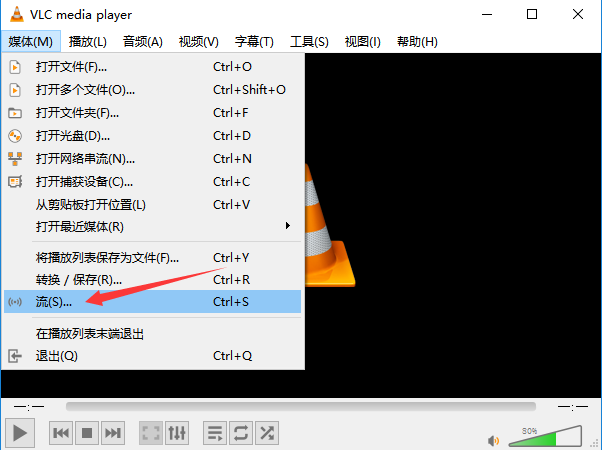

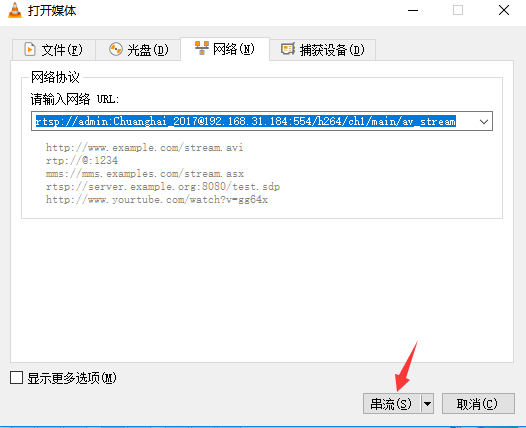
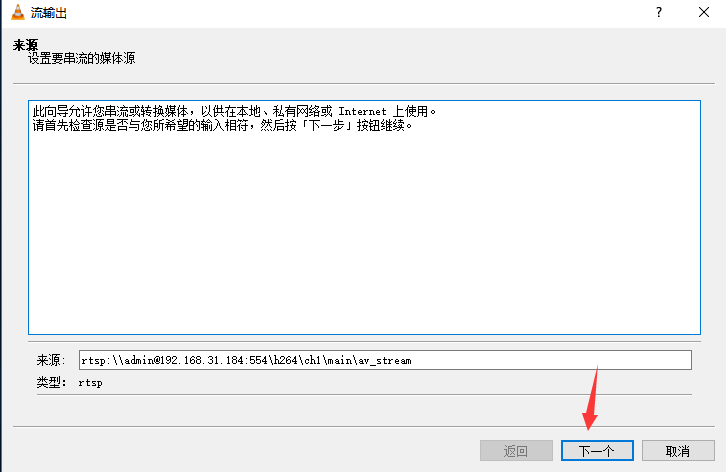
填的地址就是摄像头RTSP视频流地址,然后点串流:
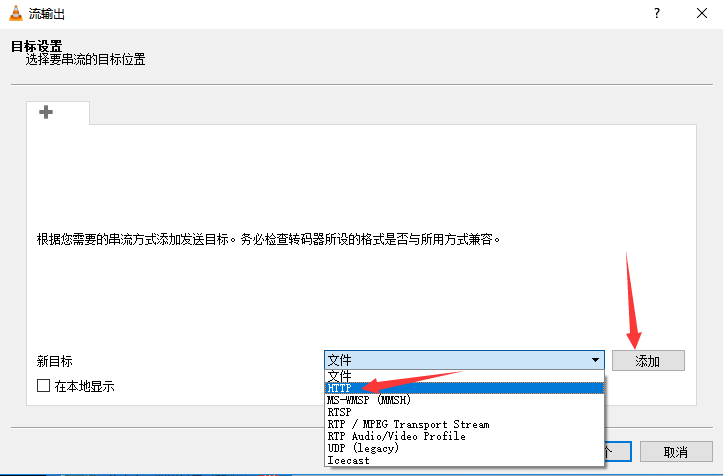
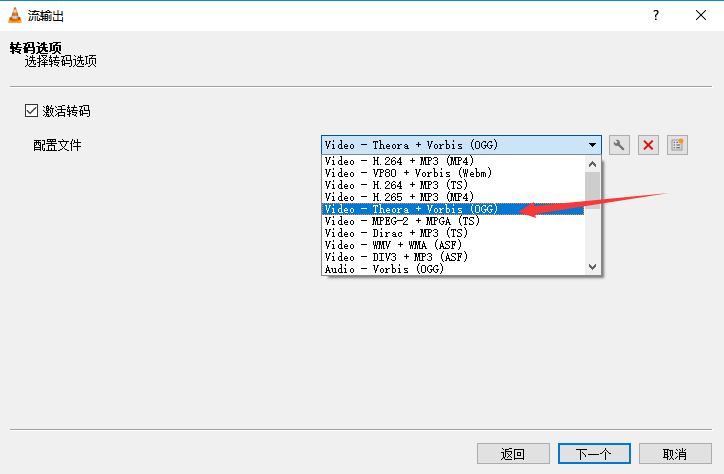

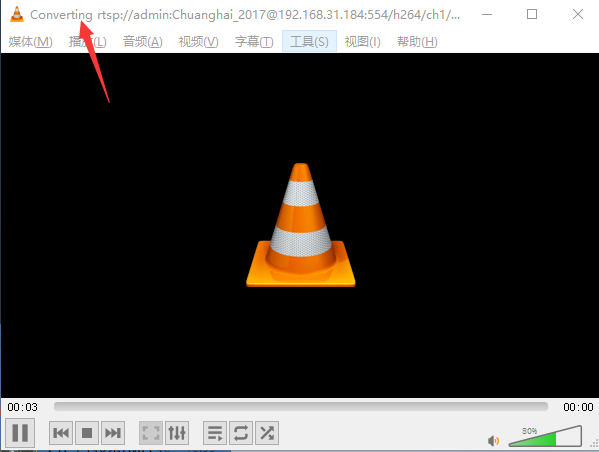
左上角是这样的说明就已经在转换了:
网页显示
注意资源地址,同一局域网下的要访问就需要把localhost改为转换软件运行电脑的ip地址:
<!DOCTYPE html>
<html lang="en">
<head>
	<title>Video</title>
</head>
<body>
	<video src="http://localhost:8080/test" width="350px" height="250px" controls="controls">
		不支持
	</video>
</body>
</html>
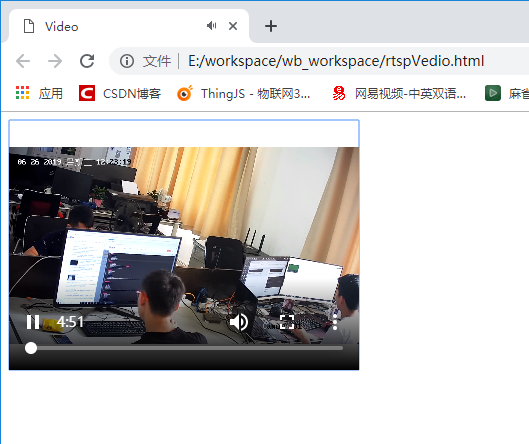
这种方式转换多路的时候,时间越久延迟会越大,实际运用操作起来比较麻烦。
VLC-Qt库
在知道视频地址的情况下可以使用插件库来解码视频,到官网下载需要的库文件:
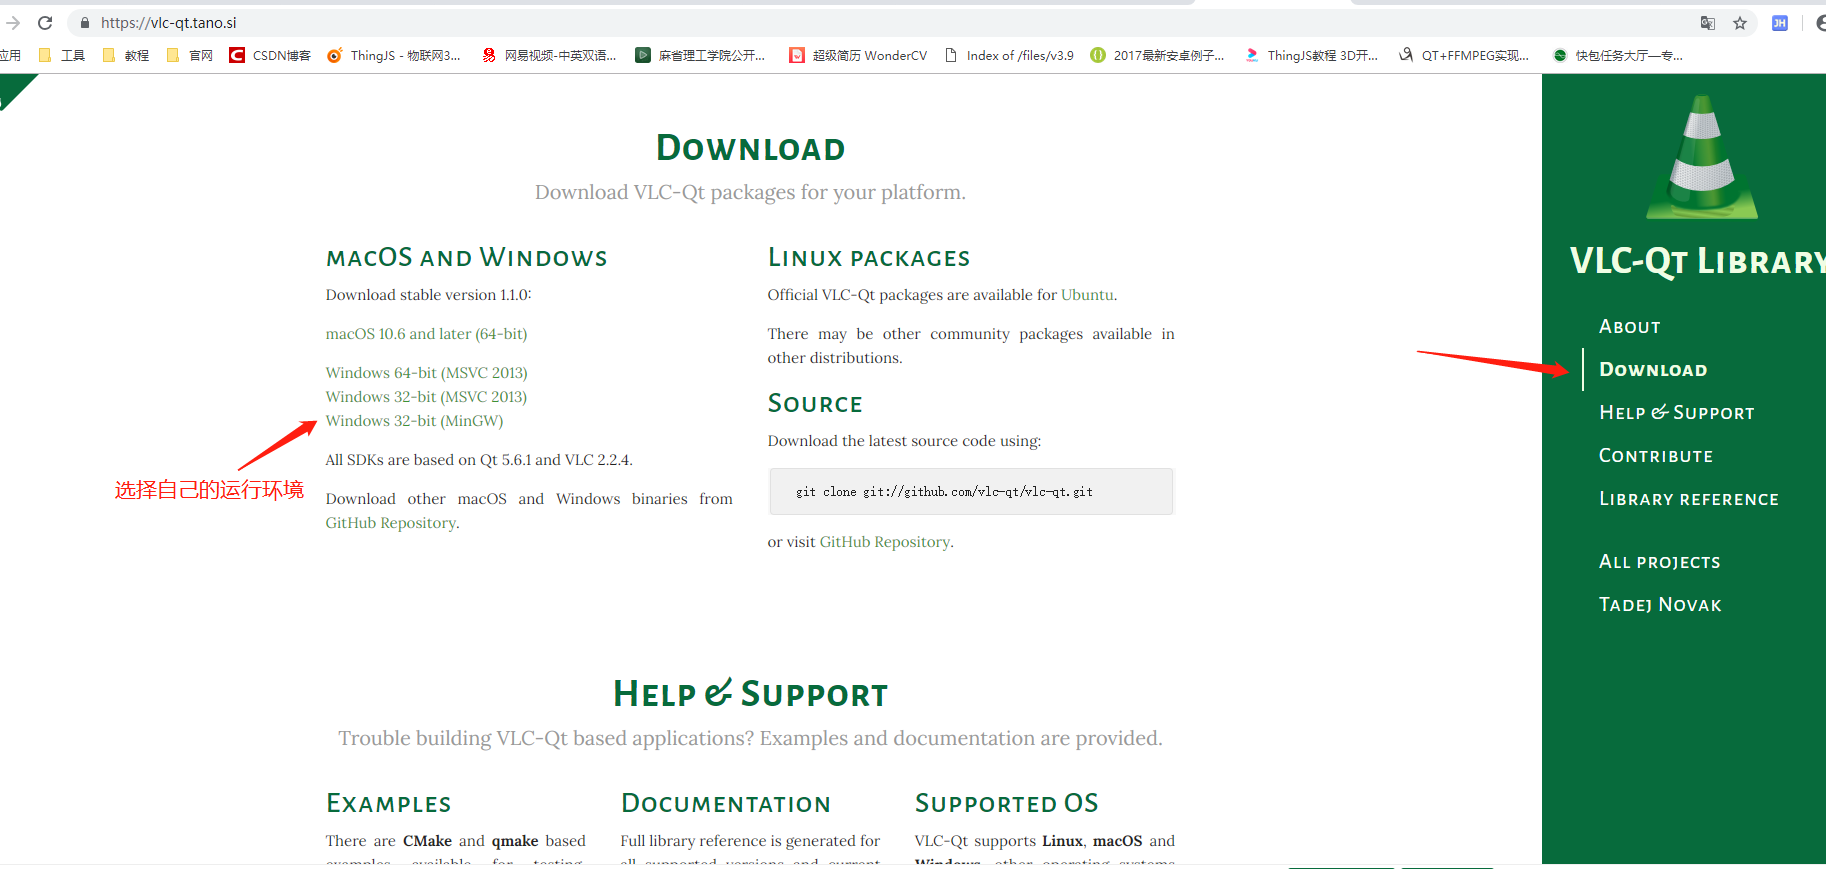
下载完成后解压出来有如下3个文件夹:

- include:包含了所需的头文件
- lib:包含所需的 lib 文件
- bin:包含了所需的 dll 文件(动态库及插件)
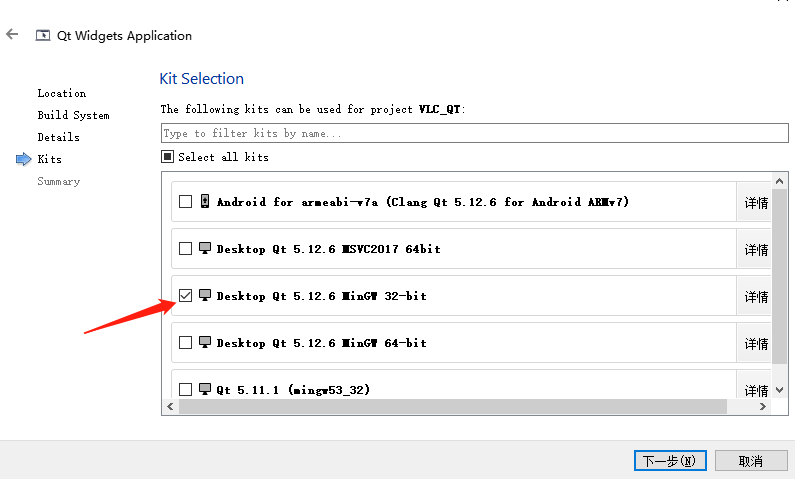
新建Qt工程:
在.pro文件中添加库所在路径

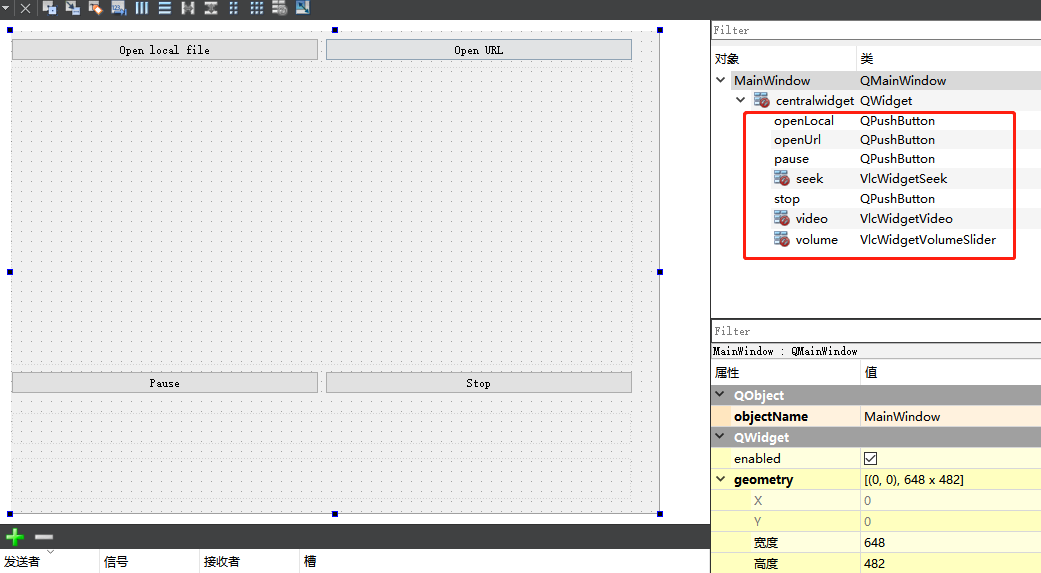
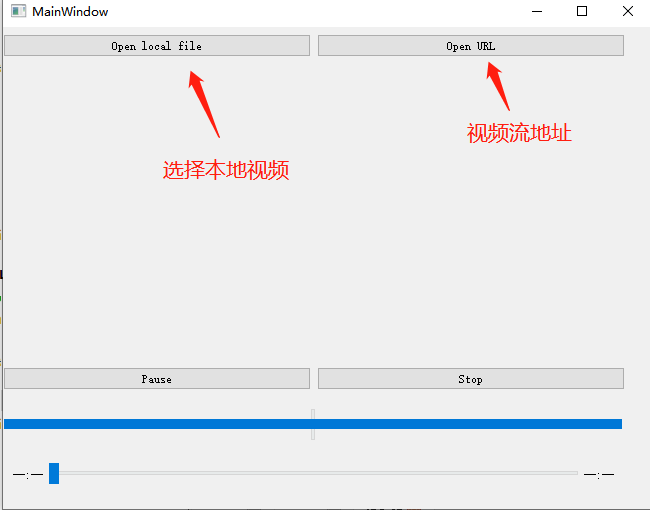
布局文件如下:
mainWindow.h文件如下:
#ifndef MAINWINDOW_H
#define MAINWINDOW_H

#include <QMainWindow>
#include <QFileDialog>
#include <QInputDialog>
#include <VLCQtCore/Common.h>
#include <VLCQtCore/Instance.h>
#include <VLCQtCore/Media.h>
#include <VLCQtCore/MediaPlayer.h>

QT_BEGIN_NAMESPACE
namespace Ui {
    class MainWindow; }
QT_END_NAMESPACE

class VlcInstance;
class VlcMedia;
class VlcMediaPlayer;

class MainWindow : public QMainWindow
{

    Q_OBJECT

public:
    MainWindow(QWidget *parent = nullptr);
    ~MainWindow();

private slots:
    void openLocal();
    void openUrl();

private:
    Ui::MainWindow *ui;

    VlcInstance *_instance;
    VlcMedia *_media;
    VlcMediaPlayer *_player;

};
#endif // MAINWINDOW_H
mainWindow.c文件如下:
#include "mainwindow.h"
#include "ui_mainwindow.h"

MainWindow::MainWindow(QWidget *parent)
    : QMainWindow(parent)
    , ui(new Ui::MainWindow)
{

    ui->setupUi(this);

    _instance = new VlcInstance(VlcCommon::args(), this);
    _player = new VlcMediaPlayer(_instance);
    _player->setVideoWidget(ui->video);
    ui->video->setMediaPlayer(_player);
    ui->volume->setMediaPlayer(_player);
    ui->volume->setVolume(50);
    ui->seek->setMediaPlayer(_player);

    connect(ui->openLocal, &QPushButton::clicked, this, &MainWindow::openLocal);
    connect(ui->openUrl, &QPushButton::clicked, this, &MainWindow::openUrl);
    connect(ui->stop, &QPushButton::clicked, _player, &VlcMediaPlayer::stop);
}

void MainWindow::openLocal()
{

    QString file =
            QFileDialog::getOpenFileName(this, tr("Open file"),
                                         QDir::homePath(),
                                         tr("Multimedia files(*)"));

    if (file.isEmpty())
        return;

    _media = new VlcMedia(file, true, _instance);

    _player->open(_media);
}

void MainWindow::openUrl()
{

    QString url =
            QInputDialog::getText(this, tr("Open Url"), tr("Enter the URL you want to play"));

    if (url.isEmpty())
        return;

    _media = new VlcMedia(url, _instance);

    _player->open(_media);
}


MainWindow::~MainWindow()
{

    delete _player;
    delete _media;
    delete _instance;
    delete ui;
}
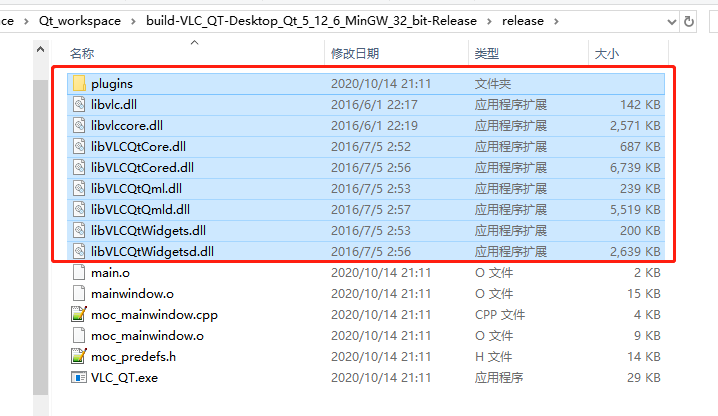
使用发布版编译应用,程序会运行失败:
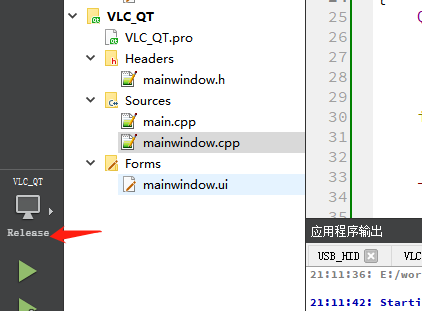
把下载的bin文件夹下所有文件复制到exe所在路径后再次编译运行即可:
这种方式不适合web端
SDK(C++)
本文使用环境如下:
- 操作系统:win10 64位
- Qt版本: 5.13.0
- 编译器版本:mingw73_64
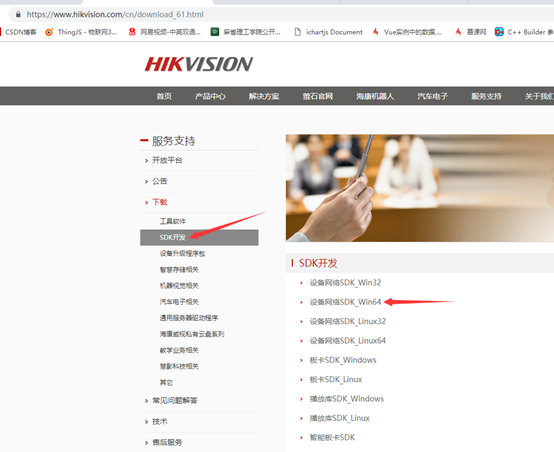
SDK下载。
一定要注意版本。
编写应用
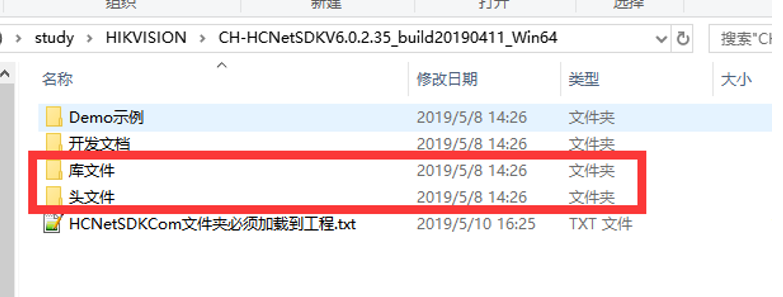
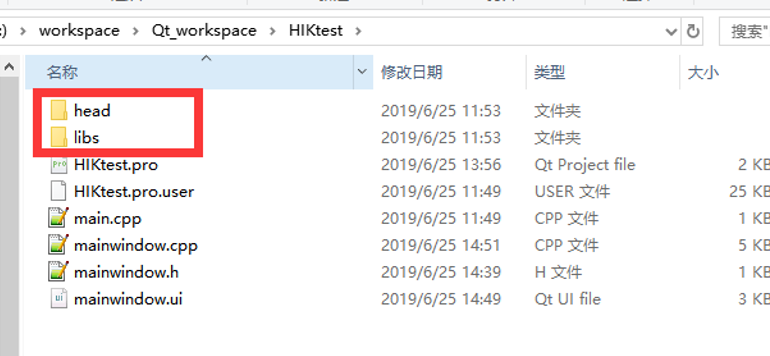
- 下载SDK下来解压,复制如下需要的文件到工程:
改名为:
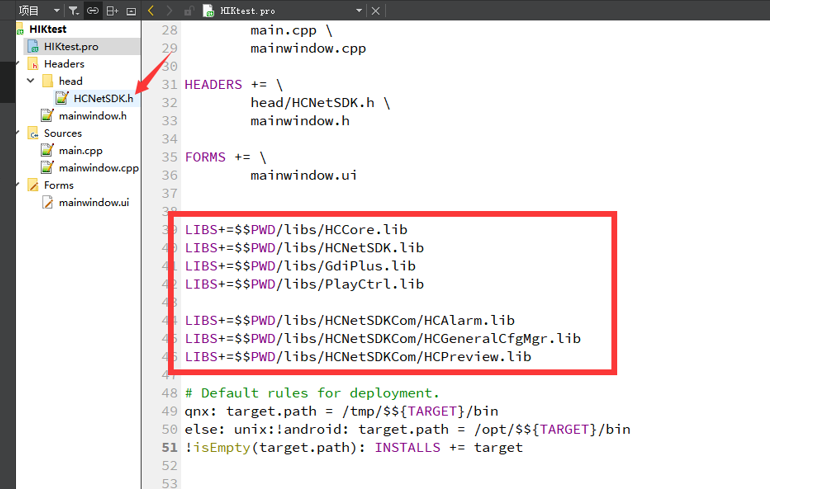
- 然后在.pro中添加库路径,:
LIBS+=$$PWD/libs/HCCore.lib
LIBS+=$$PWD/libs/HCNetSDK.lib
LIBS+=$$PWD/libs/GdiPlus.lib
LIBS+=$$PWD/libs/PlayCtrl.lib

LIBS+=$$PWD/libs/HCNetSDKCom/HCAlarm.lib
LIBS+=$$PWD/libs/HCNetSDKCom/HCGeneralCfgMgr.lib
LIBS+=$$PWD/libs/HCNetSDKCom/HCPreview.lib
添加头文件并包含:
#include <windows.h>
#include <head/HCNetSDK.h>
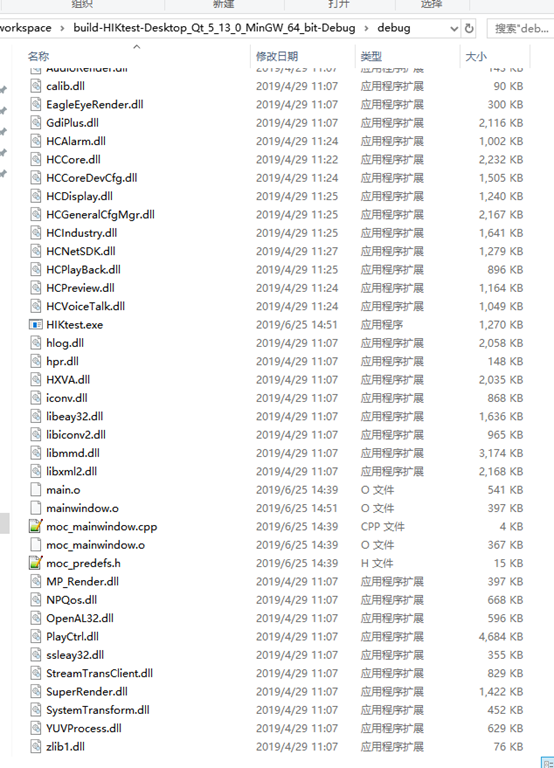
3. 再把库文件夹中所有dll文件放到编译后exe所在路径(有些用不上,但是全部找出来添加不会有问题):
4. 然后开始调用函数初始化:
	// 初始化
	bool isok = NET_DVR_Init();
	if(isok == false)
	{

	    qDebug() << "NET_DVR_Init error;error number is " <<NET_DVR_GetLastError();
	    return;
	}
	//设置连接时间与重连时间
	NET_DVR_SetConnectTime(2000, 1);
	NET_DVR_SetReconnect(10000, true);
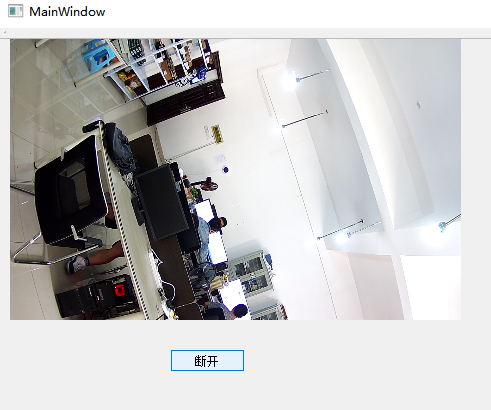
点击按钮开始连接(布局中只有一个名为faceRecognition的label和名为connectFaceRecognition的按钮):
int faceRecognitionRealPlayHandle = 0;
int faceRecognitionUserID = 0;
if(ui->connectFaceRecognition->text() =="连接"){
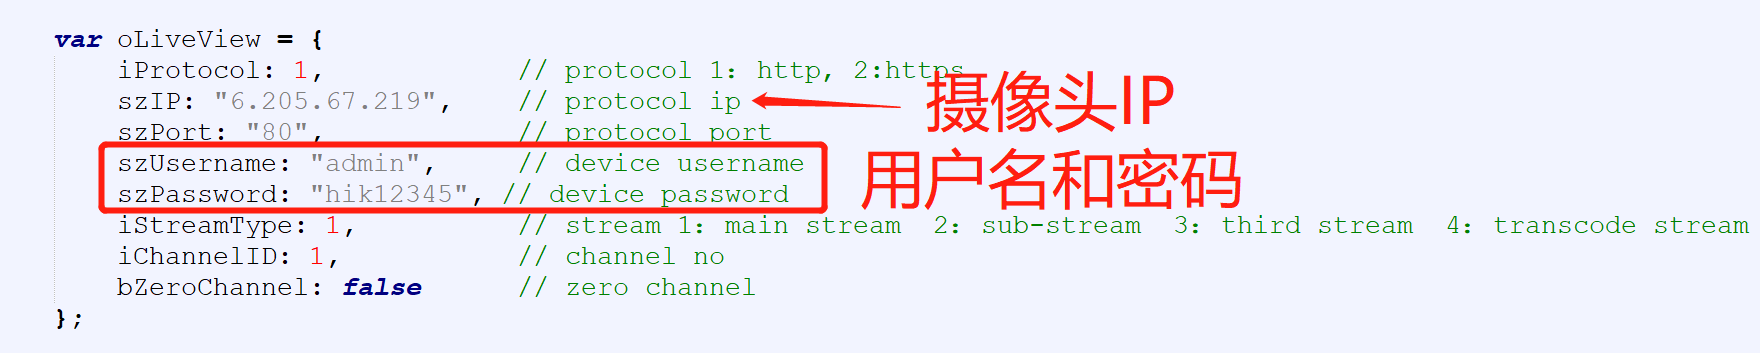
NET_DVR_DEVICEINFO_V30 deviceInfoTmp;
// 摄像头IP,用户名和密码
faceRecognitionUserID = NET_DVR_Login_V30("192.168.31.168",8000,"admin","chuanghai2017",&deviceInfoTmp);
if(faceRecognitionUserID<0)
{
errorCode = NET_DVR_GetLastError();
QMessageBox::warning(NULL,"提示",QString("摄像头登陆失败! 错误码:%1").arg(errorCode));
return;
}
//启动预览
NET_DVR_PREVIEWINFO struPlayInfo;
struPlayInfo.hPlayWnd = (HWND)ui->faceRecognition->winId(); //设置获取窗口句柄 需要 SDK 解码时句柄设为有效值,仅取流不解码时可设为空
struPlayInfo.lChannel = 1; //预览通道号
struPlayInfo.dwStreamType = 0; //0-主码流,1-子码流,2-码流 3,3-码流 4,以此类推
struPlayInfo.dwLinkMode = 0; //0- TCP 方式,1- UDP 方式,2- 多播方式,3- RTP 方式,4-RTP/RTSP,5-RSTP/HTTP
struPlayInfo.bBlocked = 1; //0- 非阻塞取流,1- 阻塞取流
struPlayInfo.dwDisplayBufNum = 15; //播放库播放缓冲区最大缓冲帧数
faceRecognitionRealPlayHandle = NET_DVR_RealPlay_V40(faceRecognitionUserID, &struPlayInfo, NULL, NULL);
if(faceRecognitionRealPlayHandle <0)
{
errorCode = NET_DVR_GetLastError();
QMessageBox::warning(NULL,"提示",QString("摄像头播放失败! 错误码:%1").arg(errorCode));
NET_DVR_Logout(faceRecognitionUserID);
}else{
ui->connectFaceRecognition->setText("断开");
}
}else{
//关闭预览
NET_DVR_StopRealPlay(faceRecognitionRealPlayHandle);
//注销用户
NET_DVR_Logout(faceRecognitionUserID);
ui->connectFaceRecognition->setText("连接");
}
这种方式不适合web端
ffmpeg+Nginx
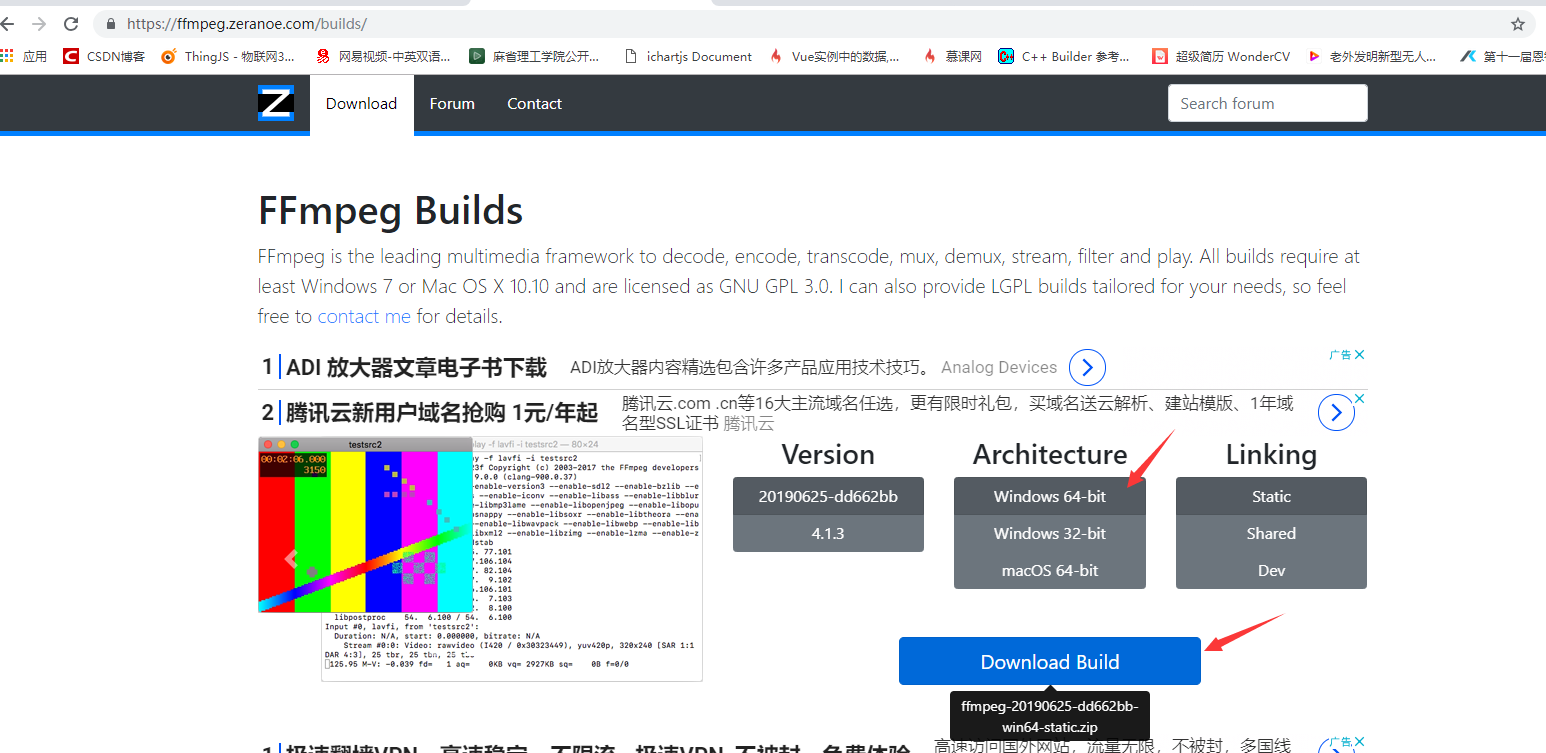
ffmpeg安装比较简单,下载下来把bin目录配置到环境变量,就OK了。
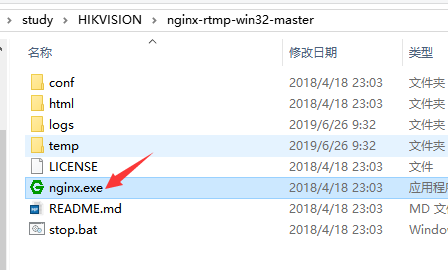
先运行nginx.exe(需要是已经集成rtmp模块的):
再打开cmd输入如下并回车:
ffmpeg -i "rtsp://admin:wls771102@192.168.14.175:554/h265/ch1/main/av_stream" -f flv -r 25 -s 640x360 -an rtmp://localhost:1935/live/room
看到这样的状态就可以访问rtmp://localhost:1935/live/room显示图像,不过需要浏览器支持rtmp:
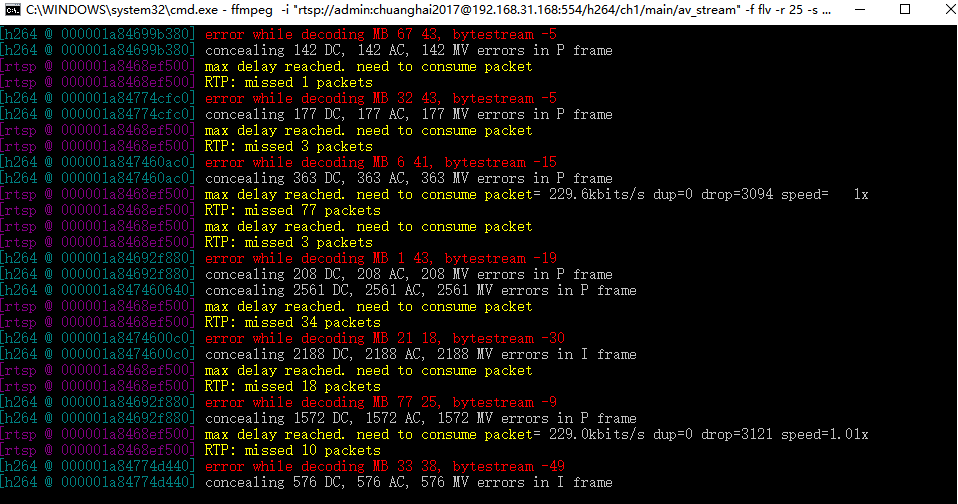
这种方式丢帧明显,图像模糊。
直接使用ffmpeg解码视频
这里对这个demo作者表示感谢,写得确实已经很精简了,也就不说了,作者提到的关闭Shadow build:
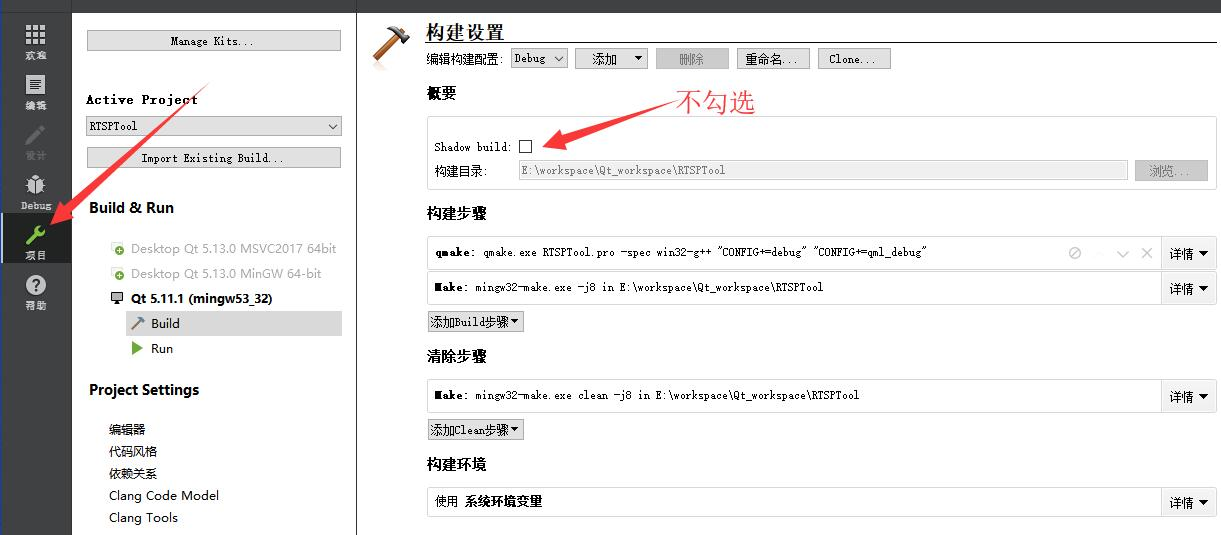
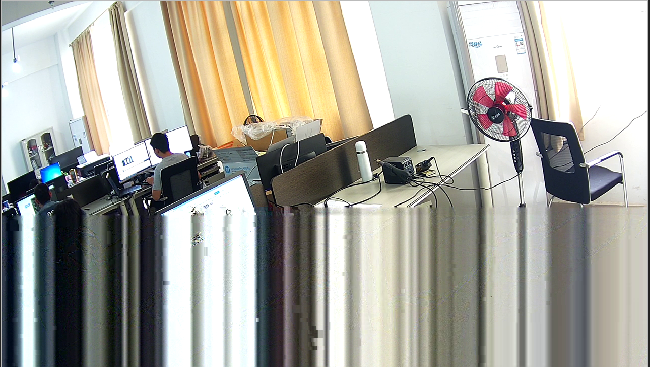
在测试中发现有时候显示会有一半模糊具体原因还不太清除:
AppEmit
传送门
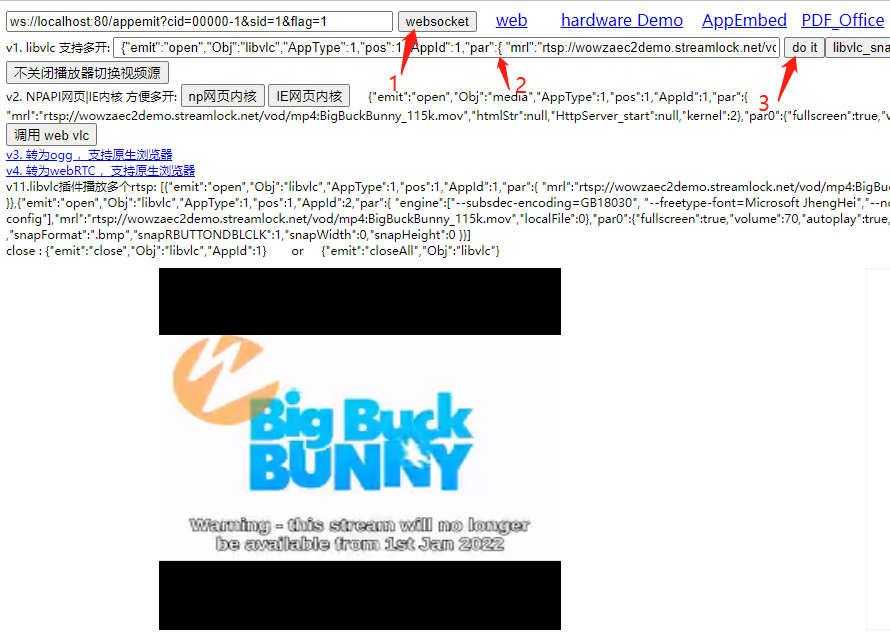
下载解压后,尝试运行demo获取rtsp视频流:

依次点击1、3即可看到画面,2位置的输入框需要按规则输入包含rtsp视频流地址信息的json格式描述,页面中列举了简单的测试案例:
主要代码提取出来:
<!DOCTYPE html>  <!-- manifest="/websocket.appcache"-->
<html >
<head>
    <meta http-equiv="Content-Type" content="text/html; charset=utf-8" />
    <meta name="viewport" content="width=device-width, initial-scale=1, maximum-scale=1, user-scalable=no">
    <title> rtsp demo</title>
    <script type="text/javascript"> </script>
   <style type="text/css"> .Appboxs {
      margin-top:10px; display: -webkit-box; display: -moz-box; display: -ms-flexbox; display: -webkit-flex;display: flex; display: box; display: flexbox; justify-content:space-around; } </style>
</head>
<body >

<div class="container">
<input type="text" class="form-control" size="50" style="margin-bottom:3px;" id="input_url" value="ws://localhost:80/appemit?cid=00000-1&sid=1&flag=1" />
<button type="button" id="btn_Flash" onclick="init_App()" >初始化websocket(第一步)</button>
    <div >
		<div style="font-size:10px">libvlc:

		<!--双视频源 [{"emit":"open","Obj":"libvlc","AppType":1,"pos":1,"AppId":1,"par":{ "mrl":"rtsp://wowzaec2demo.streamlock.net/vod/mp4:BigBuckBunny_115k.mov","localFile":0},"par0":{"fullscreen":1,"volume":70,"autoplay":1,"controls":1 }},{"emit":"open","Obj":"libvlc","AppType":1,"pos":1,"AppId":2,"par":{ "engine":["--subsdec-encoding=GB18030", "--freetype-font=Microsoft JhengHei","--no-snapshot-preview","-I","dummy" ,"--ignore-config"],"mrl":"rtsp://192.168.161.224/1/h264major","localFile":0},"par0":{"fullscreen":true,"volume":70,"autoplay":true,"controls":true ,"snapPath":"/file/snap/" ,"snapFormat":".bmp","snapRBUTTONDBLCLK":1,"snapWidth":0,"snapHeight":0 }}]-->

		<!--单视频源 {"emit":"open","Obj":"libvlc","AppType":1,"pos":1,"AppId":1,"par":{ "mrl":"rtsp://192.168.161.224/1/h264major","localFile":0},"par0":{"fullscreen":1,"volume":70,"autoplay":1,"controls":1,"bgcolor":"2A2937"}}-->
			<input type="text" class="form-control" size="150" style="margin-bottom:3px;" id="input_par" value=' [{
    "emit":"open","Obj":"libvlc","AppType":1,"pos":1,"AppId":1,"par":{ "mrl":"rtsp://wowzaec2demo.streamlock.net/vod/mp4:BigBuckBunny_115k.mov","localFile":0},"par0":{
    "fullscreen":1,"volume":70,"autoplay":1,"controls":1 }},{
    "emit":"open","Obj":"libvlc","AppType":1,"pos":1,"AppId":2,"par":{ "engine":["--subsdec-encoding=GB18030", "--freetype-font=Microsoft JhengHei","--no-snapshot-preview","-I","dummy" ,"--ignore-config"],"mrl":"rtsp://192.168.161.224/1/h264major","localFile":0},"par0":{
    "fullscreen":true,"volume":70,"autoplay":true,"controls":true ,"snapPath":"/file/snap/" ,"snapFormat":".bmp","snapRBUTTONDBLCLK":1,"snapWidth":0,"snapHeight":0 }}]'/>
			<button type="button" id="btn_1" onclick="input_App() " >开始(第二步)</button>
		</div>
	</div>
     <div class="Appboxs" >
		<!-- textarea或者改为div 都可以,绑定嵌入APP的位置, AppEmbed 要一致。如果要跟随浏览器变化大小,设置相对%比例即可-->
 		<div id="AppEmbed1" style="border: solid 1px #F0F0F0; min-width:30px;min-height:20px;width:400px;height:360px" ></div>
		<div id="AppEmbed2" style="border: solid 1px #F0F0F0;min-width:30px;min-height:20px;width:400px;height:360px" ></div>
	</div>
<!--<script type="text/javascript" src="https://cdn.bootcss.com/pako/1.0.11/pako.min.js"></script> 如果使用Gzip压缩解压数据,则需要引入-->
  <script type="text/javascript" src="AppEmit_1.2_min.js"></script>
<script> //init_App(); //载入页面运行  var init_App=function(){
      AE.InitApp(document.getElementById('input_url').value); } var input_App= function(Jdata){
      //回调的数据Jdata var ReqPar0={
     }; ReqPar0=JSON.parse(document.getElementById("input_par").value); // AE.OpenApp(ReqPar); //执行文本框里的内容 AE.OpenApp(ReqPar0); } </script>
</body>
</html>
WebComponentsKit插件
测试文件下载地址,在nginx-1.10.2\www\hik\codebase下有WebComponentsKit插件,需要先安装。
nginx的配置文件中如下两部分必须:

#websocket相关配置
proxy_http_version 1.1;
proxy_set_header Upgrade $http_upgrade;
proxy_set_header Connection "upgrade";
proxy_set_header X-real-ip $remote_addr;
proxy_set_header X-Forwarded-For $remote_addr;


location ~ /ISAPI|SDK/ {
	if ($http_cookie ~ "webVideoCtrlProxy=(.+)") {
	proxy_pass http://$cookie_webVideoCtrlProxy;
	break;
	}
}
location ^~ /webSocketVideoCtrlProxy {
	#web socket
	proxy_http_version 1.1;
	proxy_set_header Upgrade $http_upgrade;
	proxy_set_header Connection "upgrade";
	proxy_set_header Host $host;

	if ($http_cookie ~ "webVideoCtrlProxyWs=(.+)") {
	proxy_pass http://$cookie_webVideoCtrlProxyWs/$cookie_webVideoCtrlProxyWsChannel?$args;
	break;
	}
	if ($http_cookie ~ "webVideoCtrlProxyWss=(.+)") {
	proxy_pass http://$cookie_webVideoCtrlProxyWss/$cookie_webVideoCtrlProxyWsChannel?$args;
	break;
	}
}
发布者:全栈程序员-站长,转载请注明出处:https://javaforall.net/126506.html原文链接:https://javaforall.net


