
大家好,又见面了,我是你们的朋友全栈君。
系列目录
第一篇:3分钟快速了解Mybatis的基础配置
第二篇:带你3分钟了解Mybatis映射文件(sql,resultMap等映射)
第三篇: 三分钟带你了解mybatis关联映射(案例分析一对一,多对多)
原创不易,如若喜欢,就点一点赞,关注一下吧!
一、整合环境搭建-jar包准备
1.spring所需要使用的jar包有(8+2):
- spring-aop-5.0.4.RELEASE.jar、
- spring-aspects-5.0.4.RELEASE.jar、
- spring-beans-5.0.4.RELEASE.jar、
- spring-context-5.0.4.RELEASE.jar、
- spring-core-5.0.4.RELEASE.jar、
- spring-expression-5.0.4.RELEASE.jar、
- spring-jdbc-5.0.4.RELEASE.jar、
- spring-tx-5.0.4.RELEASE-javadoc.jar
- 以及aop和aspect的补充jar (2个)
- aopalliance-1.0.jar
- aspectjweaver-1.5.4.jar
2.mybatis所需要使用的jar包有
- mybatis-3.4.6.jar
- commons-logging-1.2.jar
- log4j-1.2.17.jar
3.spring整合mybatis的中间jar
- //数据库启动jar
- mysql-connector-java-5.1.9.jar
- //mybatis支持spring整合的中间件 jar
- mybatis-spring-1.3.1.jar
- // 数据源支持jar
- commons-dbcp2-2.1.1.jar
- commons-pooI2-2.4.2.jar
二、整合环境搭建-创建项目
1.eclipse环境创建
在eclipse环境下 创建一个spring-mybatis的项目(java项目或动态网站项目都可以),并将第一步中的jar包添加到项目类路径中。
2.jar添加到类路径的两种方式
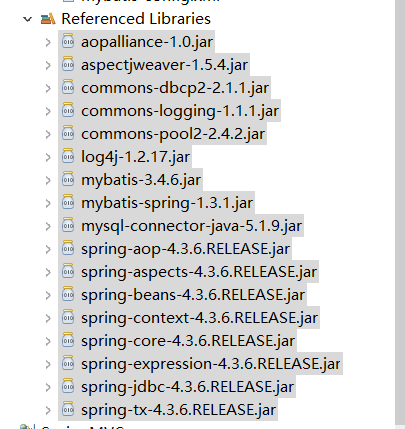
- java项目添加到内路径方式: 将jar包粘贴到src目录下,全选右键选择build path 点击add build path,添加完成后的截图如下:

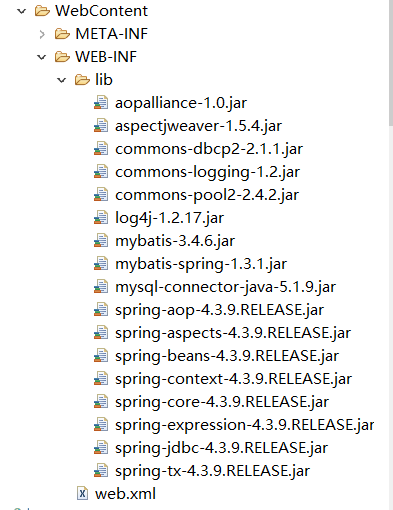
- 动态网站添加到内路径方式: 将jar包粘贴到项目的lib目录中,并发布到类路径下。添加完成后的截图如下:
三、整合环境搭建-编写配置文档
1.db.properties(数据库相关信息文档)
- 在src目录下新建一个文件,命名为db.properties,在里面添加连接数据库的相关信息。
<!--db.properties文件内容-->
jdbc.driver=com.mysql.jdbc.Driver
jdbc.url=jdbc:mysql://localhost:3306/mybatis?useSSL=true
jdbc.username=root
jdbc.password=mysql200410
jdbc.maxTotal=30
jdbc.maxIdle=10
jdbc.initialSize=5
2.spring配置文件
- 在src目录下新建一个xml文件,命名为applicationContext,在里面配置spring的相关信息
<?xml version="1.0" encoding="UTF-8"?>
<beans xmlns="http://www.springframework.org/schema/beans"
	xmlns:xsi="http://www.w3.org/2001/XMLSchema-instance"
	xmlns:tx="http://www.springframework.org/schema/tx"
	xmlns:aop="http://www.springframework.org/schema/aop"
	xmlns:jdbc="http://www.springframework.org/schema/jdbc"
	xmlns:context="http://www.springframework.org/schema/context"
	xsi:schemaLocation="http://www.springframework.org/schema/jdbc http://www.springframework.org/schema/jdbc/spring-jdbc-4.3.xsd
		http://www.springframework.org/schema/beans http://www.springframework.org/schema/beans/spring-beans.xsd
		http://www.springframework.org/schema/context http://www.springframework.org/schema/context/spring-context-4.3.xsd
		http://www.springframework.org/schema/aop http://www.springframework.org/schema/aop/spring-aop-4.3.xsd
		http://www.springframework.org/schema/tx http://www.springframework.org/schema/tx/spring-tx-4.3.xsd">

	<!-- 加载配置文件db.properties方式1:通过类来加载
	<bean class="org.springframework.beans.factory.config.PreferencesPlaceholderConfigurer">
		<property name="locations">
			<array>
				<value>db.properties</value>
			</array>
		</property>
	</bean>
	-->
	<!--  <!-- 加载配置文件db.properties方式2:通过context来加载-->
	<context:property-placeholder location="classpath:db.properties"/>
	 <!--配置数据源 -->
	<bean id="dataSource" class="org.apache.commons.dbcp2.BasicDataSource">
		 <!--数据库驱动 -->
        <property name="driverClassName" value="${jdbc.driver}" />
        <!--连接数据库的url -->
        <property name="url" value="${jdbc.url}" />
        <!--连接数据库的用户名 -->
        <property name="username" value="${jdbc.username}" />
        <!--连接数据库的密码 -->
        <property name="password" value="${jdbc.password}" />
        <!--最大连接数 -->
        <property name="maxTotal" value="${jdbc.maxTotal}" />
        <!--最大空闲连接  -->
        <property name="maxIdle" value="${jdbc.maxIdle}" />
        <!--初始化连接数  -->
        <property name="initialSize" value="${jdbc.initialSize}" />
	</bean>
	 <!--配置事物管理  -->
	<bean id="dataSourceTransactionManager" class="org.springframework.jdbc.datasource.DataSourceTransactionManager">
		<property name="dataSource" ref="dataSource"></property>
	</bean>
	 <!--开启事物注解  -->
	<tx:annotation-driven transaction-manager="dataSourceTransactionManager"/>
	 <!--配置mybatis工厂  -->
	<bean id="sqlSessionFactoryBean" class="org.mybatis.spring.SqlSessionFactoryBean">
	 <!--加载数据源  -->
		<property name="dataSource" ref="dataSource"/>
		 <!--加载配置文件  -->
		<property name="configLocation" value="mybatis-config.xml"></property>
	</bean>
</beans>
3.mybatis配置文件
- 在src目录下新建一个xml文件,命名为mybatis-config.xml,在里面配置mybatis的相关信息。
<?xml version="1.0" encoding="UTF-8" ?>
<!DOCTYPE configuration
PUBLIC "-//mybatis.org//DTD Config 3.0//EN"
"http://mybatis.org/dtd/mybatis-3-config.dtd">
<configuration>
<!--设置pojo别名-->
<typeAliases><package name="org.spring.beans"/></typeAliases>
<!--加载CustomerMapper.xml文件-->
	<mappers>
		<mapper resource="org/spring/mapper/CustomerMapper.xml"/>
	</mappers>
</configuration>
四、开发整合-完成项目
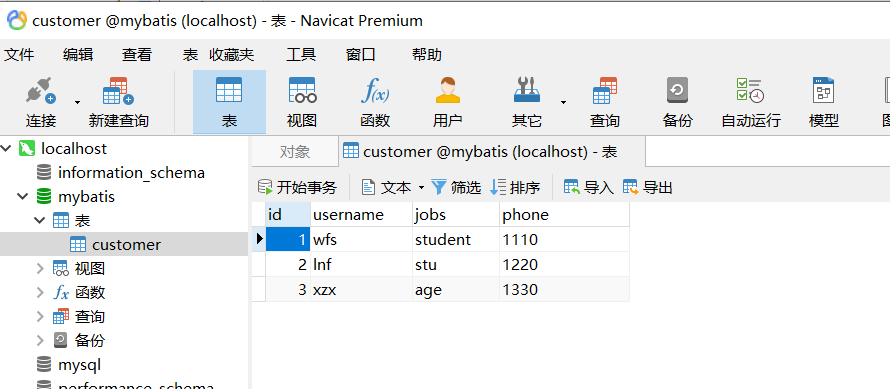
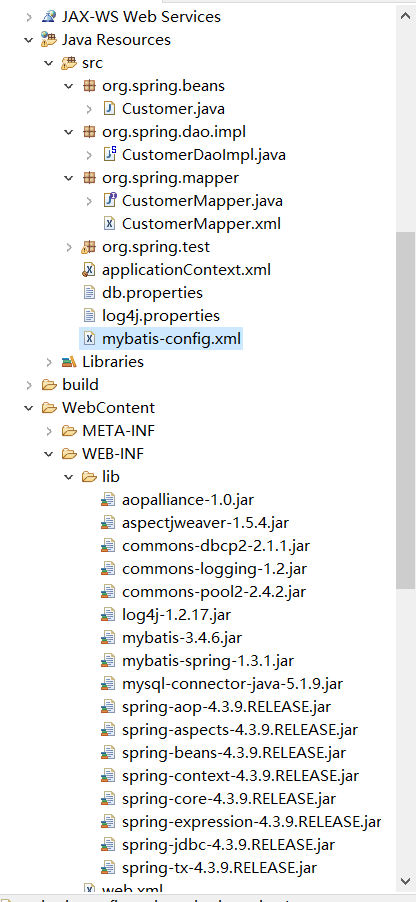
- 在上述搭建的环境中,进行项目测试,数据库表图与架构图如下:
1.实现持久层
- 在src目录下创建org.spring.benas 包并创建Customer类,该类中的变量与数据库中的表的字段一一对应
package org.spring.beans;

public class Customer {
	private int Id;
	private String username;
	private String jobs;
	private String phone;
	public Customer() {
		super();
		// TODO Auto-generated constructor stub
	}
	public Customer(int Id, String username, String jobs, String phone) {
		super();
		this.Id = Id;
		this.username = username;
		this.jobs = jobs;
		this.phone = phone;
	}
	public int getId() {
		return Id;
	}
	public void setId(int Id) {
		this.Id = Id;
	}
	public String getUsername() {
		return username;
	}
	public void setUsername(String username) {
		this.username = username;
	}
	public String getJobs() {
		return jobs;
	}
	public void setJobs(String jobs) {
		this.jobs = jobs;
	}
	public String getPhone() {
		return phone;
	}
	public void setPhone(String phone) {
		this.phone = phone;
	}
	@Override
	public String toString() {
		return "Customer [id=" + Id + ", username=" + username + ", jobs=" + jobs + ", phone=" + phone + "]";
	}

}
2.创建数据库映射文件
- 在src目录下创建org.spring.mapper包并创建CustomerMapper.xml文件,并将sql语句写入其中。
<?xml version="1.0" encoding="UTF-8"?>
<!DOCTYPE mapper
PUBLIC "-//mybatis.org//DTD Mapper 3.0//EN"
"http://mybatis.org/dtd/mybatis-3-mapper.dtd">
<mapper namespace="org.spring.mapper.CustomerMapper">
	<select id="querycustomer" resultType="org.spring.beans.Customer" parameterType="int">
		select * from customer where id=#{id}
	</select>
</mapper>
3.实现dao层(为了方便映射,我们将其更名为CustomerMapper.java)
- 在src目录下的org.spring.mapper包下创建CustomerMapper.java接口,并将方法写入其中。
package org.spring.mapper;

import org.spring.beans.Customer;

public interface CustomerMapper {
	public Customer querycustomer(int id);

}
4.实现dao层的实现类
- 在src目录下创建org.spring.dao.impl包并创建CustomerDaoImpl.java实现类,在实现整合的过程中,我们需要继承SqlSessionTemplate类或SqlSessionDaoSupport,通过这两个其中之一类的getSqlSessionO 方法来获取所需的SqlSession。
package org.spring.dao.impl;

import org.mybatis.spring.support.SqlSessionDaoSupport;
import org.spring.beans.Customer;
import org.spring.mapper.CustomerMapper;

public class CustomerDaoImpl extends SqlSessionDaoSupport implements CustomerMapper{

	@Override
	public Customer querycustomer(int id) {
		return this.getSqlSession().selectOne("org.spring.mapper.CustomerMapper.querycustomer", id);
	}

}
5.实现log4j.xml日志
# Global logging configuration
log4j.rootLogger=ERROR, stdout
# MyBatis logging configuration...
log4j.logger.org.spring=DEBUG
# Console output...
log4j.appender.stdout=org.apache.log4j.ConsoleAppender
log4j.appender.stdout.layout=org.apache.log4j.PatternLayout
log4j.appender.stdout.layout.ConversionPattern=%5p [%t] - %m%n
- 需要注意的是,我们在粘贴log4j.xml文件时,需要修改log4j.logger.org.spring=DEBUG中的对应的包的位置。否则将出错。
五、项目测试
- 在src目录下创建org.spring.test包并创建Test.java类,完成测试。
package org.spring.test;

import org.spring.beans.Customer;
import org.spring.mapper.CustomerMapper;
import org.springframework.context.ApplicationContext;
import org.springframework.context.support.ClassPathXmlApplicationContext;

public class Test {
	public static void main(String[] args) {
		ApplicationContext context = new ClassPathXmlApplicationContext("applicationContext.xml");
		CustomerMapper cus = (CustomerMapper) context.getBean("customerMapper");
		Customer customer = cus.querycustomer(2);
		System.out.println(customer);
	}
}
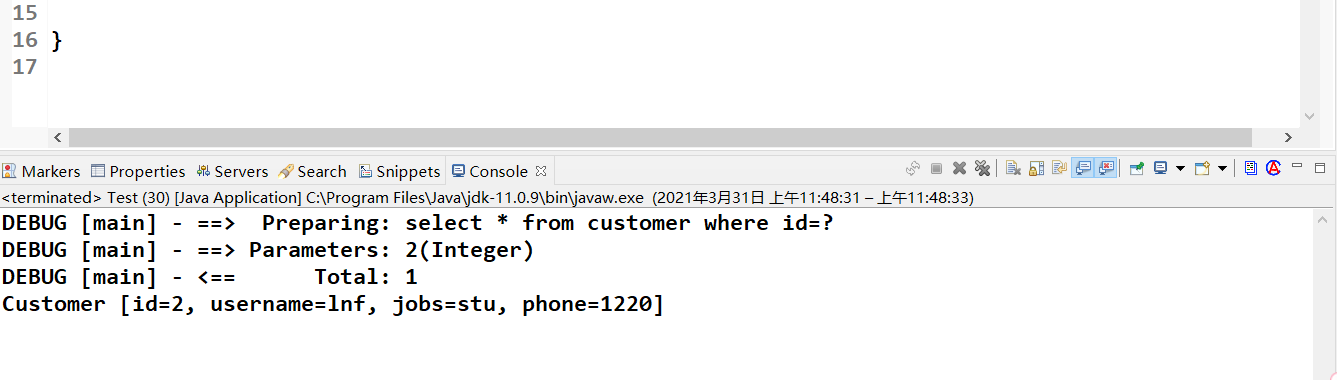
- 测试结果正确,完成整合工作。测试结果如下:
原创不易,如若喜欢,就点一点赞,关注一下吧!求赞求关注!
版权声明:本文内容由互联网用户自发贡献,该文观点仅代表作者本人。本站仅提供信息存储空间服务,不拥有所有权,不承担相关法律责任。如发现本站有涉嫌侵权/违法违规的内容, 请联系我们举报,一经查实,本站将立刻删除。
发布者:全栈程序员-站长,转载请注明出处:https://javaforall.net/134265.html原文链接:https://javaforall.net


