
大家好,又见面了,我是你们的朋友全栈君。
一、使用模板监控nginx
1.下载nginx(要监控的主机也就是客户端)
#1.有CentOS-Base.repo和epel.repo这两个源就可以直接yum下载nginx
[root@db01 ~]# cd /etc/yum.repos.d/
[root@db01 yum.repos.d]# ll
总用量 16
-rw-r--r--. 1 root root 2523 11月 18 03:23 CentOS-Base.repo
-rw-r--r--. 1 root root  664 11月 18 03:23 epel.repo

#2.下载nginx
[root@db01 ~]# yum install nginx -y
2.前提条件(server端)
#1.开启监控取值页面 (MySQL默认自动开启===》mysql -uroot -p1 -e 'show status;'===》有值就是已经开启)
[root@db01 ~]# vim /etc/nginx/nginx.conf
server {
listen 80 default_server;
listen [::]:80 default_server;
server_name _;
root /usr/share/nginx/html;
# Load configuration files for the default server block.
include /etc/nginx/default.d/*.conf;
location / {
}
location /nginx_status {
#在默认的location下添加一个location
stub_status;
}
........
#2.启动并设置开机自启
[root@db01 ~]# systemctl start nginx.service
[root@db01 ~]# systemctl enable nginx.service
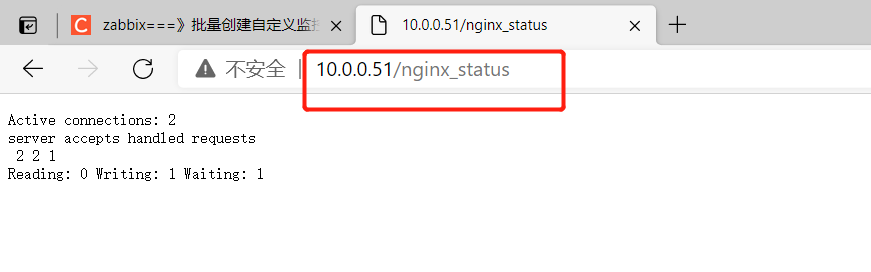
#3.在浏览器测试如下图
#4.在命令行测试
[root@db01 ~]# curl http://10.0.0.51/nginx_status
Active connections: 1
server accepts handled requests
3 3 3
Reading: 0 Writing: 1 Waiting: 0

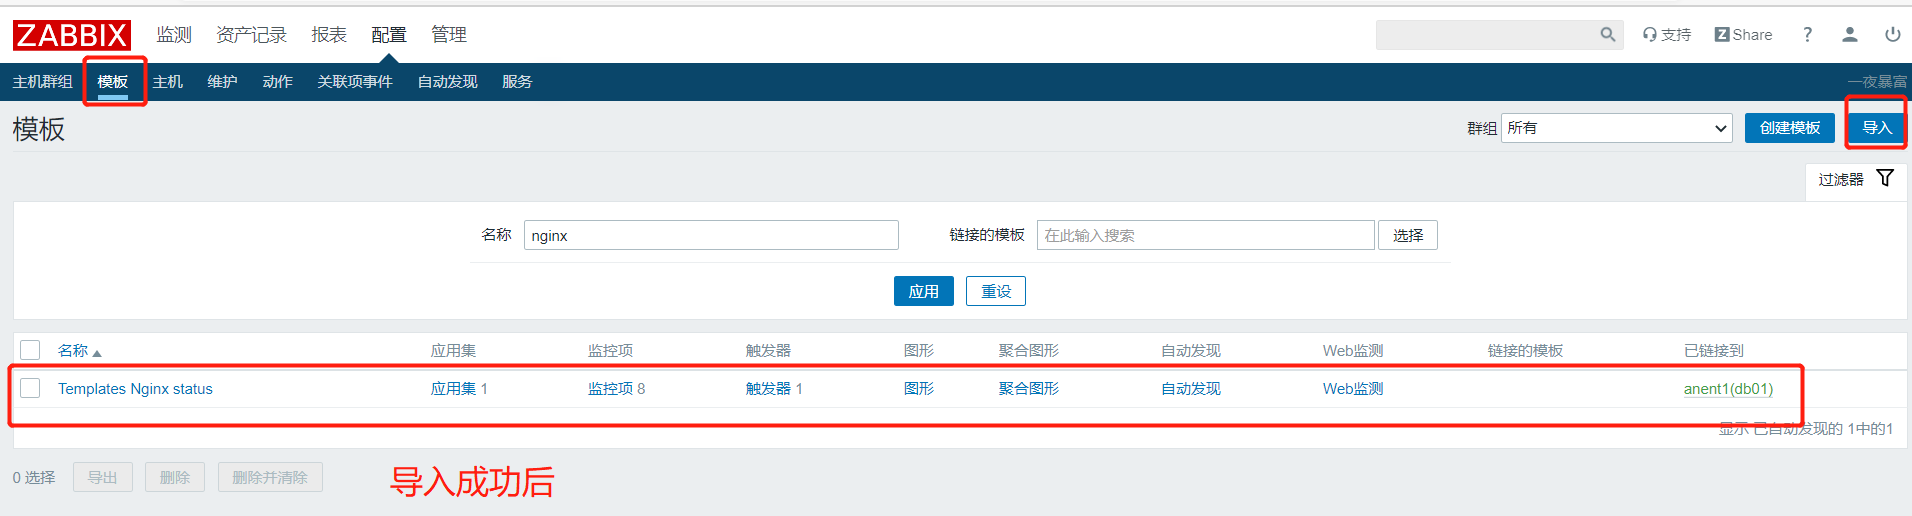
3.导入模板
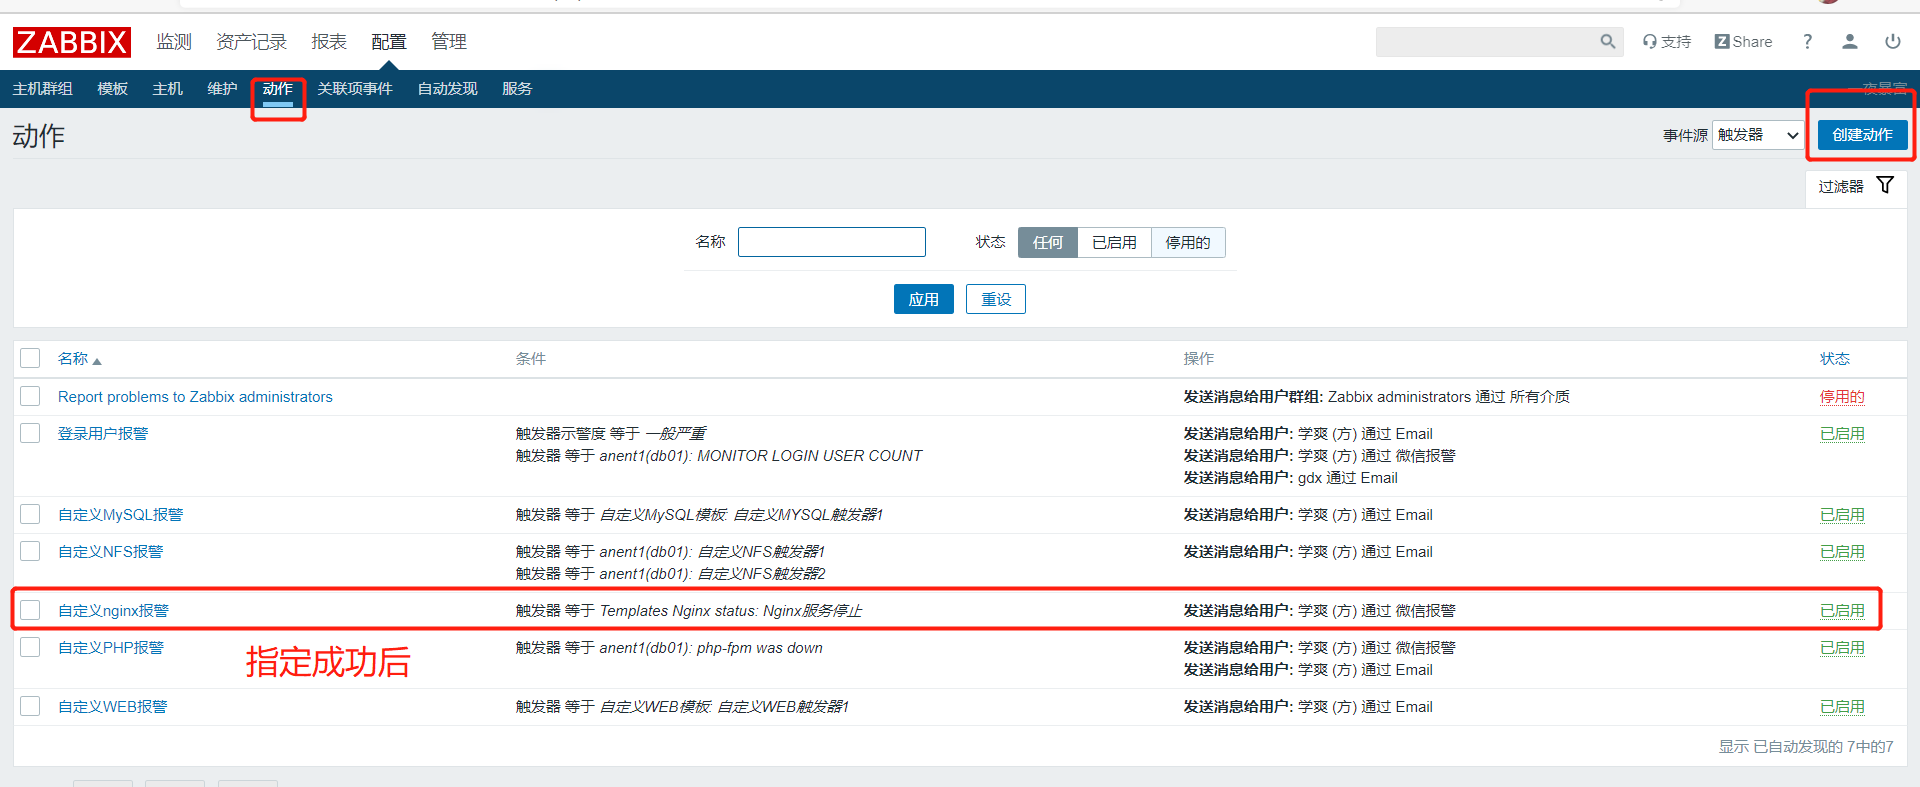
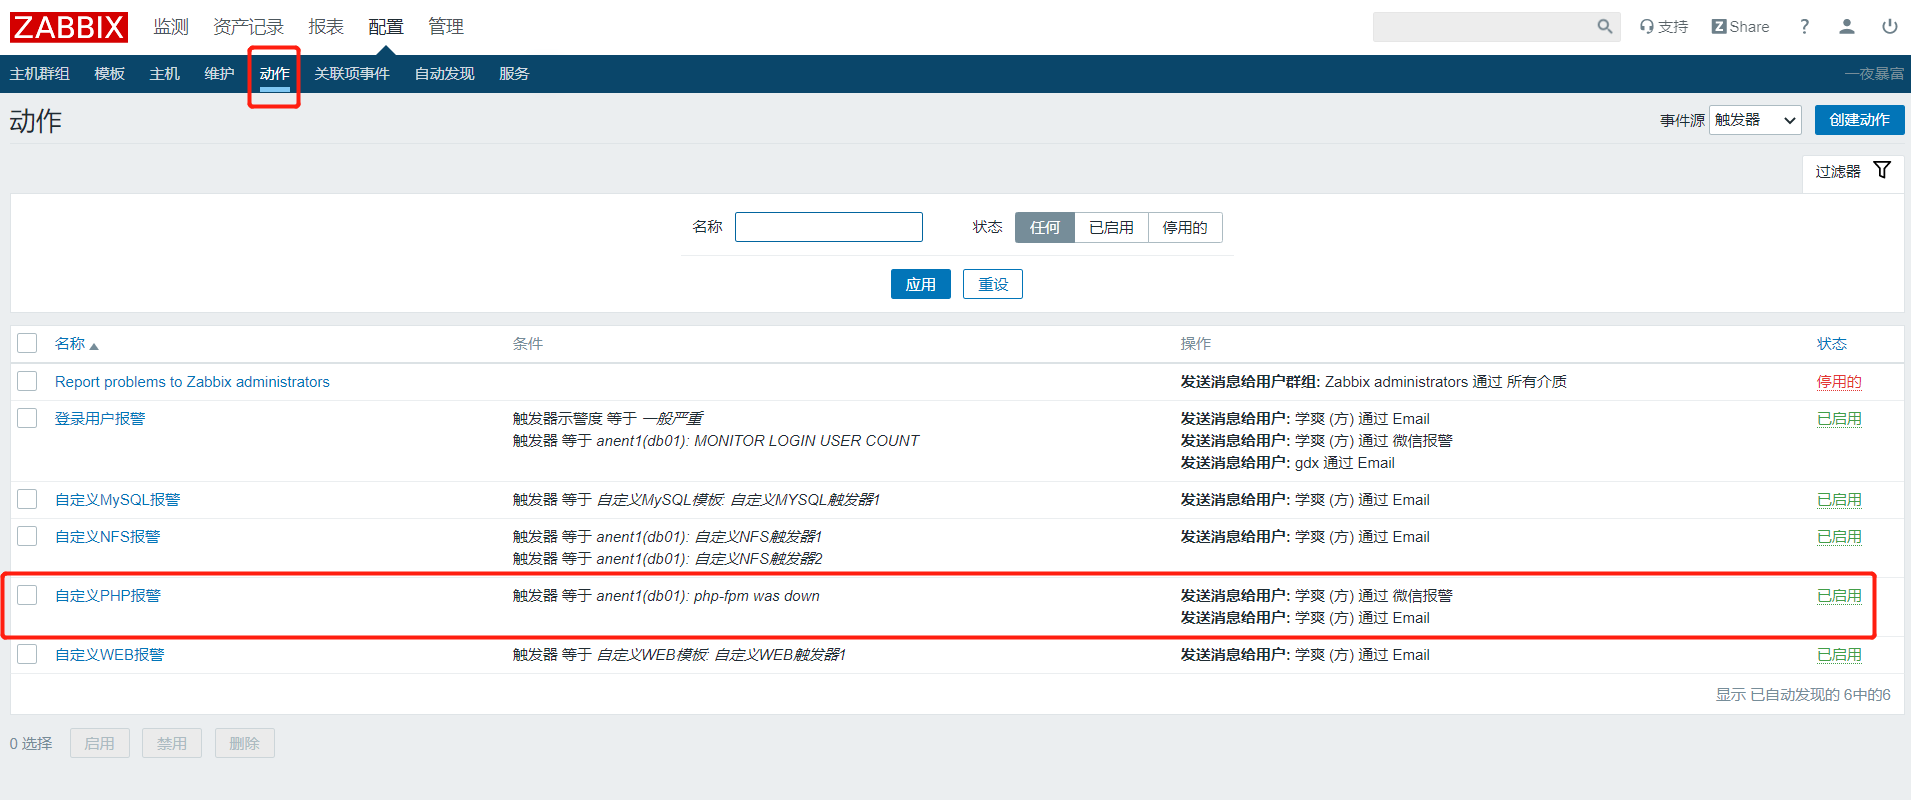
4.给触发器指定动作
5.导入配置文件与脚本(客户端)
#1.导入配置文件
[root@db01 ~]# cd /etc/zabbix/zabbix_agentd.d/
[root@db01 zabbix_agentd.d]# rz #导入nginx_status.conf
[root@db01 zabbix_agentd.d]# ll
-rw-r--r-- 1 root root   88 12月  4 10:05 nginx_status.conf
[root@db01 ~]# vim /etc/zabbix/zabbix_agentd.d/nginx_status.conf
UserParameter=nginx_status[*],/bin/bash /server/scripts/nginx_monitor.sh $1

#注:要指定执行脚本的解释器,脚本路径要与实际相符

#2.创建放脚本的目录
[root@db01 ~]# mkide -p /server/scripts/
[root@db01 ~]# cd /server/scripts/
[root@db01 scripts]# rz #上传nginx_monitor.sh
[root@db01 scripts]# ll
-rw-r--r-- 1 root root 1512 12月  4 10:27 nginx_monitor.sh
6.命令行测试(服务端)
#1.nginx服务开启时
[root@web03 ~]# zabbix_get -s 10.0.0.51 -p 10050 -k nginx_status["check",http://10.0.0.51/nginx_status]
1


#2.nginx服务关闭后
[root@web03 ~]# zabbix_get -s 10.0.0.51 -p 10050 -k nginx_status["check",http://10.0.0.51/nginx_status]
0
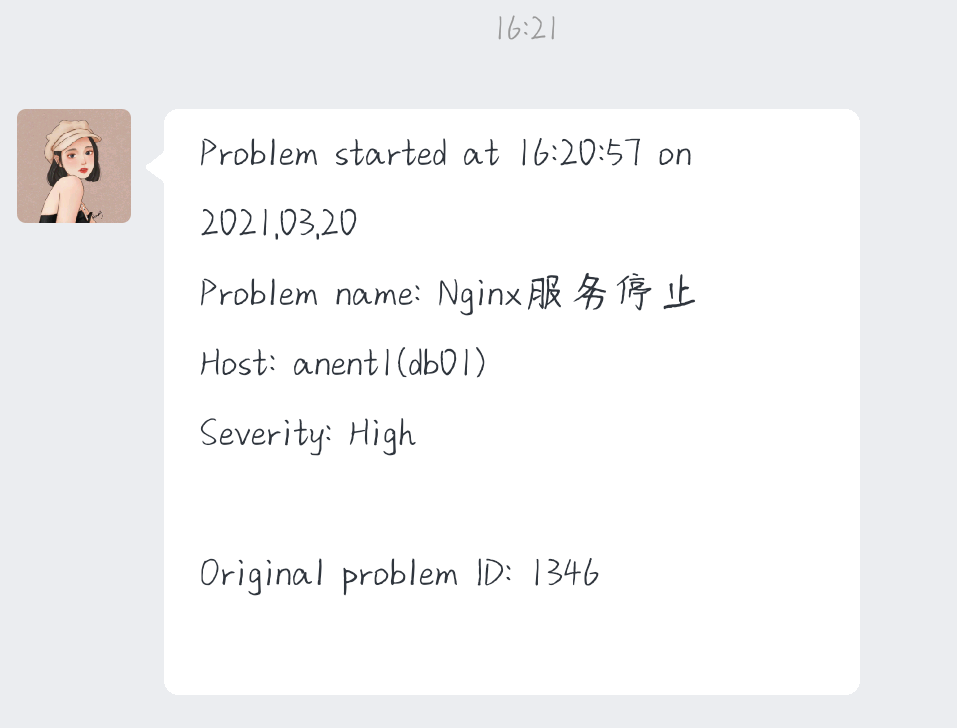
7.测试zabbix报警
#1.客户端关闭nginx服务
[root@db01 ~]# systemctl stop nginx.service

#2.接收报警信息
二、使用模板监控php服务
1.下载php服务
[root@db01 ~]# yum install php-fpm -y
2.修改php配置文件(开启监控取值页面)
[root@db01 ~]# vim /etc/php-fpm.d/www.conf
pm.status_path = /php_status   #修改这一行内容并去掉注释
3.修改nginx的配置文件
#1.修改配置文件
[root@db01 ~]# vim /etc/nginx/nginx.conf
      location / {

        }
        location /nginx_status {

           stub_status;
        }
        location /php_status {
       #添加新的一组location
            fastcgi_pass 127.0.0.1:9000;
            fastcgi_index index.php;
            fastcgi_param SCRIPT_FILENAME  $document_root$fastcgi_script_name;
            include       fastcgi_params;
        }
.....

#2.检查nginx配置文件语法
[root@db01 ~]# nginx -t
nginx: the configuration file /etc/nginx/nginx.conf syntax is ok
nginx: configuration file /etc/nginx/nginx.conf test is successful
4.启动nginx和php服务
[root@db01 ~]# systemctl restart nginx.service
[root@db01 ~]# systemctl restart php-fpm.service
5.浏览器上监测修改是否成功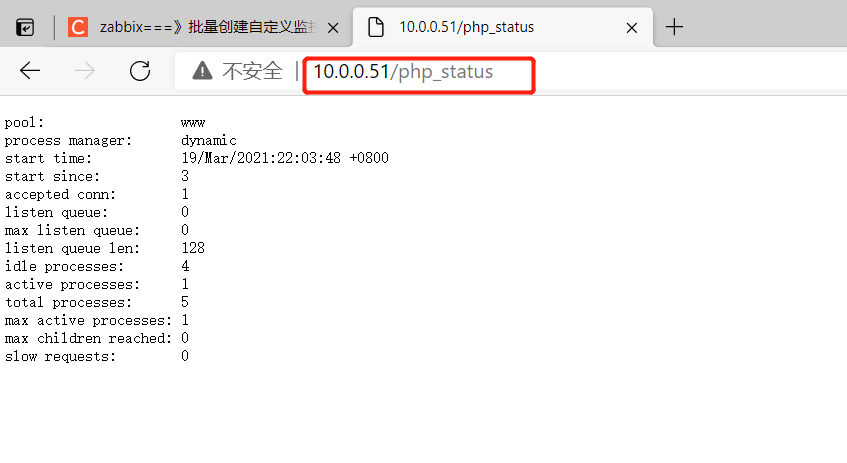
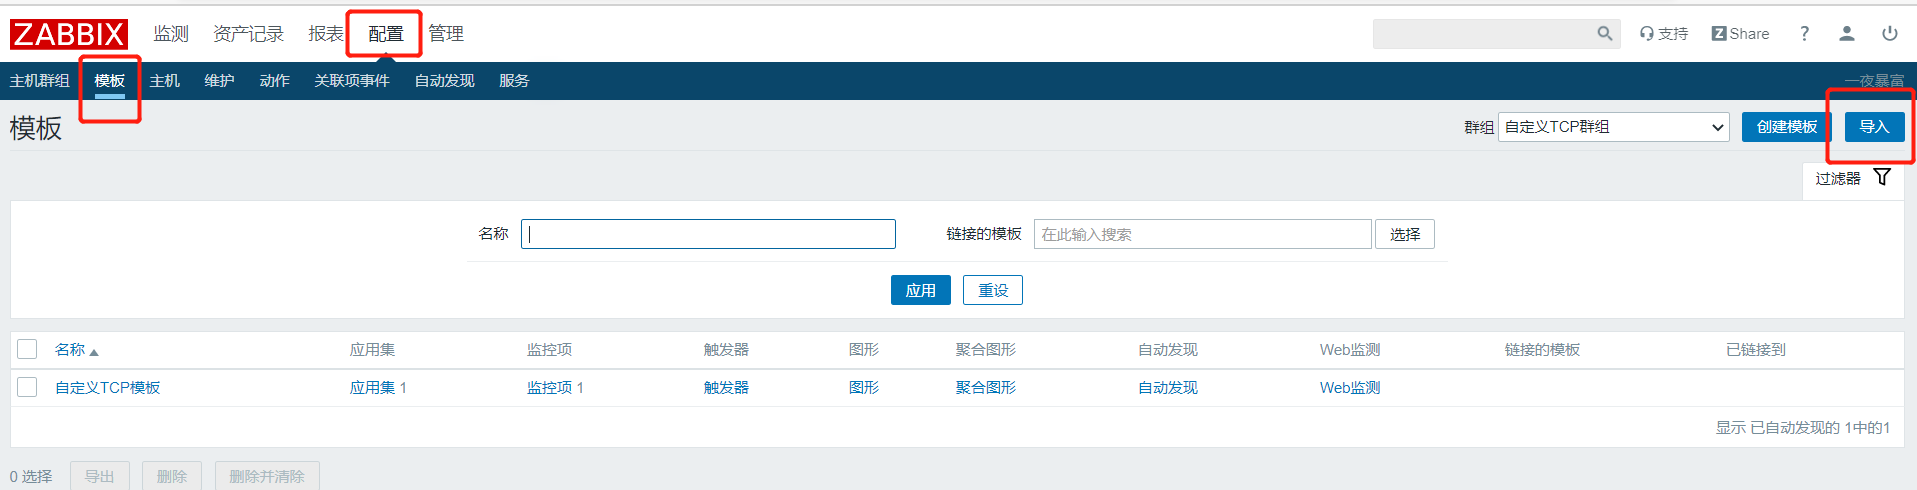
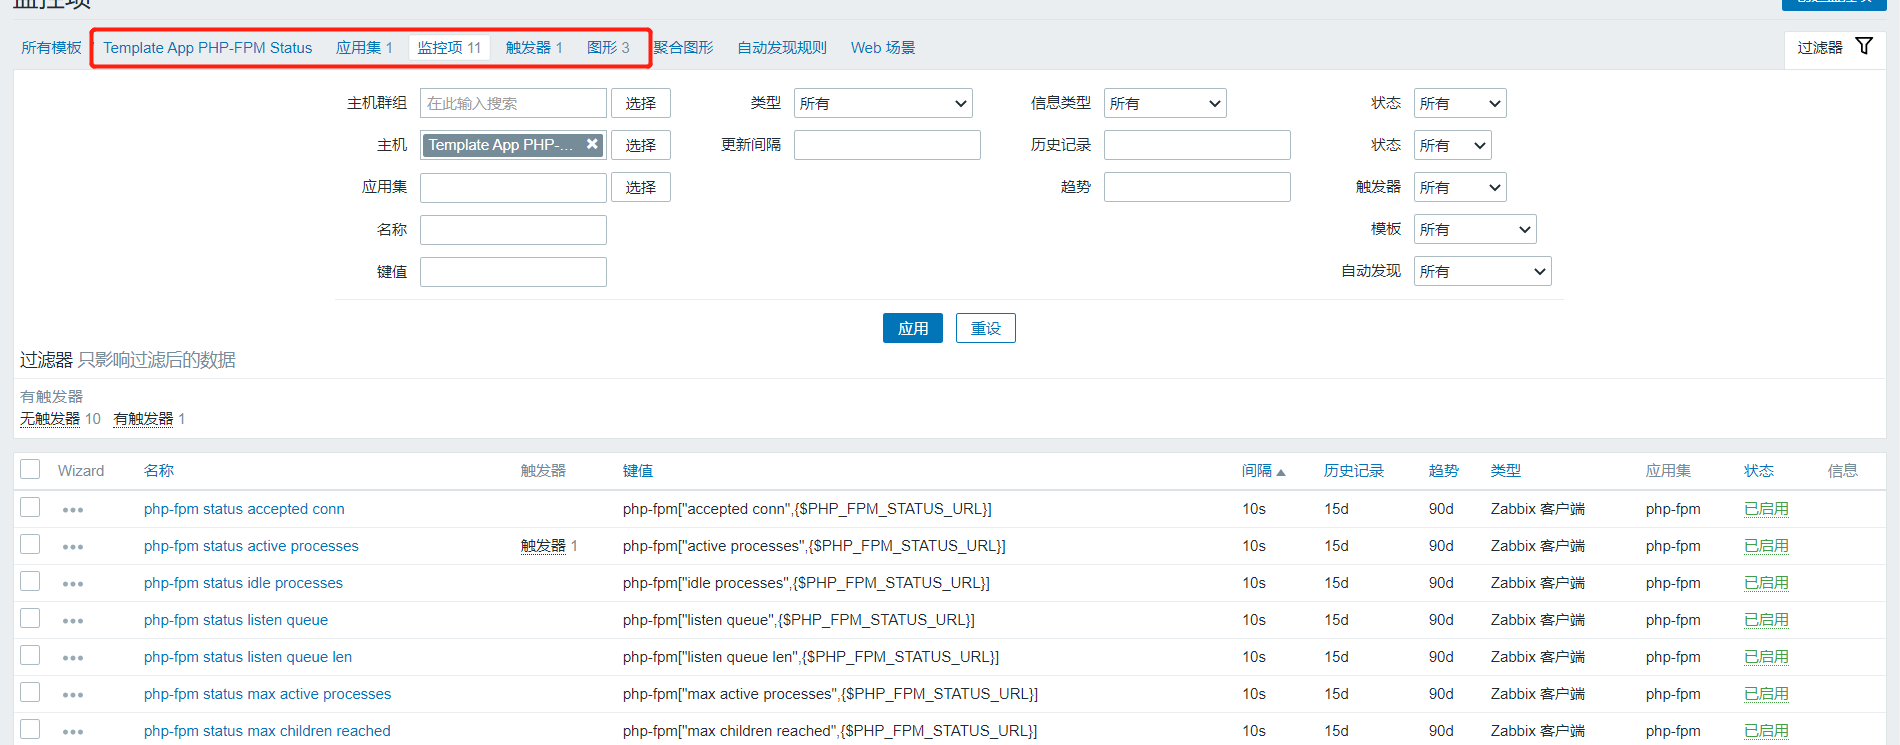
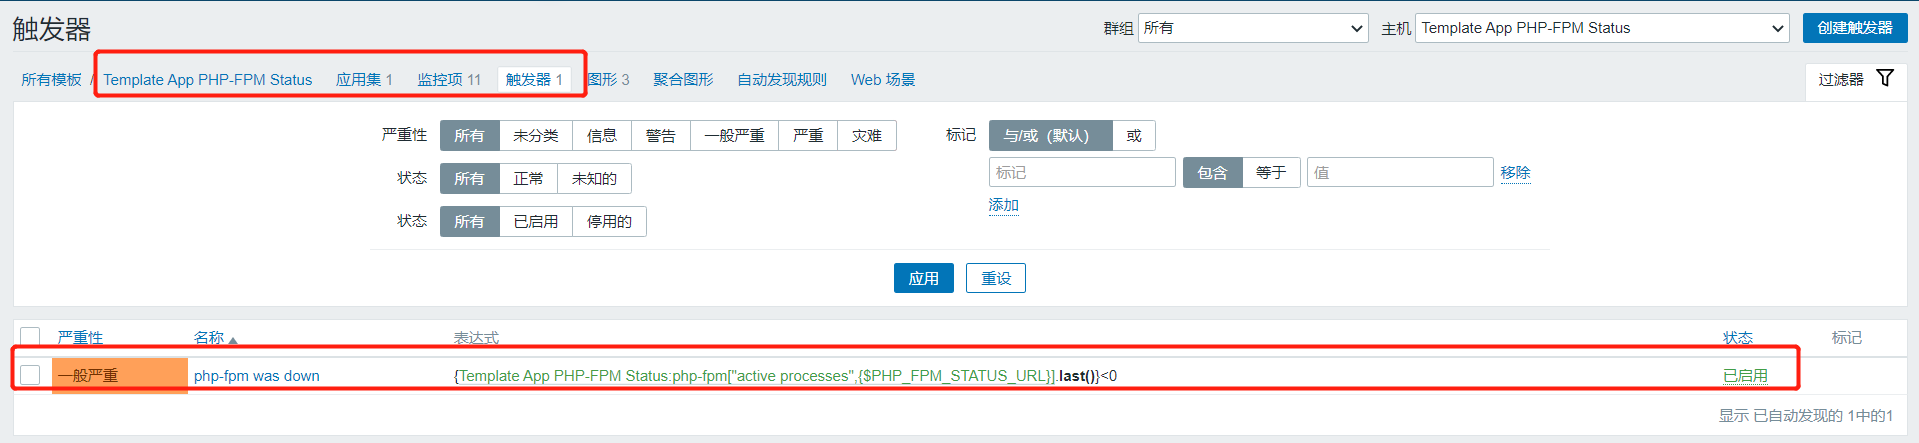
6.导入模板

7.导入脚本和配置文件(客户端)
#1.导入配置文件
[root@db01 ~]# cd /etc/zabbix/zabbix_agentd.d/
[root@db01 zabbix_agentd.d]# rz #导入fpm.conf
[root@db01 zabbix_agentd.d]# ll
总用量 16
-rw-r--r-- 1 root root   68 3月  19 22:32 fpm.conf
[root@db01 ~]# vim /etc/zabbix/zabbix_agentd.d/fpm.conf
UserParameter=php-fpm[*],/bin/bash /server/scripts/fpm.sh "$1" "$2"
#注:要指定执行脚本的解释器,脚本路径要与实际相符

#2.创建放脚本的目录
[root@db01 ~]# mkide -p /server/scripts/
[root@db01 ~]# cd /server/scripts/
[root@db01 scripts]# rz #上传fpm.sh
[root@db01 scripts]# ll
总用量 4
-rw-r--r-- 1 root root 1559 12月  4 13:00 fpm.sh
8.命令行测试(服务端)
#1.php服务开启时
[root@web03 ~]# zabbix_get -s 10.0.0.51 -p 10050 -k php-fpm["active processes",http://10.0.0.51/php_status]
1

#2.php服务关闭后
[root@web03 ~]# zabbix_get -s 10.0.0.51 -p 10050 -k php-fpm["active processes",http://10.0.0.51/php_status]
-0.94
9.测试zabbix报警
#1.客户端关闭nginx服务
[root@db01 ~]# systemctl stop php-fpm.service

#2.接收报警信息
三、搭建discuz论坛使用redis加速(未完待续)
discuz论坛需要lnmp环境
1.修改nginx配置文件
[root@db01 ~]# vim /etc/nginx/nginx.conf
    server {

        listen       80 default_server;
        listen       [::]:80 default_server;
        server_name  _;
        root         /code;    #改路径
        index index.php index.html index.htm;  #如果没有则添加
        # Load configuration files for the default server block.
        include /etc/nginx/default.d/*.conf;

        location / {

        }
        location /nginx_status {

            stub_status;
        }
        location /php_status {

            fastcgi_pass 127.0.0.1:9000;
            fastcgi_index index.php;
            fastcgi_param SCRIPT_FILENAME  $document_root$fastcgi_script_name;
            include       fastcgi_params;
        }

        location ~ \.php$ {
        #添加一组新的location内容
            fastcgi_pass 127.0.0.1:9000;
            fastcgi_index index.php;
            fastcgi_param SCRIPT_FILENAME  $document_root$fastcgi_script_name;
            include       fastcgi_params;
        }
        error_page 404 /404.html;
        location = /404.html {

        }
 ........

#2.重启nginx服务
[root@db01 ~]# systemctl restart nginx.service

#3.准备项目文件
[root@db01 ~]# mkdir /code
[root@db01 ~]# cd /code/
[root@db01 code]# rz -E #上传word press包
[root@db01 code]# tar xvf wordpress.tar.gz #解压
[root@db01 code]# chown -R nginx.nginx . #修改权限
版权声明:本文内容由互联网用户自发贡献,该文观点仅代表作者本人。本站仅提供信息存储空间服务,不拥有所有权,不承担相关法律责任。如发现本站有涉嫌侵权/违法违规的内容, 请联系我们举报,一经查实,本站将立刻删除。
发布者:全栈程序员-站长,转载请注明出处:https://javaforall.net/135340.html原文链接:https://javaforall.net


