
大家好,又见面了,我是你们的朋友全栈君。
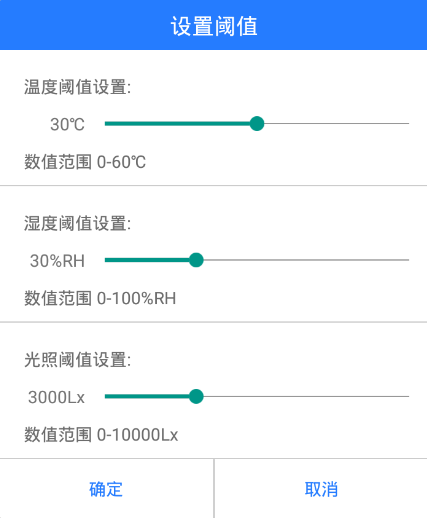
效果图:
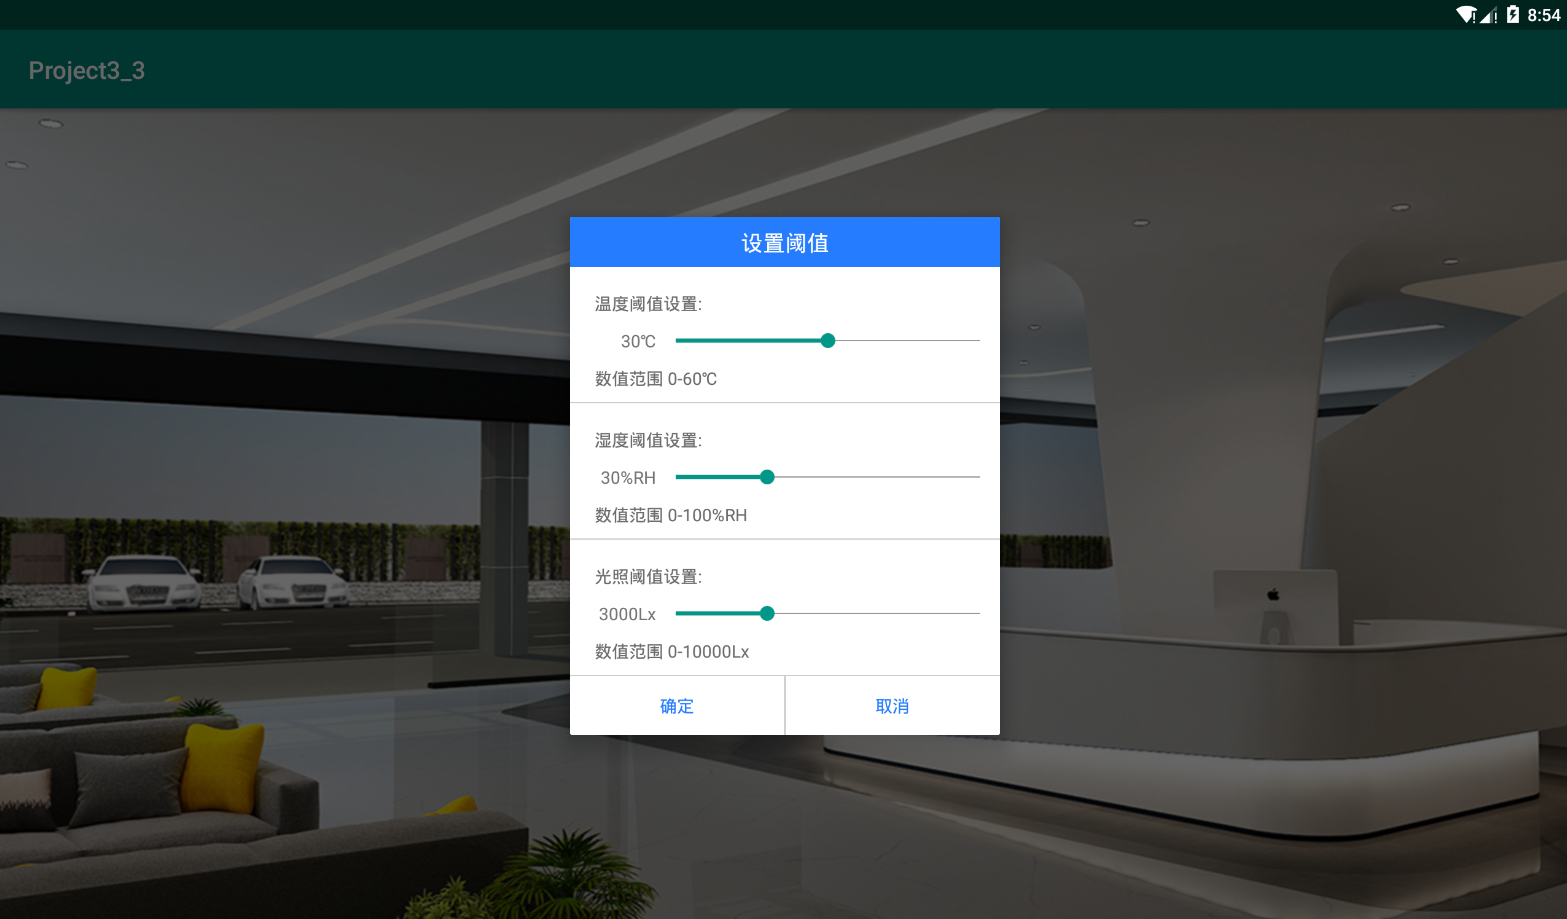

自定义对话框布局:
<?xml version="1.0" encoding="utf-8"?>
<LinearLayout xmlns:android="http://schemas.android.com/apk/res/android"
              android:layout_width="350dp"
              android:layout_height="wrap_content"
              android:background="@android:color/white"
              android:orientation="vertical">
    <!--自定义对话框,线性布局水平方向-->

    <!--第一部分标题栏-->
    <TextView
        android:id="@+id/tvTitle"
        android:layout_width="match_parent"
        android:layout_height="wrap_content"
        android:background="#257CFF"
        android:gravity="center"
        android:paddingBottom="8dp"
        android:paddingTop="8dp"
        android:text="设置阈值"
        android:textColor="@android:color/white"
        android:textSize="18sp"/>

    <!--设置温度阈值-->
    <TextView
        android:layout_width="wrap_content"
        android:layout_height="wrap_content"
        android:layout_marginLeft="20dp"
        android:layout_marginTop="20dp"
        android:text="温度阈值设置:"
        android:textColor="#6C6C6C"/>

    <!--设置阈值-->
    <LinearLayout
        android:layout_width="match_parent"
        android:layout_height="wrap_content"
        android:layout_marginTop="5dp"
        android:gravity="center"
        android:orientation="horizontal">

        <LinearLayout
            android:layout_width="0dp"
            android:layout_height="wrap_content"
            android:gravity="right"
            android:layout_weight="1">

            <TextView
                android:id="@+id/tv_tempValue"
                android:layout_width="wrap_content"
                android:layout_height="match_parent"
                android:text="30"/>

            <TextView
                android:layout_width="wrap_content"
                android:layout_height="match_parent"
                android:text="℃"
                />
        </LinearLayout>

        <SeekBar
            android:id="@+id/sb_temp"
            android:layout_width="0dp"
            android:layout_height="wrap_content"
            android:layout_weight="4"
            android:max="60"
            android:progress="30"/>
    </LinearLayout>

    <TextView
        android:layout_width="match_parent"
        android:layout_height="wrap_content"
        android:layout_marginLeft="20dp"
        android:layout_marginTop="5dp"
        android:text="数值范围 0-60℃"
        android:textColor="#6C6C6C"/>

    <!--分割线-->
    <View
        android:layout_width="match_parent"
        android:layout_height="1dp"
        android:layout_marginTop="10dp"
        android:background="#cccccc"></View>
    <!--设置湿度阈值-->
    <TextView
        android:layout_width="wrap_content"
        android:layout_height="wrap_content"
        android:layout_marginLeft="20dp"
        android:layout_marginTop="20dp"
        android:text="湿度阈值设置:"
        android:textColor="#6C6C6C"/>

    <!--设置阈值-->
    <LinearLayout
        android:layout_width="match_parent"
        android:layout_height="wrap_content"
        android:layout_marginTop="5dp"
        android:gravity="center"
        android:orientation="horizontal">

        <LinearLayout
            android:layout_width="0dp"
            android:layout_height="wrap_content"
            android:gravity="right"
            android:layout_weight="1">

            <TextView
                android:id="@+id/tv_humiValue"
                android:layout_width="wrap_content"
                android:layout_height="wrap_content"
                android:focusable="false"
                android:text="30"/>

            <TextView
                android:layout_width="wrap_content"
                android:layout_height="wrap_content"
                android:text="%RH"
                />
        </LinearLayout>

        <SeekBar
            android:id="@+id/sb_humi"
            android:layout_width="0dp"
            android:layout_height="wrap_content"
            android:layout_weight="4"
            android:max="100"
            android:progress="30"/>
    </LinearLayout>

    <TextView
        android:layout_width="match_parent"
        android:layout_height="wrap_content"
        android:layout_marginLeft="20dp"
        android:layout_marginTop="5dp"
        android:text="数值范围 0-100%RH"
        android:textColor="#6C6C6C"/>
    <!--分割线-->
    <View
        android:layout_width="match_parent"
        android:layout_height="1dp"
        android:layout_marginTop="10dp"
        android:background="#cccccc"></View>
    <!--设置光照阈值-->
    <TextView
        android:layout_width="wrap_content"
        android:layout_height="wrap_content"
        android:layout_marginLeft="20dp"
        android:layout_marginTop="20dp"
        android:text="光照阈值设置:"
        android:textColor="#6C6C6C"/>

    <!--设置阈值-->
    <LinearLayout
        android:layout_width="match_parent"
        android:layout_height="wrap_content"
        android:layout_marginTop="5dp"
        android:gravity="center"
        android:orientation="horizontal">

        <LinearLayout
            android:layout_width="0dp"
            android:layout_height="wrap_content"
            android:gravity="right"
            android:layout_weight="1">

            <TextView
                android:id="@+id/tv_lightValue"
                android:layout_width="wrap_content"
                android:layout_height="wrap_content"
                android:focusable="false"
                android:text="3000"/>

            <TextView
                android:layout_width="wrap_content"
                android:layout_height="wrap_content"
                android:text="Lx"/>
        </LinearLayout>

        <SeekBar
            android:id="@+id/sb_light"
            android:layout_width="0dp"
            android:layout_height="wrap_content"
            android:layout_weight="4"
            android:max="10000"
            android:progress="3000"/>
    </LinearLayout>

    <TextView
        android:layout_width="match_parent"
        android:layout_height="wrap_content"
        android:layout_marginLeft="20dp"
        android:layout_marginTop="5dp"
        android:text="数值范围 0-10000Lx"
        android:textColor="#6C6C6C"/>
    <View
        android:layout_width="match_parent"
        android:layout_height="1dp"
        android:layout_marginTop="10dp"
        android:background="#cccccc"></View>
    <!--确定,取消按钮-->
    <LinearLayout
        android:layout_width="match_parent"
        android:layout_height="wrap_content"
        android:orientation="horizontal">


        <Button
            android:id="@+id/btn_confirm"
            android:layout_width="wrap_content"
            android:layout_height="wrap_content"
            android:layout_weight="1"
            android:background="@android:color/white"
            android:paddingBottom="10dp"
            android:paddingTop="10dp"
            android:text="确定"
            android:textColor="#257CFF"/>
        <!--分割线-->
        <View
            android:layout_width="1dp"
            android:layout_height="match_parent"
            android:background="#cccccc"></View>
        <Button
            android:id="@+id/btn_cancel"
            android:layout_width="wrap_content"
            android:layout_height="wrap_content"
            android:layout_weight="1"
            android:background="@android:color/white"
            android:paddingBottom="10dp"
            android:paddingTop="10dp"
            android:text="取消"
            android:textColor="#257CFF"/>
    </LinearLayout>
</LinearLayout>
自定义对话框实现类:
package com.newland.project3_3;

import android.app.Dialog;
import android.content.Context;
import android.support.annotation.NonNull;
import android.view.View;
import android.widget.Button;
import android.widget.SeekBar;
import android.widget.TextView;


/**
 * 设置阈值对话框
 */
public class SettingThresholdDialog extends Dialog {

    private TextView tvTempValue,tvHumiValue,tvLightValue;
    private Button btnCancel;
    private Button btnConfirm;
    private SeekBar sbTemp,sbHumi,sbLight;


    public SettingThresholdDialog(@NonNull Context context) {
        super(context,R.style.Dialog);
        //关联布局文件
        this.setContentView(R.layout.dialog_setting_threshold);
        //初始化组件
        initView();
        addListener();
    }

    private void initView() {
        sbTemp =  findViewById(R.id.sb_temp);
        sbHumi =  findViewById(R.id.sb_humi);
        sbLight =  findViewById(R.id.sb_light);
        tvTempValue = findViewById(R.id.tv_tempValue);
        tvHumiValue = findViewById(R.id.tv_humiValue);
        tvLightValue = findViewById(R.id.tv_lightValue);
        btnCancel = findViewById(R.id.btn_cancel);
        btnConfirm =  findViewById(R.id.btn_confirm);
    }

    private void addListener() {
        //温度SeekBar状态改变监听
        sbTemp.setOnSeekBarChangeListener(new SeekBar.OnSeekBarChangeListener() {
            @Override
            public void onProgressChanged(SeekBar seekBar, int progress, boolean fromUser) {
                //SeekBar进度显示到TextView上
                tvTempValue.setText(String.valueOf(progress));
            }
            @Override
            public void onStartTrackingTouch(SeekBar seekBar) {

            }
            @Override
            public void onStopTrackingTouch(SeekBar seekBar) {

            }
        });
        //湿度SeekBar状态改变监听
        sbHumi.setOnSeekBarChangeListener(new SeekBar.OnSeekBarChangeListener() {
            @Override
            public void onProgressChanged(SeekBar seekBar, int progress, boolean fromUser) {
                //SeekBar进度显示到TextView上
                tvHumiValue.setText(String.valueOf(progress));
            }
            @Override
            public void onStartTrackingTouch(SeekBar seekBar) {

            }
            @Override
            public void onStopTrackingTouch(SeekBar seekBar) {

            }
        });
        //光照SeekBar状态改变监听
        sbLight.setOnSeekBarChangeListener(new SeekBar.OnSeekBarChangeListener() {
            @Override
            public void onProgressChanged(SeekBar seekBar, int progress, boolean fromUser) {
                //SeekBar进度显示到TextView上
                tvLightValue.setText(String.valueOf(progress));
            }
            @Override
            public void onStartTrackingTouch(SeekBar seekBar) {

            }
            @Override
            public void onStopTrackingTouch(SeekBar seekBar) {

            }
        });
        //设置确定点击事件
        btnConfirm.setOnClickListener(new View.OnClickListener() {
            @Override
            public void onClick(View v) {
                //对话框消失
                SettingThresholdDialog.this.dismiss();
            }
        });
        //设置取消点击事件
        btnCancel.setOnClickListener(new View.OnClickListener() {
            @Override
            public void onClick(View v) {
                //对话框消失
                SettingThresholdDialog.this.dismiss();
            }
        });
    }
}
在主类中创建对话框并显示:
package com.newland.project3_3;

import android.support.v7.app.AppCompatActivity;
import android.os.Bundle;

public class MainActivity extends AppCompatActivity {

    @Override
    protected void onCreate(Bundle savedInstanceState) {
        super.onCreate(savedInstanceState);
        setContentView(R.layout.activity_main);
        //创建对话框并显示
        SettingThresholdDialog dialog = new SettingThresholdDialog(this);
        dialog.show();
    }
}
版权声明:本文内容由互联网用户自发贡献,该文观点仅代表作者本人。本站仅提供信息存储空间服务,不拥有所有权,不承担相关法律责任。如发现本站有涉嫌侵权/违法违规的内容, 请联系我们举报,一经查实,本站将立刻删除。
发布者:全栈程序员-站长,转载请注明出处:https://javaforall.net/151784.html原文链接:https://javaforall.net


