
大家好,又见面了,我是你们的朋友全栈君。如果您正在找激活码,请点击查看最新教程,关注关注公众号 “全栈程序员社区” 获取激活教程,可能之前旧版本教程已经失效.最新Idea2022.1教程亲测有效,一键激活。
Jetbrains全系列IDE使用 1年只要46元 售后保障 童叟无欺
点击“单价”按钮或“数量信息”按钮,可按据升序或降序进行排序。 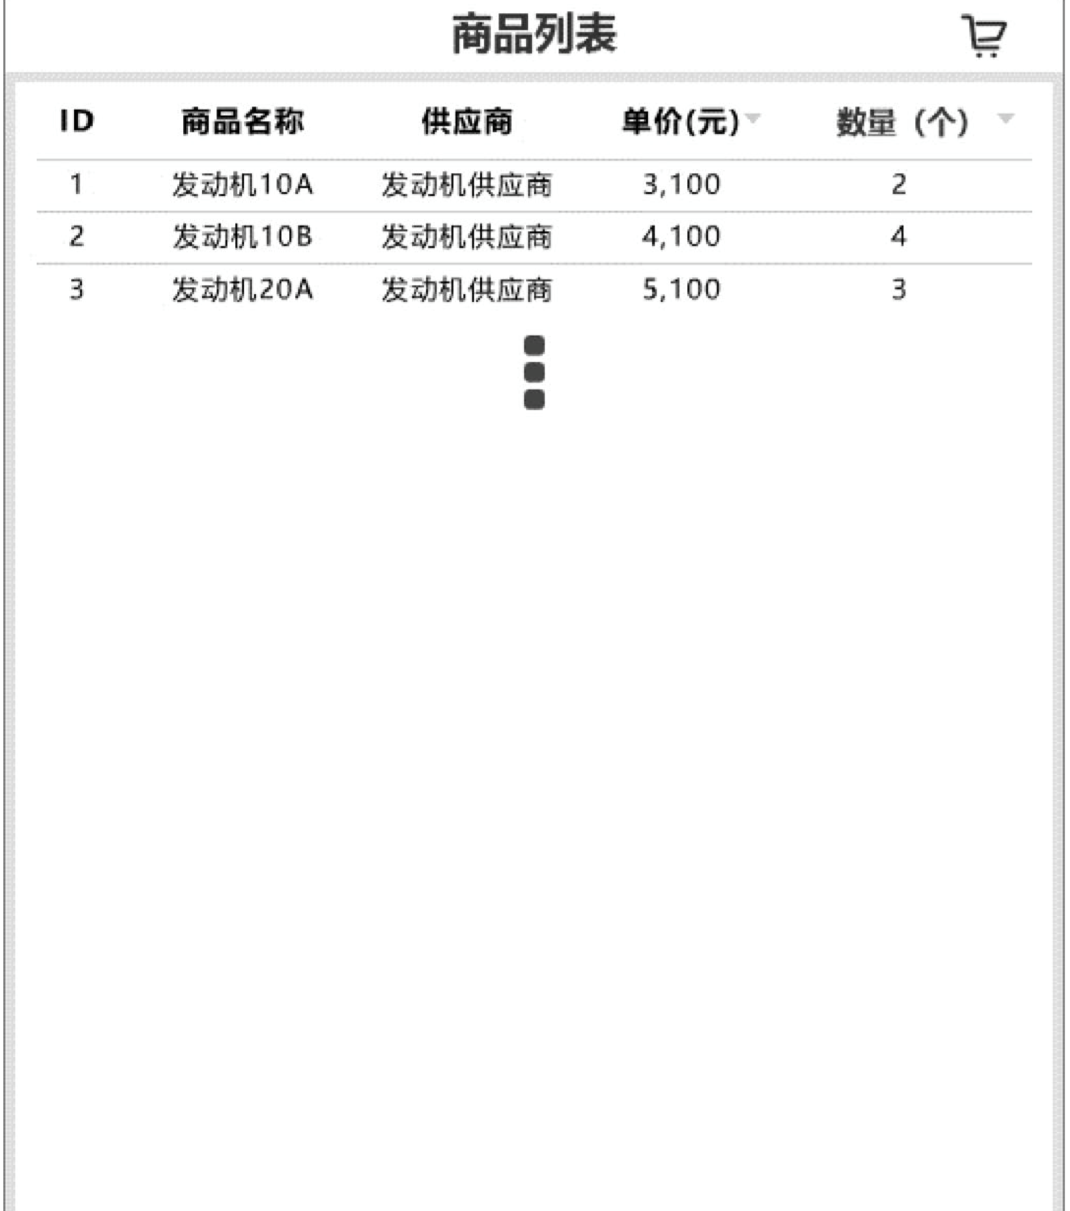

布局没什么好说的
在这里插入代码片<LinearLayout xmlns:android="http://schemas.android.com/apk/res/android" xmlns:app="http://schemas.android.com/apk/res-auto" xmlns:tools="http://schemas.android.com/tools" android:layout_width="match_parent" android:layout_height="match_parent" tools:context=".shangpingActivity" android:orientation="vertical">

    <TextView android:layout_width="match_parent" android:layout_height="50dp" android:text="商品列表" android:textColor="#000000" android:textStyle="bold" android:textSize="25sp" android:gravity="center"/>

    <LinearLayout android:layout_marginTop="5dp" android:layout_width="match_parent" android:layout_height="match_parent" android:orientation="vertical">
        <LinearLayout android:layout_width="match_parent" android:layout_height="wrap_content" android:orientation="horizontal">
            <TextView android:text="ID" android:textStyle="bold" android:textColor="#000000" android:gravity="center" android:layout_width="0dp" android:layout_weight="1" android:layout_height="wrap_content"/>
            <TextView android:text="商品名称" android:textStyle="bold" android:textColor="#000000" android:gravity="center" android:layout_weight="1" android:layout_width="0dp" android:layout_height="wrap_content"/>
            <TextView android:text="供应商" android:textStyle="bold" android:textColor="#000000" android:gravity="center" android:layout_weight="1" android:layout_width="0dp" android:layout_height="wrap_content"/>
            <TextView android:id="@+id/tv_but_price" android:text="单价(元)" android:textStyle="bold" android:textColor="#000000" android:gravity="center" android:layout_weight="1" android:layout_width="0dp" android:layout_height="wrap_content"/>
            <TextView android:id="@+id/tv_but_num" android:text="数量(个)" android:textStyle="bold" android:textColor="#000000" android:gravity="center" android:layout_weight="1" android:layout_width="0dp" android:layout_height="wrap_content"/>

        </LinearLayout>


        <ListView android:id="@+id/list_viewsp" android:layout_width="match_parent" android:layout_height="match_parent"/>

    </LinearLayout>

</LinearLayout>
接下来写 商品的实体类
在这里插入代码片
public class Shangping {

    private String id;
    private String name;
    private String shop;
    private String price;
    private String num;

    public Shangping(String id, String name, String shop, String price, String num) {
        this.id = id;
        this.name = name;
        this.shop = shop;
        this.price = price;
        this.num = num;
    }

    public String getId() {
        return id;
    }

    public void setId(String id) {
        this.id = id;
    }

    public String getName() {
        return name;
    }

    public void setName(String name) {
        this.name = name;
    }

    public String getShop() {
        return shop;
    }

    public void setShop(String shop) {
        this.shop = shop;
    }

    public String getPrice() {
        return price;
    }

    public void setPrice(String price) {
        this.price = price;
    }

    public String getNum() {
        return num;
    }

    public void setNum(String num) {
        this.num = num;
    }
}
实体类为后面的传值做准备
接着写listview的布局文件
在这里插入代码片

<LinearLayout xmlns:android="http://schemas.android.com/apk/res/android" android:layout_width="match_parent" android:layout_height="match_parent" android:orientation="horizontal">
    <TextView android:id="@+id/tv_id" android:gravity="center" android:layout_width="0dp" android:layout_weight="1" android:layout_height="wrap_content"/>
    <TextView android:id="@+id/tv_name" android:gravity="center" android:layout_width="0dp" android:layout_weight="1" android:layout_height="wrap_content"/>
    <TextView android:id="@+id/tv_shop" android:gravity="center" android:layout_width="0dp" android:layout_weight="1" android:layout_height="wrap_content"/>
    <TextView android:id="@+id/tv_privc" android:gravity="center" android:layout_width="0dp" android:layout_weight="1" android:layout_height="wrap_content"/>
    <TextView android:id="@+id/tv_num" android:gravity="center" android:layout_width="0dp" android:layout_weight="1" android:layout_height="wrap_content"/>

</LinearLayout>
然后写listview的适配器
在这里插入代码片


public class AdapterShangPing extends ArrayAdapter {

    private int count;

    public AdapterShangPing(@NonNull Context context, int resource, List<Shangping> list) {
        super(context, resource,list);
        count=resource;
    }

    @NonNull
    @Override
    public View getView(int position, @Nullable View convertView, @NonNull ViewGroup parent) {

            Shangping sp= (Shangping) getItem(position);
            View view= LayoutInflater.from(getContext()).inflate(count,null);
            TextView tv1,tv2,tv3,tv4,tv5;
            tv1=view.findViewById(R.id.tv_id);
            tv2=view.findViewById(R.id.tv_name);
            tv3=view.findViewById(R.id.tv_shop);
            tv4=view.findViewById(R.id.tv_privc);
            tv5=view.findViewById(R.id.tv_num);
            tv1.setText(sp.getId());
            tv2.setText(sp.getName());
            tv3.setText(sp.getShop());
            tv4.setText(sp.getPrice());
            tv5.setText(sp.getNum());

        return view;
    }
}
接着写排序,排序其实很简单,只需要创建一个实体类然后实现Comparator接口,然后重写compare方法
在这里插入代码片
public class Pricesort implements Comparator<Shangping> {

    @Override
    public int compare(Shangping o1, Shangping o2) {

        return o1.getPrice().compareTo(o2.getPrice());
    }
}
在这里插入代码片
public class Numsort implements Comparator<Shangping> {

    @Override
    public int compare(Shangping o1, Shangping o2) {

        return o1.getNum().compareTo(o2.getNum());
    }
}
最后附上Activity代码
在这里插入代码片
public class shangpingActivity extends AppCompatActivity {
    private ListView listView;
    private List<Shangping> list_sp=new ArrayList<>();//存数据
    TextView tvbut_price,tvbut_num;
    AdapterShangPing adapter;
    @Override
    protected void onCreate(Bundle savedInstanceState) {
        super.onCreate(savedInstanceState);
        setContentView(R.layout.activity_shangping);
        into();//初始化数据
        listView=findViewById(R.id.list_viewsp);
        tvbut_num=findViewById(R.id.tv_but_price);
        tvbut_price=findViewById(R.id.tv_but_num);
         adapter=new AdapterShangPing(shangpingActivity.this,R.layout.list_shangping,list_sp);//初始化适配器
        listView.setAdapter(adapter);
            setClick();//设置textview的点击事件,然后排序
    }
    private  void into(){
        list_sp.add(new Shangping("1","发动机10A","发动机供应商","3,100","6"));
        list_sp.add(new Shangping("2","发动机10A","发动机供应商","4,100","1"));
        list_sp.add(new Shangping("3","发动机10A","发动机供应商","5,100","3"));
        list_sp.add(new Shangping("4","发动机10A","发动机供应商","4,300","4"));
    }
    private void setClick(){

        tvbut_price.setOnClickListener(new View.OnClickListener() {
            @Override
            public void onClick(View v) {
                Collections.sort(list_sp,new Numsort());
                adapter.notifyDataSetChanged();
            }
        });
        tvbut_num.setOnClickListener(new View.OnClickListener() {
            @Override
            public void onClick(View v) {
                Collections.sort(list_sp,new Pricesort());
                adapter.notifyDataSetChanged();
            }
        });

    }

}
版权声明:本文内容由互联网用户自发贡献,该文观点仅代表作者本人。本站仅提供信息存储空间服务,不拥有所有权,不承担相关法律责任。如发现本站有涉嫌侵权/违法违规的内容, 请联系我们举报,一经查实,本站将立刻删除。
发布者:全栈程序员-站长,转载请注明出处:https://javaforall.net/194194.html原文链接:https://javaforall.net


