
在新的项目中,使用到了ILRuntime的热更新方式,不同于XLua等,这种方式的热更新是由纯C#实现的,所以就不需要客户端懂Lua的代码。更详细的介绍可以看官方的文档。
官方的介绍及文档为:http://ourpalm.github.io/ILRuntime/public/v1/guide/index.html
目前大致的理解为:将游戏分为两个部分,Unity和Hotfix。其中主要的游戏逻辑部分也就是可能需要热更的部分都写在Hotfix当中,然后将其导出为Hotfix.dll文件供Unity使用。游戏上线后若需要更新代码,只需要修改Hotfix中的代码,然后生成新的Hotfix.dll文件热更上去即可。
接下来就用一个简单的Demo来实现这么一个过程。思路为,把原本UI逻辑的类放在Hotfix当中,由于没有继承MonoBehaviour,所以通过实现一个带有Start,Update等方法的接口,然后在Unity部分相应调用,来实现Hotfix中的生命周期。同时通过GameObject.Find的方法找到对应的组件,进行操作。
创建Unity工程环境
首先我们创建一个新的Unity工程,然后将ILRuntime需要的部分导入工程当中,即官方Demo中的Mono.Cecil.20,Mono.Cecil.Pdb,ILRuntime三个文件夹(删除ILRuntime/Adapters/Editor)
勾选 player settings -> Other Settings – > Allow ‘unsafe’ Code选项
创建Hotfix工程环境
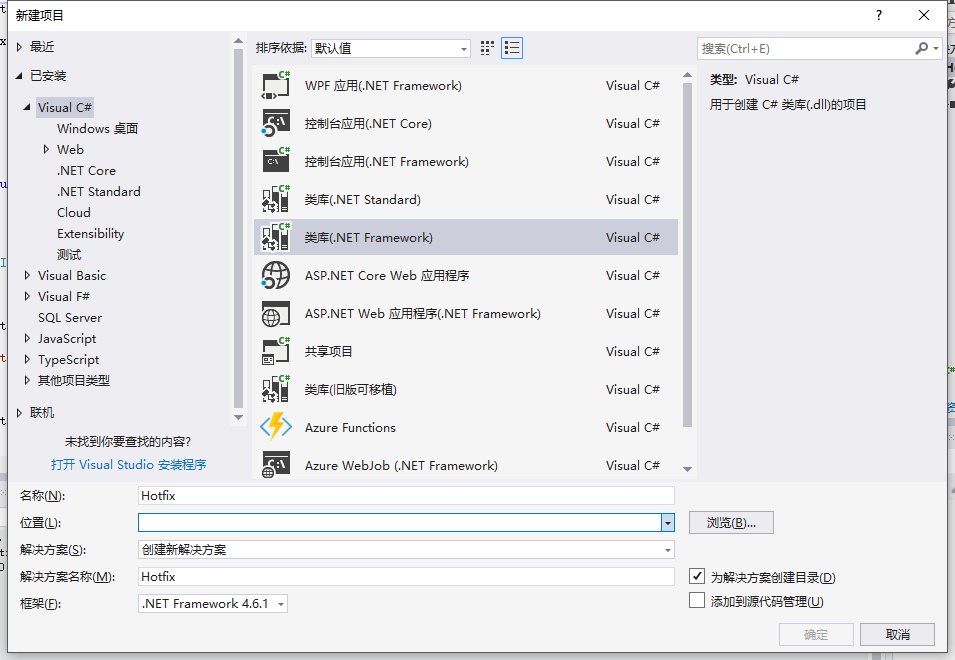
打开我们的VS,文件->新建->项目,创建一个C#类库,命名为Hotfix,如图

然后在解决方案->引用处右键,添加引用,如图

其中UnityEngine.dll,UnityEngine.UI.dll 和 UnityEngine.CoreModule.dll三个文件在Unity的安装目录下,Assembly-CSharp.dll在上面创建的Unity工程的Library/ScriptAssemblies目录下
注:UnityEngine.CoreModule.dll是在Unity2017.2之后的版本才有,之前的版本可以不用添加,若在官方demo中UnityEngine.dll报找不到的错误的话,重新引用下正确目录下的dll文件即可。
创建接口与适配器,并实现接口
首先我们可以在Unity中创建一个简单的接口,用于处理Hotfix中的生命周期
public interface IUI { void Start(); void Update(); }然后在Hotfix工程中,新建一个类Main.cs,实现IUI接口
namespace Hotfix { //IUI为unity中的接口,所以要在unity中实现一个继承适配器 public class MainUI:IUI { public void Start() { } public void Update() { } } }由于IUI是Unity的接口,而MainUI是Hotfix的类,这里有一个ILRuntime中跨域继承的概念,官方文档提到如果你想在热更DLL项目当中继承一个Unity主工程里的类,或者实现一个主工程里的接口,你需要在Unity主工程中实现一个继承适配器。
所以我们在Unity中创建一个类 InterfaceIUIAdaptor.cs,实现继承适配器(根据文档给的代码进行修改)
using ILRuntime.CLR.Method; using ILRuntime.Runtime.Enviorment; using ILRuntime.Runtime.Intepreter; using System; public class InterfaceIUIAdaptor : CrossBindingAdaptor { public override Type BaseCLRType { get { return typeof(IUI);//这是你想继承的那个类 } } public override Type AdaptorType { get { return typeof(Adaptor);//这是实际的适配器类 } } public override object CreateCLRInstance(ILRuntime.Runtime.Enviorment.AppDomain appdomain, ILTypeInstance instance) { return new Adaptor(appdomain, instance);//创建一个新的实例 } //实际的适配器类需要继承你想继承的那个类,并且实现CrossBindingAdaptorType接口 public class Adaptor : IUI, CrossBindingAdaptorType { ILTypeInstance instance; ILRuntime.Runtime.Enviorment.AppDomain appdomain; IMethod m_Start; bool m_StartGot; IMethod m_Update; bool m_UpdateGot; public Adaptor() { } public Adaptor(ILRuntime.Runtime.Enviorment.AppDomain appdomain, ILTypeInstance instance) { this.appdomain = appdomain; this.instance = instance; } public ILTypeInstance ILInstance { get { return instance; } } //你需要重写所有你希望在热更脚本里面重写的方法,并且将控制权转到脚本里去 public void Start() { if (!m_StartGot) { m_Start = instance.Type.GetMethod("Start", 0); m_StartGot = true; } if (m_Start != null) { appdomain.Invoke(m_Start, instance, null);//没有参数建议显式传递null为参数列表,否则会自动new object[0]导致GC Alloc } } public void Update() { if (!m_UpdateGot) { m_Update = instance.Type.GetMethod("Update", 0); m_UpdateGot = true; } if (m_Update != null) { appdomain.Invoke(m_Update, instance, null); } } } }
读取Hotfix.dll文件,并执行其内部操作
首先我们将Hotfix工程中,解决方案右键生成,生成Hotfix.dll和Hotfix.pdb两个文件,将这两个文件拷贝到Unity的StreamingAssets目录下。
然后我们创建一个新的类 Launch.cs,在这里面我们首先读取上面的两个Hotfix文件,然后进行一些ILRuntime的预设置,例如绑定继承适配器,注册委托等。最后我们要在里面找到Hotfix中实现IUI接口的类,因为这些类就是我们的UI逻辑类,然后在自己的Start,Update等生命周期方法中,调用Hotfix中IUI类对应的方法。代码如下:
using ILRuntime.Runtime.Enviorment; using System; using System.Collections; using System.Collections.Generic; using System.IO; using System.Linq; using UnityEngine; public class Launch : MonoBehaviour { List

    DllUIUpdateList = new List

     (); ILRuntime.Runtime.Enviorment.AppDomain appdomain; void Start() { StartCoroutine(LoadILRuntime()); } IEnumerator LoadILRuntime() { //读取dll文件 appdomain = new ILRuntime.Runtime.Enviorment.AppDomain(); WWW www = new WWW(Application.streamingAssetsPath + "/Hotfix.dll"); while (!www.isDone) { yield return null; } if (!string.IsNullOrEmpty(www.error)) { Debug.LogError(www.error); } byte[] dll = www.bytes; www.Dispose(); www = new WWW(Application.streamingAssetsPath + "/Hotfix.pdb"); while (!www.isDone) { yield return null; } if (!string.IsNullOrEmpty(www.error)) { Debug.LogError(www.error); } byte[] pdb = www.bytes; using (System.IO.MemoryStream fs = new MemoryStream(dll)) { using (System.IO.MemoryStream p = new MemoryStream(pdb)) { appdomain.LoadAssembly(fs, p, new Mono.Cecil.Pdb.PdbReaderProvider()); } } OnILRuntimeInit(); OnILRuntimeInitialized(); } void Update() { if (DllUIUpdateList.Count > 0) { foreach(var update in DllUIUpdateList) { update(); } } } void OnILRuntimeInit() { //跨域继承绑定适配器 appdomain.RegisterCrossBindingAdaptor(new InterfaceIUIAdaptor()); //Button点击事件的委托注册 appdomain.DelegateManager.RegisterDelegateConvertor

      ((act) => { return new UnityEngine.Events.UnityAction(() => { ((Action)act)(); }); }); } void OnILRuntimeInitialized() { //获取Hotfix.dll内部定义的类 List

       allTypes = new List

        (); var values = appdomain.LoadedTypes.Values.ToList(); foreach (var v in values) { allTypes.Add(v.ReflectionType); } //去重 allTypes = allTypes.Distinct().ToList(); DllUIUpdateList.Clear(); foreach (var v in allTypes) { //找到实现IUI接口的类 Adaptor 前面写的适配器IUI的类 if (v.IsClass && v.GetInterface("Adaptor") != null) { //生成实例 var gs = appdomain.Instantiate

         (v.FullName); //调用接口方法 gs.Start(); DllUIUpdateList.Add(gs.Update); } } } }
注:代码中有一个委托注册的功能,是因为在Hotfix中调用UGUI的Button的onCkick,需要生成委托转换器,否则会报错
搭建UI及实现UI逻辑
Demo中,简单的在场景中创建一个简单的Button和Text,然后将Launch.cs挂到Canvas上即可。然后在我们之前Hotfix中创建的MainUI.cs中添加我们的UI逻辑:
using UnityEngine; using UnityEngine.UI; namespace Hotfix { //IUI为unity中的接口,所以要在unity中实现一个继承适配器 public class MainUI:IUI { Button m_btn; Text m_text; int count = 0; bool isClick = false; public void Start() { m_btn = GameObject.Find("Canvas/Button").GetComponent 然后重新生成下dll文件,将原来Unity StreamingAssets下的文件替换掉即可(以后修改逻辑亦是如此,达到热更的效果)。
运行效果如下:
更详细的内容请看后面的文章~~~~
发布者:全栈程序员-站长,转载请注明出处:https://javaforall.net/198947.html原文链接:https://javaforall.net


